Inviting you for tea or cocktails at the Sea House Pavilion, via magic carpet
Having the Sea House Pavilion win the Grand Prize award in HBS’s 2013 Creatin’ Contest feels like this pic: dreamy, delightful, unbelievable. Completely unexpected. Truly an honor.
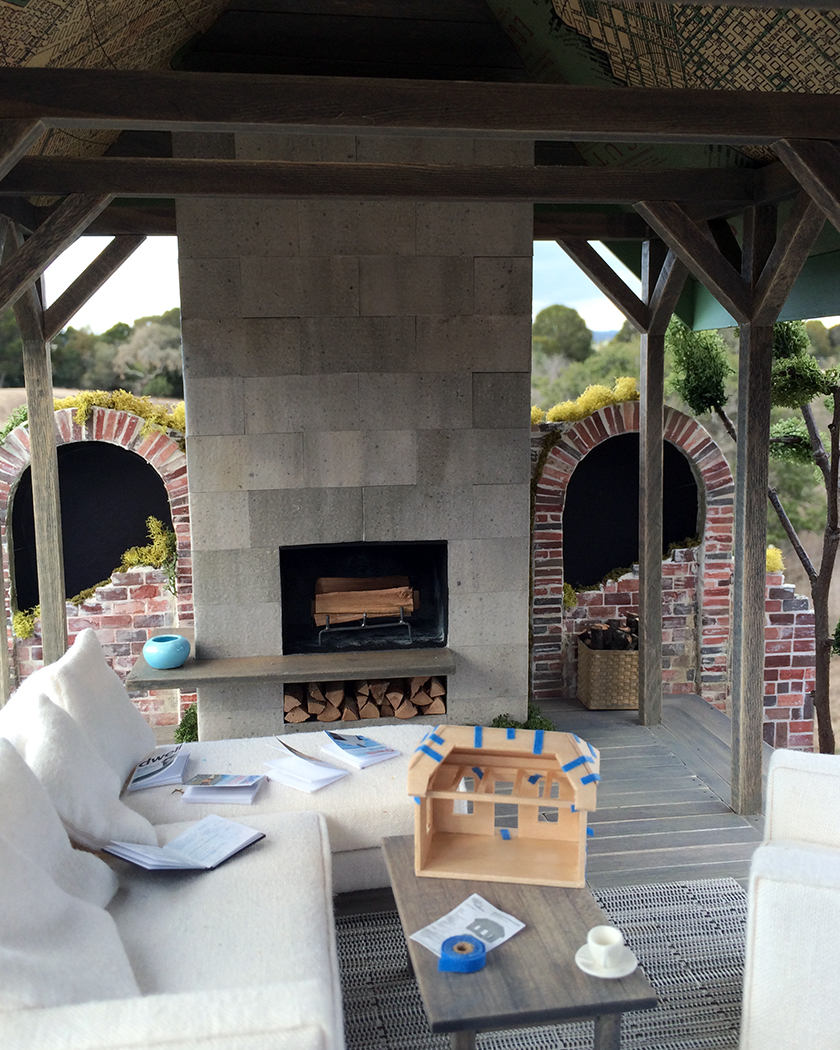
Come sit down and hang out
And it has afforded me the opportunity to learn to spell pavilion correctly (I still keep wanting it to have two Ls).
I mentioned in an earlier post that I made a tiny version of my notebook, open to some of my first sketches done in April 2013 (seen above, on the couch).
Computer, enhance.

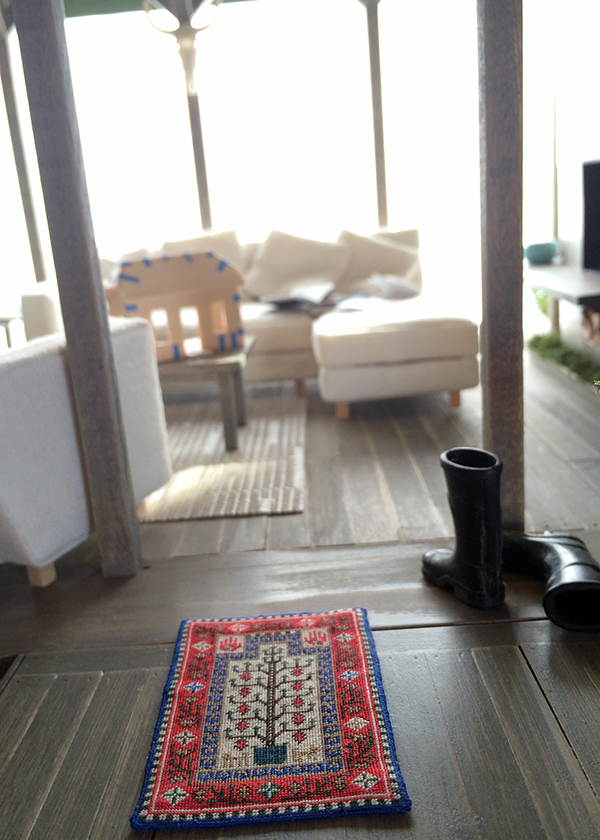
Some of my sketches and notes for the Charming Cottage
I spent most of last year getting our house in Rhode Island ready to sell, then packing it up and driving across the United States in a 31-foot motor home with my husband, our very large dog and two disgruntled cats, to return to Northern California, where I am from. (We shipped all our stuff, except the guitars.) The starting kit Charming Cottage in blue tape dry fit was as far as I had gotten before the move until Mid-September, when I was able to unpack my studio, try to decipher my notes and begin to build in earnest.
I worked on it nights, weekends, holidays and vacations right up to the deadline. I was so happy when I learned we could make a digital contest submission this year.

The sun is starting to set. Might we get some rain?
The Sea House Pavilion is part of a compound in coastal Northern California, in the same town where Loft No. 1961 is, my first-ever build and a First-time Entrants’ Award winner in the 2012 HBS contest. More about that later :)

Loft No. 1961, the studio of a woman writing a book about her father’s death
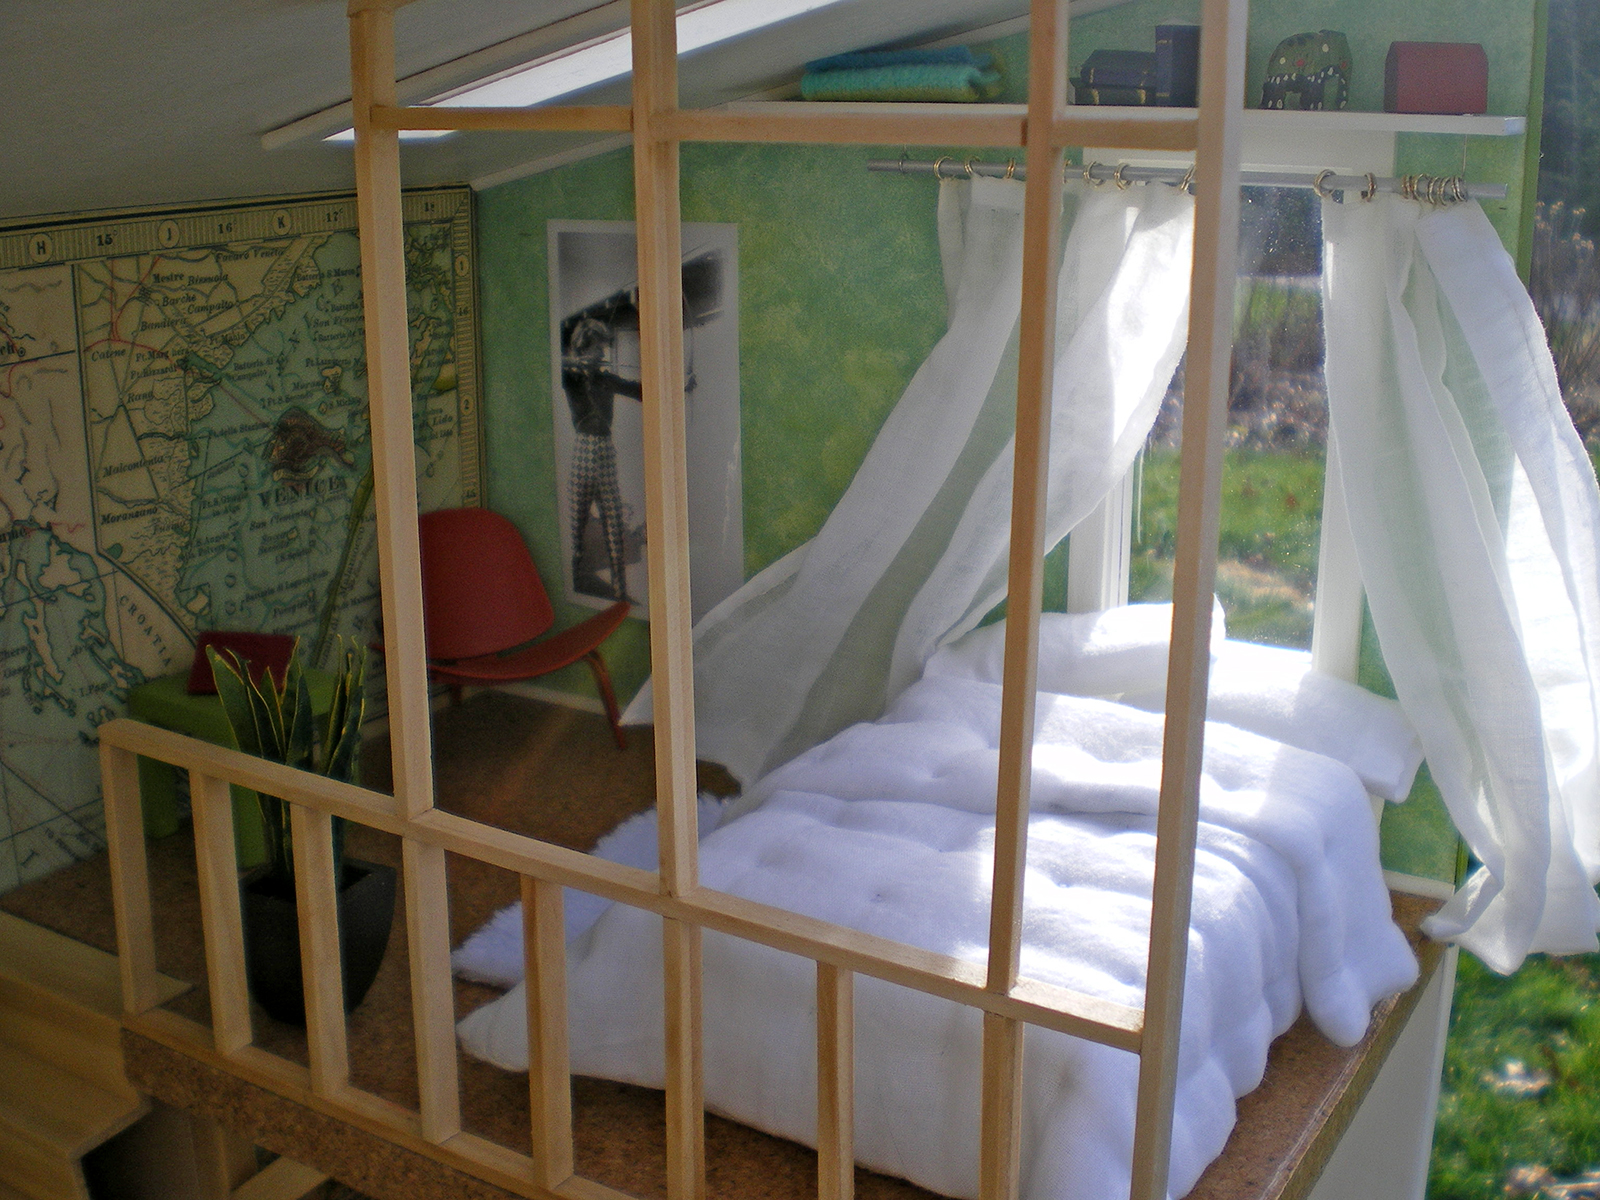
The loft bed where the writer can sleep to dream
You might notice some themes that seem to carry through my builds :)