Her favorite color remains blue, and she can fly like this bunny.

My favorite modern miniature of all time.
Her favorite color remains blue, and she can fly like this bunny.
My favorite modern miniature of all time.

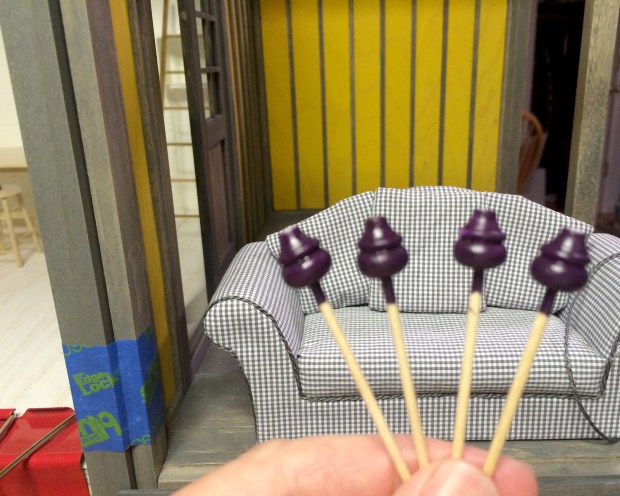
So happy with the results of Annie Christensen’s echeveria tutorial! Here are a few before adding the chalk detailing. I experimented with watercoloring both sides of gray and light green card stock, as well as a duplex sheet of sage/dark green.
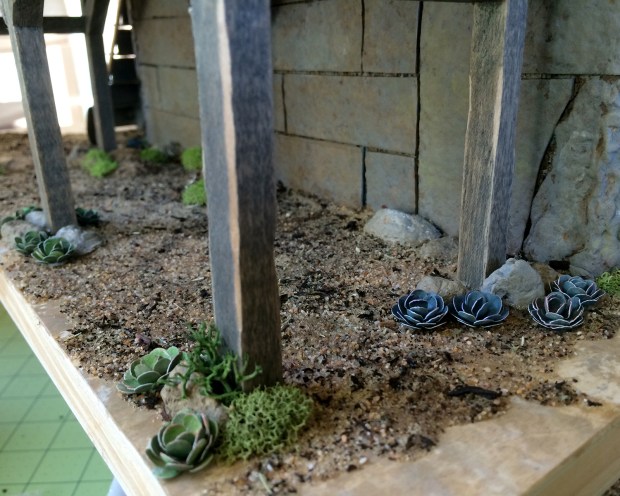
Some in place under the lavender-drying deck (two varieties).

And more around the back. Truly, paper alchemy. I’ve got some micro-punches on order to make smaller ones, and different varieties. With lavender and California poppies growing, this landscaping will be so NorCal.

(This is a peek at one of my succulent beds, so you know I speak true. You can just see some CA poppy in the mid right edge. They should start going off next month :)

Here’s a peek at Kris Compas’s Lisa Chair Kit. I used the same fabric and finishes as the coordinating sofa. It’s an interesting build — some of those pieces are wee. The kit’s very well thought out, with detailed instructions, and of course the ultra-convenience of not having to measure and cut the parts.
The optimal placement of cabriole legs is a mystery to me. I badly placed them three times, (I know, how hard could it be?!) and since that involves drilling holes, the bottom of the chair is now less than pristine :( After whining to Kris in an email about it, she made some smart suggestions, and I was able to do a good-enough fix. Just don’t inspect the underside.
The painting in the background is the foundation color wash dabbing paper :)
Short answer? Paperclay. Long answer follows.

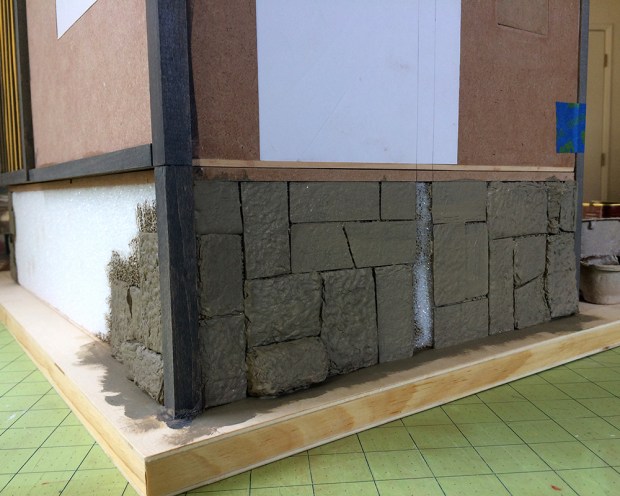
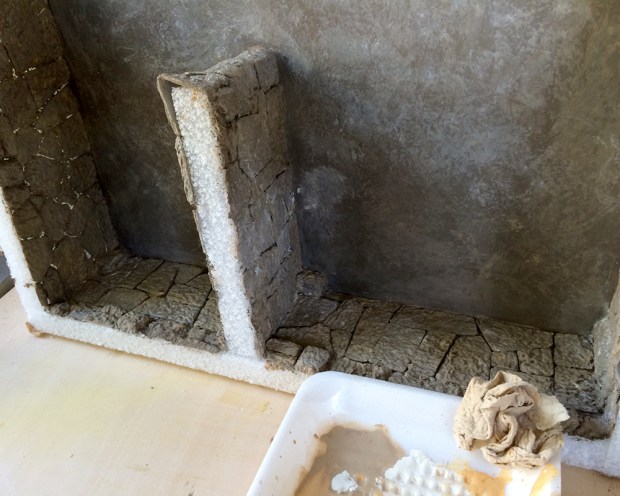
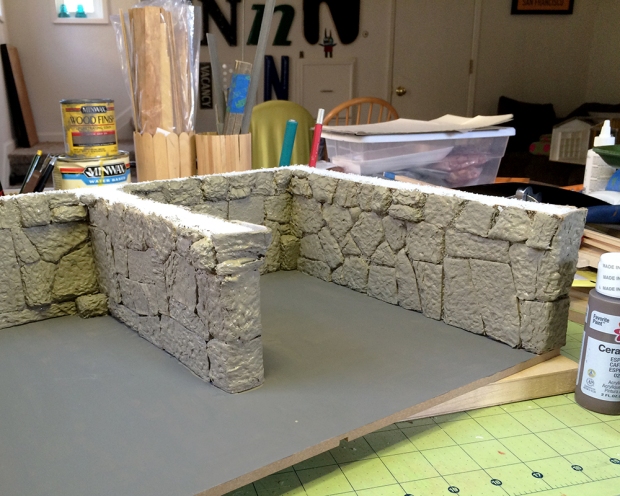
I settled in to finish the long back foundation wall, literally before the storm and power went out. Above you see the carton materials wrapped from the left side wall and primed in Ceramcoat “Mudstone”, then the beginnings of the long traverse using various parts of egg carton. Then I noticed something.
A while ago, our thoughtful reader and observer Barbara W. had sent me a mold from Woodland Scenics. Although sized as “boulders” it occurred to me that at 1:12 scale they would make excellent rubble, the kind I was using in the foundation.
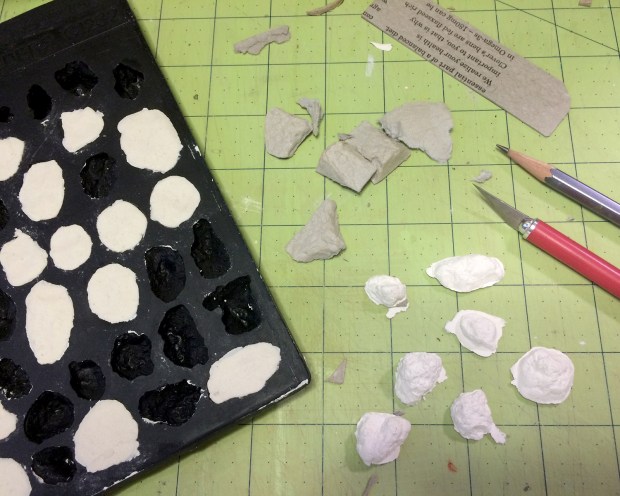
I reviewed my on-hand options and chose a pouch of Creative Paperclay. I had never worked with this material before, though it was on my list. I chose some of the larger boulder forms and filled the mold. I forgot about it until I started the back wall foundation masonry. Then I noticed that the molded boulders had a similar texture to the carton materials I was using. Like, really similar.
The dried paperclay is a remarkable material. It is extremely stable and lightweight, easy to trim, and as I was soon to find out, paints very well.
 I reloaded the mold with the full set of rocks in paperclay to use around the rest of the foundation, and finished out the back wall with the few that had already dried (those in white), along with egg carton and packaging forms. It seems to take two or three days for the paperclay to dry thoroughly.
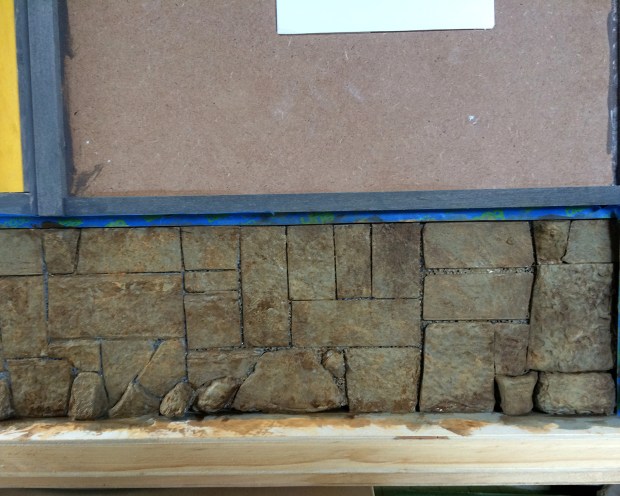
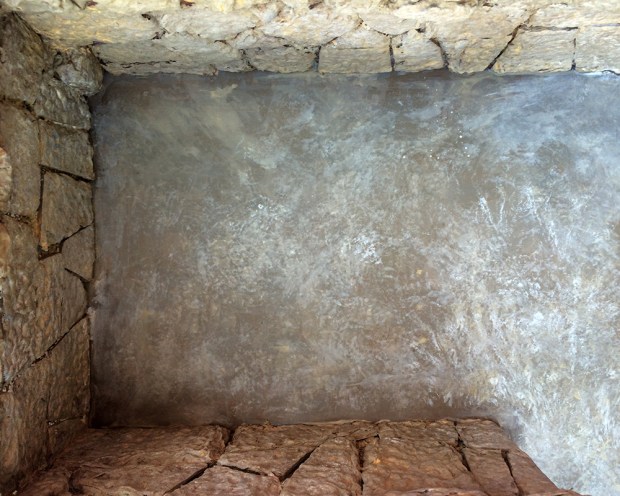
I applied the same set of acrylic layers and washes as the interior foundation.
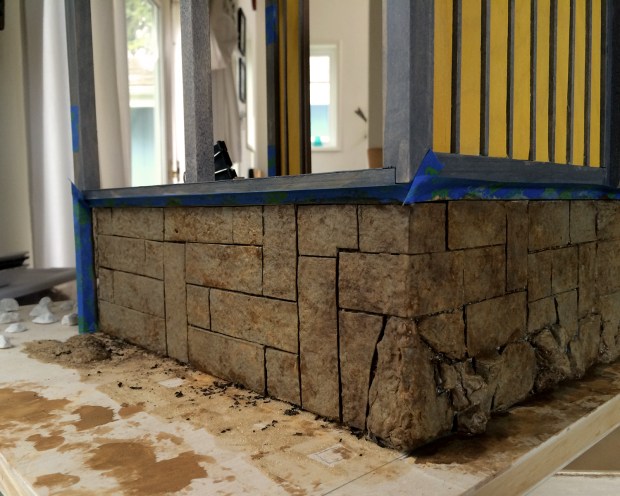
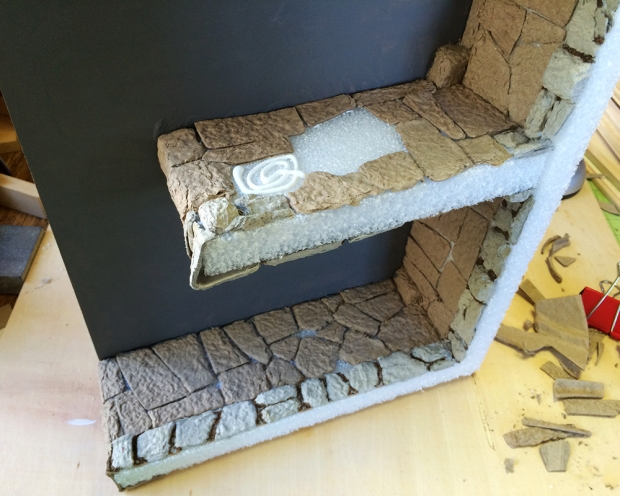
Here’s a dramatic corner shot.

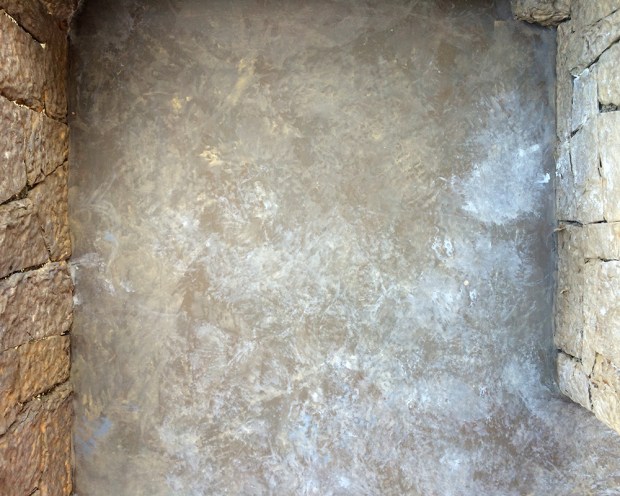
And the entire finished back foundation wall.

Although there is additional touch up and detailing to add, this needs to dry thoroughly. I could not resist gluing in some moss, though, to make it come alive. Thanks, BW, for the gift of the mold and allowing me to discover paperclay. The fun has just commenced.
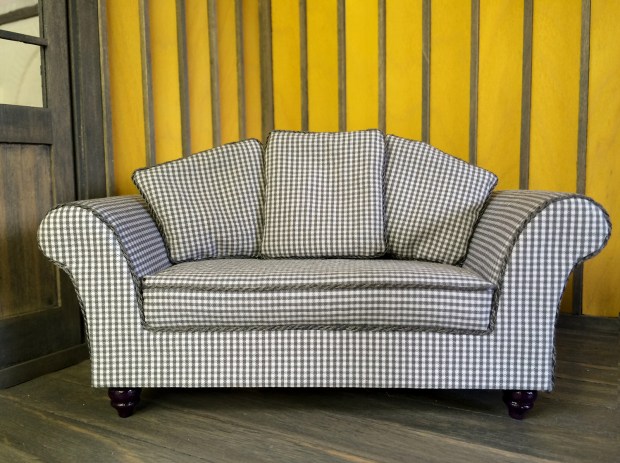 So happy with the results from the first of Kris Compas’s new line of kits, the Lisa Sofa. The micro-check fabric is cut from a thrift store-sourced man’s shirt. I used three strands of DMC floss to make the piping.
This was the couch last night. I thought I was going to use yellow piping — having also considered tomato red, plum, pumpkin and bright olive green — then opted for the charcoal gray. Keeps more options open for pillows and stuff.
The kit comes with unpainted cute fat feet. I used the aubergine acrylic the first set of doors was stained. The feet are not blurry in real life.
I am a bit surprised how well this curvy couch works on the covered porch. I had intended to use a sleek modern couch, upholstered in wool. Alternately, I have an old Houseworks Chippendale sofa kit, the one with the squiggly back. If I can find the right scale silk brocade, or maybe a fantastic Paisley man’s tie… then the wood base and legs could be yellow… The deadline for this build-along project is September 26. I don’t have to decide now :)

I cut slices of styrofoam eggs to build up areas of the ground and glued them to the project board.
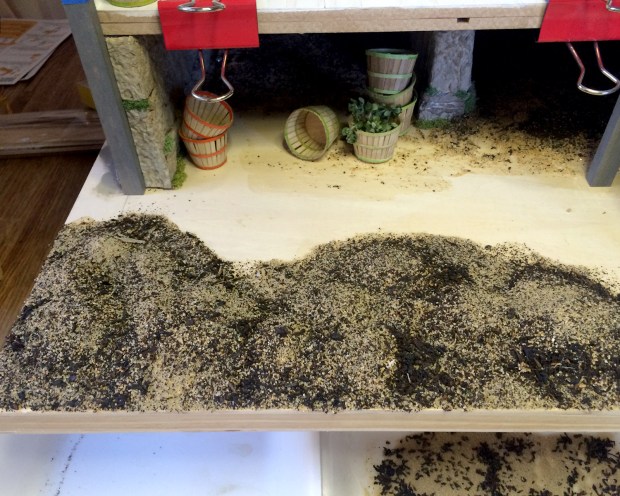
I mixed thick glue and Ceramcoat “Trail Tan” and coated the mounds and surrounding area, then sprinkled on a fine sand/tea mixture. Still drying. In addition to farming wool, Argo Wool Works also grows lavender. There will be lots of it, as well as California poppies and succulents. I found this awesome echeveria tutorial from Annie Christensen of We Love Miniatures. Very excited to begin propagating.
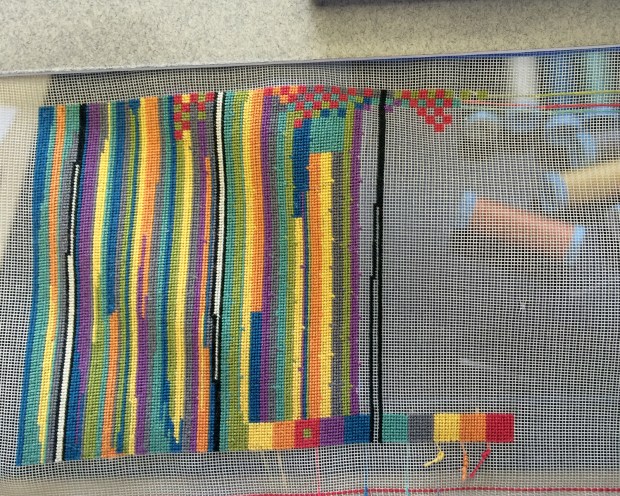
Small progress on the Yipes, Stripes Meets Checks rug.

End of day Friday, B left work early and we went down to Sharp Park to watch the waves. We walked out onto the pier, and then along the esplanade. This is where a sink hole opened up in the sea wall a few storms ago. There used to be about eight more feet of walkway there. The sun was setting and there was a blowing mist in the air from the waves. A somber view of the ocean’s power.
Also, viewed together, the Yipes, Stripes rug and this photo have a certain commonality.
O_O

I wound up making six bushel baskets from Kris Compas’s tutorial. I used one-inch wood circles that I had on hand for the base, and after the second basket, redrew the pattern so all the uprights were like fringe, instead of individual slats. (The pattern is up on 1inchminis. There’s also a version to print multiples. Yay no measuring.) By the fifth or sixth basket I was getting a nice bulbous curve by shaping it over the top of a two-ounce acrylic paint bottle. Coopering the top rim was also much easier on the paint bottle form.
I’m working mostly on the new project now, but the in-progress Argo Wool Works Showroom is a nice bright place to sit and think and plan, with a cup of tea. (The ladders are by Sir Thomas Thumb, to be used to display hanging goods. I also splurged with the 2015 contest award and bought a scythe o_O)
Now I have to go make a 12:1 cup of tea :)

I’m about to go sideways on another project, so I want to catch up on what progress there’s been on the as-yet-nameless 2016 build. I’ve opted not to enter the HBS contest this year, and so will continue to post freely on this structure. This is a side foundation in progress, integrating the 1906 San Francisco earthquake salvage, which includes rubble as well as dressed stones, aka egg cartons.
Painted in a first coat of “Mudstone” with room for the support post.

I made one of Kris Compas’s bushel baskets from this month’s tutorial. Adorable.

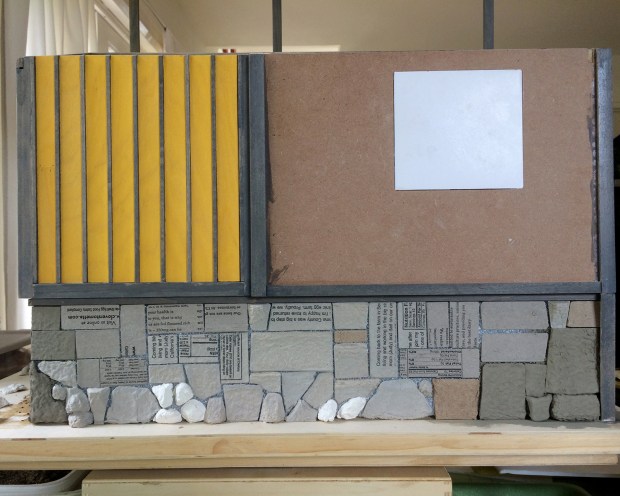
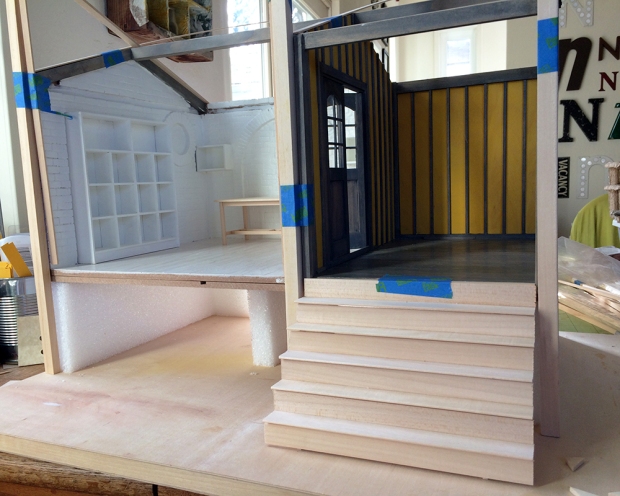
Here’s the backside of the build. I decided to add a deck off the porch to increase the living area. The main structure is not yet glued to the foundation, so I’m keeping add-ons modular. There will be more foundation elements to the deck, but I’m done with math and power tools for the evening.
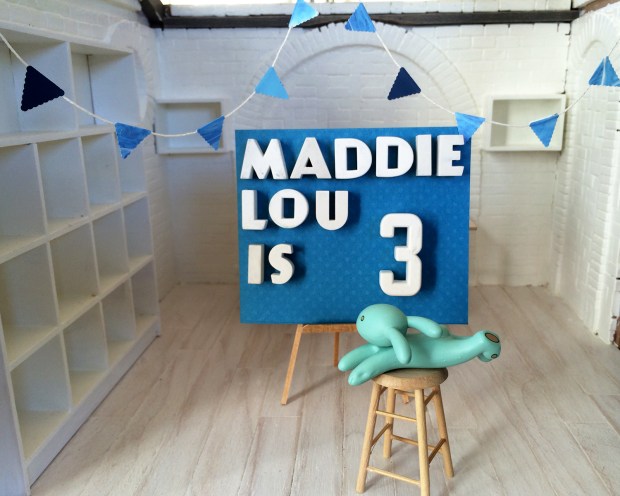
Heading into a major multi-birthday month, which I believe in celebrating *fully*. It will include multiple three-year-olds. multiple 60-year olds — and others— as well as baby goats, cheese and fine, fine wine.
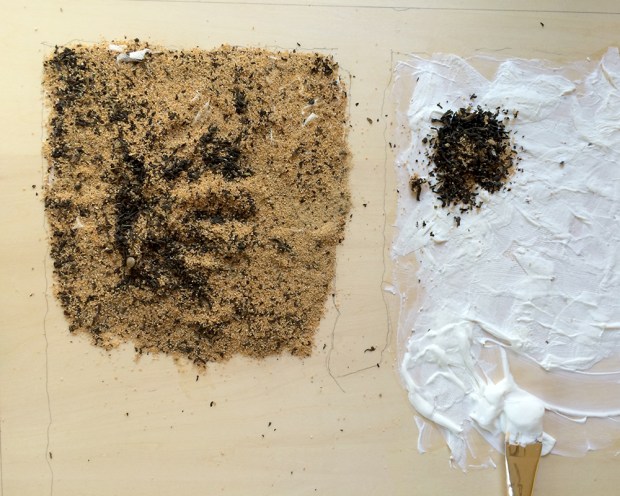
I traced the foundation perimeter outline onto the project board. Because there’s just four inches (10 cm) of clearance, and I learned valuable lessons trying to build out the underneath of the Sea House Warming Hut — only three inches — after it was fixed to its project board, I’m roughing in the base earth now. Using a mixture of glue (actually, old mosaic tile adhesive that I have an excess of — there’s that serial artist thing again) and thin paper toweling, I built up an uneven substrate in the farthest reaches of the foundation. The ground is a mix of fine sand, Irish Breakfast (leafy) and Earl Grey (fine texture) teas. (Which I also have an excess of, because I like tea. I might even collect tea, and these were really old.)

The paper-glue modeling gives enough unevenness to suggest a convincing ground. I’ll be adding in some plant life where the sun might reach. Beyond that, I don’t know.

Here’s the upside-down foundation with an “Espresso” wash, after drying overnight.
Delta Ceramcoat was on sale for US$0.97 (!) so I stocked up on these gorgeous earth colors:

If I wore lipstick I would totally want some in “Georgia Clay”.
I followed up with washes of “Roman Stucco”, “Trail Tan” and “Light Ivory”. Some stones were painted with a heavier wash of the light ivory, then dabbed off.

This is what the underside of the floor would like like if you crawled under the foundation and looked up. It will never be seen in the build, but I like knowing it’s there.
I was going to glue in joists and floorboards, but I’m just not feeling that crazy. Look at how different the stone color looks because of the light:
The exterior foundation walls are going to be built from salvaged dressed stone, with the occasional rubble and timber posts. I’ll be using egg carton:
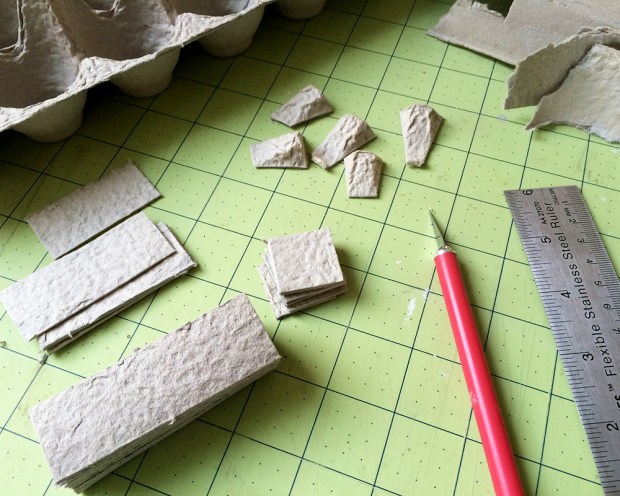
And must now remember to buy the same kind (Judy’s Organic) to keep textures similar.

Here’s the start. It will be built at the rate at which I acquire cartons, which is equivalent to driving a rubble-loaded wagon back from San Francisco, so it will take a while. And that’s okay. The scenery is gorgeous :)
Lastly, I’ll share this PSA I made today. In the crafts store parking lot I looked down to see this perfect little horror of the most commonplace litter. Feel free to share :)
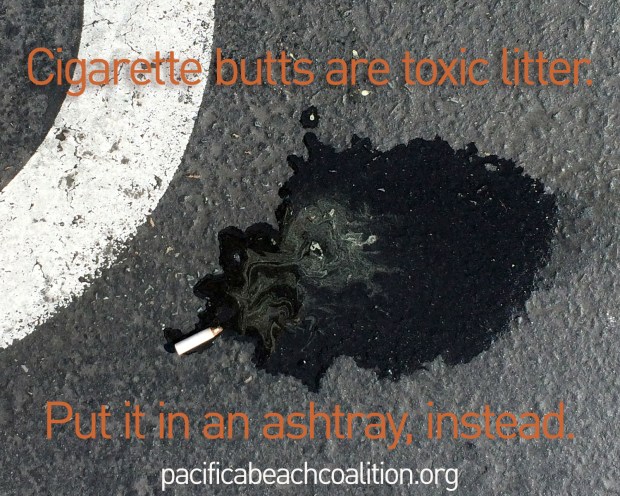
*steps down from soapbox*
After determining the maximum height of the stairs based on the project board dimensions, I established the height of the foundation, which turned out to be four inches. Using inch-thick styrofoam, I cut and glued it to the bottom of the second base kit.
I decided on more rubble and salvage from the 1906 San Francisco earthquake, and was pleased to also repurpose some foundation stones from an abandoned early build. I used the recommended Foamtastic glue, which I’m pretty sure is just an extra-thick tacky, and as a result my thumb joint is sore from *squeezing* the bottle all day.
Here’s the upside-down completed foundation, with a first coat of paint drying, an entire two-ounce bottle of Delta Ceramcoat “Mudstone”. (I’ve since added a wash of “Espresso” to good effect, but lost the light and will have to wait until tomorrow to show you.)
