Sea House Pavilion Remodel: Greenhouse Wing Leaded Glass Windows Complete

greenhouse_102717

The leaded glass windows for the Sea House Pavilion greenhouse wing are completed and installed.

greenhouse_2_102717

Here’s a mildly different view. (It’s late, and my studio lighting is rubbish.) But if you were the caretaker of an historic heritage seaside resort that was abandoned because of sea level rise, wouldn’t you want a place to grow fresh greens and fruit to supplement your subsistence gatherer lifestyle?

I know I would.

gh_all.jpg

And I would want it to be beautiful.


Sometimes, things work out better than hoped for

gh_front_03

The topic of this and last week’s Santa Cruz commute thinking time was about how to render the Sea Rise Sea House Pavilion’s greenhouse windows. I knew I wanted to do something leaded (or leaded-esque), and I knew the inevitable off-square measurements of the actual structure would be a nightmare to fit.

gh_front_04

I’ve built two wing extensions on either side of the main deck to increase the living space area. One side is the greenhouse, and the other will be the shower and sleeping alcove. For the greenhouse leaded glass, I drew my designs using 9-point (1/8-inch) lines, which seem reasonably robust for a seaward structure. They’re cut from black cardstock, and glued front and back to non-glare Plaskolite, which provides a semi-opaque — and salt-spray burnished — surface.

gh_front_02

My initial approach was to tediously center the Plaskolite within the 3/16-inch framing. (Of course if I was more dedicated, I would have routed a channel in the one million each of the frames, or, have built them with three layers of stock. But I’m not.) As I was fiddling about with measurements and drawing and cutting prototypes, I realized the best — and squarest — way is to cut the panes and cardstock leading a scant larger than the outside window openings, and glue them atop the frames. Then, trim out with thin strip wood.

gh_front_01

It looks just fine! Intentional, even. The two layers of cardstock, glued to the Plaskolite front and back, look believable. Even the little schmutzes of glue make sense in a marine environment (although they are easily cleaned up.)

gh_front_05.jpg

Here’s the whole structure-in-progress, including the new roof extension, which might be where the sleeping quarters wind up.

Ruby_101217

And here is the main — or one of the many — reasons I drive down to Santa Cruz each week: for Ruby, now four months old. She lights up a room, no batteries, routing or wires required.

Sea House Pavilion Sea Rise Remodel

stormy_100817

Turns out — after a lot of experimentation and test builds and weathering practice and pondering and faffing about — as much as I am captivated by abandoned miniatures, I do not wish to actually build one. I felt a bit sad when I realized this, but also relieved. The pavilion remodel still has sea level rise as a core premise, but now it’s more of a retrofitted, off-the-grid, self-sufficient adaptation that’s been going on for some years. With scavenging and memorabilia. The old skiff, with its faded Sea House emblem, stays. Stormy is just passing through :)

Skiff, Brackets

skiff_building

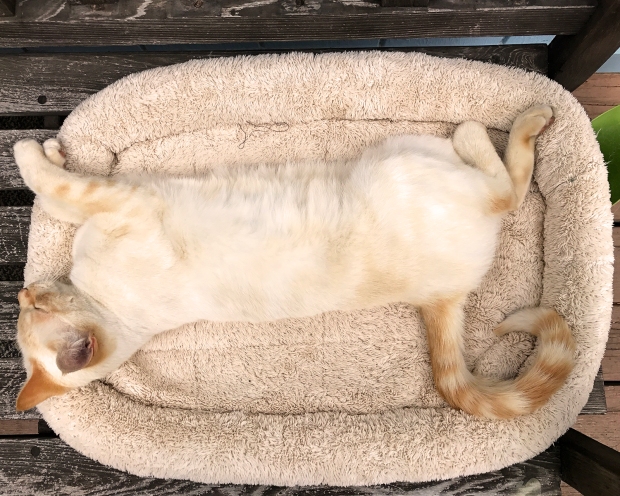
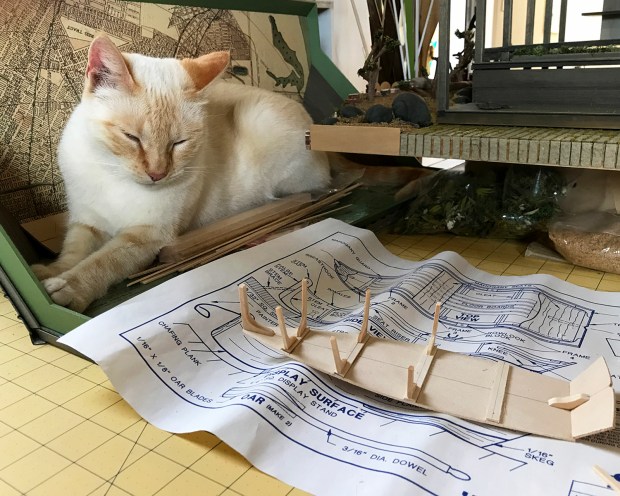
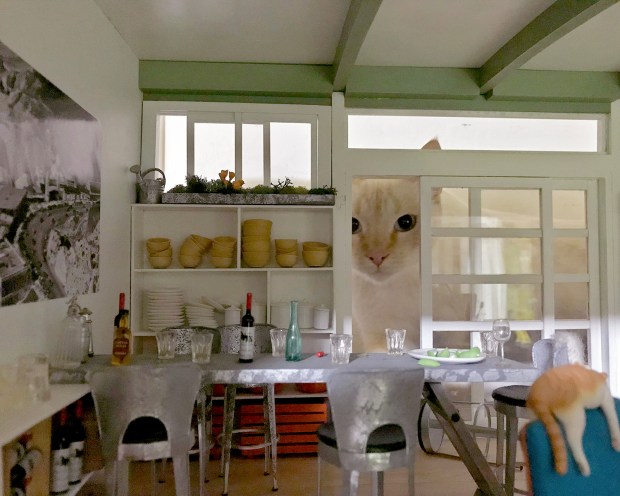
Scarlett has grown into a far more helpful studio cat. Here she continues the weathering process on the underside of the Sea House Pavilion Squat roof, while I work on building a wee skiff.

skiff_box

I eBayed this circa 1989 Midwest Products skiff model. I love this kit for many reasons: The superior 36-page construction manual and a full-size plan. Each of the 117 steps has a little checkbox next to it, to track one’s progress. And shipbuilding vocabulary: inwales, cleats, chafing plank, stem and false stem, strongback, painter, breasthook, skeg, knee and quarter knee, transom, fairing.

Here is step 109, Inwales:

skiff_building2

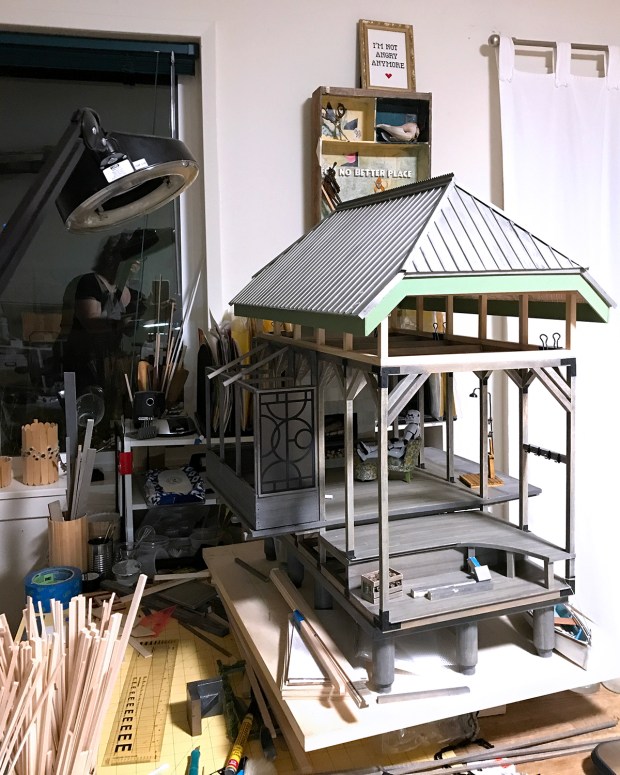
Even with the apprentice skill level 1 rating, there was still plenty of late night swearing, especially setting up the framing. I realized very early on how glad I was that the finished model would be heavily weathered.

skiff_weathered

Making the oars was possibly my favorite part. They’re built from dowels and stripwood, whittled and sanded into final shape. (Still have to varnish the second one.)

brackets_00

The outdoor shower is old Reutter Porcelain, tragically discontinued. One of my all time favorite pieces!

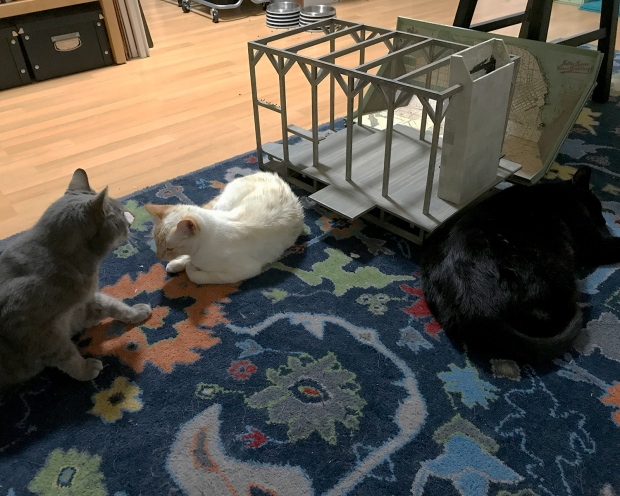
At some point, the Sea House Pavilion was retrofitted with sturdy brackets, much like the foundation of the SH Warming Hut.

brackets_parts

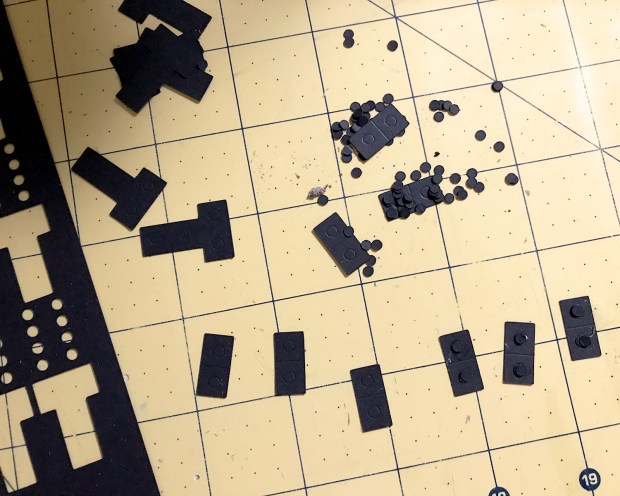
This time, made much easier by cutting the components on the Cricut machine. I used the scoring tool to mark angle folds and placement of the bolts, which are two dots thick. (Note to self: hmmmm, maybe make available to sell? Have good metallic cardstock by Neenah. Am thinking of drawing contemporary and or retro wrought iron patterns, too?)

scarlett_092117

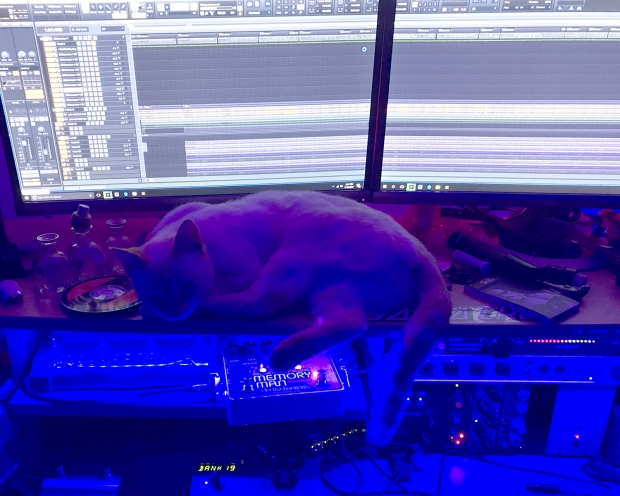
Recently, most of my building has been in the quiet of late night. Scarlett keeps me company on the studio thinking couch. Good kitty.


Studio Cat, It Has Begun

studio_cat

I’m going to lead with this pic of Scarlett, lest you think she only haunts my endeavors. Here she is at the control center of Brian’s studio, enjoying the warmth of electronic musical components, and inexplicably enduring loud sounds and buzzing. Purple and contented.

dismantled_081117

Last night, we had freak thunder and lightening storms, which drove all cats inside. I had dismantled the Sea House Pavilion build earlier, in preparation for the remodel. What better way to begin aging and distressing the various parts than to allow wet cats to regain their composures lounging about the structures? The roof cradle was their favorite for grooming (not pictured), and I can only hope a natural, organic weathering effect is underway.

base_091217

I used pliers and my fingers to yank all the cut silk and preserved moss foliage off the base. It was a major effort, and took a couple of goes. The whole build was constructed in three detachable parts: base, pavilion, roof. I also removed the back arched brick wall remains. Not sure if I’ll re-incorporate it into the new structure — sea level rise does take its toll. I remember it was part of the backstory of the Sea House Pavilion, and I do love combining old and new. That sense of place, the evocation of those who came before us, even as we go about our contemporary lives. We’ll see what happens.


An Idea Occurs

Some backstory: A long time ago, there was the Sea House Pavilion build. Good times.

SH_Pavilion_side

It surprise-won the Grand Prize in that year’s HBS contest. Then more stuff happened, and once again, we packed up and moved house. This time, up the coast to Pacifica. Time passed, and we got a new kitten. Whereas the older two boy cats had always ignored my work, Scarlett’s relentless depredations of all miniature endeavors, um, challenged my work flow. All the builds had to go live on top of tall bookcases.

image_090417psd

Here is the above-mentioned cat, now slightly less naughty, and a partial view of our north fence line, in the process of being demolished and rebuilt.

backyard

Late this afternoon, I sat outside on the retaining wall, looking at the back of our little blu house. We’ve had some very high temperatures in the San Francisco Bay Area — like, tacky wax melting; all the miniature pictures and signs fell off walls in all the builds. Triple digits F° hot. Today was the first day it was cooler than the face of the sun possible, pleasant even, to be outside.

backyard2

Perhaps it was the temporary expansiveness of a fence-less suburban back yard… but an idea — a solution to something else entirely — occurred to me.

master.jpg

The idea began when I unearthed this lovely corroded Master lock, as I was weeding and tidying up some of the excavations before the fence guys return tomorrow. Kris Compas’s post about how she dilapidates upholstery, read earlier in the day, and the steady stream of Abandoned Miniatures in my FB feed no doubt contributed to my thinkings.

idea01

idea02.jpg

2+2=5 was playing as I wrote :)

So the idea to reimagine the Sea House Pavilion as “a post-sea level rise coastal squat” may be the solution — a transformation — to the problem of housing all these builds. Just keep remodeling them! And I get to do research and problem solving and learn by doing new techniques! My favorite things! There’s still Scarlett to reckon with, of course, but she may turn out to be my assistant disheveler.

Fiesta Yucca

FY01-02_both2
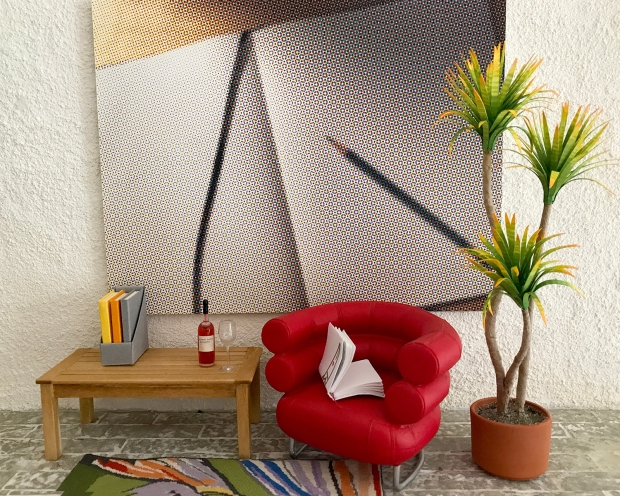
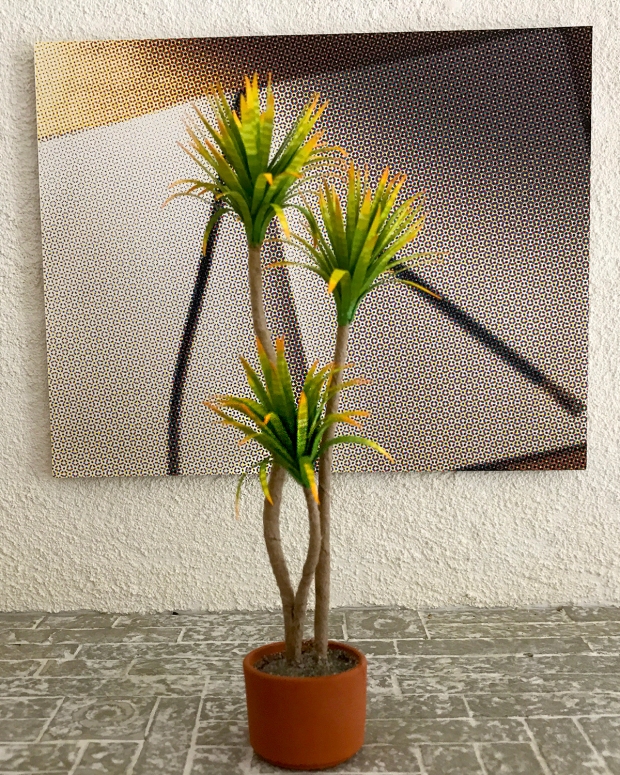
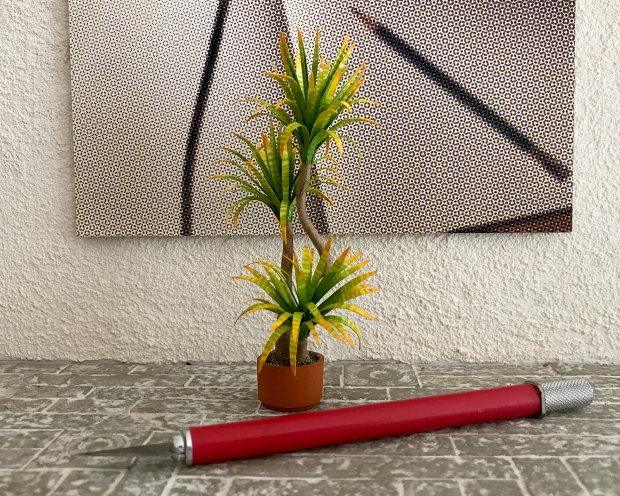
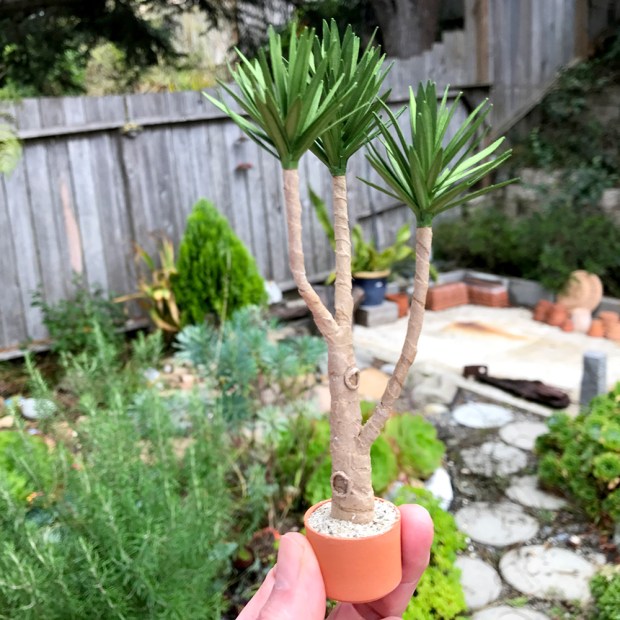
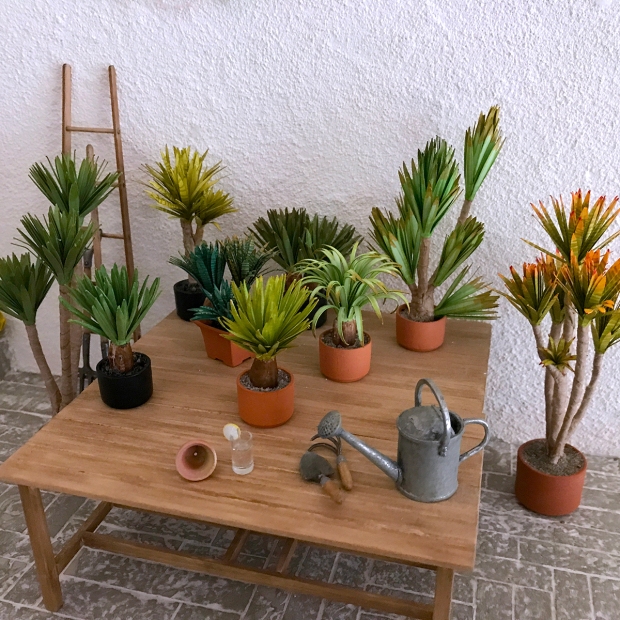
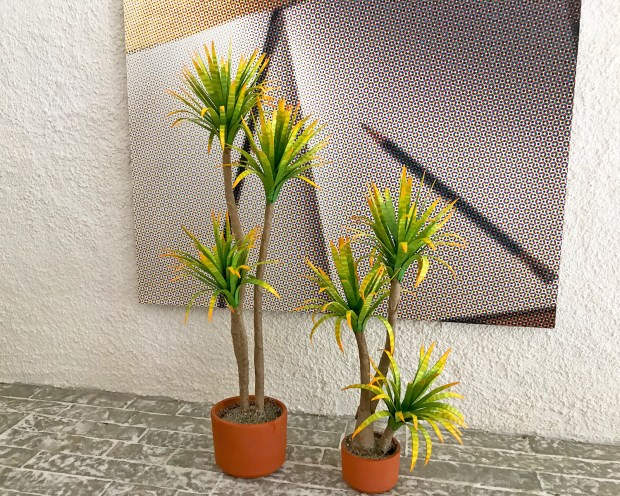
Two first-ever specimens of yuccas — finished potted plants, not kits —  will soon be available over at MMS+S. I’ve boldly named them Fiesta Yuccas, a taxonomy unique to nancyland, which means they’re not strictly exact replicas of yuccas one might encounter in this mortal coil. The leaf pattern graduates from a rich medium green to lime to sunflower, tipped in gold and striped with moss. The flat leaf pattern looks like a very appealing mandala. Sure to add light and life to your arrangements.

FY01-1

The taller of the two is slender and graceful, with three branching trunks. Both specimens are potted in Braxton Payne terra cotta cylinder pots. Of course.

FY01-5

FY02-2

The shorter one, potted in a slightly smaller cylinder, has the same three-leaf cluster structure as its taller sibling, and projects a powerful presence. The trunk armatures remain pliable and can be curved or straightened into most any form.

That I have arrived at not one, but two! specimens that tilt my acceptance meter to ‘yes, this is worthwhile’ is a tremendous achievement (she who regularly invites to tea the three-headed monster of perfectionism/paralysis/procrastination).

So that means I get to post a cat picture.

rectangle_082817

Here is our yearling+ Scarlett, sleeping out the very foggy summer on a side deck bench. Every time I walk by she rouses enough to meow some variation of “Mao, wow!”

I smile every time.


Treasure Map, Yucca Kit

treasure_map_081317

Maddie drew a treasure map. The iconography is bold and challenging on many levels, not the least of which is her rendering of the letter “R”. Type designers, bow down, maybe even despair a little bit, that you might ever envision an “R” this way. I’ve not yet heard her telling of the map story, only that the thing that looks like a Crusader shield is an “X marks the spot”.

YU01_outside

I’ve listed the first yucca tree kit over at MMS+S. It includes both an armature kit and a leafy clusters kit, with a choice of three base colors: white, manila or green. I plan on making kits of just the leafy clusters available, for those who want to make their own armatures, and eventually just supply packs of leafy clusters sans instructions, for those who get it and want to build more yucca plants. Every build needs at least one good yucca :)

_scene03

So many possibilities! There’s one more versatile yucca houseplant kit in the queue, and after that, it’s on to making specimens. I’ve drawn a different leaf cluster, longer and finer, and am working with a smaller gauge armature, just for the finished trees and plants.

Maddie_Ruby_081417

Here is Maddie, studying the most recent Eric Carle book, and Ruby, being what contented two-month old humans are. Kind of my world right now :)

Rousseau 1:12 Mural First Cuts

palm01_cut

I sketched out and constructed a palm plant motif in Illustrator, then reversed a copy of it to make the most of the painted papers.

first_cuts

Here are my first cuts of the pattern from two of the painted papers, flung onto the wall. I was working against the losing of the light (because hey, Game of Thrones). They will work splendidly as a middle background layer, when arranged.

Still undecided how I will stick them down.

first_cuts_paper

It took me a couple of cuts to get it right, but here is what a (partial) painted paper looks like after four passes of cutting. Still plenty of material for hand cutting parts available.