Sometimes, things work out better than hoped for

gh_front_03

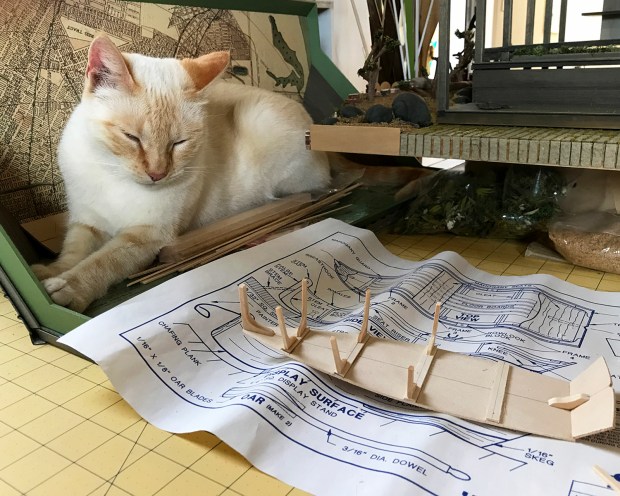
The topic of this and last week’s Santa Cruz commute thinking time was about how to render the Sea Rise Sea House Pavilion’s greenhouse windows. I knew I wanted to do something leaded (or leaded-esque), and I knew the inevitable off-square measurements of the actual structure would be a nightmare to fit.

gh_front_04

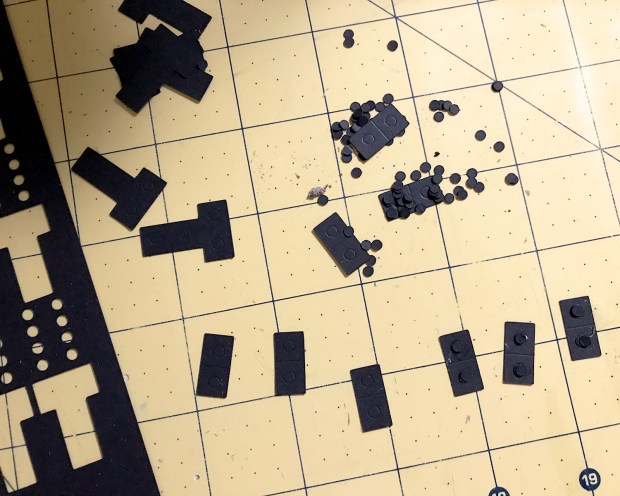
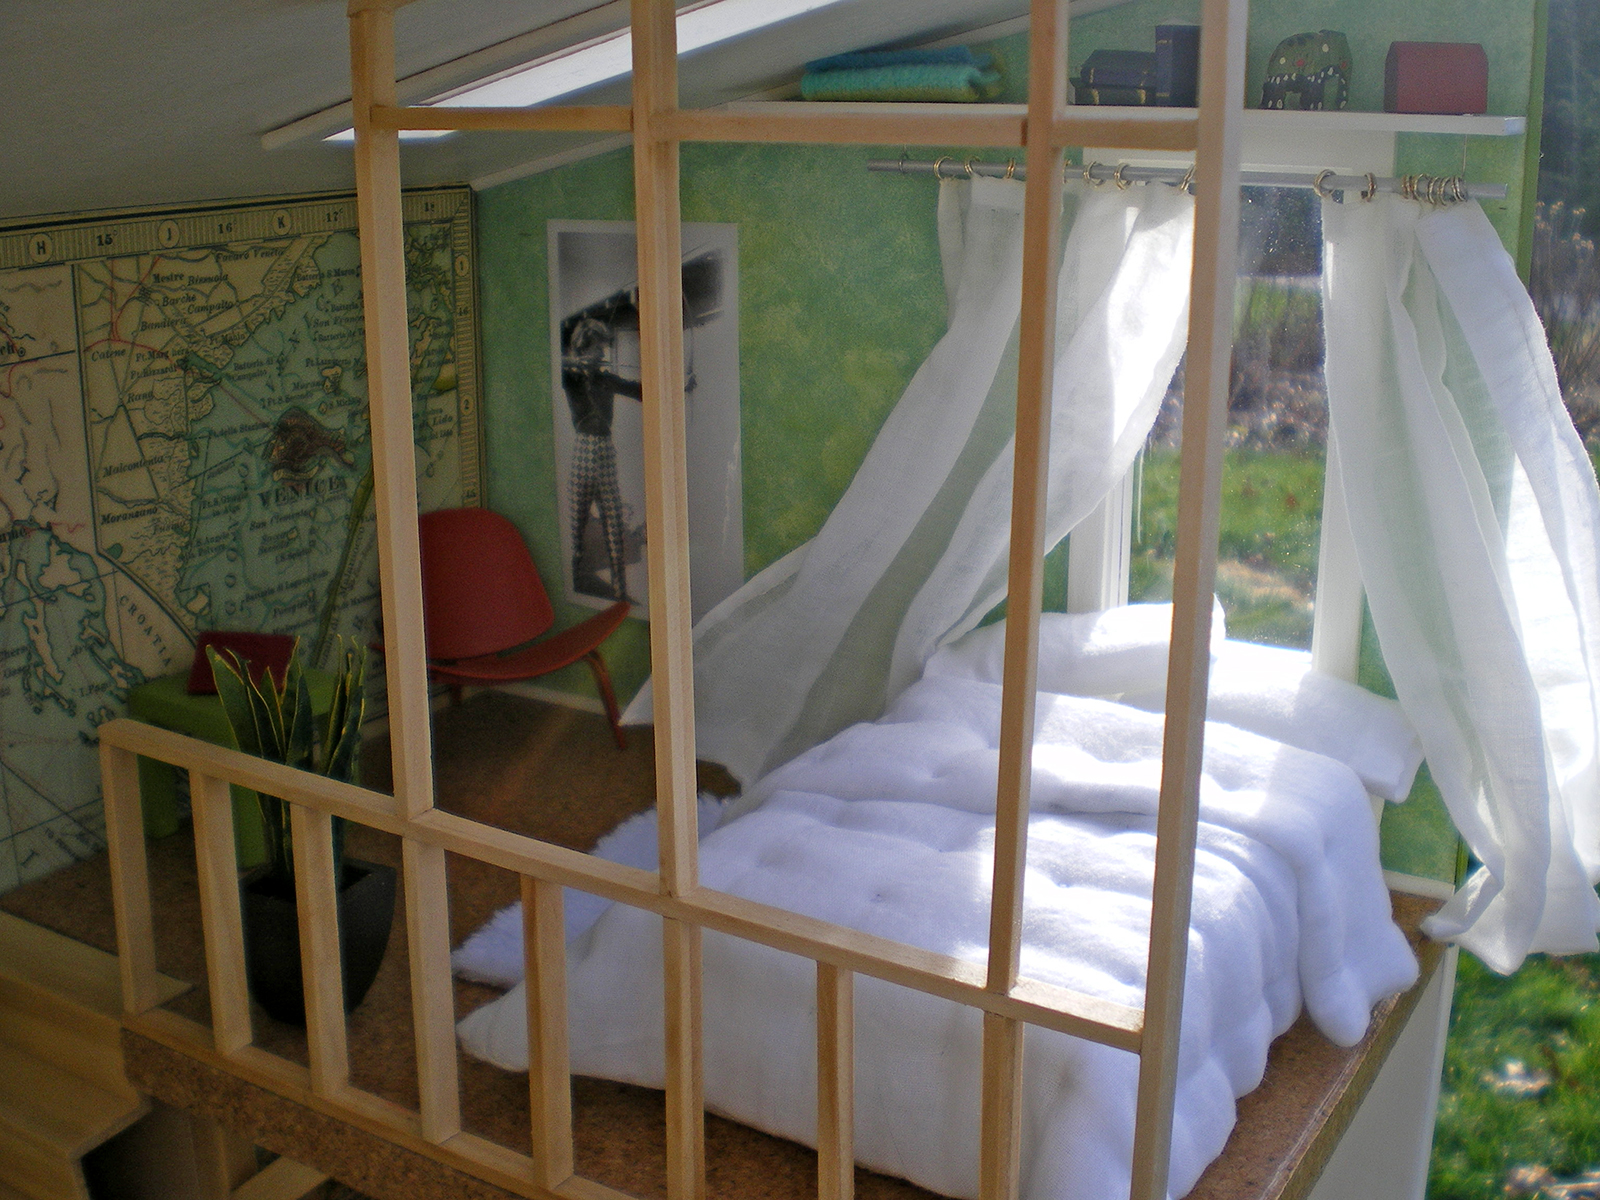
I’ve built two wing extensions on either side of the main deck to increase the living space area. One side is the greenhouse, and the other will be the shower and sleeping alcove. For the greenhouse leaded glass, I drew my designs using 9-point (1/8-inch) lines, which seem reasonably robust for a seaward structure. They’re cut from black cardstock, and glued front and back to non-glare Plaskolite, which provides a semi-opaque — and salt-spray burnished — surface.

gh_front_02

My initial approach was to tediously center the Plaskolite within the 3/16-inch framing. (Of course if I was more dedicated, I would have routed a channel in the one million each of the frames, or, have built them with three layers of stock. But I’m not.) As I was fiddling about with measurements and drawing and cutting prototypes, I realized the best — and squarest — way is to cut the panes and cardstock leading a scant larger than the outside window openings, and glue them atop the frames. Then, trim out with thin strip wood.

gh_front_01

It looks just fine! Intentional, even. The two layers of cardstock, glued to the Plaskolite front and back, look believable. Even the little schmutzes of glue make sense in a marine environment (although they are easily cleaned up.)

gh_front_05.jpg

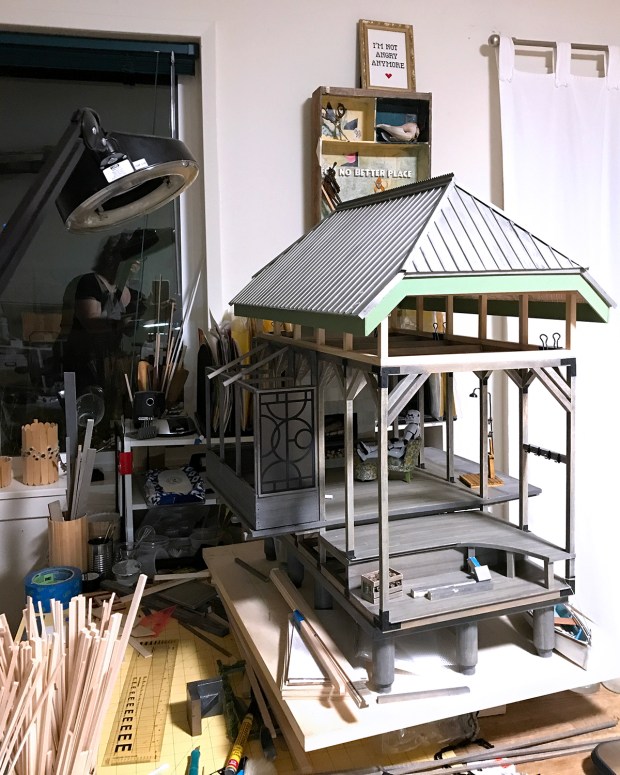
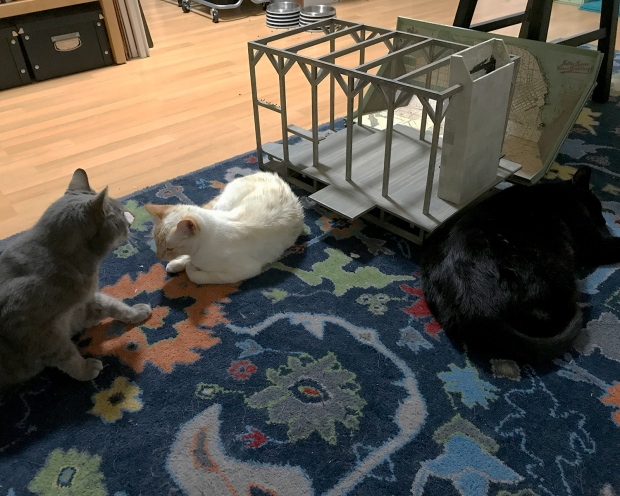
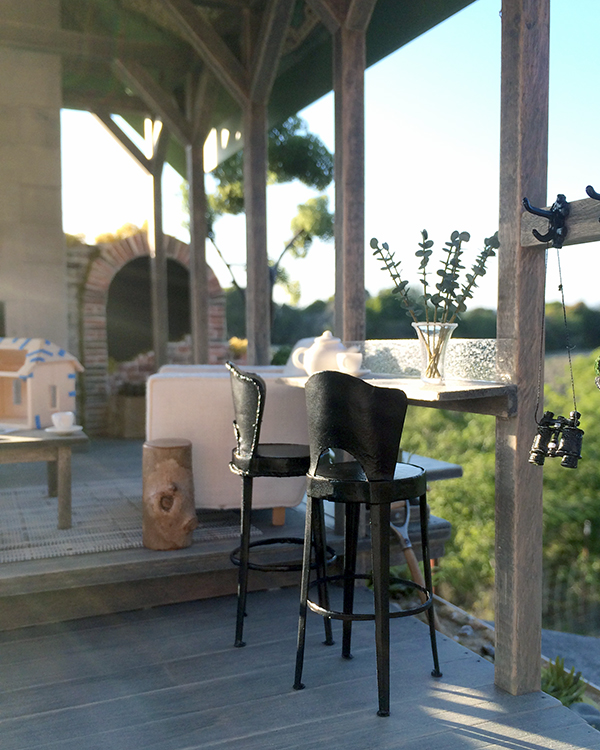
Here’s the whole structure-in-progress, including the new roof extension, which might be where the sleeping quarters wind up.

Ruby_101217

And here is the main — or one of the many — reasons I drive down to Santa Cruz each week: for Ruby, now four months old. She lights up a room, no batteries, routing or wires required.

Sea House Pavilion Sea Rise Remodel

stormy_100817

Turns out — after a lot of experimentation and test builds and weathering practice and pondering and faffing about — as much as I am captivated by abandoned miniatures, I do not wish to actually build one. I felt a bit sad when I realized this, but also relieved. The pavilion remodel still has sea level rise as a core premise, but now it’s more of a retrofitted, off-the-grid, self-sufficient adaptation that’s been going on for some years. With scavenging and memorabilia. The old skiff, with its faded Sea House emblem, stays. Stormy is just passing through :)

Skiff, Brackets

skiff_building

Scarlett has grown into a far more helpful studio cat. Here she continues the weathering process on the underside of the Sea House Pavilion Squat roof, while I work on building a wee skiff.

skiff_box

I eBayed this circa 1989 Midwest Products skiff model. I love this kit for many reasons: The superior 36-page construction manual and a full-size plan. Each of the 117 steps has a little checkbox next to it, to track one’s progress. And shipbuilding vocabulary: inwales, cleats, chafing plank, stem and false stem, strongback, painter, breasthook, skeg, knee and quarter knee, transom, fairing.

Here is step 109, Inwales:

skiff_building2

Even with the apprentice skill level 1 rating, there was still plenty of late night swearing, especially setting up the framing. I realized very early on how glad I was that the finished model would be heavily weathered.

skiff_weathered

Making the oars was possibly my favorite part. They’re built from dowels and stripwood, whittled and sanded into final shape. (Still have to varnish the second one.)

brackets_00

The outdoor shower is old Reutter Porcelain, tragically discontinued. One of my all time favorite pieces!

At some point, the Sea House Pavilion was retrofitted with sturdy brackets, much like the foundation of the SH Warming Hut.

brackets_parts

This time, made much easier by cutting the components on the Cricut machine. I used the scoring tool to mark angle folds and placement of the bolts, which are two dots thick. (Note to self: hmmmm, maybe make available to sell? Have good metallic cardstock by Neenah. Am thinking of drawing contemporary and or retro wrought iron patterns, too?)

scarlett_092117

Recently, most of my building has been in the quiet of late night. Scarlett keeps me company on the studio thinking couch. Good kitty.


Studio Cat, It Has Begun

studio_cat

I’m going to lead with this pic of Scarlett, lest you think she only haunts my endeavors. Here she is at the control center of Brian’s studio, enjoying the warmth of electronic musical components, and inexplicably enduring loud sounds and buzzing. Purple and contented.

dismantled_081117

Last night, we had freak thunder and lightening storms, which drove all cats inside. I had dismantled the Sea House Pavilion build earlier, in preparation for the remodel. What better way to begin aging and distressing the various parts than to allow wet cats to regain their composures lounging about the structures? The roof cradle was their favorite for grooming (not pictured), and I can only hope a natural, organic weathering effect is underway.

base_091217

I used pliers and my fingers to yank all the cut silk and preserved moss foliage off the base. It was a major effort, and took a couple of goes. The whole build was constructed in three detachable parts: base, pavilion, roof. I also removed the back arched brick wall remains. Not sure if I’ll re-incorporate it into the new structure — sea level rise does take its toll. I remember it was part of the backstory of the Sea House Pavilion, and I do love combining old and new. That sense of place, the evocation of those who came before us, even as we go about our contemporary lives. We’ll see what happens.


peacock rug complete

modern miniature peacock rug

After completing stitching and staring at it for a while, I trimmed the edges of the silk gauze to about a quarter-inch (6 mm).

modern miniature peacock rug

I washed and gently blotted it mostly dry, then pinned it into square(ish) and left it to dry overnight.

modern miniature peacock rug

The raw edges are turned to the back, corners mitered, and the edge oversewn exactly one row of the 49-count silk gauze with a double strand of Gütermann silk. I pondered the binding color at length, and finally chose the darker gray.

modern miniatures peacock rug

This is what the back looks like, and shows the combination of tent, basketweave and snarled stitches. Mistakes were made. Many were corrected, but some were discovered too late. Kind of like life.

modern miniature peacock rug

I fused featherweight interfacing to the back, to protect and seal the raw edges. Note to self: dust your build floors more often!

modern miniatures peacock rug

And here’s the finished rug, inviting you in to the Sea House Pavilion for a cup of tea or a glass of wine. It’s a great place to watch the storm blow in.

it’s that time (again)

Yes. We are moving. Well, actually, packing in preparation for moving.

Yes. We are moving. Well, actually, packing in preparation for moving.

About an hour and a half up the coast, to Pacifica. Very excited for new beginnings, very sad to depart the Soquel hills and the superior Santa Cruz County climate.

Finding a new house (oh, and working) is why I’ve not been doing any building the last few months. But I have been stitching — sometimes late or in the middle of the night — on the Animals rug, and a new, smaller rug project: Peacock.

Peacock, designed by Roger Bell in 1913–14.

Peacock, designed by Roger Bell in 1913–14.

I came across this remarkable book, Bloomsbury Needlepoint From the Tapestries at Charleston Farmhouse by Melinda Coss. It is both great art history and charts of designs by Duncan Grant, Roger Fry and Vanessa Bell.

You want this book.

You want this book.

Roger Fry’s original 1914 design was worked on 10-count double mesh canvas, and measured 22 xx 15 inches (55.9 x 38.1 cm).

Roger Fry’s original 1914 design was worked on 10-count double mesh canvas, and measured 22 x 15 inches (55.9 x 38.1 cm).

My version is on 49-count silk gauze with Gütermann silk, 227 x 153 stitches, 4.625 x 3.125 inches (11.75 x 7.9 cm). And although I wish Gütermann had more and better shades of greens and blues (especially), this piece gives me the comfort and focus I need right now. Thank you, tiny needlepoint!


Vintage stools for the Sea House Pavilion

Metal stool (unpainted) made from cardstock, wood and string from a tutorial by Kris Kompas

Metal stool (un-metal, unpainted) made from cardstock, wood and string, from a tutorial by Kris Compas

Kris Compas over at 1inchminis has a great tutorial this month for a vintage metal stool. I love this design!

They work well in the Sea House Pavilion. I am not happy with the thread detail to simulate a rolled metal edge — I couldn’t get it to look like anything other than fussy thread — but without it they look a bit plain. More exploration of materials is called for.

New vintage chairs for the Sea House Pavilion. Come sit and watch the sun go down.

New vintage chairs for the Sea House Pavilion. Come sit and watch the sun go down.

I also made a pattern for a slightly modified seat back, so I’ll be able to experiment more. And order new spray paint. Check out this range of colors from Liquitex!

Thanks, Kris!

2013 grand prize winner

Inviting you into the Sea House Pavilion, in a magic carpet way

Inviting you for tea or cocktails at the Sea House Pavilion, via magic carpet

Having the Sea House Pavilion win the Grand Prize award in HBS’s 2013 Creatin’ Contest feels like this pic: dreamy, delightful, unbelievable. Completely unexpected. Truly an honor.

Come sit down

Come sit down and hang out

And it has afforded me the opportunity to learn to spell pavilion correctly (I still keep wanting it to have two Ls).

I mentioned in an earlier post that I made a tiny version of my notebook, open to some of my first sketches done in April 2013 (seen above, on the couch).

Computer, enhance.

Some of my sketches and notes for the Charming Cottage

Some of my sketches and notes for the Charming Cottage

I spent most of last year getting our house in Rhode Island ready to sell, then packing it up and driving across the United States in a 31-foot motor home with my husband, our very large dog and two disgruntled cats, to return to Northern California, where I am from. (We shipped all our stuff, except the guitars.) The starting kit Charming Cottage in blue tape dry fit was as far as I had gotten before the move until Mid-September, when I was able to unpack my studio, try to decipher my notes and begin to build in earnest.

I worked on it nights, weekends, holidays and vacations right up to the deadline. I was so happy when I learned we could make a digital contest submission this year.

SH_Pavilion_side

The sun is starting to set. Might we get some rain?

The Sea House Pavilion is part of a compound in coastal Northern California, in the same town where Loft No. 1961 is, my first-ever build and a First-time Entrants’ Award winner in the 2012 HBS contest. More about that later :)

Enge_Loft_003

Loft No. 1961, the studio of a woman writing a book about her father’s death

The loft bed where she can sleep when she’s worked late

The loft bed where the writer can sleep to dream

You might notice some themes that seem to carry through my builds :)

sea house pavilion: fire place moss trough

hmmm… the moss seems to have grown unruly since I first transplanted it

hmmm… the moss seems to have grown unruly since I first transplanted it

One of the things I like about outdoor rooms is how luxurious commonplace interior items, like a fireplace, look and feel. The granite blocks are cut from textured cover stock, glazed with matte acrylic washes of warm grays and taupe, and very lightly spattered while still wet with Payne’s gray on a fine brush. They are glued onto a foamcore structure (which also conceals batteries) that extends up into the rafters. I painted the firebox black and drybrushed on some char and ash. Brian split all the logs and made the grate by soldering bits of metal fencing together :) There is a shelf/bench of salvaged planking from the Sea House Pleasure Pier on one side and part of the front, made from basswood stained with Classic Gray Minwax, weathered with a fine-toothed razor saw blade and mechanical pencil, then sanded smooth.

The final addition was a low trough of the same wood planted with moss, which thrives in the cool marine climate. I like how it adds softness to the linear structure, and a bit of life and color. It also conceals a devilish leveling problem with the old wood decking and the quarried granite.