Sea House Warming Hut: Now We Are Six

www.nancyland.com

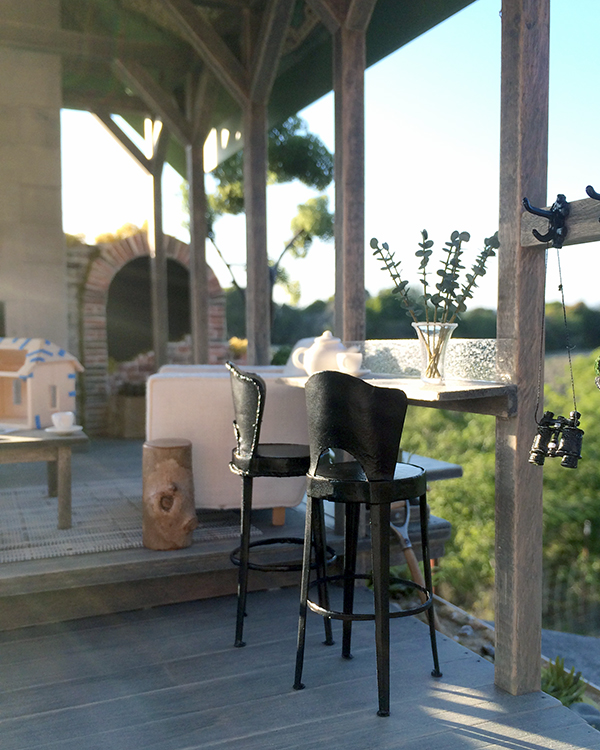
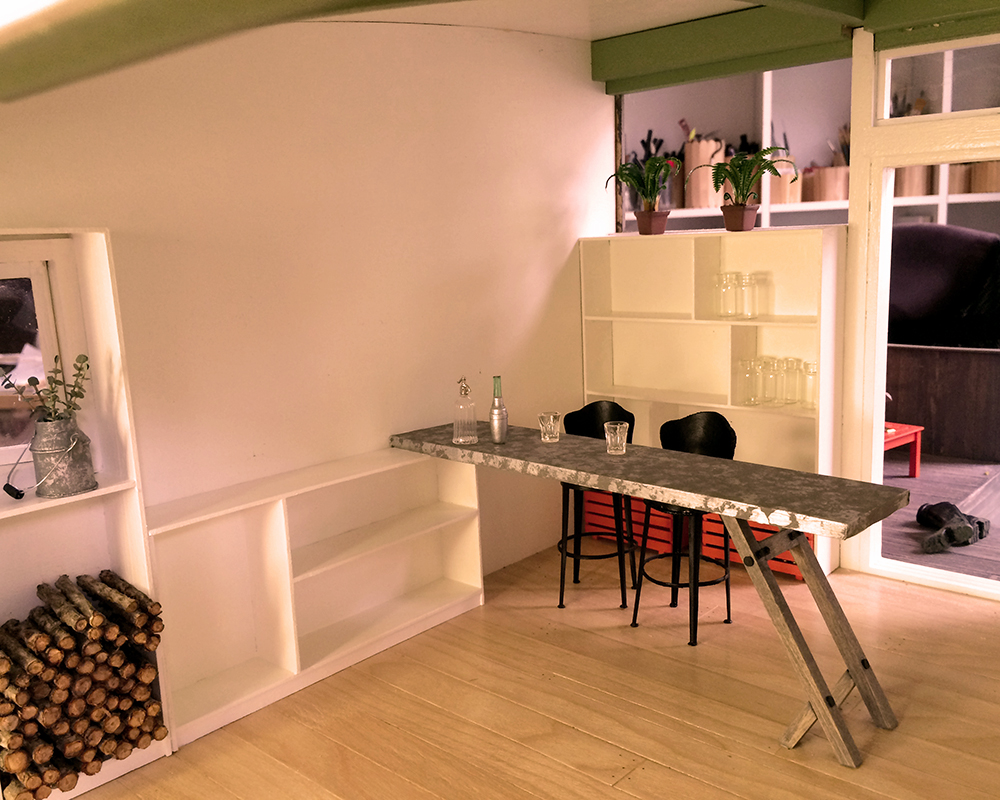
Here are the unpainted stools, having a drink at the bar. Seeing them a light color lets me know I want them darker. But not black or aluminum. And because I want to spray them, I am somewhat limited in my color choices. Current thinking is a basilly sage green, and repainting the woodstove to match. Because different greens can clash horribly. But would that be too matchy-matchy, the stove and the stools?

I see several cans of spray paint in my near future.

www.nancyland.com

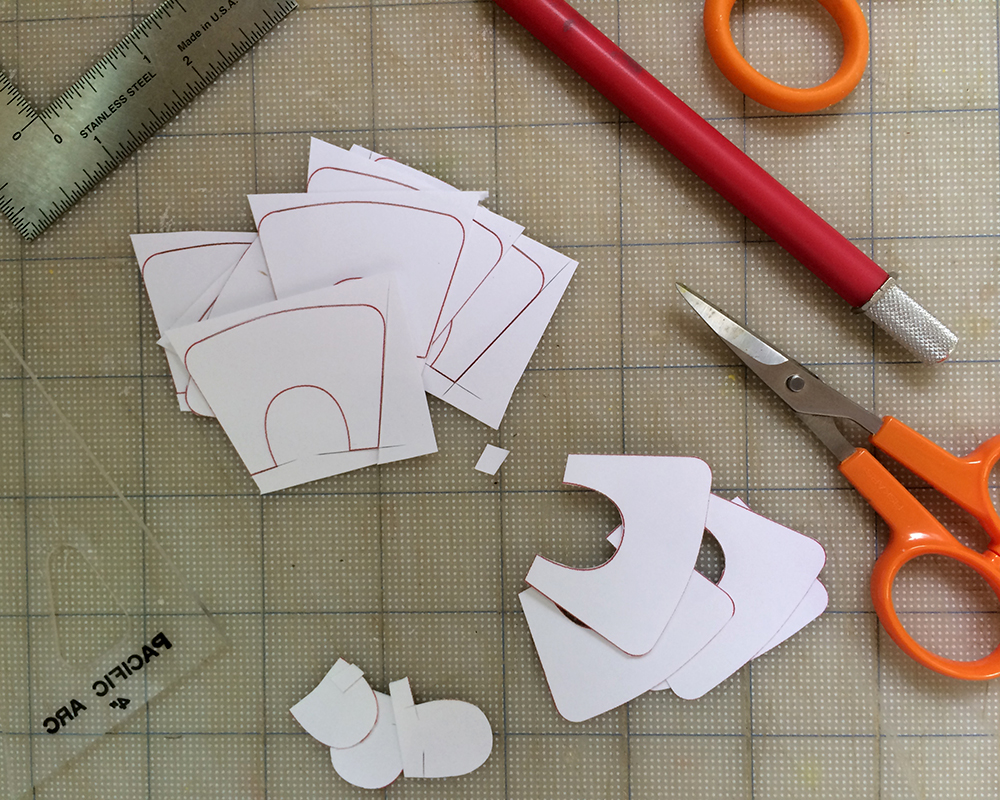
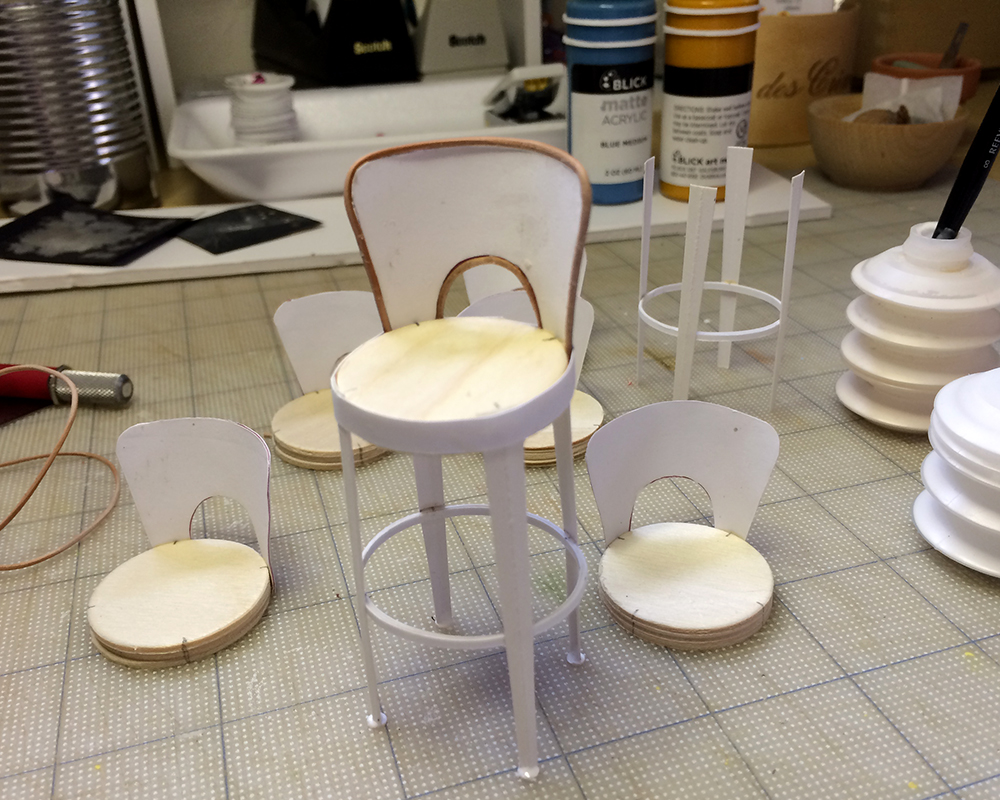
You know what the hardest part of making this whole set of stools was? Gluing the 1/8-inch round feet on the bottom of the legs. They each needed a good size dot of glue — but not too much — and then they would repeatedly stick to the applicator, the knife blade, the tweezers and/or my fingernail, in succession. At least two out of four instances for each of the six stools.

Sea House Warming Hut: Bar Stools

I’m using Kris Compas’s design tutorial to make the six bar stools. When she first posted it, I made two for the Sea House Pavilion. They’re so perfect.

New vintage chairs for the Sea House Pavilion. Come sit and watch the sun go down.

New vintage chairs for the Sea House Pavilion. Come sit and watch the sun go down.

I used Woodsies rather than illustration board for the seats, because why reinvent a similarly-sized wheel?

www.nancyland.com

I modified the seat back, and printed it out on card stock. I cut all the straight lines with an X-acto.

www.nancyland.com

And then hand cut the curves with scissors.

www.nancyland.com

Kris walks us through the construction process with such ease, it makes her brilliance with deconstruction and solution all the more remarkable.

www.nancyland.com

I used one millimeter leather lacing to simulate the rolled edge of the metal. It’s smoother than crochet thread, and very pliable.

www.nancyland.com

And here’s the first finished chair, ready for painting. Still undecided about the color. I’ll probably make all six, and pile them into to the hut around the bar. I don’t want them to be a focal point, and I’m also pretty sure I don’t want them galvanized. The interior will tell me, after there’s more… stuff.

Sea House Warming Hut: Interior

www.nancyland.com

It’s getting towards end of day here, and sunlight is straying through the fog clouds for the first time today. Join us for a sunset drink at the new bar? The ocean is very sparkly.

I built a cabinet to serve as base and storage for the “zinc”-topped bar that will easily accommodate six. The bar legs are more salvaged pleasure pier wood, stained the same color as the hut siding and bolted together.

The bar stools, borrowed from the Sea House Pavilion, were made from this fabulous Kris Compas tutorial. I will make six new chairs, with a lower profile back. No idea yet what the color will be yet.

One of the things the Warming Hut will have available is local honey, made by happy cliffside coastal bees. I got some of those tiny fingernail jewel jars from the freaky, sad dollar store; they scale to 1:12 quarts nicely. Last night I fooled around making a honey jar label:

www.nancyland.com

but after several iterations it still doesn’t scale well to the wee jar size, and I can’t decide if Sea House can brand retro vintage, or if I should stick to my preferred minimalist modern style (+ quirk).

I’ve filled a couple more notebook pages with sketches and ideas for the hut interior design and contents. I’m anticipating drawing some maps and charts. In Map Art Lab by Jill K. Berry and Linden McNeilly, there are some swell folding and pop-up diagrams I am eager to try. I’m also considering native plant seeds and starts, in little flat crates.

The biggest unknown is what the small armchairs around the wood stove will be.

I am very drawn to this chair from wilminidesign.blogspot.com/es called “Design Chair”:

chair

Also considering Jane Harrop’s “Utility Fireside Chair” from her book Thirties & Forties. Its very Danish Modern, and the peacock blue linen I’d like to upholster with will work well. She sells the chair as a 1:12 kit from her website, but I’ve made a few from the instructions in her book.

harrop_chair

That sunset drink is calling. Coming by?

Sea House Warming Hut: Overwrought Iron

www.nancyland.com

I decided to use the remaining section of the JMG Miniatures laser-cut panel to make the ruined remnants of a wrought iron railing, as a part of the original brick foundation. I wanted it to be twisted wreckage with a story to tell, but not faux-Gothic macabre.

www.nancyland.com

Several coats of flat black spray paint, glue globbing, lamp black acrylic, “rust + dust” shaved pastels and tiny dots of opportunistic sage lichens. It’s really fun to crap paint intentionally, for once :)

www.nancyland.com

After smooshing them around in a few places, I opted for the back, with the view into the open hut above. I set them in far enough to be visible, but not a statement beyond “What was deluxe becomes debris.”*

And with that, I think I’ll turn my attention to the interior of the hut for a while (except for the ongoing living roof planting and interminable foundation gravel gluing). I’ve been considering the chairs for ‘round the fireplace, as well as other seating and maps and books and beverages.

*A special prize! for all who *know* the provenance of that… lyric. And care to share it. Googling is informative, but totally cheating in this case. Unless it’s to marvel at the poignant brilliance of this perfect song :)

Sea House Warming Hut: Wroughting Irons

www.nancyland.com

It’s a foggy morning here in Nancyland, and the crew is finishing up installing a vintage wrought iron railing and foundation grate, welcome salvage from the Sea House Pleasure Pier.

I have been looking for a well-designed wave pattern to meld into Warming Hut history and decor, and found it in these laser-cut panels from JMG Laser Engraving. (HBS/miniatures.com carries some of their products.)

www.nancyland.com

For the railing, I cut the section I wanted free, and glued it between two lengths of basswood. After spraying with several coats of flat black paint, I mounted it to the open edge of the deck with glue and brackets made from solid-core black paper. These were bolted with 1/8-inch and 1/16-inch bolts for extra security.

Actually, they’re totally just for appearance.

www.nancyland.com

As it happens, I installed the lower grate first, gently curved and held in place with glue and bolts. I then re-grew the poppies peeking through the bars.

After staring at it for a while, I realized it is far too smooth to be convincing salvaged wrought iron, especially in a marine environment. The railing assembly was still in process, so I mucked it up with tiny dabs of glue and smudges to simulate rust and age. Then I painted it with three different types of black paint. You can kind of see the effect in the first photo of the railing. It’s nice and grody, but well-maintained and hopefully structurally sound. I’ll apply this wroughting process to the grate next :)

After I get my lap back.

www.nancyland.com

Is Napoleon the inspiration for my color palette?

Sea House Warming Hut: Living Roof Drainage

www.nancyland.com

I wanted the rock ley line drainage system to look substantial, but not dominate the living roof. I determined that height was the key, especially so that the plantings did not swallow it.

I measured out a simple grid on the roof, and cut 3/16-inch (5mm) strips of mat board. After gluing these to the roof, I colored them in with a black “Industrial Super Permanent” Sharpie (fine point). Because I am serious.

www.nancyland.com

Then I cut 3/16-inch (5mm)-wide strips of my favorite solid black paper, Canford Raven, made by Daler-Rowney. I put these on the parchment-covered half-sheet tray I use for messy (and/or abstract art).

www.nancyland.com

Ran a stout bead of quick-grab tacky glue.

www.nancyland.com

Then sprinkled them with beach gravel.

www.nancyland.com

After the strips had dried, I excavated them from the gravel.

www.nancyland.com

You might be thinking this is a lot of pictures of tiny rocks, and you’re probably right. It’s because I love them. No, really. I take high-resolution photos, and like to zoom in and look at the individual tiny rocks. Because each one is beautiful.

I glued the rocky strips to the grid frame.

www.nancyland.com

And I’m satisfied with the relative proportions of drainage to (eventual) plantings. I can always trim the mosses as they get closer to the grid if they insist on being too lively.

As for below, I’m almost done with the bracketry. I’ve made like half a million of them.

Also making progress on gluing the gravel ground in, weathering the old brick foundations, and planting California poppies where the wind might have blown them.

www.nancyland.com

Sea House Warming Hut Secure

Something was bothering me.

Backstory: The Sea House Warming Hut is situated on a rocky coastal bluff, in seismically active Northern California. Although it has a new post-and-pier base (built over the evocative remains of an unreinforced brick masonry foundation), I doubted that the wood glue used (miniature code for imaginary construction screws and nails) would keep it from sliding over the cliff in the event of a temblor.

So I set about making brackets and bolts.

www.nancyland.com

From cover weight solid-core black paper (think: powder-coated steel), I cut  5/16-inch (10 mm) wide strips, which were scored and trimmed to form the various styles of structure-saving brackets. And from a doubled thickness of the black paper I punched 1/16-inch (2 mm) circles to serve as bolts. These were glued in place with tiny dots of tacky glue.

www.nancyland.com

The bracket assemblies are secured to the structure in all the proper places. I am not even going to count how many more I need to make. Because now our little hut is secure on its cliffside, and we can all breathe deep sighs of relief and well-being. Please, enjoy your day. Maybe stop by for an iced tea or Pimm’s Cup?

Argh! I just realized I’m going to have to retrofit the Sea House Pavilion and Loft 1961 too. Gah.

Sea House Warming Hut: As above, so below

www.nancyland.com

I visited one of the Warming Hut muses today: the living roof atop the California Academy of Sciences in Golden Gate Park.

It is a wonderland.

www.nancyland.com

Those are whale bones drying in the sun, and views of San Francisco neighborhoods to the south.

The biggest revelation was what to do with the Warming Hut roof, in my ambiguous quest to add visual interest.

www.nancyland.com

Criss-crossing the Cal Academy roof’s seven hills is a grid work of stones contained in wire mesh, like ley lines, to facilitate drainage.

www.nancyland.com

They create a subtle framework, and could translate to 1:12 scale splendidly. I am so happy to have my answer!

Meanwhile, I’ve been building out the terrain under the the hut.

www.nancyland.com

In addition to the air-dry clay boulders, tiny driftwood logs and beach gravel, I’m adding some scrumbly old brick foundations. They’ll be only mildly visible, but will add some mystery + history :)

And, it ties the Warming Hut to the Sea House Pavilion, which was staged against some brick ruins.

I’ve learned to do mortar a little better since then :)

www.nancyland.com

The ruins of old brick buildings adjacent the Sea House Pavilion

Here’s the wee brick skunk works:

www.nancyland.com

And one final work-in-progress mood shot:

www.nancyland.com

Because I love the combination of gnarly real and simulacrum.

Input

www.nancyland.com

Madeline (age: 2) came to visit and give her feedback on the Sea House Warming Hut. So gratifying to see her interact with the build and components. Her most enduring source of fascination, beyond the opening and closing windows and slider? And moving the deck furniture indoors and out? And loading the firewood into the stove? And watering the poppies with the miniature watering can?

How it was that the beach gravel was glued in place.

Draw your own conclusions, but never underestimate the apparently simple magics.

Sea House Warming Hut: Rocks Again

www.nancyland.com

After a few weeks of realtime gardening, I started back in on the Warming Hut rock foundation. I’m nestling (or is it more like tectonic upthrusting?) my air-dry clay boulders into black sand beach gravel and bits of tiny smooth driftwood. Planting poppies where they might find a scraggly foothold.

And I’m out of poppies again.

I filled the cracks in the clay with veins of “quartz” made from carpenter’s glue and a pearl white matte acrylic. The brightness was toned down with a muddy ochre acrylic wash.

It wasn’t quite as crystalline as I wanted, so I mixed some white glue with clear glass microbeads, and selectively refilled some of the larger fissures. It kind of looked like tiny tapioca pudding, and I really fretted that quartz crystals are not round. Also all the rocks started looking like Jabba the Hutt again, and I was going to have to throw everything away :(

www.nancyland.com

The best tool for smooshing the mixture into the cracks in any semblance of a natural appearance turned out to be, of course, a fingertip, followed by a wet wipe. (More about those later.)

Here you can see the difference between the new crystal mix and the muddy washed-carpenter’s glue and pearl white acrylic veins.

www.nancyland.com

Happily, the white glue did dry clear (just as it always does) and the effect was a little more convincing.

www.nancyland.com

I toned everything down with the muddy ochre wash. I think I’ll glue all the rocks around and under the pilings, and continue adding my beloved Pacifica black beach gravel and pebbles.

And make like 150 more poppies.

www.nancyland.com

Funsy.