A Surprise Mudroom, Keli’s Flowers

plans

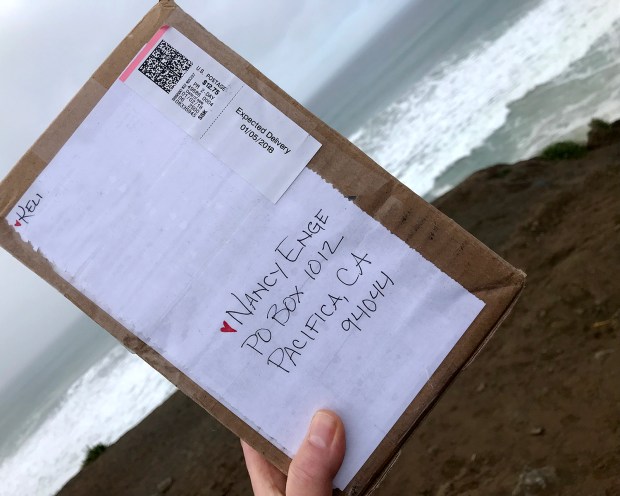
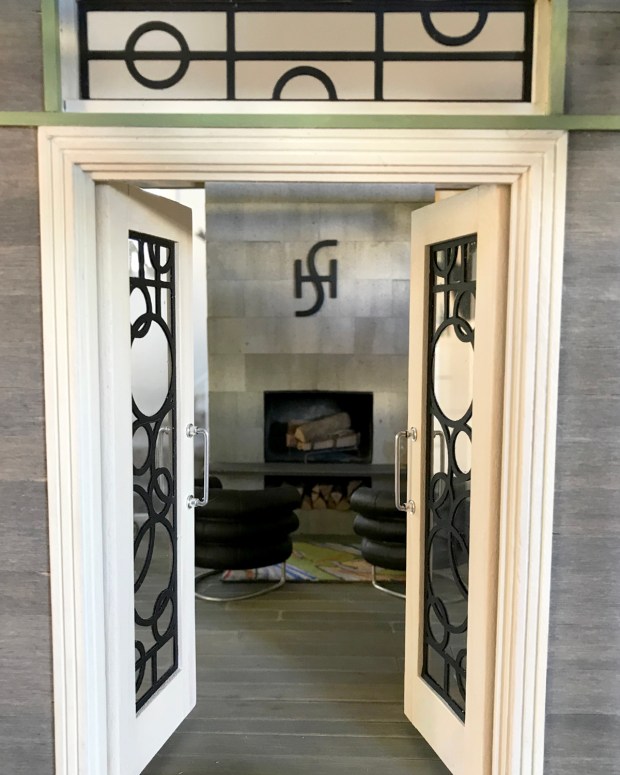
The new year brings gifts of change, and gifts of gifts. I have scrapped the idea of a shower room in the Sea Rise Sea House Pavilion remodel, opting instead for a mudroom back entrance. Specifically, to act as a showroom for the gifts from Charlene’s legacy that Keli has bestowed.

mudroom_120718

A mudroom fits right in to the spirit of the build, and believe me, these pieces from Charlene’s collection are exquisitely detailed and realized.

mudroom_02_010718

I’ll show more detail on the actual pieces after I’m not so caught up in building the mudroom. Shown here are waders, completely handmade from very thin leather, paint and wire buckles. Tiny black seed beads for suspender fasteners. One of three (!) uh, two fishing poles, made of metal, wood, wire and magic. The tackle box will be the subject of its whole own post — there are tied lures with real feathers, and other stuff only fisherfolk know about.

keli_flowers_010718

These are flowers realized by Keli from the EC01 Echeveria kit at Modern Miniature Succulents + Sundries. Wow, wow, wow. She made the leaves and sepals, and arranged them in a vase with microbeads.

They reminded me of proteas, and so now I’m all researching and sketching for a new kit. Thank you, Keli, for sharing the rich wonder of Charlene’s legacy, *and* for sparking a brilliant idea for a wonderful, waterwise flowering plant that plays very well with succulents.

Greenhouse Lighting, Lineage Legacy, Beauty

lighting_00

Growing in electrical confidence. I pulled the beautiful 12 volt bulbs out of these fixtures from miniatures.com, and replaced them with 3mm 3 volt LED bulbs.

lighting_01.jpg
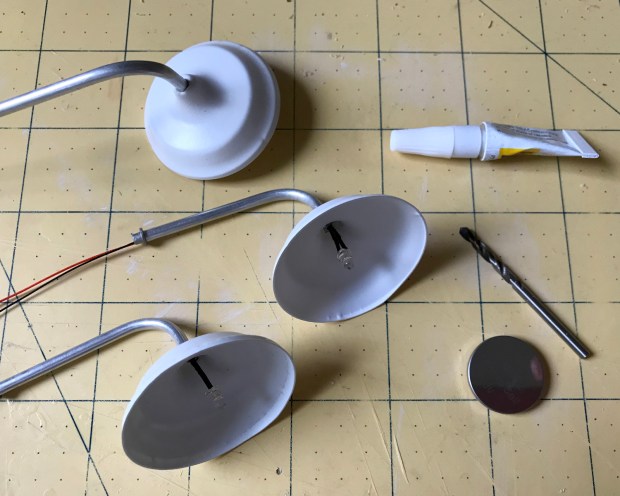
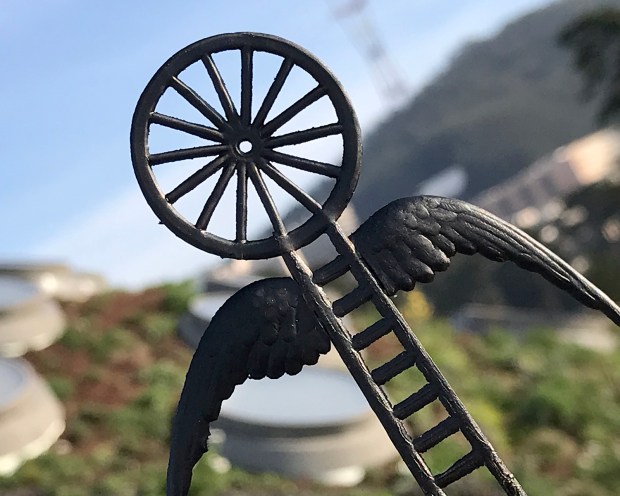
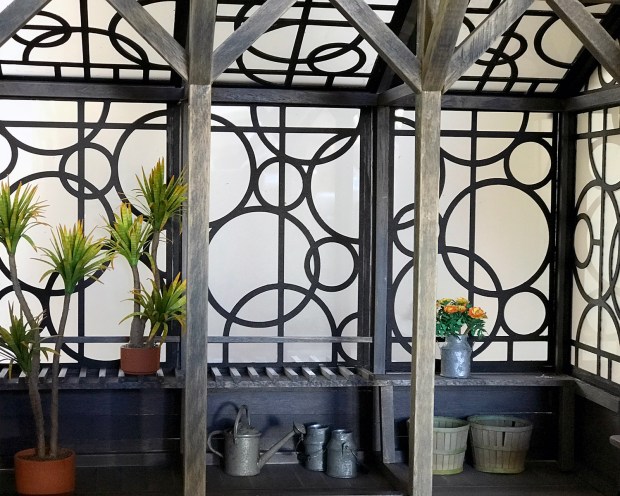
I drilled holes through the greenhouse framing to accommodate the aluminum tubing. Here are the fixtures upside down, glue drying.

lighting_02

Right side up, but still wobbly.

lighting_03

On the outside of the greenhouse I routed the wires down through 3/32-inch shrink tube, and drilled holes back into the interior. I’ll glue the shrink tube conduit to the vertical leading on the outside glass, and re-gather the wires inside to connect to a coin cell battery concealed in an under shelf tub. All in all, an elegant solution to a lighting retrofit? You will please be the judge as I implement the plan :)

parcel_obscurred_120417

In other goings-on, I received a parcel from Keli, containing — among other things! — an astonishing bestowal of gifts from Charlene’s legacy. I will share in detail in future posts; I am still processing the magnitude of what I was gifted, and am in flat-out awe of the artistry of miniaturists. These things need to be shared.

I flashed on a fever dream/hallucination I had while living on the East Coast, and had contracted Lyme disease and was very ill. In bed, gazing out the window to the woods beyond, I had a vivid vision of all the people of my individual lineage, stretching back through time — all my ancestors — accompanied by a tremendous sense of comfort and rightness. Coupled with that biological heritage review, there was a sense of recognition of others who were of my tribe. Miniaturists are my tribe :)

Maddie_010118

This is my older granddaughter Maddie, who will be 5 years old in March. Photo taken by her mum (my daughter) on a family hike with her baby sister and Papa on New Year’s Day. The expression on her face… serious wonder.

Humble Lighting, Cats

kitchen_lighting_01_123017

I got my lighting order from Evan Design: replacement chip LEDs for the under shelf, and five 3mm LEDs for the pot lights (3/16-inch brushed aluminum eyelets) in the ceiling. Look at how warm the “warm white” is!

kitchen_lighting_123017

And gah! Look at what a tangle the backside is. There’s five chip LEDs (the tiny red and green magnet wires) and five 3mm LEDs, wired to two 3V battery holder/switches. I’m posting this in all humility and baby steps learning. I *will* get better at wire stripping and making elegant connections. Because how I love learning new things?! Even though I cringe at being clumsy and awkward doing so.

Scarlett_123017

Speaking of elegant connections… I went to post this at my main workstation, but found Scarlett snugged in my chair (and absorbing the under desk Dyson heater warmth). Of course I could not disturb her, so I retreated to the couch with my laptop.

Albie_laundry_123017

And there was Albie, snugged into a fresh, warm load of laundry waiting to be folded. So now I’m arrayed on the other end of the couch, with laptop, phone, sketchbook, freshly sharpened Blackwing pencil, two reference books, a baggie of lighting components, and a glass of wine, all amid the piles of half-folded laundry. Same as it ever was,

Wheelie Has an Outing

Wheelie_teapot_122917

Today, Wheelie and the rest of us (literally, I’m guessing half the Bay Area) ventured out to the Cal Academy of Sciences in Golden Gate Park. But first, we were hungry, so we found an awesome nearby neighborhood restaurant called Hakka, on Cabrillo Street. Highly recommend!

plate_techtonics

We considered global plate tectonics.

color

As always, the ongoing Color of Life exhibit is fascinating. Wheelie discovered an affinity with the polymorphic Gouldian Finch.

Claude.jpg

We enjoyed visiting Claude in the Swamp, from a downstairs Steinhart Aquarium vantage point.

claude_fan

But I feel fairly certain that this little girl in front of us was enjoying it the most.

CA_reef

Not being divers (yet!), the local California coast kelp forest exhibits are mesmerizing.

jelly_00

The jellies never fail to entrance. Ever.

jelly_01

Wheelie discovered another kindred soul.

living_roof_00

The culmination of every visit to Cal Academy of Sciences, for me, is the pilgrimage to the living roof. One of my very favorite places.

living_roof_01

Wheelie likes it, too! She feels her spirits soar.


Dresden Trim, New Avatar

2018_glued_vellum

I was given a wonderful pack of assorted Dresden Trim, as well as an entire sheet of fish. I spent a pleasant few hours sorting through the scrap, snipping and arranging the bits and pieces. Things got interesting when I started combining parts of one with another. Above is the beginning of an illustration for 2018.

avatar_layout_mat

I cut the wings from a bird in flight (a swift? a swallow?) and this happened. I felt an instant sense of recognition, like I had met a new old friend.

avatar_constructed_front

I made the ladder longer, and glued the pieces together.

avatar_back_mat.jpg

The back is reinforced with toothpicks and cardstock circles cut to the wheel dimensions, stacked and glued together, then glued to the outer rim.

avatar_01

Because I’m not a stamped gold foil kind of girl, I spray painted her matte black. Please say hello to my new avatar.

avatar_02

She shows up strikingly against many backgrounds.

avatar_SH_front_01

I gifted her shoes made of black eyelets and tacky wax. She stands freely, observant, curious and full of questions.

avatar_SH_interior_01

However… sometimes it’s hard being 2.5D in a complex 3D world. You can lose touch with essential parts of yourself.

avatar_cloud_box

We believe it’s good to have your head in the clouds, and your feet on the ground.

avatar_n

And have your heart wide open… but sheltered by something good.

(These particular Dresden trim pieces came from Castle in the Air, but I have since found three other good online sources: Rose MilleDresden Paper Crafts; and Walter Kunze.)

Wrought Iron Sign Salvage

SH_roof_122017

I wrought Sea House emblems for the landward and sea-facing sides of the pavilion roof. They’re meant to be salvage from the old Sea House Pleasure Pier and Estate. And so they are.

SH_logo_roof_122017.jpg

Sized to fit between the raised seams on the metal roof, I cut seven copies of the emblem from 65 lb. black cardstock and glued them together. After drying under weight, I sanded the edges even, and slightly beveled the top edges. I added fastening “bolts” then lightly stippled and dry brushed some wear and weathering. Not too much. The caretaker is diligent about her conservation duties.

front_122017

Then I had to make a smaller version to mount on the fireplace.

SH_fireplace_122017

It looks splendid, don’t you agree? (Well, except for the ripply rug. There’s always something.)

kitchen2_122017

I bashed out the support column in front of the kitchen, and felt much better about the space, even though it still looks like every other ELF kitchen ever made, ever. (Not that there’s anything wrong with that.) I’ll scrape away the brackets on the floor, patch where the post was, and it’ll be an intentional remodel artifact :) I found the LED pot lights I ordered, then lost, so next step will be the ceiling/roof, and then the exterior siding.

gh_122017.jpg

In the greenhouse, the hydroponics have been relocated to an anchored barge just off the rear utility deck.

lowercase_n_121817

Meanwhile, I got to open an early present, a vintage sign hollow aluminum lowercase n, about 12 tall by 3 inches deep. Feeling the love. Thank you, my B.

Boxen, Handles, Slipcases

FF24_pavilion_02

There’s a new set of boxes over at MMS+S, reminiscent of the “dish pack” size, for all your miniature packing needs.

I installed ELF handles set in reversed eyelets on the Sea Rise Pavilion front doors, and then glued the whole panel into the frame. I think I’ve finally worked out which components will be attached together, and which will remain removable. Rethinking having the hydroponics inside the greenhouse; they might get moved to the lower back utility deck. There is still much I don’t know.

slipcases_kitchen

Working on a simple slipcase kit to fit single and triple sketchbooks, in the classic and smaller sizes. Adds a nice finishing touch, and keeps your shelves and bookcases looking tidy. (And yes, that’s an April Wright mug — her pottery is wonderful! The wee bear bowls being used as bookends are feves from Laurel’s ValueARTifacts shop.)

Other stuff in progress and in sketch phase, brimming and swimming with ideas and plans. Focusing now on finishing up work projects for the year, and spending the holidays with family, and taking some time off.

Be good to yourselves, dear imaginary friends!


Pavilion Remodel: Kitchen Progress

kitchen_120417.jpg

This is the first time I’ve ever made fake “fixed door” cabinets, and I confess I feel like I cheated to achieve a look, and/or once again betrayed my core values for the sake of… <fill_in_the_blank>

However, I really do have a bigger picture for this set/build, so faux kitchen doors and drawers are just fine. I am more than pleased with the ELF sink, tap, handles and two-burner electric stovetop. After futzing with the door/drawer front layout in Illustrator, I cut all the pieces from a single length of eggshell white-stained basswood with pretty grain. I sanded the “opening” edges ever-so-slightly to distinguish, and made templates to drill for the ELF handles. Using pliers to gently make the handles fit helped a lot.

I’m still considering the lighting/windows/shelving/roof design of this module. I know, that’s a lot to still be figuring out at this stage, and welcome to my world. I’m off to Santa Cruz for a few days tomorrow, so I’ll have some good thinking time on my drive to ideate.

Also, the perfect mug and plate on the countertop is from Keli’s friend April Wright, a miniature ceramicist working in 1:12 scale.

An Exaltation of Yuccas

I’m excited to share photos of some incredible yuccas, made by two different miniature artists, both starting from the same kit.*

*Uhh, to clarify: each had her own kit. Two artists, two kits, two locations. Nancy B finished first. Not that it was a contest.

yucca_02_nancy_bristow

This is Nancy Bristow’s work. (Nancy has been making miniatures since the 1970s, and it was she who finally identified the Braxton Payne pots I had bought at auction, and pointed me to his obscure website.) She hand-colored the leaves using markers, and I love that she styled them curling out and upward. So pert and jaunty! They’re planted in BP pots she “aged”, and used bird grit as gravel.

yucca_3_nancy_bristow

Here’s a shot of Nancy’s work-in-progress, adding knot holes to the stems. I noticed she chose to curl the leaves first, before attaching to the stem. Brilliant! It is so gratifying — and informative — to see how other makers work with my kits. One can learn so much.

yucca_keli_111917

This is Keli Minick’s interpretation of the yucca tree kit. Look at those colors! I love the graceful trunk, and the stubby branch. Two completely different plants! She suggested using round nose pliers to separate and shape the leaves after attaching — which makes the process much less tedious. And she kindly pointed out a typo in the armature instruction sheet. Argh!

YU01_contents

Here’s what the Broad Leaf Yucca Tree kit looks like to start. This is the green leaf variation; cream and white are also available. (I believe Nancy B started with white leaves; Keli with cream?)

What would you make of it?

Sincere thank-yous and expressions of humbled awe to Nancy B and Keli for allowing me to share their work.