Retro Sofa, Fairy Surprise

sofa_061916

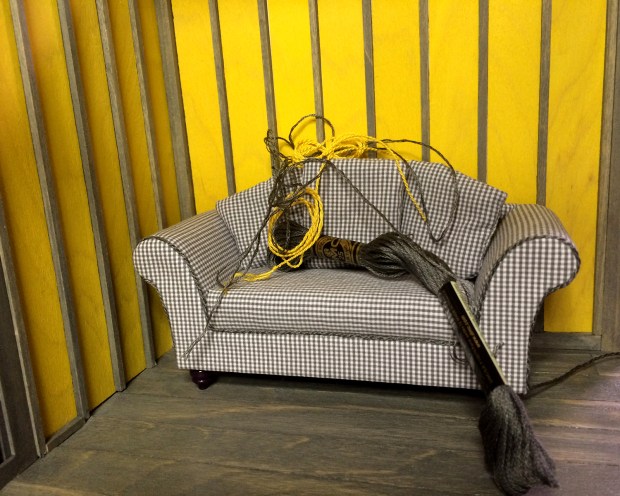
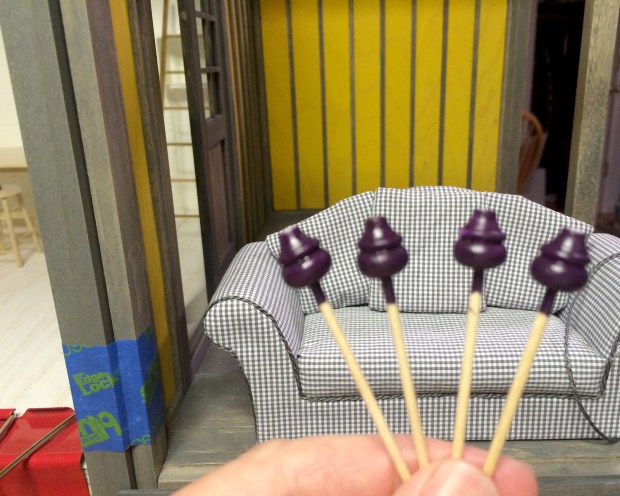
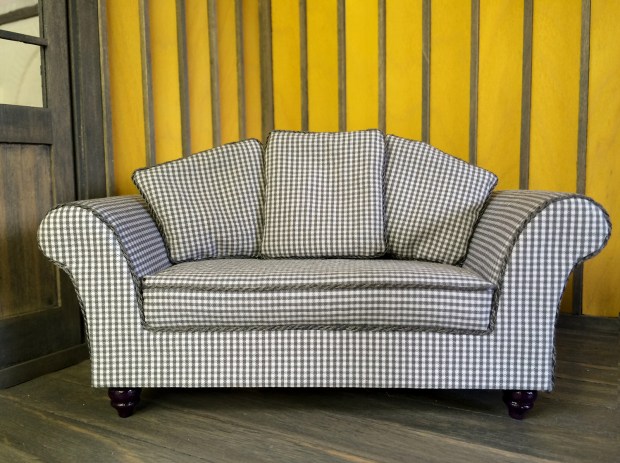
The retro sofa made from one of Kris Compas’s excellent kits, and upholstered in silk cut from a gentleperson’s tie, is finished. The legs are painted a medium gold, a tone somewhere between the multiple shades of butter yellow and tan in the fabric.

sofa_piping_061916

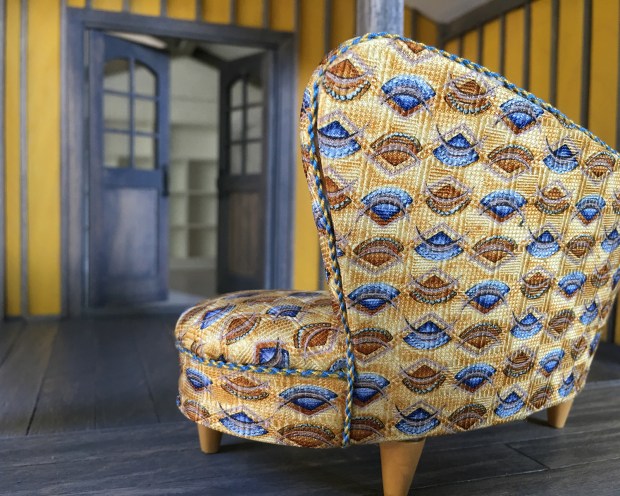
For the piping I corded three strands each of a blue and gold DMC floss. I liked the variegated result more than a single color.

I love the design of the sofa, but I’m disappointed in my fabric choice. I now see that a simpler, far less patterned fabric is called for, one that does not compete with the rhythm of the sofa’s luscious curves. Oh well.

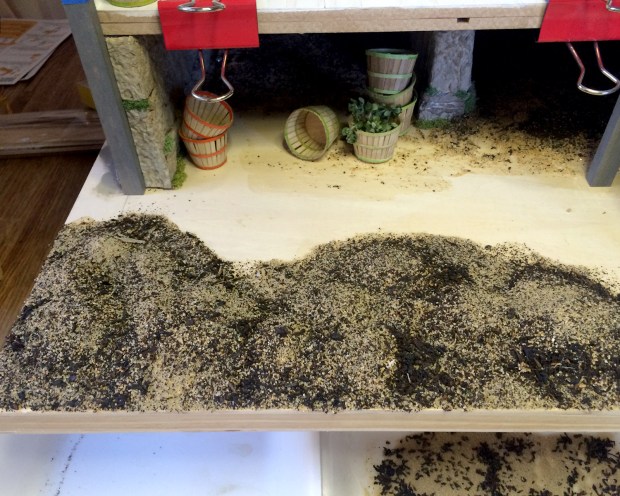
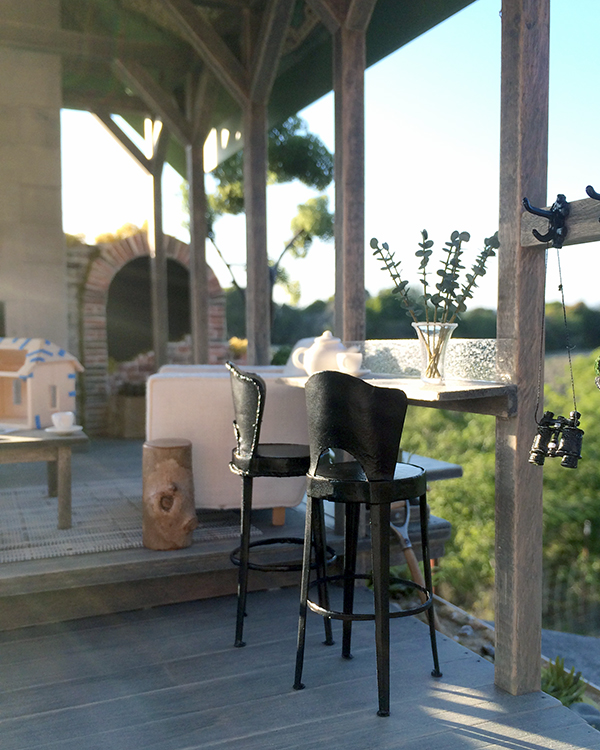
In other news, I walked out in the garden this afternoon to find that the fairies had vacated their backyard terrace location, leaving their outdoor furnishings and accessories behind.

moved_061916

A short tour found their dwelling relocated to the front southside terrace, an area I have been working on clearing of its irredeemably overgrown lavender, rosemary and other shrubberies.

moved_front_061916This is a street-facing, far more public location, and I’m frankly surprised. What will the neighborhood make of the new inhabitants?

And finally, a wee acknowledgement. Today is 19 June, or 619, which was my house number in a faraway sojourn, an amazing house in a now enchanted place. The *best* water, phenomenal night skies, and the site of epic revelries. To all of you who enjoyed Plain Meeting House Road, salut!


A Wee Armchair

lisa_chair_030816

Here’s a peek at Kris Compas’s Lisa Chair Kit. I used the same fabric and finishes as the coordinating sofa. It’s an interesting build — some of those pieces are wee. The kit’s very well thought out, with detailed instructions, and of course the ultra-convenience of not having to measure and cut the parts.

The optimal placement of cabriole legs is a mystery to me. I badly placed them three times, (I know, how hard could it be?!) and since that involves drilling holes, the bottom of the chair is now less than pristine :( After whining to Kris in an email about it, she made some smart suggestions, and I was able to do a good-enough fix. Just don’t inspect the underside.

The painting in the background is the foundation color wash dabbing paper :)

Couch, Mounds, Stripes, Sea Wall Fail

couch_022816
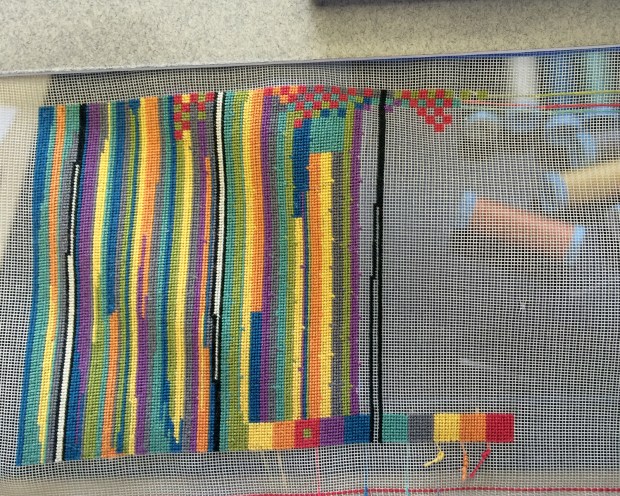
So happy with the results from the first of Kris Compas’s new line of kits, the Lisa Sofa. The micro-check fabric is cut from a thrift store-sourced man’s shirt. I used three strands of DMC floss to make the piping.

couch_022716

This was the couch last night. I thought I was going to use yellow piping — having also considered tomato red, plum, pumpkin and bright olive green — then opted for the charcoal gray. Keeps more options open for pillows and stuff.

couch_feet_022816

The kit comes with unpainted cute fat feet. I used the aubergine acrylic the first set of doors was stained. The feet are not blurry in real life.

I am a bit surprised how well this curvy couch works on the covered porch. I had intended to use a sleek modern couch, upholstered in wool. Alternately, I have an old Houseworks Chippendale sofa kit, the one with the squiggly back. If I can find the right scale silk brocade, or maybe a fantastic Paisley man’s tie… then the wood base and legs could be yellow… The deadline for this build-along project is September 26. I don’t have to decide now :)

mounds_022716

I cut slices of styrofoam eggs to build up areas of the ground and glued them to the project board.

mounds_02_022716

I mixed thick glue and Ceramcoat “Trail Tan” and coated the mounds and surrounding area, then sprinkled on a fine sand/tea mixture. Still drying. In addition to farming wool, Argo Wool Works also grows lavender. There will be lots of it, as well as California poppies and succulents. I found this awesome echeveria tutorial from Annie Christensen of We Love Miniatures. Very excited to begin propagating.

yipes_stripes_022716

Small progress on the Yipes, Stripes Meets Checks rug.

seawall_022716

End of day Friday, B left work early and we went down to Sharp Park to watch the waves. We walked out onto the pier, and then along the esplanade. This is where a sink hole opened up in the sea wall a few storms ago. There used to be about eight more feet of walkway there. The sun was setting and there was a blowing mist in the air from the waves. A somber view of the ocean’s power.

Also, viewed together, the Yipes, Stripes rug and this photo have a certain commonality.
O_O

Hide one’s light under a bushel

bushels_022216

I wound up making six bushel baskets from Kris Compas’s tutorial. I used one-inch wood circles that I had on hand for the base, and after the second basket, redrew the pattern so all the uprights were like fringe, instead of individual slats. (The pattern is up on 1inchminis. There’s also a version to print multiples. Yay no measuring.) By the fifth or sixth basket I was getting a nice bulbous curve by shaping it over the top of a two-ounce acrylic paint bottle. Coopering the top rim was also much easier on the paint bottle form.

I’m working mostly on the new project now, but the in-progress Argo Wool Works Showroom is a nice bright place to sit and think and plan, with a cup of tea. (The ladders are by Sir Thomas Thumb, to be used to display hanging goods. I also splurged with the 2015 contest award and bought a scythe o_O)

Now I have to go make a 12:1 cup of tea :)


Sea House Warming Hut: Couch

couch_frame_112915

I extrapolated Jane Harrop’s chair design into a sofa that would totally not work in real life, and that’s why I love miniature building.

couch_frame_stained_112915

And then I stained it. You more northern and East Coast people will laugh at me, but it’s been chilly here (in the 50s F (10 C) and my wood shop is in an unheated shed. So I suffered a little bit. Also, everything I seem to need now is out there, or vice versa.

I persevered.

couch_thermolam_112915

I used Thermolam Plus for the upholstery batting because that’s what Kris Compas uses. The fabric is this gorgeous wool that I cut and washed so it fluffed up in a very cozy way.

couch_upholstered_112915

Binder clips are the miniature upholsterer’s friend, especially with a fat wooly fabric.

couch_glue_112915

Upholstery nearing completion, with my signature glue pattern :)

couch_finished_112915.jpg

And the finished couch, minus bolsters and losing the light.


Sea House Warming Hut: Bar Stools Complete

www.nancyland.com

I’ll save you a lot of time: the thing I thought I didn’t want turned out to be the best thing for the space.

What I realized is that the Warming Hut is neither upscale nor over-elaborate; its appeal (aside from location) stems from simplicity and functionality. In the end, I liked the way that the bar stools integrated with the bar, and there was just no good reason to make them anything other than simply utilitarian. Which turned out to be matte aluminum.

Not that I didn’t try. Many things, colors, textures, trims. Thank you all for your suggestions!

www.nancyland.com

For comfort I added a low cushion covered in soft black leather to the seats.

And then, apparently because I had not endured enough challenge and tedium gluing the feet on, I added black furniture glides, to protect the floors and make moving the chairs quieter. That’s 48 more (two per leg) wee punched dots wrangled into place, and touched up with a black Sharpie where the aluminum paint and/or glue extended over the edges.

I turn next to filling the shelves with maps, charts, books, art and maybe even some driftwood sculpture. And maybe I’ll even finish painting the final window, and get that installed.

Sea House Warming Hut: Now We Are Six

www.nancyland.com

Here are the unpainted stools, having a drink at the bar. Seeing them a light color lets me know I want them darker. But not black or aluminum. And because I want to spray them, I am somewhat limited in my color choices. Current thinking is a basilly sage green, and repainting the woodstove to match. Because different greens can clash horribly. But would that be too matchy-matchy, the stove and the stools?

I see several cans of spray paint in my near future.

www.nancyland.com

You know what the hardest part of making this whole set of stools was? Gluing the 1/8-inch round feet on the bottom of the legs. They each needed a good size dot of glue — but not too much — and then they would repeatedly stick to the applicator, the knife blade, the tweezers and/or my fingernail, in succession. At least two out of four instances for each of the six stools.

Sea House Warming Hut: Bar Stools

I’m using Kris Compas’s design tutorial to make the six bar stools. When she first posted it, I made two for the Sea House Pavilion. They’re so perfect.

New vintage chairs for the Sea House Pavilion. Come sit and watch the sun go down.

New vintage chairs for the Sea House Pavilion. Come sit and watch the sun go down.

I used Woodsies rather than illustration board for the seats, because why reinvent a similarly-sized wheel?

www.nancyland.com

I modified the seat back, and printed it out on card stock. I cut all the straight lines with an X-acto.

www.nancyland.com

And then hand cut the curves with scissors.

www.nancyland.com

Kris walks us through the construction process with such ease, it makes her brilliance with deconstruction and solution all the more remarkable.

www.nancyland.com

I used one millimeter leather lacing to simulate the rolled edge of the metal. It’s smoother than crochet thread, and very pliable.

www.nancyland.com

And here’s the first finished chair, ready for painting. Still undecided about the color. I’ll probably make all six, and pile them into to the hut around the bar. I don’t want them to be a focal point, and I’m also pretty sure I don’t want them galvanized. The interior will tell me, after there’s more… stuff.

Cladding, Painting, Sanding, Waiting

www.nancyland.com

Here’s a mess of things in progress at once:

First coat of paint on version 4 of Kris Compas’s cone fireplace, from her wonderful tutorial this month. My initial color thought was classic minimalist matte black, but then I noticed it looks like a giant tiny Darth Vader’s helmet, and once you see that, there’s no unseeing it. Current thought is the same green as the rafters, but based on my experience with the Chrysnbon stove, who knows what the final outcome will be?

Also installed the front wall cladding. I bundle up the quarter-inch stock with tape, measure and cut with a chop saw. Lots of not-quite-long-enough offcuts for the scraps box. I’m using the blue-gray Derwent watercolor pencil after the stain dries to add variation and depth to the warm gray color. Subtle, but effective. I’ll show some examples when there’s better light. Plus it’s fun to intentionally scribble all over your project :)

in_progress_042615

Biggest decision was the color for the outdoor furniture. Last night I was thinking a deep, rich yellow, but then arrived at this orange, somewhere between California poppies and the Golden Gate Bridge. This is just the first coat, and I might temper it a bit more towards poppies, but I have to wait until light of day. I also want to finish painting the rocks and adding some of the greenery. The living roof with growing poppies will tie it all together.

I want the deck furniture to really stand out from the weathered gray wood and rocks of the cliffs, to welcome walkers to sit and enjoy the vista.

The inside seating will be upholstered arm chairs circling the stove, for those days when inside is best. I found an engaging peacock blue linen that I plan on using for those. With the sweeping views of the ocean and the sky, they’ll be less of a contrast in the otherwise light room.