Sea House Leadlights Interior, Roof; Scarlett

Hello Sea House Leadlights office

The entrance to the Sea House Leadlights office is up a few stairs and across the deck to the left of the fireplace. A set of leaded glass doors opens into a snug but functional design studio.

Details: Terra cotta pot by Braxton Payne. Basswood deck and siding stained with Minwax Classic Gray. Pumpkins made from tissue paper and thread. Boulders sculpted from air dry clay painted with acrylic washes and sealed with ultra matte varnish. All succulents, yucca and other plants hand colored with W&N Promarkers. Many are prototypes; some available as kits at Modern Miniature Succulents + Sundries.) 

Desk and bulletin board

Beneath the half-loft a large tabletop desk has plenty of room to roll out plans and inspiration. Low built-in cabinets with black leather cushions provide more seating, storage and level surfaces for tea trays.

Details: The ceiling lights are 12V modified for warm white LEDs. Bulletin board is made from cork sheet framed with basswood stained to match. Sketchbooks made from my kits at MMS+S. Various meaningful artifacts including original leaded glass designs for other Sea House buildings, and a drawing of a cat by my then 4-year old daughter. Fèves, prized vintage Monopoly shoe, and an anodized earring from the 1980s.

The white-washed brick loft stores window frames, tools, Sea House memorabilia and miscellaneous treasure — as well as the switch (lift the black basket) and battery pack (hidden in a custom box) for the LED lights.

Details: Oh yeah, the baskets and boxes are also available as kits at MMS+S.

A gazebo-style roof welcomes natural light. (I’ll detail more of that happy construction in another post.) I made the 1:144 scale basswood model of the source kit for the original Sea House Pavilion, built some years ago. The Egyptian cat is a porcelain fève. Best of all is the vibrant painting by Jim Tracey that commands the studio — also another post.

Finally, of course, Scarlett. Here she has somehow managed to fluidly infiltrate an impossibly small entrance to the Sea House Sea Rise Pavilion loft (my ongoing remodel of the original 2013 build.) I swear she does these things just to remind me she can.

Oh, how she makes me laugh.

Wrought Iron Sign Salvage

SH_roof_122017

I wrought Sea House emblems for the landward and sea-facing sides of the pavilion roof. They’re meant to be salvage from the old Sea House Pleasure Pier and Estate. And so they are.

SH_logo_roof_122017.jpg

Sized to fit between the raised seams on the metal roof, I cut seven copies of the emblem from 65 lb. black cardstock and glued them together. After drying under weight, I sanded the edges even, and slightly beveled the top edges. I added fastening “bolts” then lightly stippled and dry brushed some wear and weathering. Not too much. The caretaker is diligent about her conservation duties.

front_122017

Then I had to make a smaller version to mount on the fireplace.

SH_fireplace_122017

It looks splendid, don’t you agree? (Well, except for the ripply rug. There’s always something.)

kitchen2_122017

I bashed out the support column in front of the kitchen, and felt much better about the space, even though it still looks like every other ELF kitchen ever made, ever. (Not that there’s anything wrong with that.) I’ll scrape away the brackets on the floor, patch where the post was, and it’ll be an intentional remodel artifact :) I found the LED pot lights I ordered, then lost, so next step will be the ceiling/roof, and then the exterior siding.

gh_122017.jpg

In the greenhouse, the hydroponics have been relocated to an anchored barge just off the rear utility deck.

lowercase_n_121817

Meanwhile, I got to open an early present, a vintage sign hollow aluminum lowercase n, about 12 tall by 3 inches deep. Feeling the love. Thank you, my B.

An Exaltation of Yuccas

I’m excited to share photos of some incredible yuccas, made by two different miniature artists, both starting from the same kit.*

*Uhh, to clarify: each had her own kit. Two artists, two kits, two locations. Nancy B finished first. Not that it was a contest.

yucca_02_nancy_bristow

This is Nancy Bristow’s work. (Nancy has been making miniatures since the 1970s, and it was she who finally identified the Braxton Payne pots I had bought at auction, and pointed me to his obscure website.) She hand-colored the leaves using markers, and I love that she styled them curling out and upward. So pert and jaunty! They’re planted in BP pots she “aged”, and used bird grit as gravel.

yucca_3_nancy_bristow

Here’s a shot of Nancy’s work-in-progress, adding knot holes to the stems. I noticed she chose to curl the leaves first, before attaching to the stem. Brilliant! It is so gratifying — and informative — to see how other makers work with my kits. One can learn so much.

yucca_keli_111917

This is Keli Minick’s interpretation of the yucca tree kit. Look at those colors! I love the graceful trunk, and the stubby branch. Two completely different plants! She suggested using round nose pliers to separate and shape the leaves after attaching — which makes the process much less tedious. And she kindly pointed out a typo in the armature instruction sheet. Argh!

YU01_contents

Here’s what the Broad Leaf Yucca Tree kit looks like to start. This is the green leaf variation; cream and white are also available. (I believe Nancy B started with white leaves; Keli with cream?)

What would you make of it?

Sincere thank-yous and expressions of humbled awe to Nancy B and Keli for allowing me to share their work. 

Sea House Pavilion Remodel: Front Entry

front_102917

Work has begun on framing in the front entry, using 3/8-inch stock to match the existing structure. I chose a set of Houseworks French doors, installed backwards so they open outward. There will be a 5-inch wide transom window above. The door woodwork is finished in an eggshell white stain, and the two side panels will be reclaimed weathered gray horizontal planking.

front_transom_source

I got curious about the line weights in intricate pattern that I might successfully cut (and remove from the mat) on the Cricut, and got down to 6 points (.083-inch / 2.1 mm). This seems a good scale for the narrow panels of the doors and transom (the greenhouse window leading is 9 points (.125- inch / 3.2 mm).

inside4_102917

The difference in scale between the front doors and the greenhouse windows makes sense (especially now that I know I can cut finer line weights). The interior front wall will be planked in the eggshell white stain, with a matte varnish.

inside5_102917

Now I’m thinking on how the ceiling between the main floor and the sleeping loft will work, and how to finish out the fireplace through to the roof — some tricksy geometries. I ordered a bunch of vegetable kits from Georgie Steeds at The Miniature Garden — my favorite miniature plant kit purveyor — to populate the long shelf in the greenhouse. The interior greenhouse windows are open to the room so the potted trees can reach out.

gh_inside_102917

Also, how is it almost November?!


Sea House Pavilion Sea Rise Remodel

stormy_100817

Turns out — after a lot of experimentation and test builds and weathering practice and pondering and faffing about — as much as I am captivated by abandoned miniatures, I do not wish to actually build one. I felt a bit sad when I realized this, but also relieved. The pavilion remodel still has sea level rise as a core premise, but now it’s more of a retrofitted, off-the-grid, self-sufficient adaptation that’s been going on for some years. With scavenging and memorabilia. The old skiff, with its faded Sea House emblem, stays. Stormy is just passing through :)

Fiesta Yucca

FY01-02_both2Two first-ever specimens of yuccas — finished potted plants, not kits —  will soon be available over at MMS+S. I’ve boldly named them Fiesta Yuccas, a taxonomy unique to nancyland, which means they’re not strictly exact replicas of yuccas one might encounter in this mortal coil. The leaf pattern graduates from a rich medium green to lime to sunflower, tipped in gold and striped with moss. The flat leaf pattern looks like a very appealing mandala. Sure to add light and life to your arrangements.

FY01-1

The taller of the two is slender and graceful, with three branching trunks. Both specimens are potted in Braxton Payne terra cotta cylinder pots. Of course.

FY01-5

FY02-2

The shorter one, potted in a slightly smaller cylinder, has the same three-leaf cluster structure as its taller sibling, and projects a powerful presence. The trunk armatures remain pliable and can be curved or straightened into most any form.

That I have arrived at not one, but two! specimens that tilt my acceptance meter to ‘yes, this is worthwhile’ is a tremendous achievement (she who regularly invites to tea the three-headed monster of perfectionism/paralysis/procrastination).

So that means I get to post a cat picture.

rectangle_082817

Here is our yearling+ Scarlett, sleeping out the very foggy summer on a side deck bench. Every time I walk by she rouses enough to meow some variation of “Mao, wow!”

I smile every time.


Treasure Map, Yucca Kit

treasure_map_081317

Maddie drew a treasure map. The iconography is bold and challenging on many levels, not the least of which is her rendering of the letter “R”. Type designers, bow down, maybe even despair a little bit, that you might ever envision an “R” this way. I’ve not yet heard her telling of the map story, only that the thing that looks like a Crusader shield is an “X marks the spot”.

YU01_outside

I’ve listed the first yucca tree kit over at MMS+S. It includes both an armature kit and a leafy clusters kit, with a choice of three base colors: white, manila or green. I plan on making kits of just the leafy clusters available, for those who want to make their own armatures, and eventually just supply packs of leafy clusters sans instructions, for those who get it and want to build more yucca plants. Every build needs at least one good yucca :)

_scene03

So many possibilities! There’s one more versatile yucca houseplant kit in the queue, and after that, it’s on to making specimens. I’ve drawn a different leaf cluster, longer and finer, and am working with a smaller gauge armature, just for the finished trees and plants.

Maddie_Ruby_081417

Here is Maddie, studying the most recent Eric Carle book, and Ruby, being what contented two-month old humans are. Kind of my world right now :)

Armatures, S-Town, Cricut

torn_paper_5x4

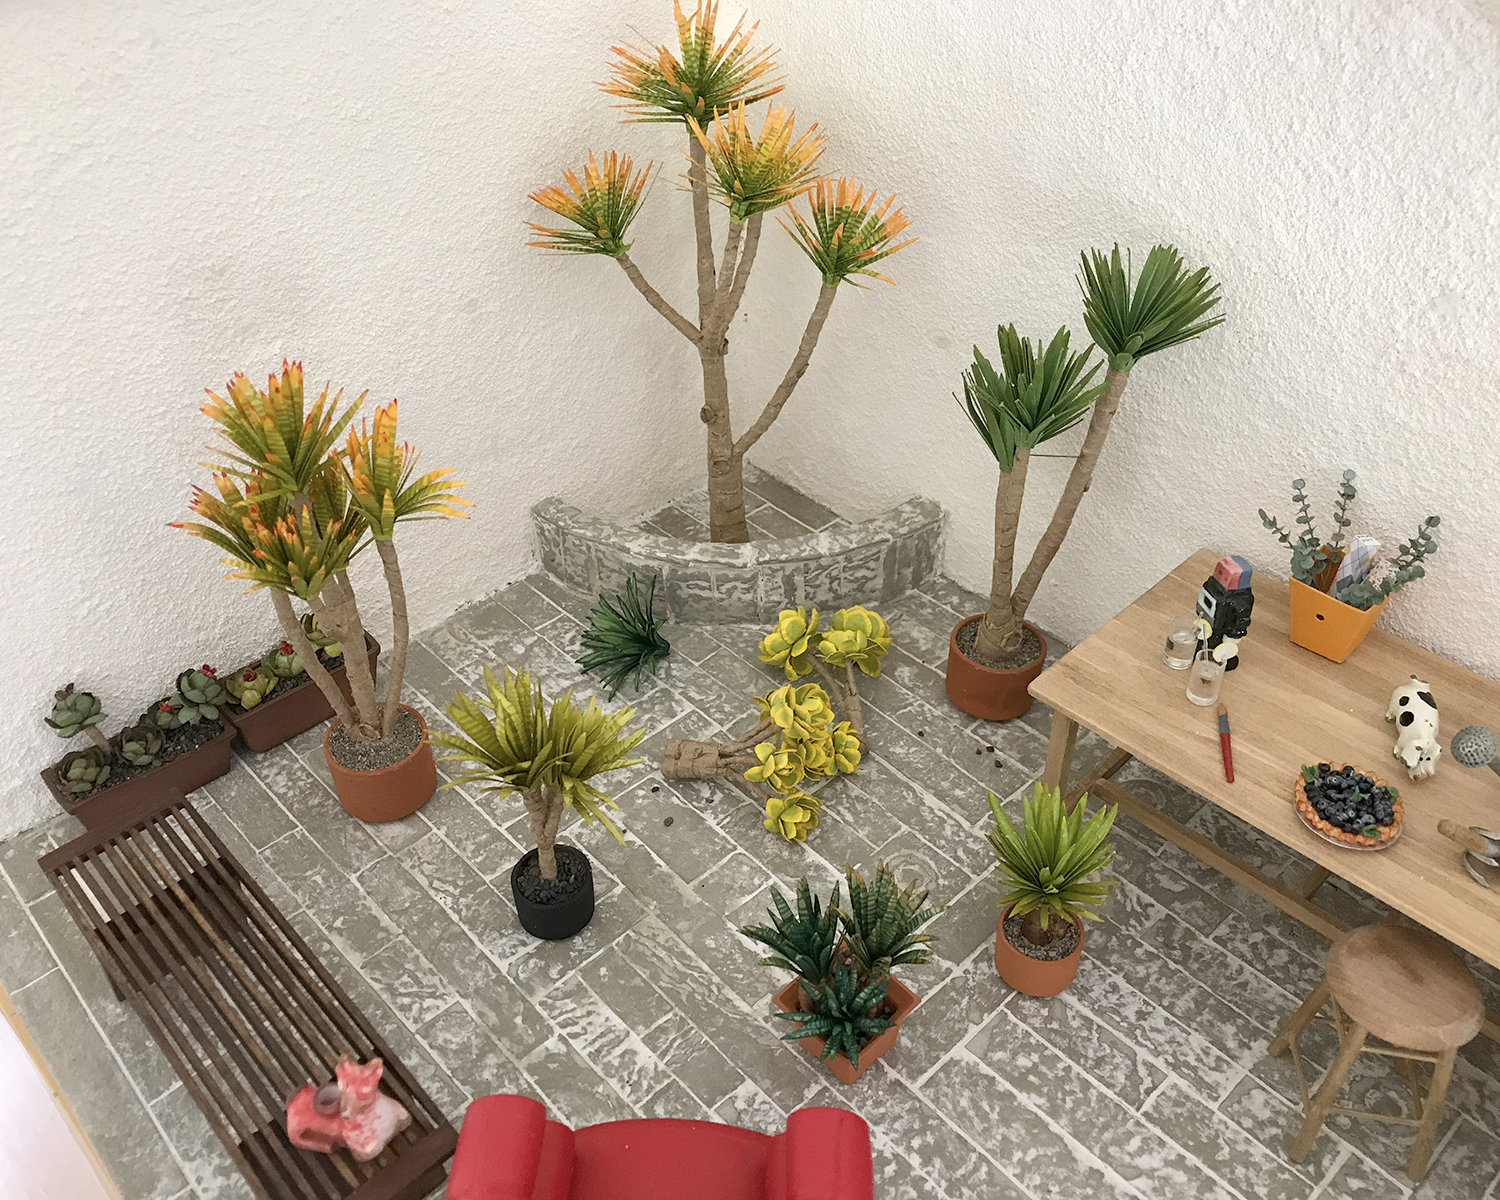
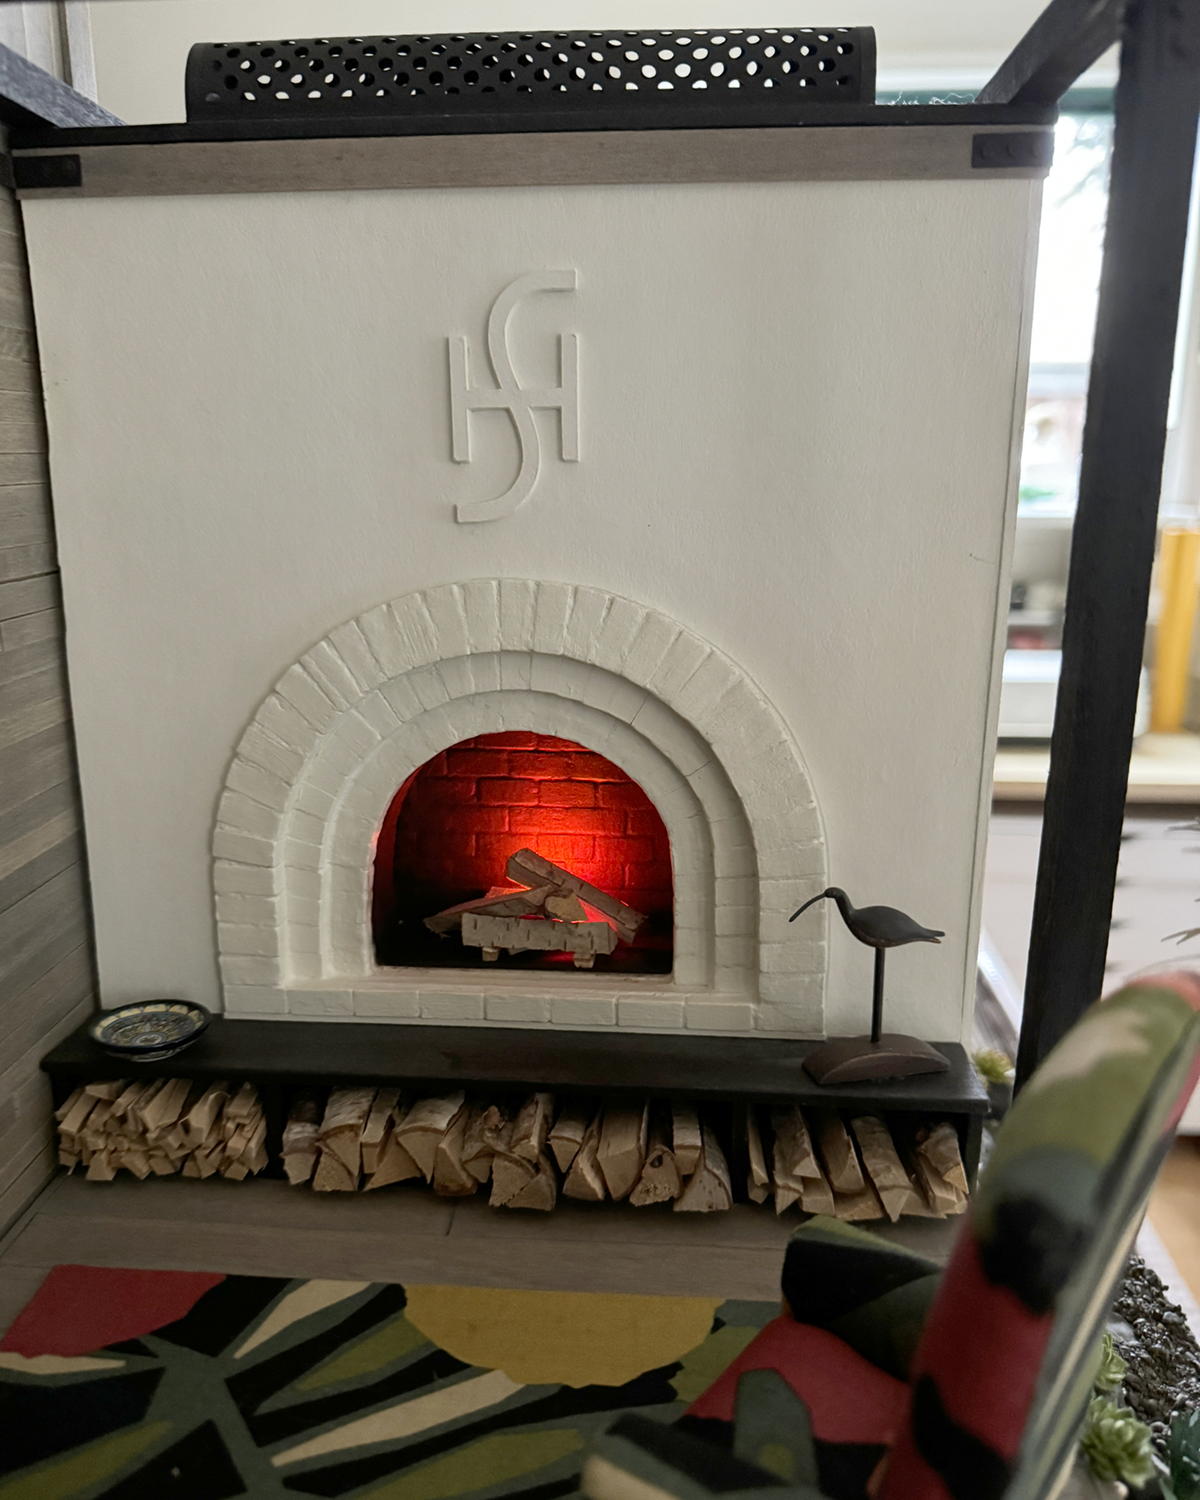
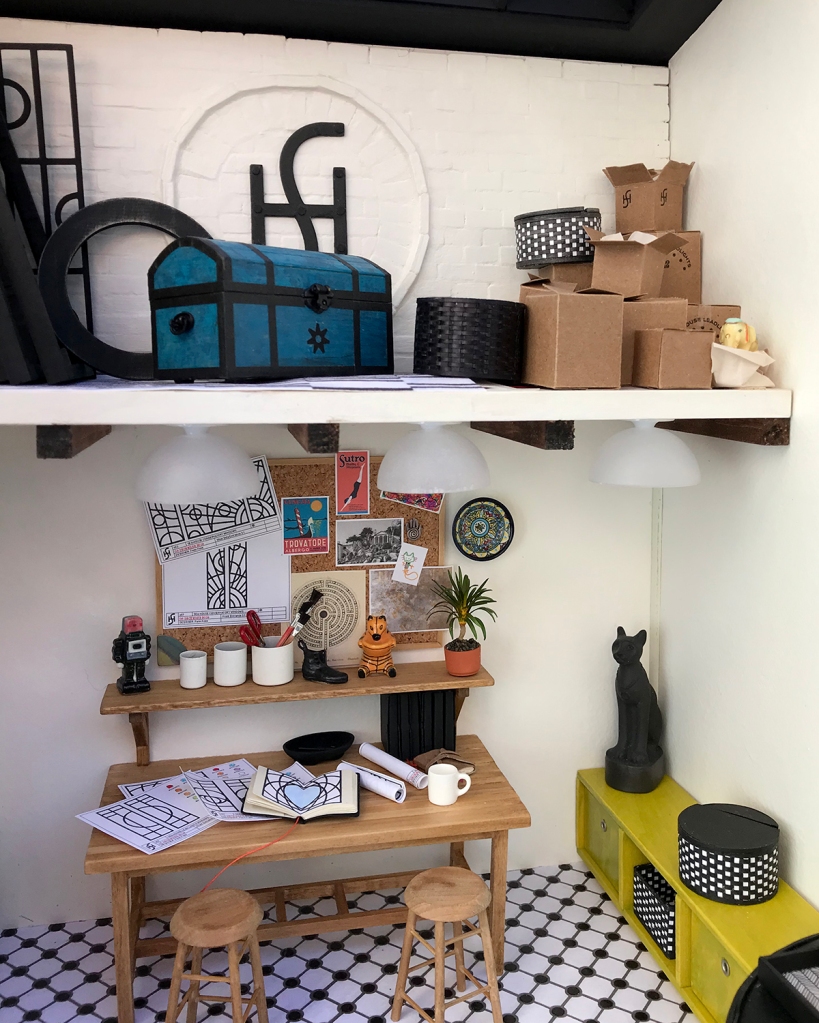
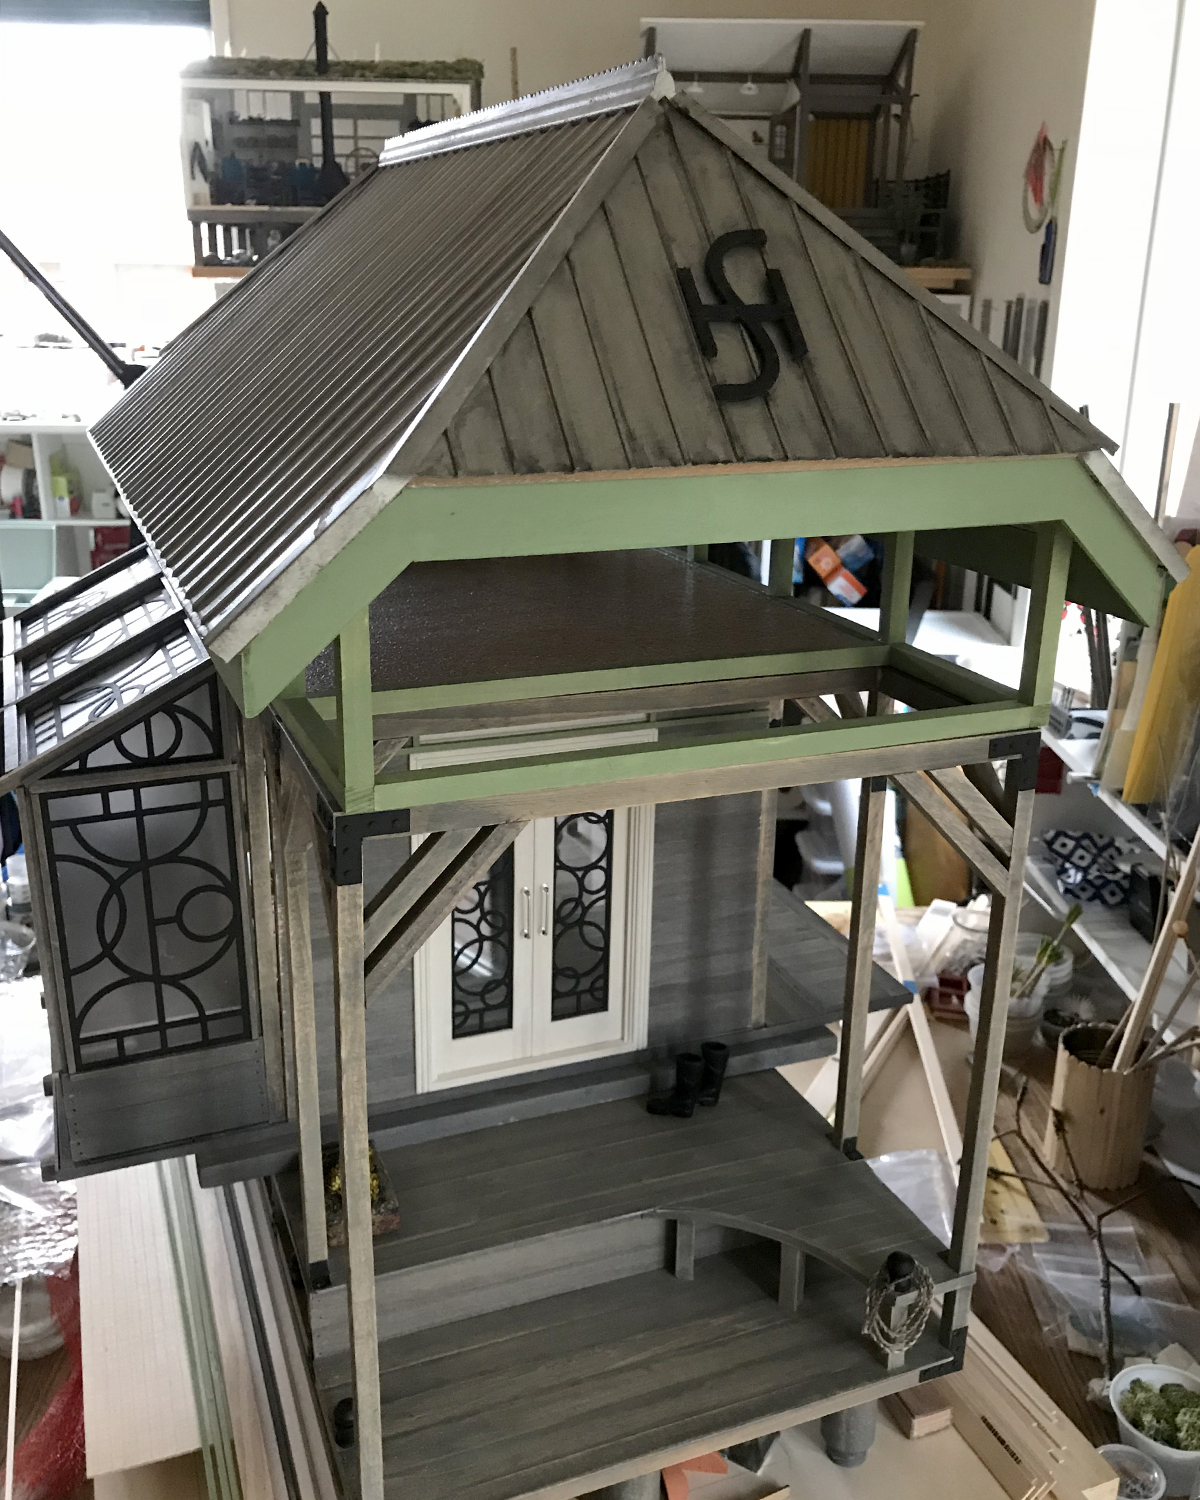
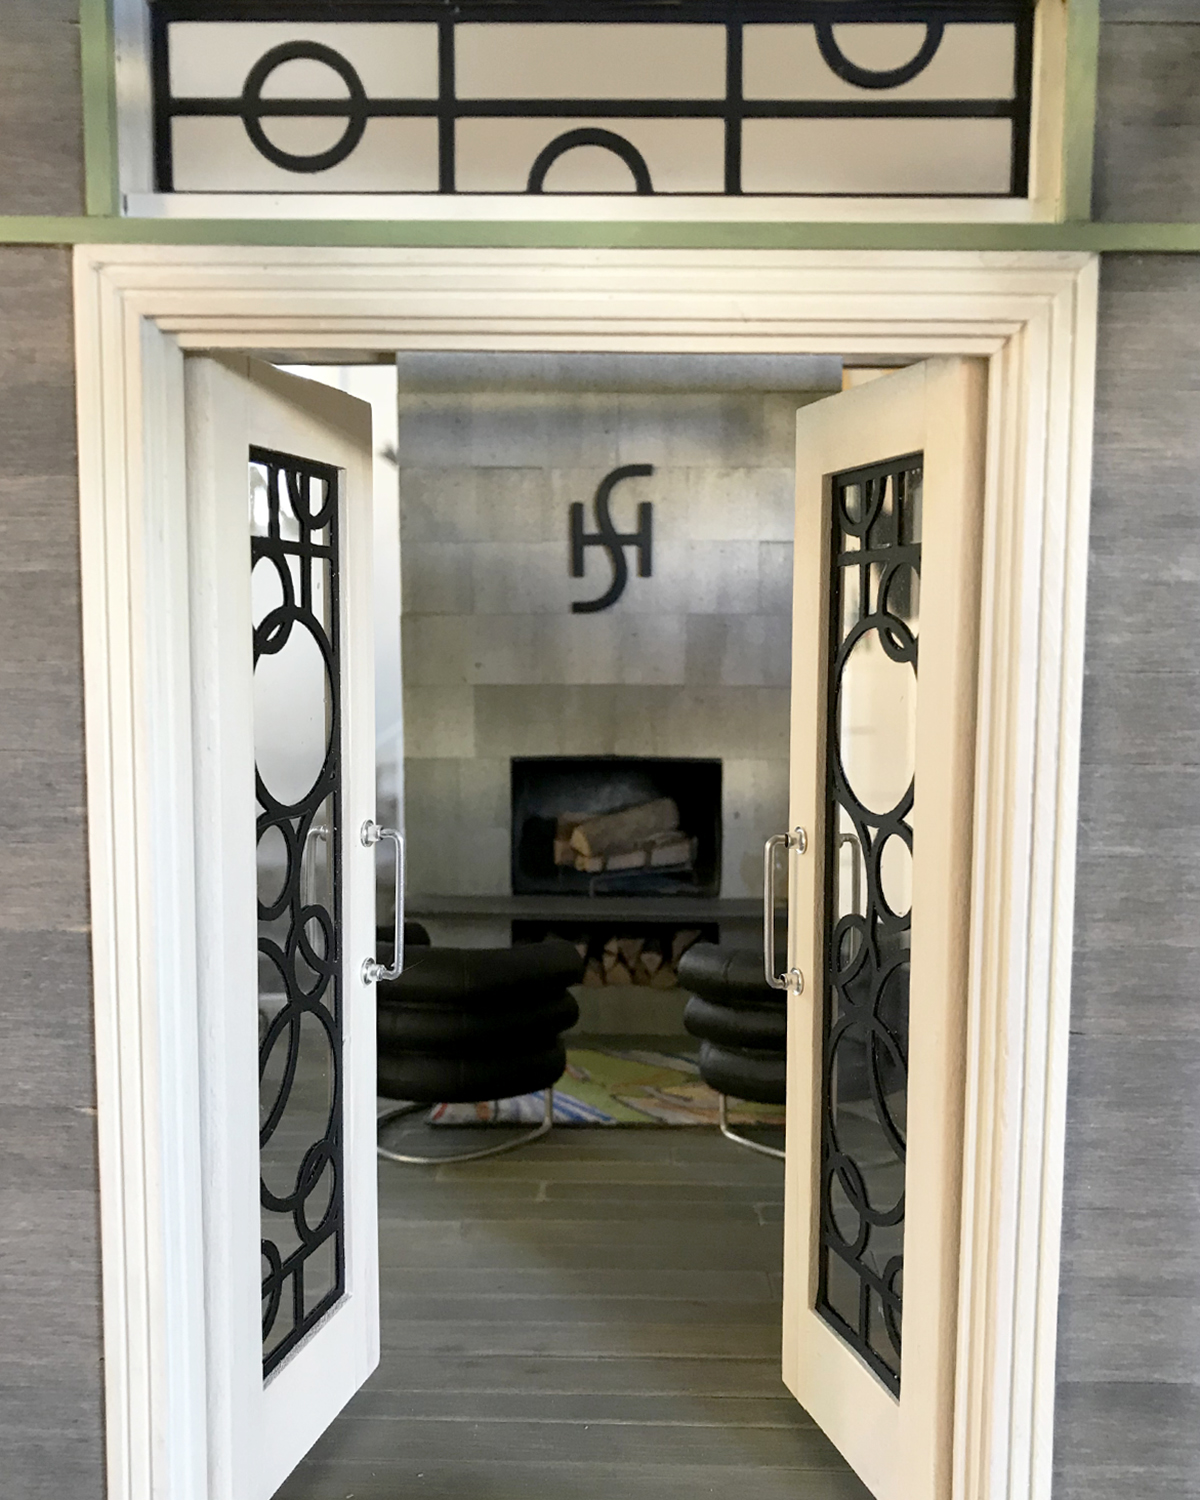
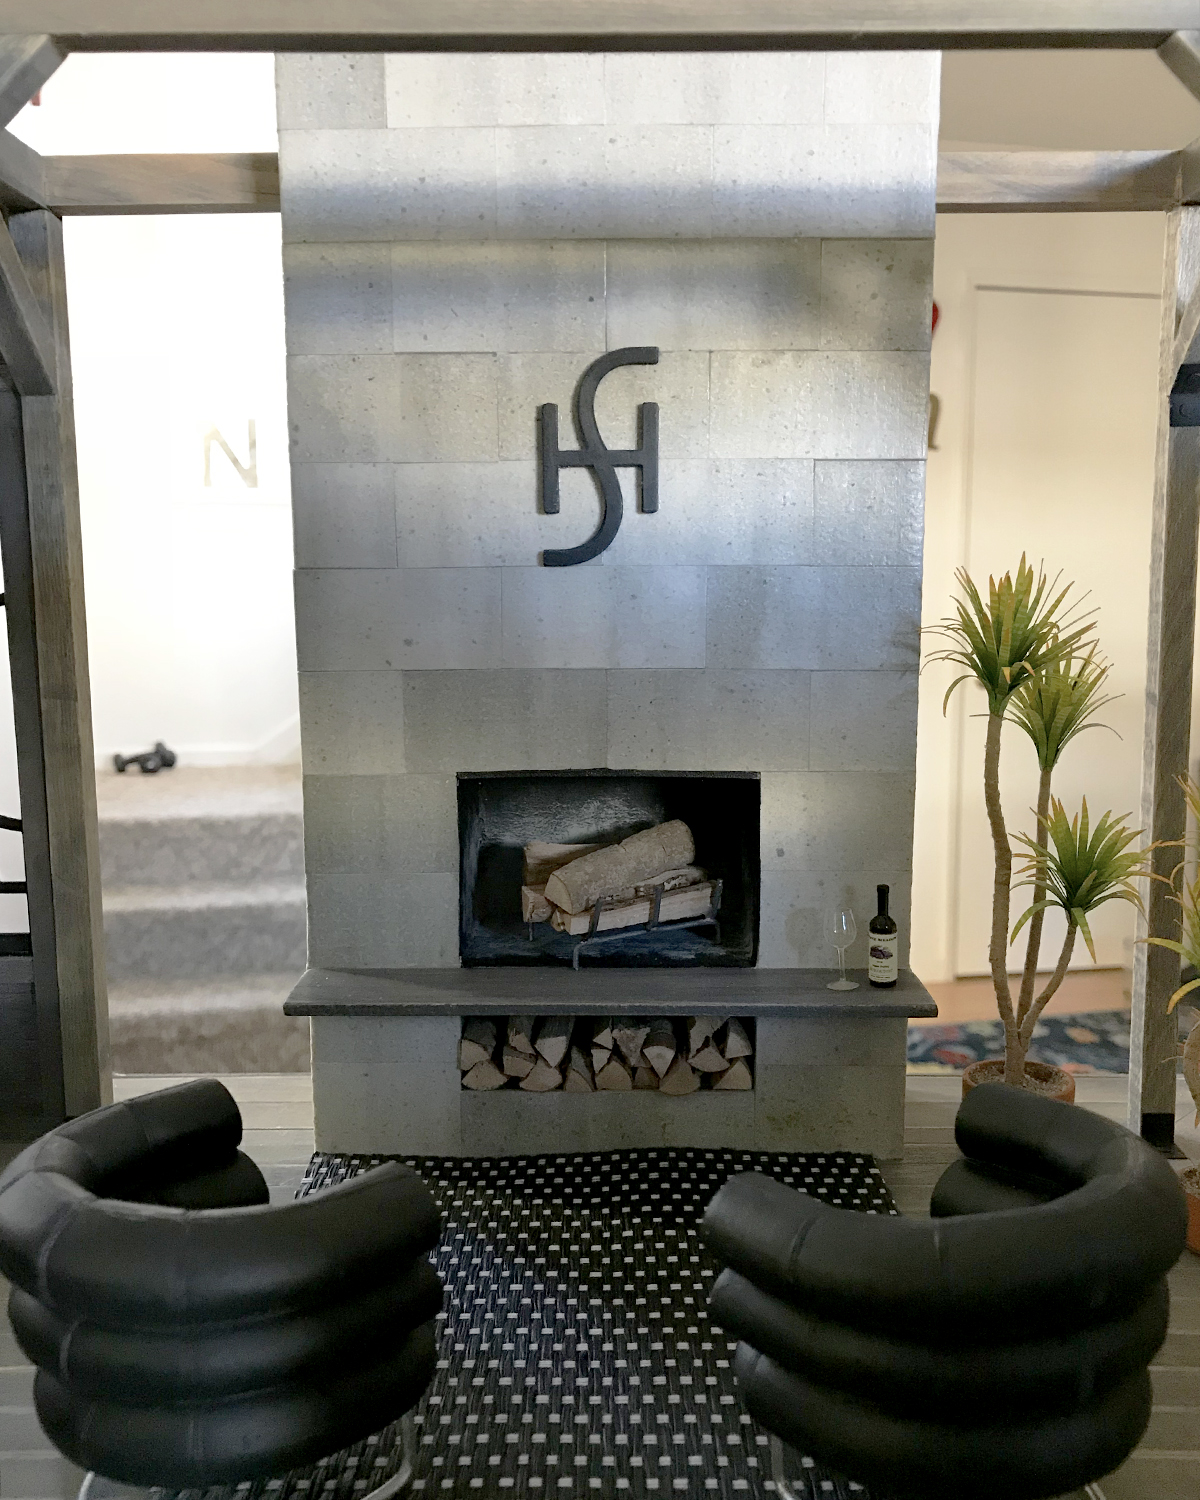
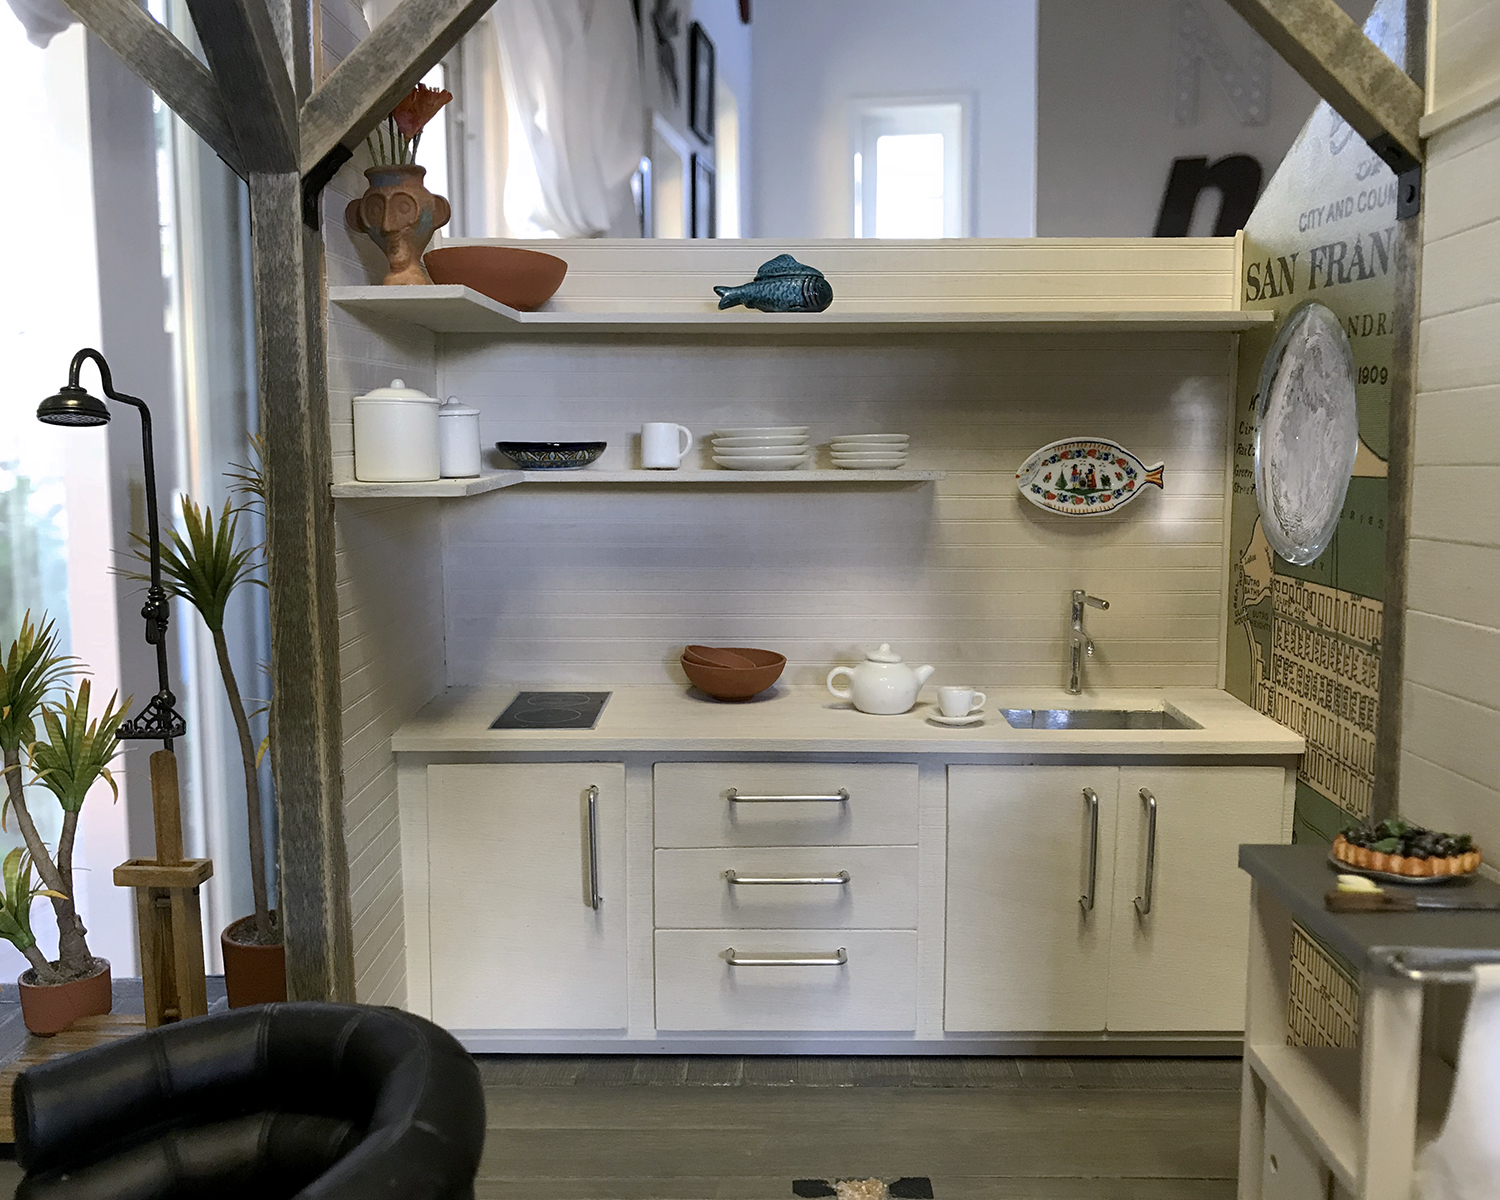
I’m working on a yucca-and-others armature kit. It involves hand-tearing a lot of brown paper into narrow strips. One of my best-practice recommendations will be to watch a movie (that does not require eyes glued to the screen) or better yet, listen to podcasts. As of this writing, I’m listening to S-Town, again.

clockface

My husband’s employer was hosting a TSA Pre certification opportunity, so after we enrolled, he cut work early. After a pleasant luncheon in the Presidio, we took a stroll through the Legion of Honor Museum, where this very antique clock caught my eye — hence the S-Town reference. If you’ve not listened to this brilliant piece of true life storytelling yet, I encourage you to do so. I promise it will simultaneously break and uplift whatever is left of your tender, jaded heart.

Here’s one of my latest exchanges with the wonderful customer support worker bees at Cricut:

Nancy Enge: Any progress with the SVG import capability?
Nancy Enge: My experience says no.
*** Deepak joined the chat ***
Deepak: Hello Nancy

Deepak: We are still working on it.
Nancy Enge: Hello Deepak
Deepak: Let me try from my laptop.
Nancy Enge: Try what?
Deepak: Uploading that image
Nancy Enge: Deepak, don’t waste your time
Deepak: Yay!!!
Deepak: It is uploading on my laptop
Nancy Enge: Yay what?
Nancy Enge: That is just normal technology

Nancy Enge: As you can see: a mess
Nancy Enge: All of the score line lines are thrown hither and thither
Deepak: We are continuously working to provide better user experience.
Nancy Enge: Of course you are
Nancy Enge: I did not mean to imply that any of you are slacking
Nancy Enge: Especially you customer support staff
Deepak: :)
Nancy Enge: I was just checking in on this most troublesome problem we have encountered
Nancy Enge: for the last few weeks
Deepak: You know today I got an user who is not able to upload an SVG image, I tried it on my laptop.
(04:12:36 AM) Deepak: It didn’t work.
Deepak: However I tried your image, it worked.
Nancy Enge: Welcome to my world
Deepak: So I was so happy.
Nancy Enge: Hehehehe
Deepak: :)
Nancy Enge: Simple SVGs work
Nancy Enge: It’s those with lines meant to be score lines that are problematic
Deepak: Yeah, you are right.
Nancy Enge: Why this is the case, I have no idea
Nancy Enge: I am a designer, not a software engineer
Nancy Enge: Dammit :)
Deepak: I am not sure with whom you you talked. I have your image and photo, I will show it to our product specialist
Deepak: Next 2 days is my week off.
Deepak: I will update you by Monday.
Nancy Enge: Thank you, Deepak. I have talked with three of your brethren to date
Deepak: I have already saved details.
Deepak: I will drop an email on Monday after checking with him,.
Nancy Enge: I know those of us who upload our own designs are Cricut’s minority users, outliers…
Deepak: For us everyone is important.
Nancy Enge: We would all like to believe that :)

Deepak: There are some technical bugs; we are actively working on it. We are not in the business of selling machines. However, we are in the business of winning hearts.

Deepak: I will surely get back to you on Monday.

Nancy Enge: *cough*
Nancy Enge: Sorry, I’m laughing so hard I almost spilled my drink
Deepak: :)
Nancy Enge: I appreciate your efforts on our behalf, Deepak.
Deepak: Thank you so much! :)
Nancy Enge: So, I’ll keep trying
Deepak: For your inconvenience I am adding $10 Store credit to your account.
Deepak: Using that you can purchase digital cartridges.
Nancy Enge: Ugh
Deepak: It will reflect on your account within 48 hours..
Nancy Enge: Thank you, though
Deepak: You are welcome
Deepak: Is there anything else I can assist you with today?
Nancy Enge: No.
Deepak: Have a great night
Nancy Enge: You, as well.
*** Deepak left the chat ***
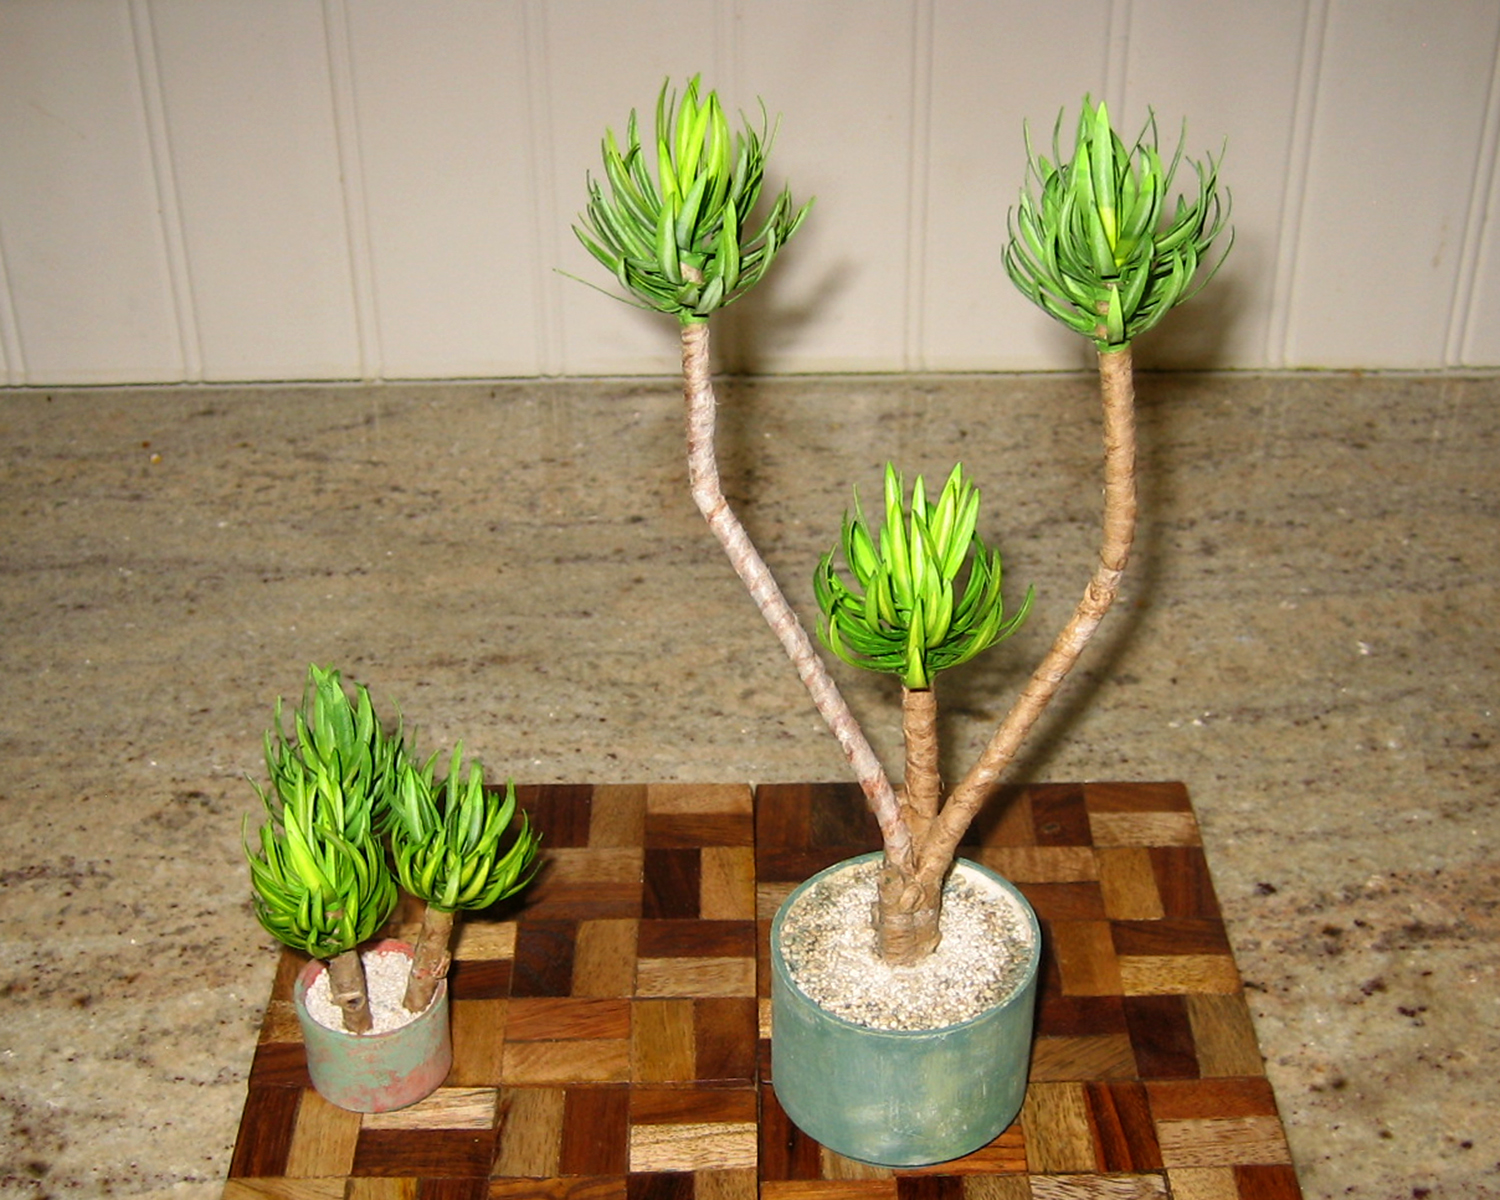
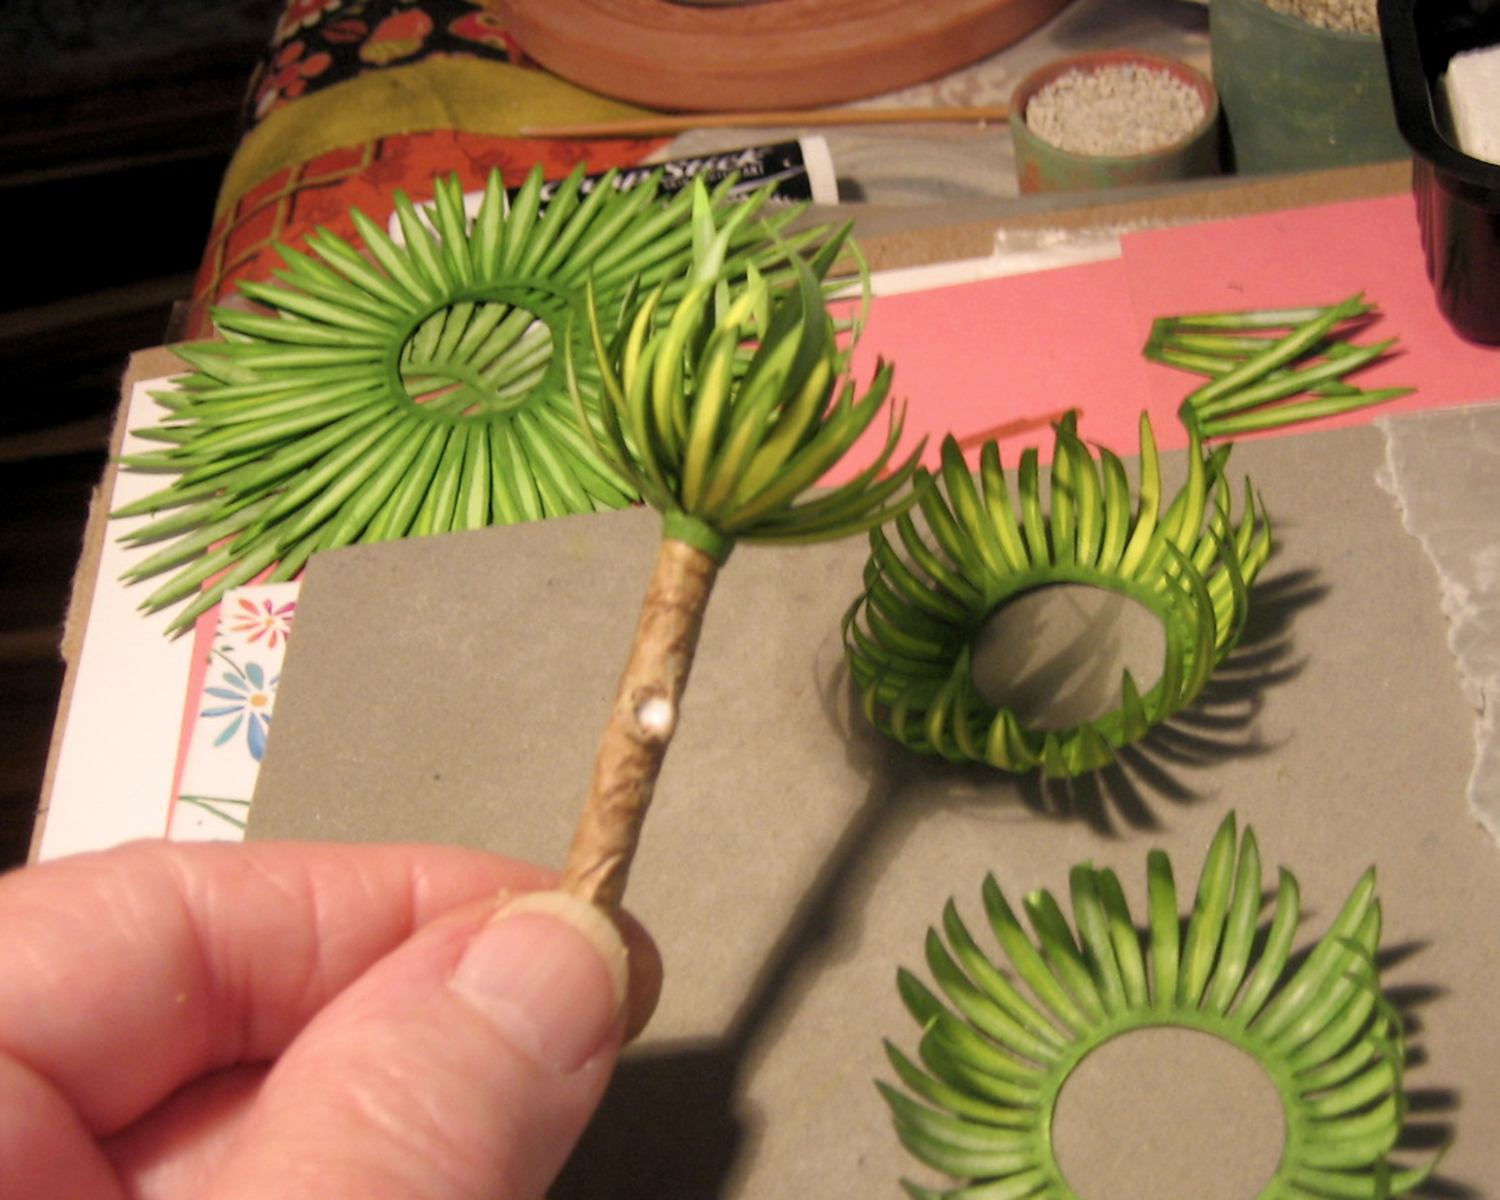
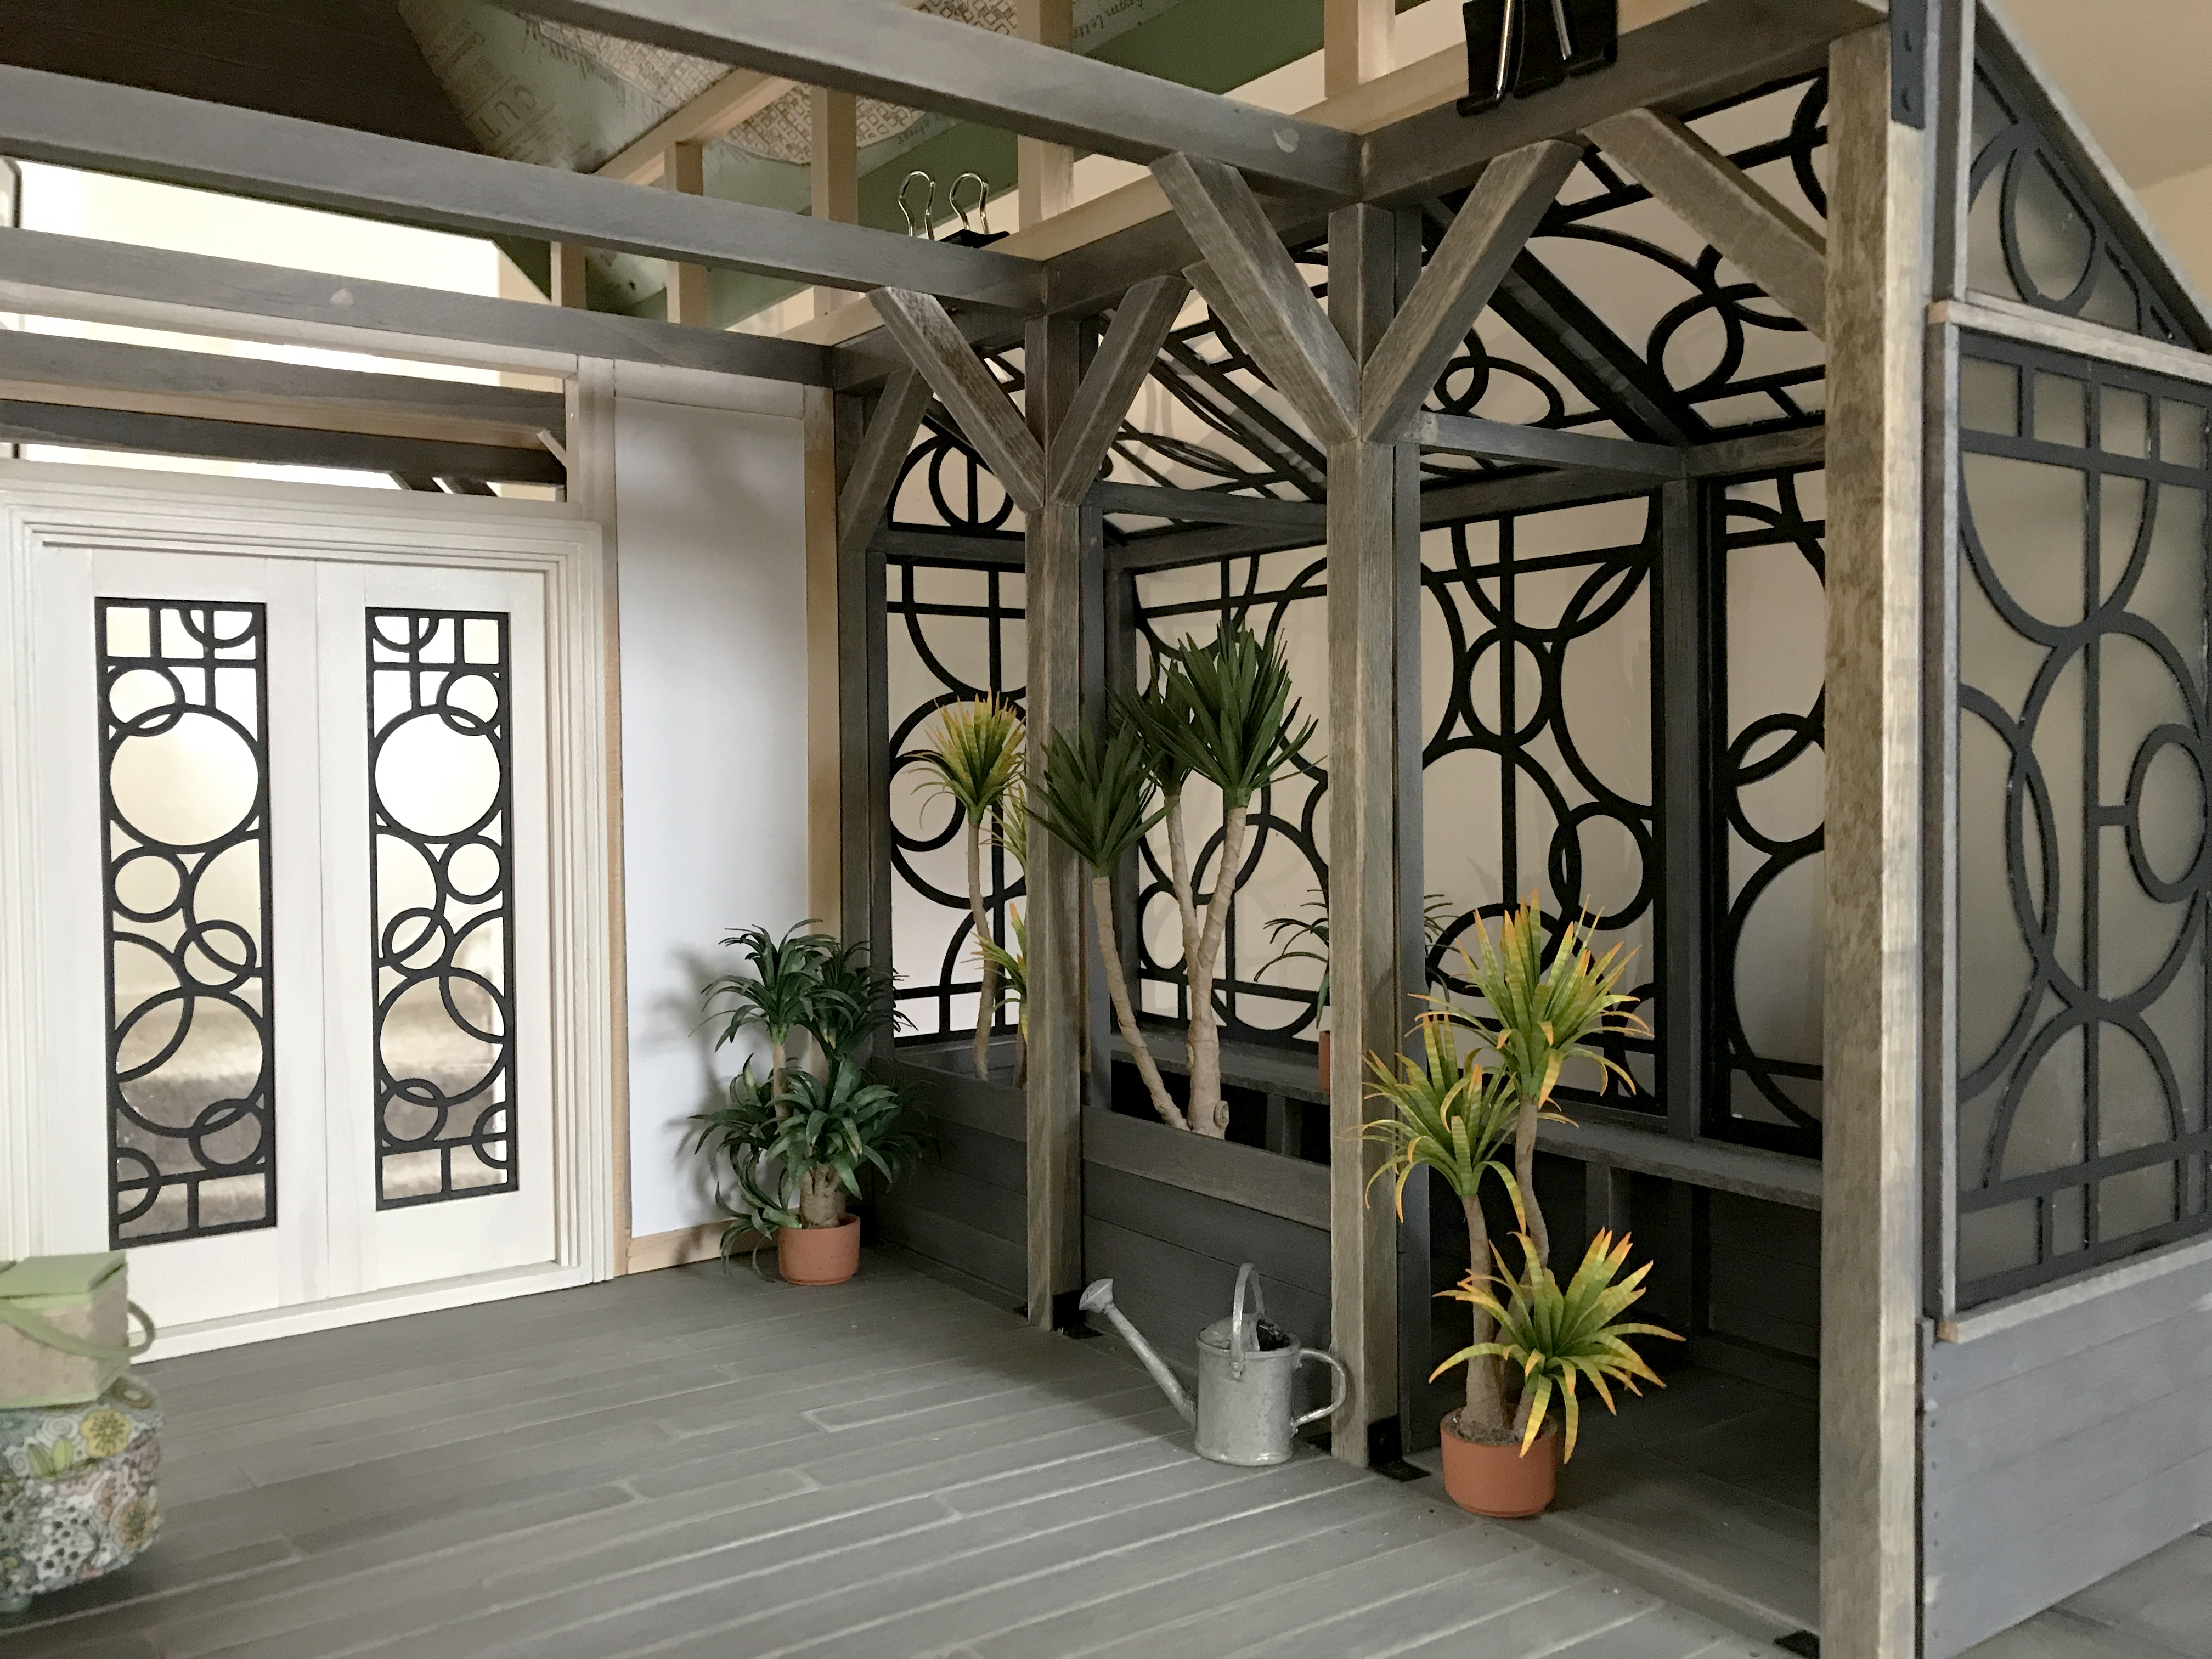
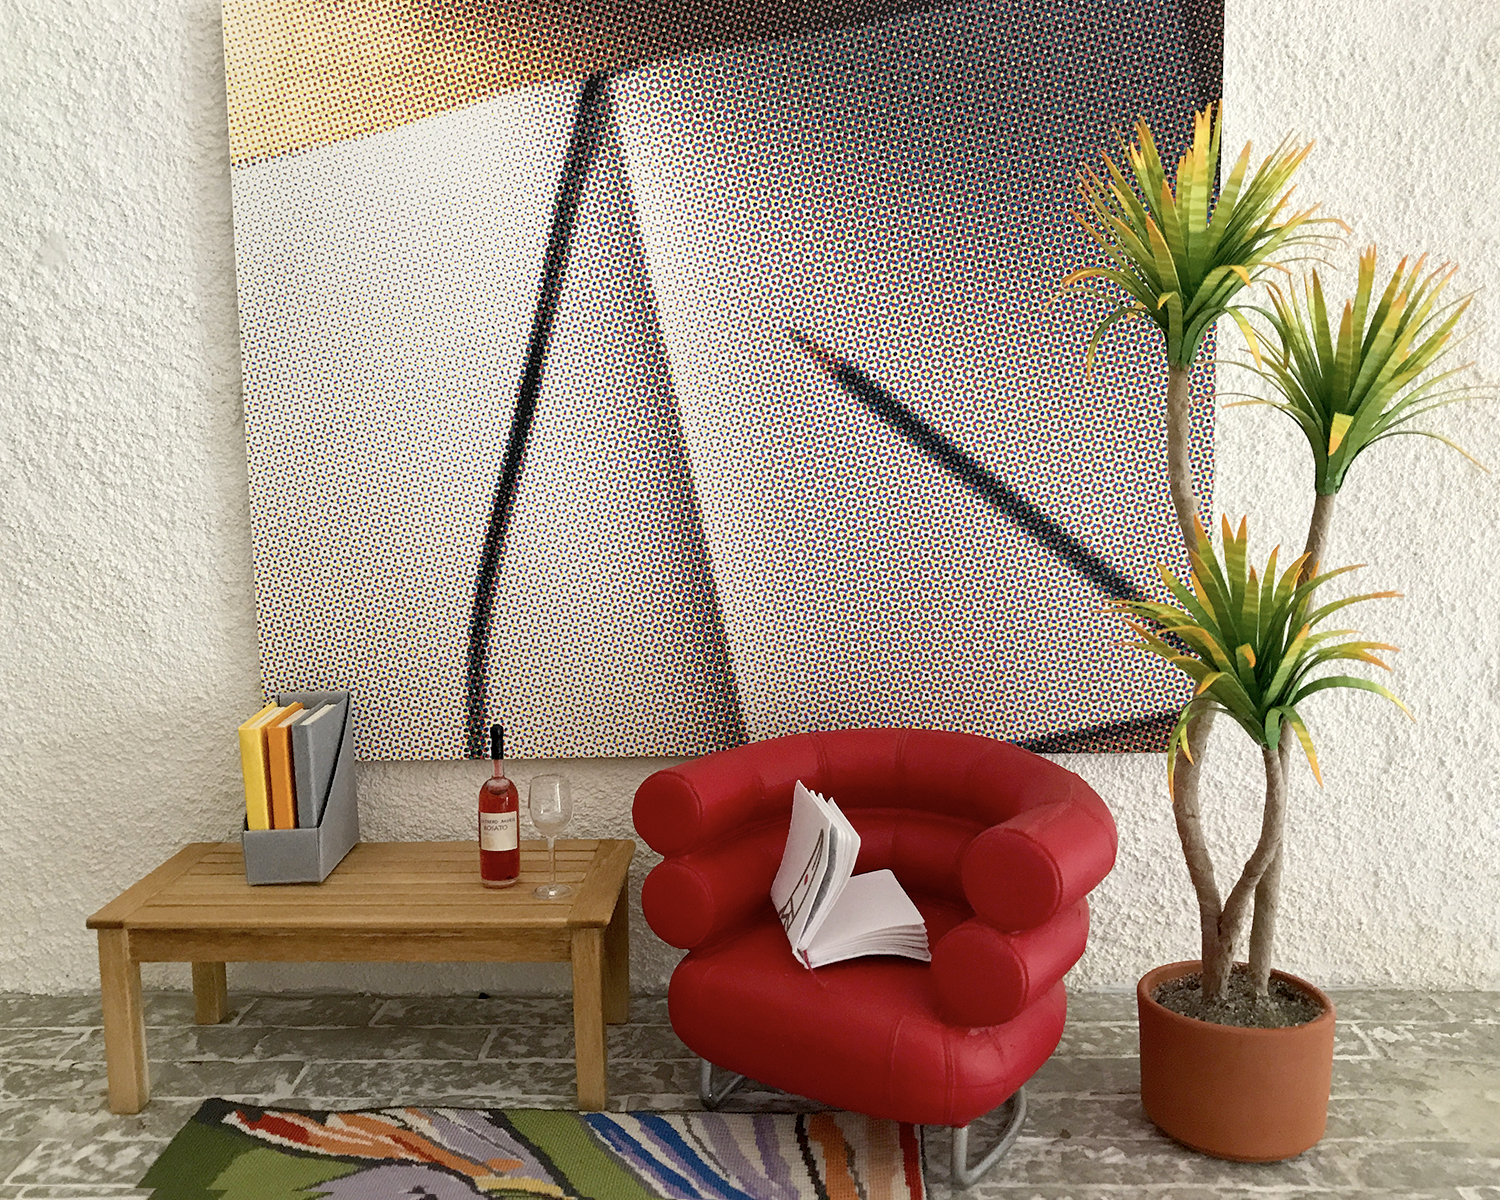
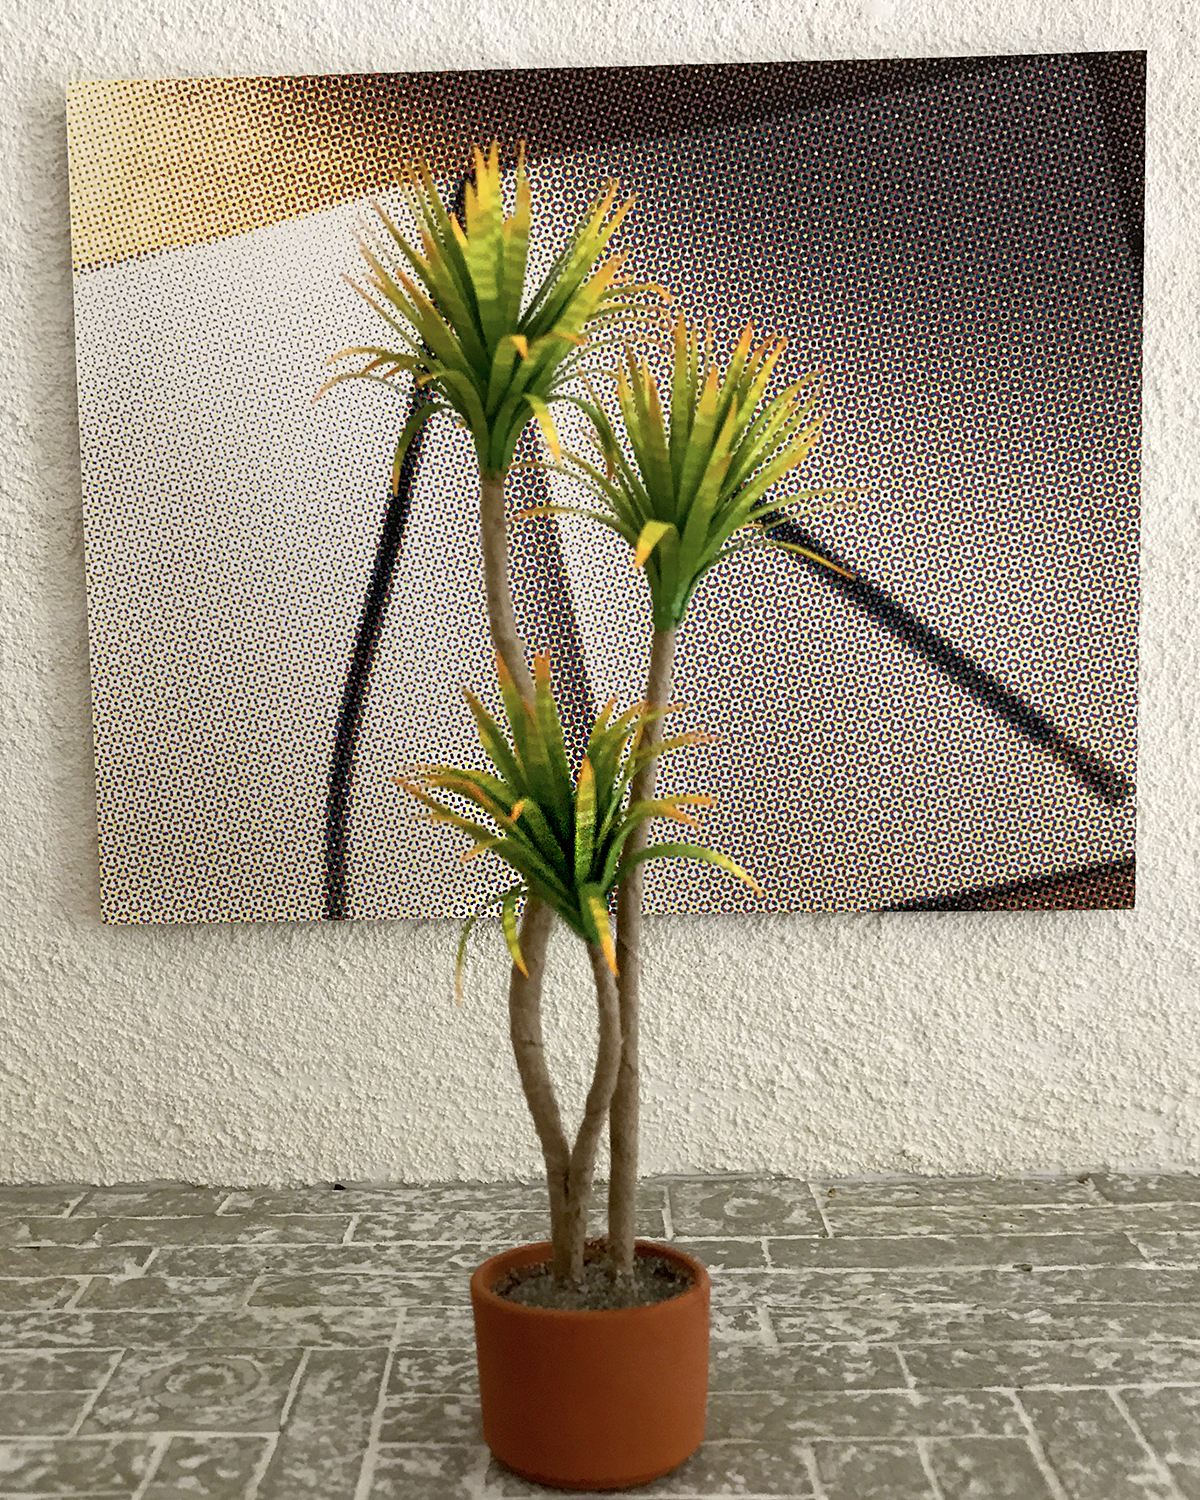
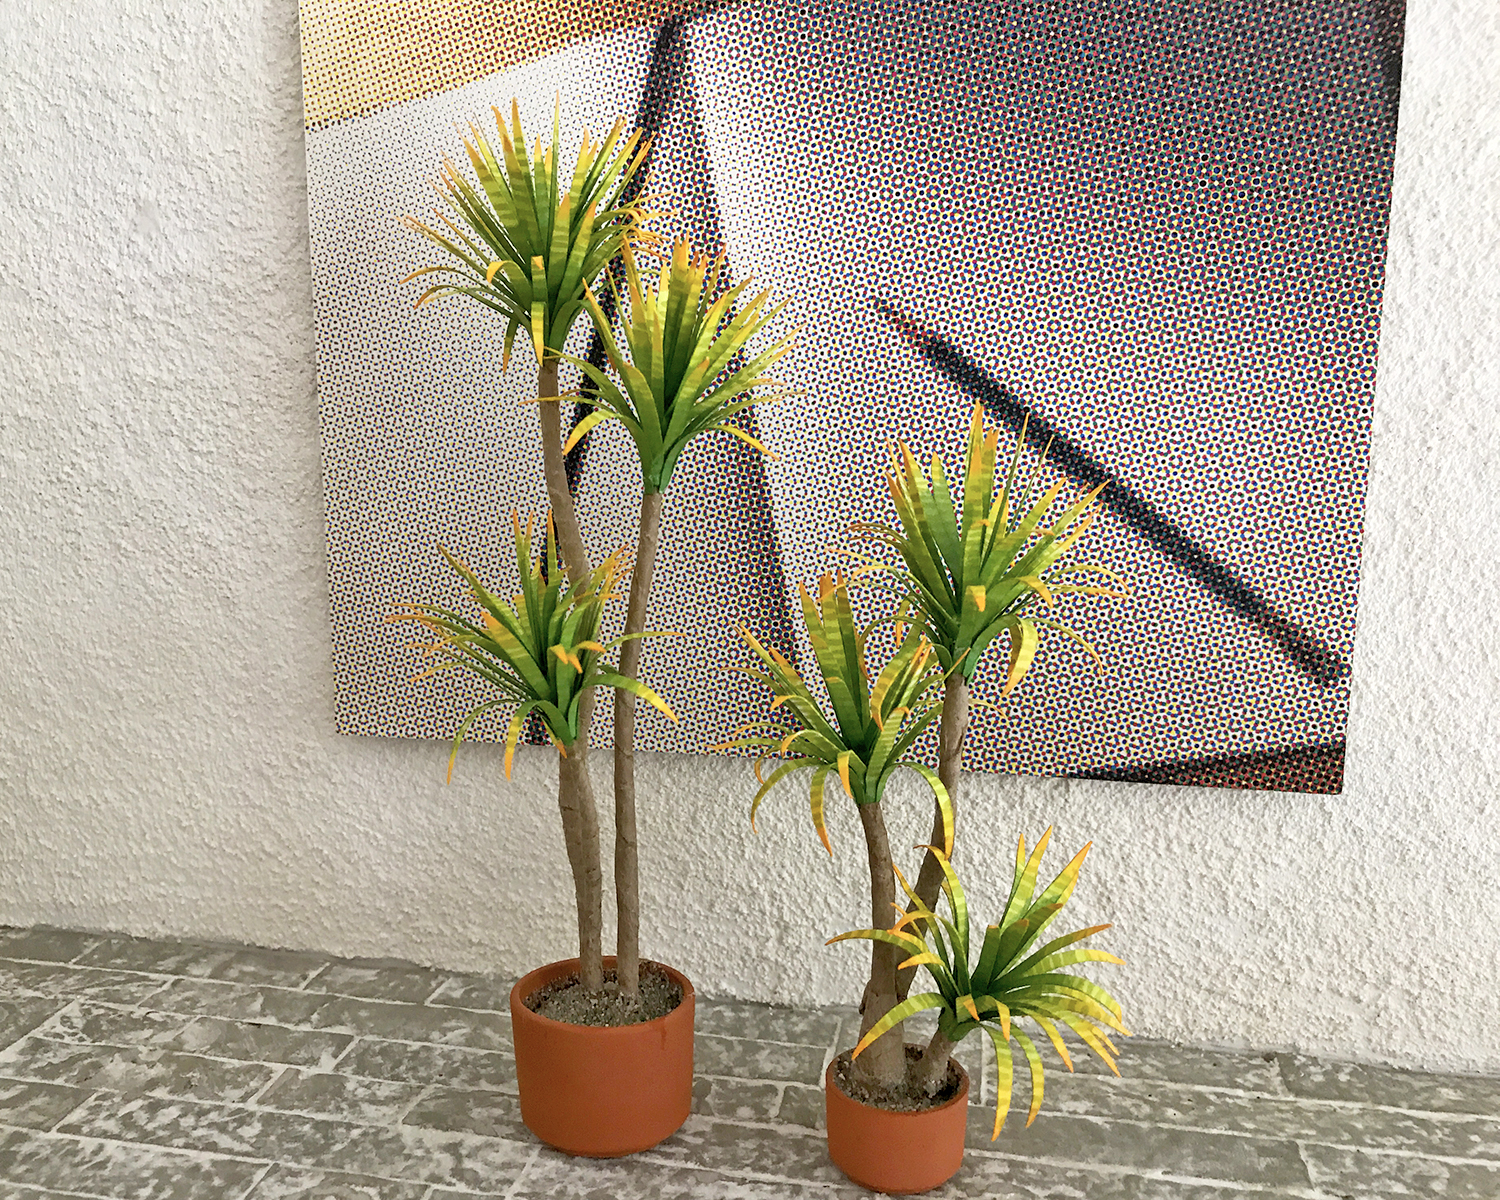
 

Albie, Yucca, Frustration

Albie_072317

This is Albie, absorbing the morning sun through the studio sliding doors. Our large middle cat, he is a handsome warm inky black, and very difficult to photograph. This one has zero interest in destroying miniatures.

MMSS_072317

Re-working the Modern Miniature Succulents + Sundries set a bit. I built a corner planter for specimens, and glued in one yucca tree with the new, narrower leaves. For the rest, I want to keep the plantings fluid and easy to change out, so I devised a kind of armature on the stalks of rolled brown paper for elevation. They are planted to the floor with tacky wax.

MMSS_nursery_072317

Here’s how it looks planted out, and with other plants massed around, like a typical nursery.

yucca_proto_072317

Still experimenting with colorways on the different stocks. This is the original shape leaf cluster in medium green, with leaf and pine markers. After the glue is set, the leaves are separated and arrayed.

proto_shaped_072317

Here is a similar leaf cluster, scored down the middle with the back of an Xacto knife. it makes it into a whole other plant.

side_by_side

Here they are side-by-side. So much potential!

And now for the frustration rant: Cricut has released a new version of their Design Space app that has inexplicably broken my SVG files — the format for my drawings used to cut all these shapes. I have been in close contact with their support staff for the last two weeks, but no answers, fixes or workarounds yet. I even abandoned Firefox for Google Chrome. It is all very tedious, time wasting and — frustrating.

Body Chan

body_chan_072217

My long-awaited Body Chan figure from Bandai finally arrived. She’s meant to be an artist’s model, or as the packaging proclaims “Pursuing Character Expression through Humanoid Action.” I had hoped to use her as a modern miniatures set figure, alongside Stormy and Zilly, or maybe to even replace them. She’s incredibly posable with like 30  points of articulation (some incomprehensible), several sets of hands, and essential modern accessories: smartphone, tablet, flip phone?, laptop, gun, katana. I so wanted to love her.

But. For my purposes, she’s too distracting: very naked (although she is sculpted with underpants on), and too slight (and anorexic) — in some areas — with thighs narrower than her lower legs, and five inches tall. Too anime. (Although this is Bandai’s express intention: “By design that commitment pulled, and reproduce the optimal head and body balance in anime characters.”)

Still. Very expressive and well-made. There is a male figure available, as well — I hope assume he has his underpants on, too. Both come in two colors: pale orange (pictured) and gray, which I thought looked like the sad shadow of death.

I know I tried to use this model outside its intended purpose, and really, it’s beautifully made, and I got it on sale at half-price, and she’ll be fun to pose in unexpected locations, so I’m not totally disappointed. Maybe tomorrow, there could be a Bandai meetup with the aforementioned characters… unless it’s just too dissonant to post.