
Wee wool pillows, bolsters, rugs, throws, yarn, roving… :)
Also hoping the power stays on!
Wee wool pillows, bolsters, rugs, throws, yarn, roving… :)
Also hoping the power stays on!
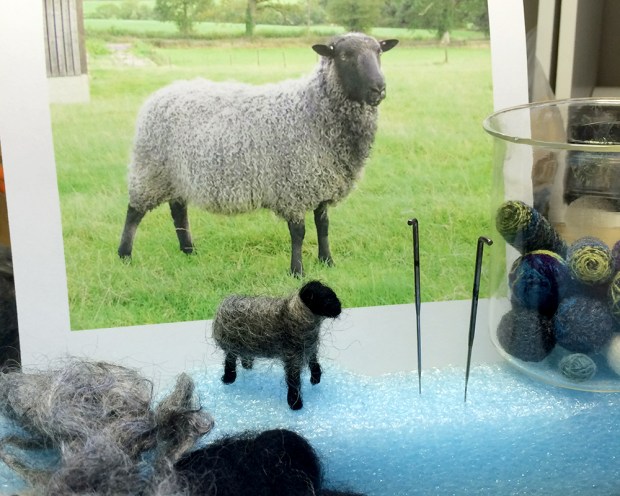
Working on a wee Gotland sheep using, you guessed it: Gotland fleece and dyed black wool roving. The fleece is from Big Sky Fiber Arts in Montana; check out their wonderful selection of fibers, silk and prefelts. The wee (1.5 inches/38 mm) sheep will be an ambassador for Argo Wool Works :)
It’s overcast, foggy and damp here in Nancyland today and the light is low. I wanted to used vintage photography as wall art in the hut, and have found some good imagery that sets the historical background of the area (real and imagined).

This undated shot from before 1950 shows some of the headlands and other parts of the Sea House Pleasure Pier empire (now demolished).
I found this postcard of an old view south of the Warming Hut
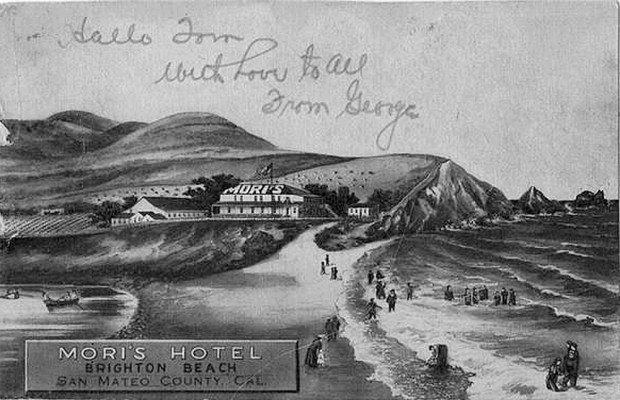
and decided to tint it

but didn’t like how it looked on the wall. I’m showing it here anyway because I like the handwritten greeting from George to Tom.
And of course there will be this map from Cavallini & Company.
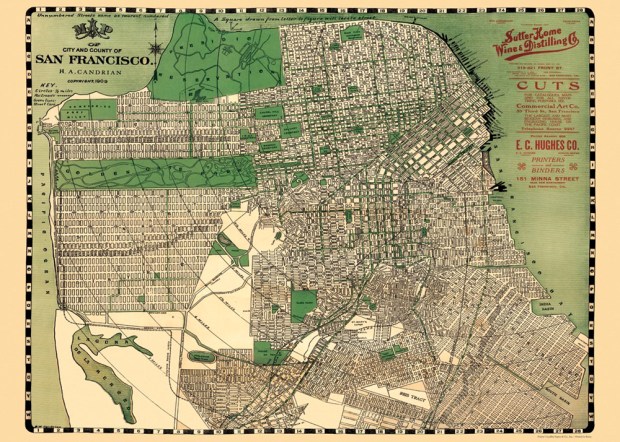
It’s the same one that is on the ceiling of the Sea House Pavilion (2013), and the source of the color palette. The green, anyway.

Merrily, merrily, merrily…
and with love to all.

Double rainbow, from the Pacific Ocean north to hilltop Daly City. About five minutes to appear, double, shimmer and fade away.
I’m using Kris Compas’s design tutorial to make the six bar stools. When she first posted it, I made two for the Sea House Pavilion. They’re so perfect.
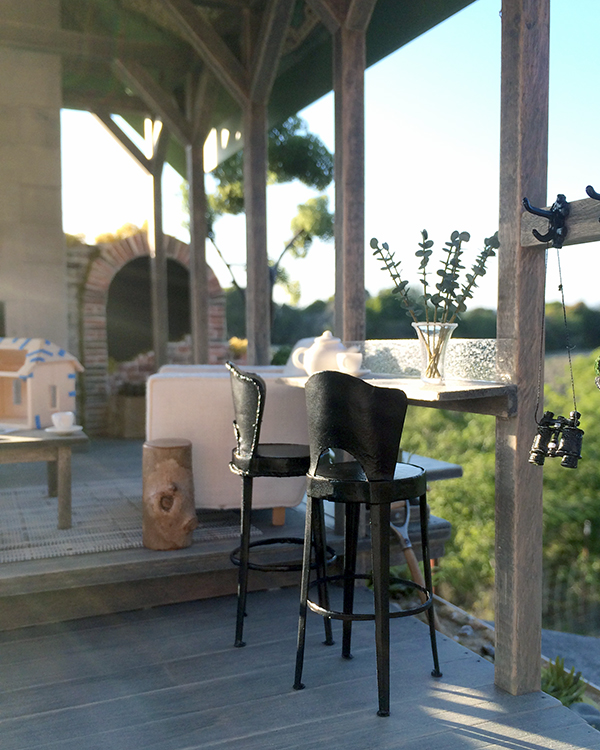
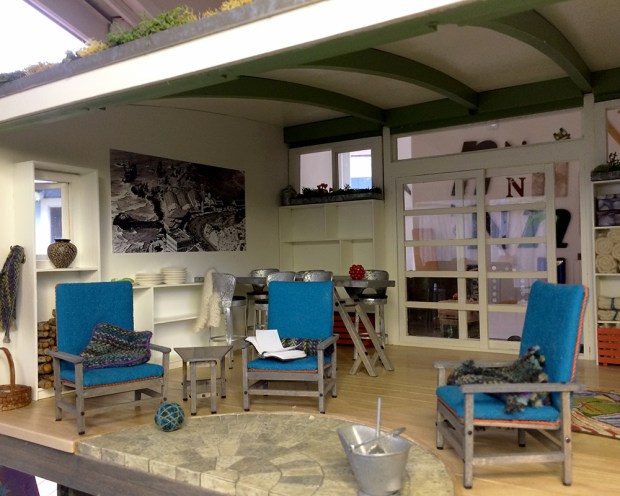
New vintage chairs for the Sea House Pavilion. Come sit and watch the sun go down.
I used Woodsies rather than illustration board for the seats, because why reinvent a similarly-sized wheel?

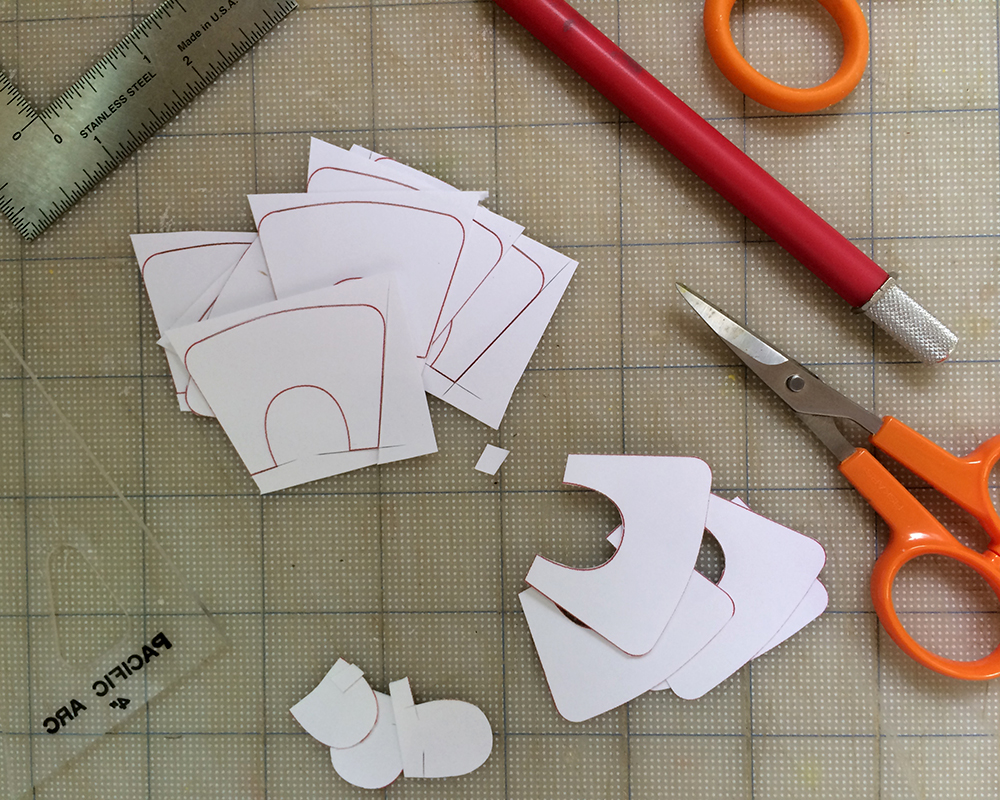
I modified the seat back, and printed it out on card stock. I cut all the straight lines with an X-acto.

And then hand cut the curves with scissors.
Kris walks us through the construction process with such ease, it makes her brilliance with deconstruction and solution all the more remarkable.

I used one millimeter leather lacing to simulate the rolled edge of the metal. It’s smoother than crochet thread, and very pliable.
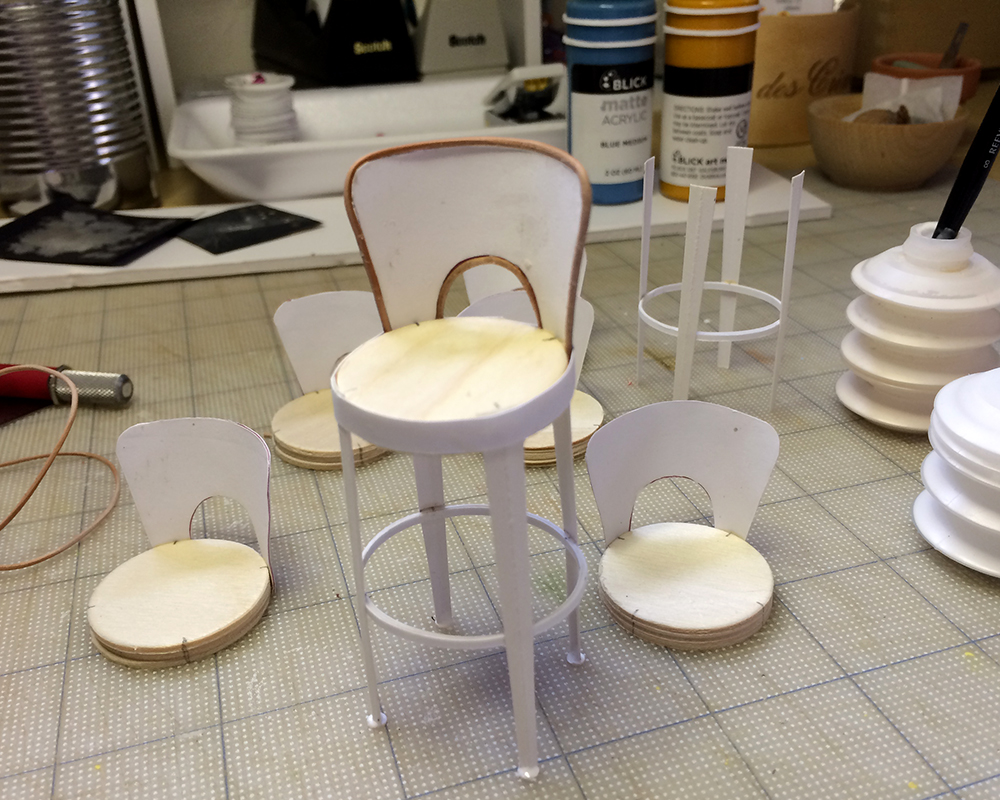
And here’s the first finished chair, ready for painting. Still undecided about the color. I’ll probably make all six, and pile them into to the hut around the bar. I don’t want them to be a focal point, and I’m also pretty sure I don’t want them galvanized. The interior will tell me, after there’s more… stuff.

I visited one of the Warming Hut muses today: the living roof atop the California Academy of Sciences in Golden Gate Park.
It is a wonderland.
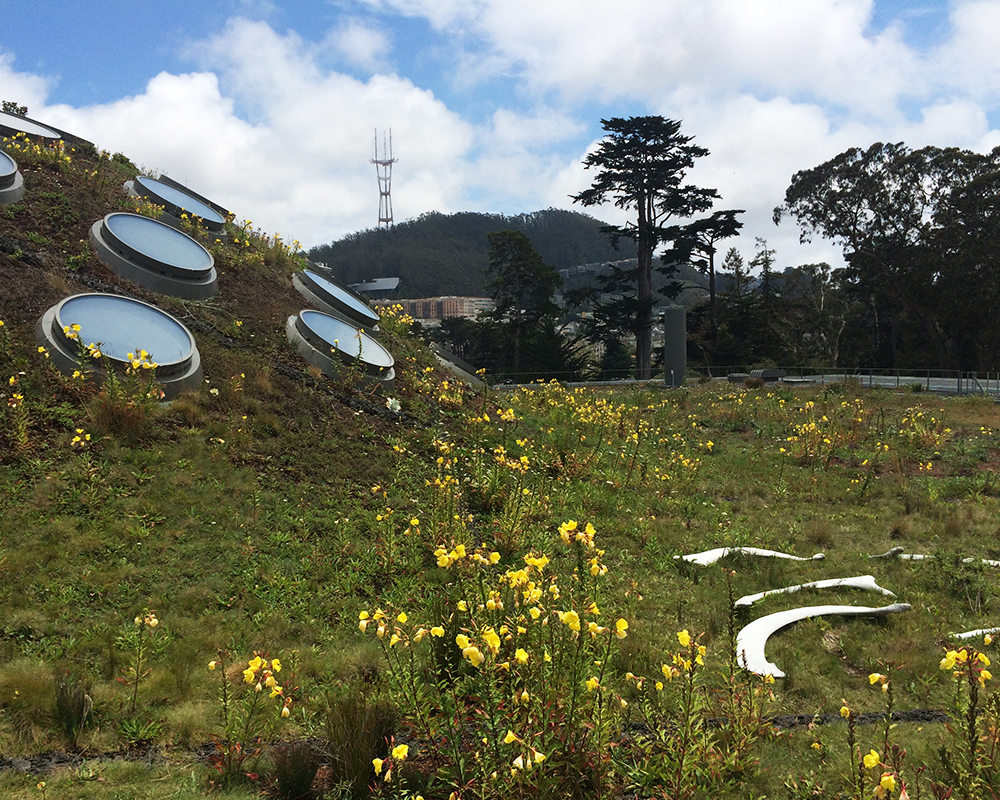
Those are whale bones drying in the sun, and views of San Francisco neighborhoods to the south.
The biggest revelation was what to do with the Warming Hut roof, in my ambiguous quest to add visual interest.

Criss-crossing the Cal Academy roof’s seven hills is a grid work of stones contained in wire mesh, like ley lines, to facilitate drainage.

They create a subtle framework, and could translate to 1:12 scale splendidly. I am so happy to have my answer!
Meanwhile, I’ve been building out the terrain under the the hut.

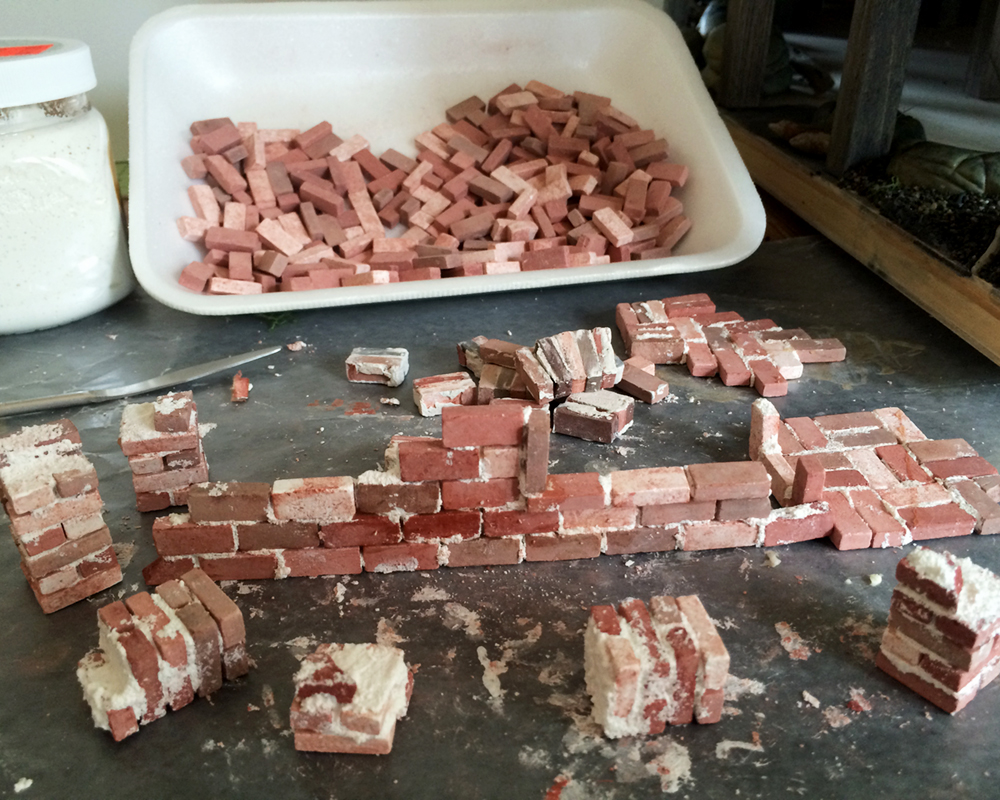
In addition to the air-dry clay boulders, tiny driftwood logs and beach gravel, I’m adding some scrumbly old brick foundations. They’ll be only mildly visible, but will add some mystery + history :)
And, it ties the Warming Hut to the Sea House Pavilion, which was staged against some brick ruins.
I’ve learned to do mortar a little better since then :)

The ruins of old brick buildings adjacent the Sea House Pavilion
Here’s the wee brick skunk works:
And one final work-in-progress mood shot:
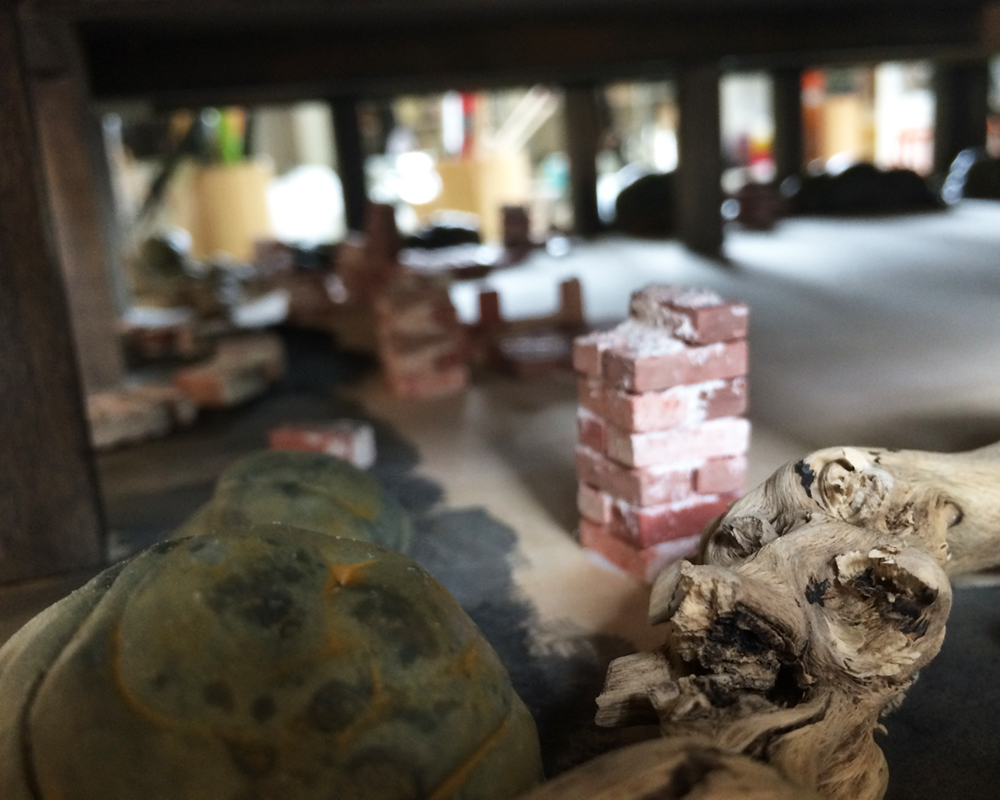
Because I love the combination of gnarly real and simulacrum.

I keep company with a two-year-old — though not as often as I’d like — and this worksheet was in her cubby when I picked her up from preschool the other day.
Where to begin on how awesome this is?
Blue is her favorite color, so I expect she started her response with that. Observe the variety of her expression, especially the very distinct, staccato marks in the lower right. Those typically come with a lot of force and flair. The rhythm and dynamic articulation, begun in the second and culminating in the fourth form, are both exploratory and concise at once.
With the introspective addition of a bonny spring kelly green, the counterpoint line work defines a new dominion, again both expansive and self-contained.
I could go on, but that would just be silly :)
The point is, someone is telling you, with bold straight lines and dotted guides: this is your name, and how it is “written”.
How will you respond?
Recently, HBS/miniatures.com wondered
So, again, we ask … How many of y’all use sketches to “concept” your mini projects? We’re wondering if this is the exception or the norm?
Here are some sketchbook notes from January, when I started the build:
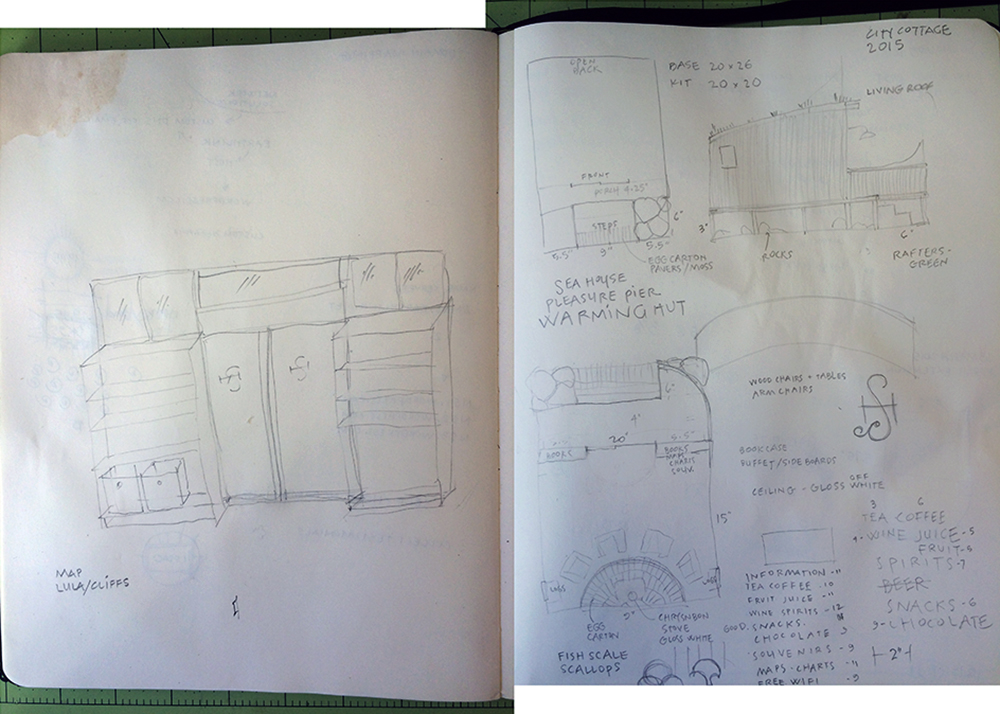
It’s a pretty clear — and typical — reveal of both my initial ideas and process: sketches, doodles and notes. Working with approximate dimensions helps keep things feasible. I have to sketch out furniture and cabinets and make cut lists.
I keep a paper folder of ideas, swatches and snippets of possible “things” as well as digital files for research and reference.
What’s unusual about these sketches and this build is how little I’ve diverged from my original concept thus far.
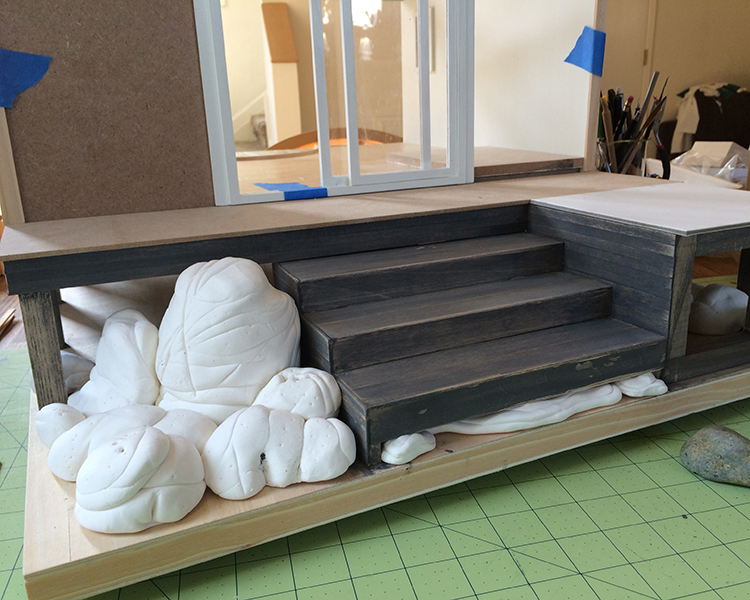
I made the front shelves and the wood storage under the back windows from inch wide x 1/16-inch basswood, and painted them the same Simply White as the rest of the trim.
Today I took a pleasant meander around my yard looking for the right branches to make the logs. I chose a woody bottlebrush shrub (Callistemon) and pruned out several offshoots. These I cut into 1.25-inch logs and stacked into the wood holder with glue to fix them in place.
Then I sat with a glass of sparkling water, the lemony scent of the wood and the invigorating fragrance of eucalyptus mingling on the afternoon breeze.


The first batch of the Sea House Warming Hut air-dry clay boulders are nice and dry. Mid-week, I saw that a crack had developed in the largest one, and got the idea to fill it with a quartz vein. I have this lovely pearl white acrylic, and if I mix it with some wood glue and load it in a syringe, I think it will behave convincingly. I’ll wait until I model, paint and salt all the boulders, though.

I know I’m not the only one to buy something because of the packaging. In this case, I had wanted to make domed skylights, and this container — of organic gala apples, no less — at the local big box store was ideal. Although the original project was sidelined, the cut-apart plastic is now making excellent bases for individual rocks. My landscape modeling compound of choice is Crayola Model Magic, and making the boulders hollow saves a lot of cost.
The apples were very good, too.

Here is an action shot of a boulder in the making, and my dual purpose small metal ruler.

This is 8 ounces (226 g) worth of boulders and rocks — enough to populate the left side of the build. (You can also see my second-favorite multipurpose modeling tool: a silicone wine stopper.) I’ll let these guys dry for a day, then paint a first coat with the same taupe wash. I want to do the additional glazing and salt crystal sprinkling to all of the rock foundation at the same time. If all goes well this week, I’ll see time to continue my elemental play.
In other news, Christina, the winner of the Denise’s City Cottage kit provided by HBS/miniatures.com giveaway, contacted me and it’s on the way to her. Hopefully she’ll post about her build, too. I’m really enjoying seeing so many approaches, and as always, learning tonnes.
PS: I was FaceTiming with my two-year-old granddaughter, showing her the rocks I made from clay and the rest of the build-in-progress. She was listening and studying the screen very intently, then announced, “I want to go there.” Best appreciation ever.

I’m using air dry clay to sculpt the boulders that populate the Warming Hut foundation. For the largest one I used a small tin and a plastic cup as a base, then coiled unevenly-rolled lengths of clay around it.
I made certain decisions about the type of rock I wanted to see, then used my hands, a small metal ruler and a ball point stylus to make like the earth, wind, water and all the other magics of geology.

This is my model rock for style and color.

Even though the clay’s just one day dry, I’ve put the first coat of acrylic glaze on. There are a lot of rocks to build and paint. Most of them will fit under the foundation, as if the posts have been drilled and set into them, so the painting part will be a wee bit tricksy. (That was part of my conundrum of when best to glue or not to glue the hut in place.)

The gaps between the boulders will be filled with beach gravel and tiny pebbles (from my prized collection), with some driftwood logs wedged in here and there, and small bits of greenery.

The limited edition 2015 HBS/miniatures.com Creatin’ Contest starting kit
Like some of the other miniaturists who were enticed to participate in HBS/miniatures.com build blog-along, I had already purchased and begun to build this year’s starting kit. And I’ll enter the Sea House Warming Hut in the contest come December 16, even though I have no aspiration of winning, having been honored with the Grand Prize in 2013 for my Sea House Pavilion. (Note to all those who don’t enter their projects because you think you have no chance: no one was more astonished to win than I was. Truly. So show your work and enter! It’s way fun.)
So what to do with this second kit provided by HBS?
Much as I’d like to, I haven’t the time (or space) to do another project. I’d like to offer the kit as encouragement to anyone who might be hesitant to enter the contest, or undertake miniature world building. Leave a comment, and I’ll randomly draw a name on Tuesday, March 31, 2015 from those who respond. I ask only that you consider using the kit to enter the contest, and that you pay shipping costs (I’m in Northern California, and the kit weighs about 11 pounds). What say you?
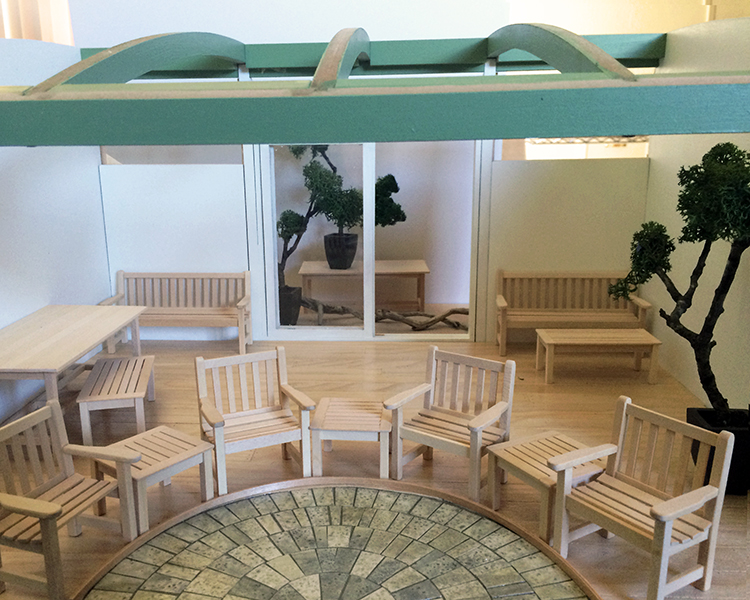
Perfect furniture by Bruce Dawson, who has shuttered his studio and is closing out inventory :(
Not a lot of progress on the Warming Hut, what with all the March birthday celebrations.
I did see that one of my favorite miniature furniture builders, Bruce Dawson, is retiring (again) and closing out all his inventory through his Etsy shop bedMiniatures. Shown above are the unpainted 1:12 basswood items I picked up. (He has some half-inch scale pieces as well.) Do check out his shop. His prices are more than reasonable. There are still a few cherry Mission style tables and bookcases that are especially wonderful. Don’t miss this opportunity! You’ll be very, very glad.
