Note: contains expressive language, may not be suitable for curse-averse persons.
“As soon as you have evidence of fairies, everything can be real.”
— Sir Arthur (Edward) Conan Doyle
Note: contains expressive language, may not be suitable for curse-averse persons.
“As soon as you have evidence of fairies, everything can be real.”
— Sir Arthur (Edward) Conan Doyle

HBS/miniatures.com helped with the siding, windows, door and some tools :)
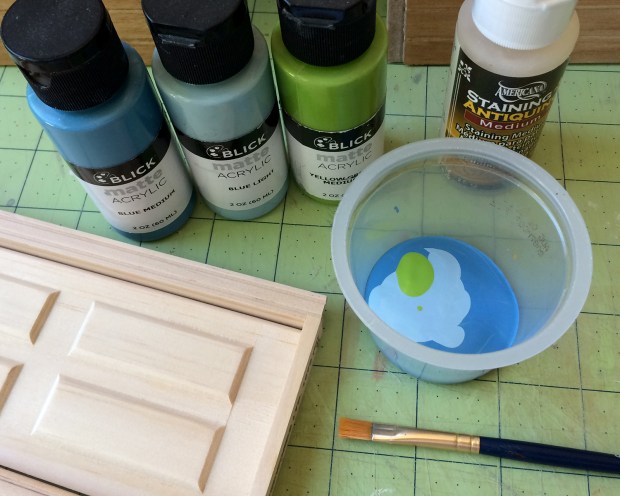
I helped with staining and sealing.

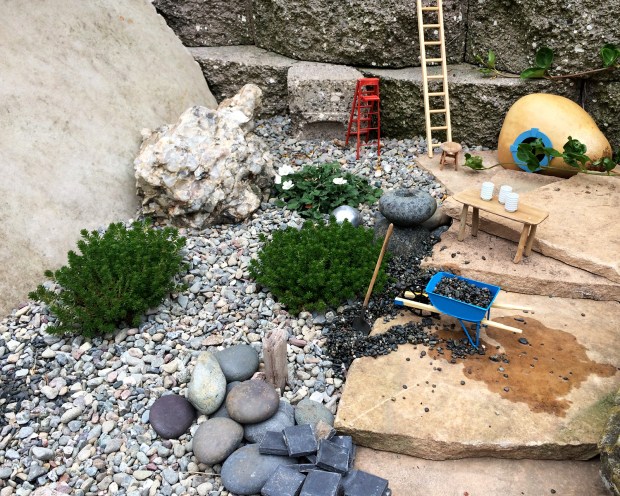
In March, landscaping began.


Construction continues, but they are very tidy and keep the jobsite clean.
I’ve yet to see them, but signs of habitation are increasing.

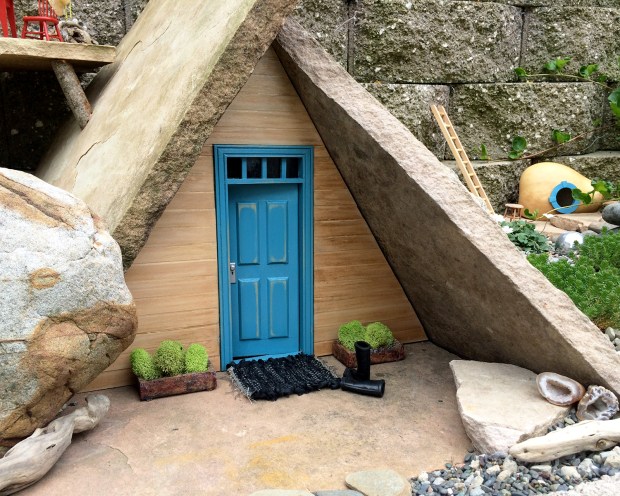
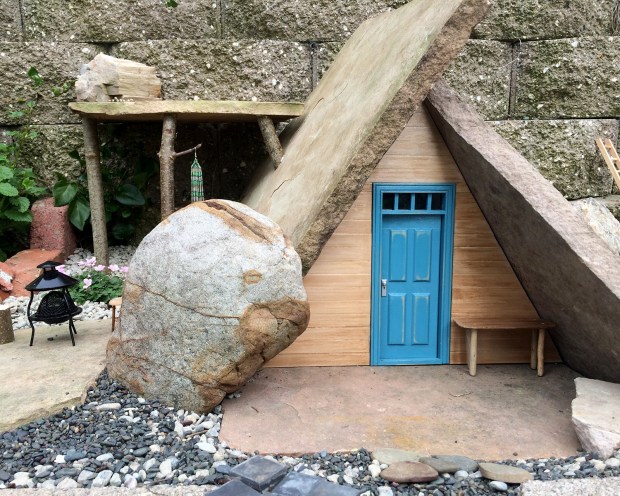
We have some new neighbors. I’ve not actually met them yet, but they’ve been busy, and seem a bit reclusive and perhaps, eccentric.
In early February, I noticed some changes in my urban back yard retaining terrace, which I like to call the castle wall.

A raised planting bed disappeared, and a rudimentary structure appeared.
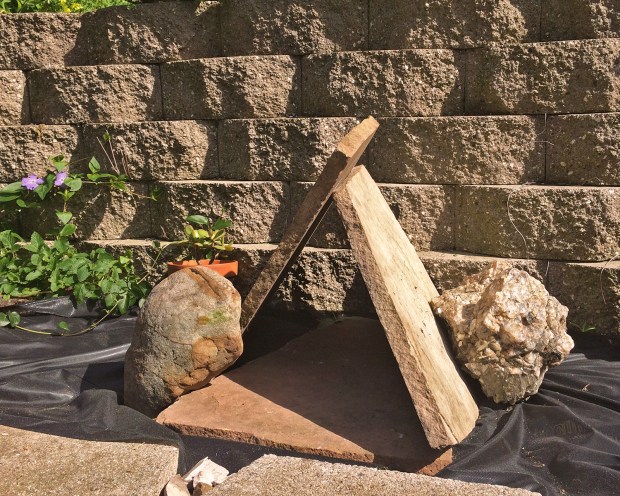
Rocks and flagstone were relocated, and weed cloth laid down.

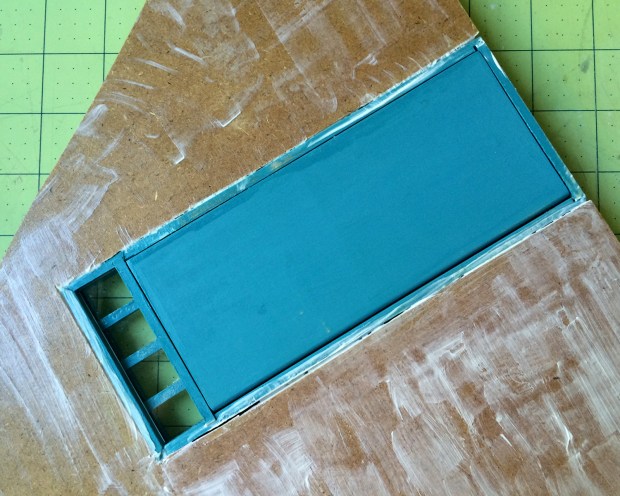
A pieced foamcore front appeared and disappeared several times, and then a front door!

The foamcore was replaced by MDF, and a gourd with a circular window.

What could possibly happen next?

Finished the elephant tea cozy from Janet Granger Designs! It is stitched on 32-count silk gauze with Anchor stranded cotton. Bummer side note: Janet’s site was hacked and hijacked and she’s in the process of restoring it; you may not be able get through :(
The differences in the elephant’s blanket shawl were not intentional, nor part of the pattern. By the time I realized I was off, I was disinclined to rip it all out. I can live with an imperfect tea cozy, especially because you only see one side at a time :)

Here it is trimmed, and the two sides hemmed and stitched together. So adorable. I want to make the ginger cat next.
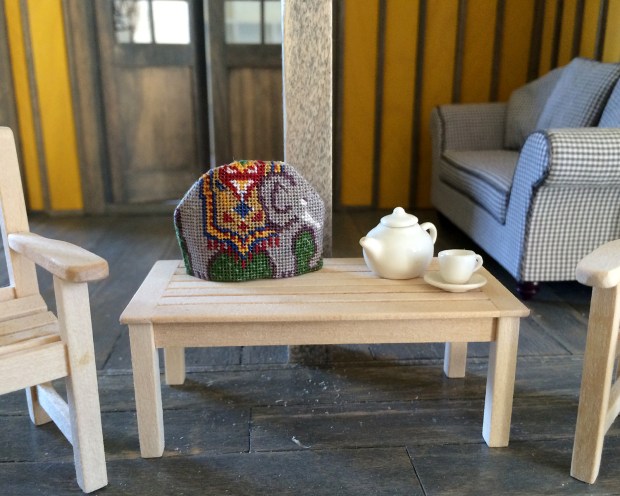
A new load of barewood outdoor furniture was delivered today, so I made tea —green, with fresh mint leaves and ginger — and sat on the unfinished deck to think about color.
Table and chairs from my stash of Bruce Dawson, regrettably retired from miniatures. Ooooh! I just saw that SP Miniatures has some of his cherry pieces. Grab them while you can! Teapot, cup and saucer are from HBS/miniatures.com.

Native poppy season is well underway here in Northern California. One of my art supply stockists (thank you, Britain, for that great word) was selling Letraset markers for $0.67 (!) so I laid in a fresh supply of flower colors. The 3/16-inch (4–5mm) petals — four per flower — are punched from inexpensive 20 lb. paper. Stamens are a thin strip of paper tinted deep yellow, cut into a fine fringe and rolled around the stem tips. I’m using 28-gauge paper-wrapped wire cut to approximately .75 to 1.25-inch (19–31mm) lengths.
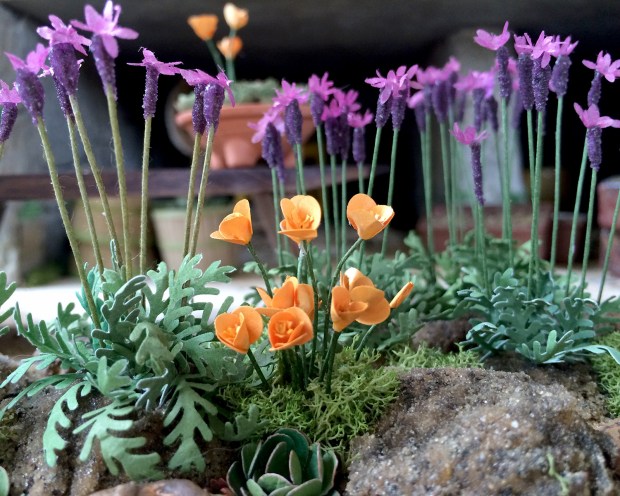
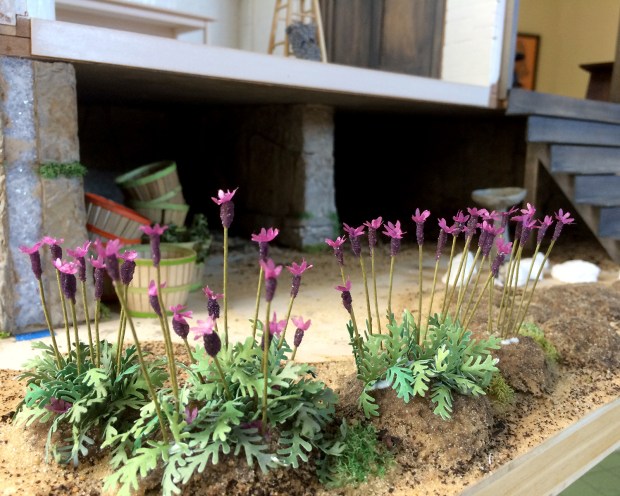
Here’s the first clump of poppies in with the lavender. The color with these markers when dry is a bit muted, so I’m going to mix in some Sharpie for vibrancy in subsequent propagation. I’m using small mounds of preserved moss to suggest their foliage, as I did on the Sea House Warming Hut living roof. There is continuity in Nancyland :)

The yummy bench is from Peter Tucker, found at the Good Sam show a few years back.
You are welcome to come sit and watch the gardens grow :)

Small progress.
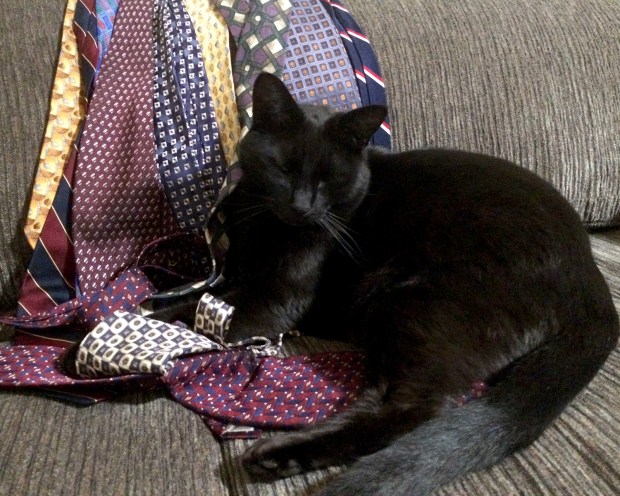
Albie immediately curled up on the rest of the ties, and I set up to make more lavender.
I’m still experimenting with technique, but I try to make a shrubbery’s worth of stems each time, so if they change I can call them varieties or cultivars :) #miniaturejustifications
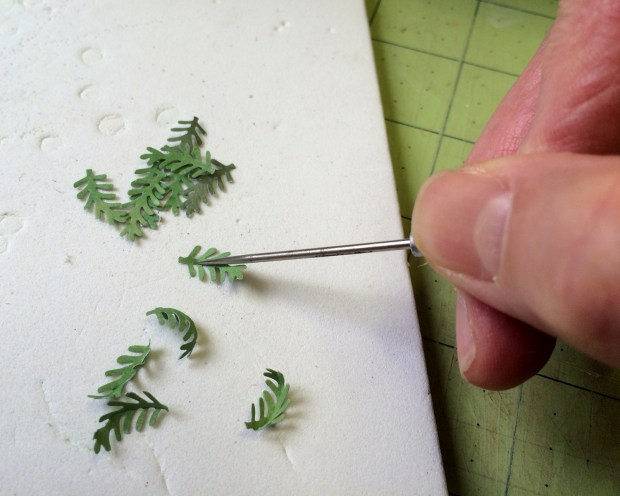
I’m using paper-wrapped stem wire, purple superfine sand (Activa Scenic brand) for the flowers, tissue paper for the petals, tacky glue, and cardstock painted grayish-green for the foliage. Most tutorials call for lycopodium as foliage, but I’ve decided on this well-designed and versatile punch from Punch Bunch.

I got my birthday order from The Miniature Garden, which included some 28-gauge paper covered stem wire, yay! Turns out what I’ve been using is 26-gauge, so voilà, the first (subtle) variety. (The #28 is on the left.)
I cut 1.5-inch (3.8 cm) lengths of stem wire and rolled one end a scant quarter-inch (6mm) in tacky glue.

Rather than dip the glued end, I pour the sand repeatedly over the stem wire. This builds up and preserves the shape of the flower.

The sanded stems are placed upright to dry. (The fluffy ones you see on the left are made with Flowersoft, a poofy kind of scatter that I’m considering using.)
The petals on top are made from tissue paper punched with a small flower shape, cupped with a ball stylus, and glued to the flower.
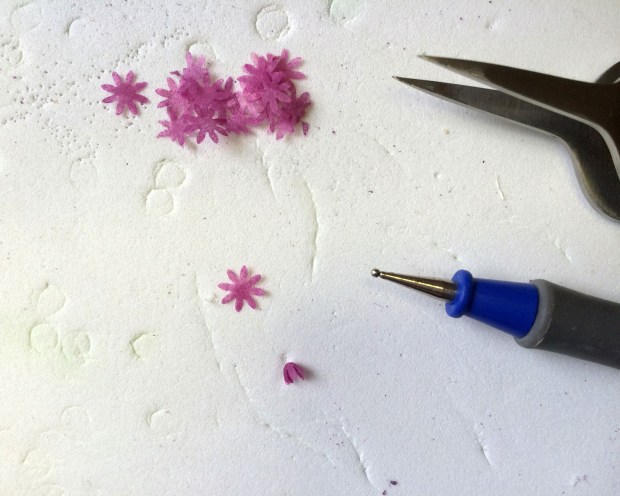
In the foreground you can see the Flowersoft flowers with petals cut from waxed paper tinted with a marker. Behind those are the sanded flowers with tissue petals.

The lavender spikes are planted in the mounds with an awl and glue.
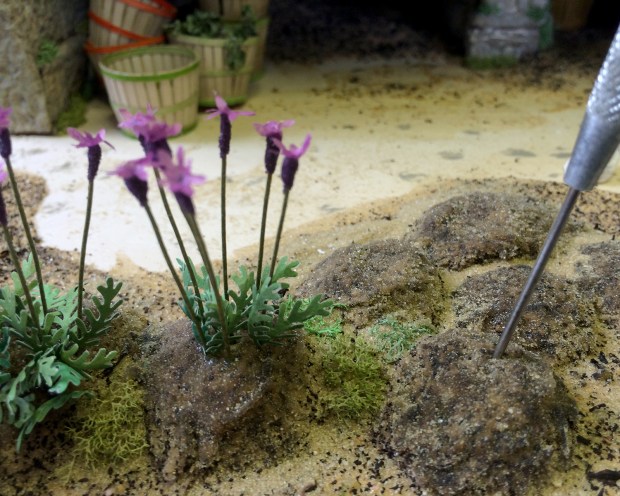
These ones were built on #26 wire stems.
The foliage is shaped with a stylus and glued in around the stems to create a pleasantly convincing, if stylized, base.

Making more echeveria hen and chicks to cluster in around the lavender mounds. If you look closely above, you can see once again the difference between #26 and #28 (on the right) stem wire.
 There’s an entire molds-worth of paperclay rocks dried and awaiting mineralization. These will be nestled and half-buried around the lavender, poppy and succulents bed as an unobtrusive border.
Happy vernal equinox (for those of us in the Northern Hemisphere)!
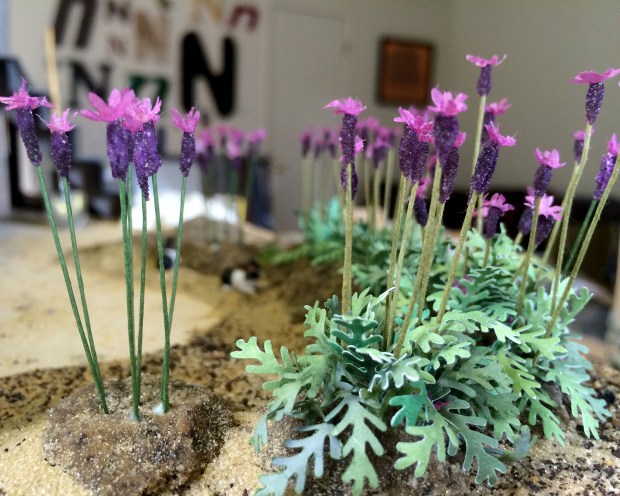
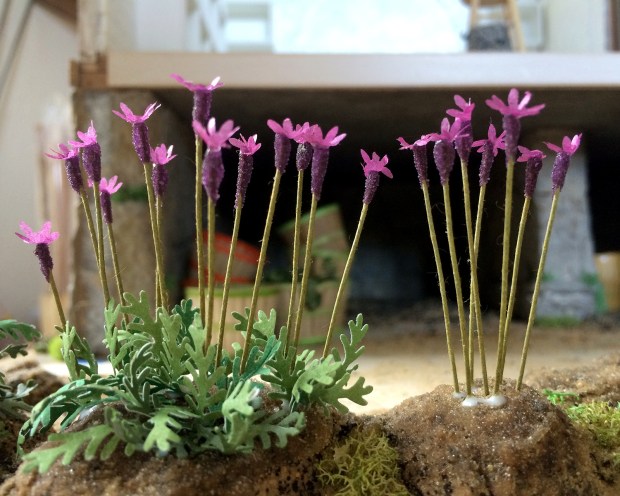
 I mentioned that Argo Wool Works also grows lavender. There are a few good approaches to making miniature lavender, and after a thoughtful review, I’ve adopted a hybrid technique. This is always the question in miniatures: how best to convey a feeling, an illusion of the real thing? Absolute adherence to reality, or a simpatico synthesis of appearance? Answers often surprise me, as did this lavender.
 These are the start of the demonstration lavender beds outside the AWW showroom, as planted in the egg styrofoam and sand-covered mounds established earlier. I’ll post a more step-by-step later, when I’ve more available time. I think the method is worthwhile :)
The final observances of my family’s multiple March birthdays have been celebrated. I was delighted to receive an unexpected gift from one of my oldest, dearest friends, who noted my quest for fabulous silk ties with a large bag of said items. Her husband — another oldest, dearest friend — is a professional wearer of ties.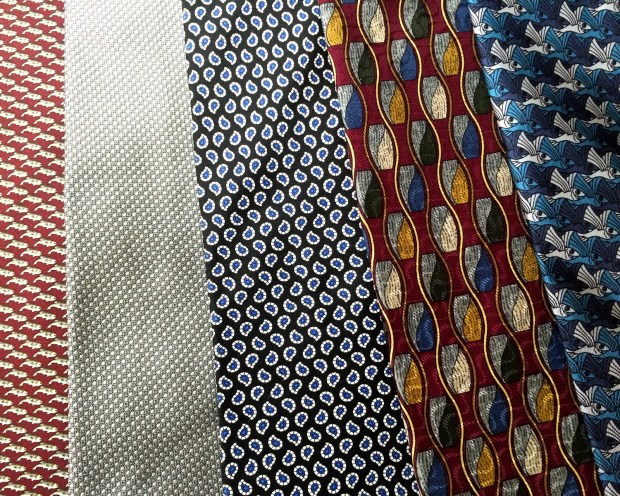 These are the top five I pulled out for the squiggly vintage Chippendale sofa, and/or throw pillows. The far left is out of focus, but is a delightful fish pattern. The next is an exquisite gray/black circular motif… on through a classic understated Paisley, a retro-looking I don’t even know what, and a brilliant Escher tribute.
Adding to the Spring bounty is another bestowal of wood veneer and samples that would have otherwise gone into landfill, from family member Tony. This is a large roll of oak veneer, and samples of bamboo, cut both horizontally and vertically. So, so beautiful, and interesting! May your cups runneth over with unexpected gifts and bounty to share.
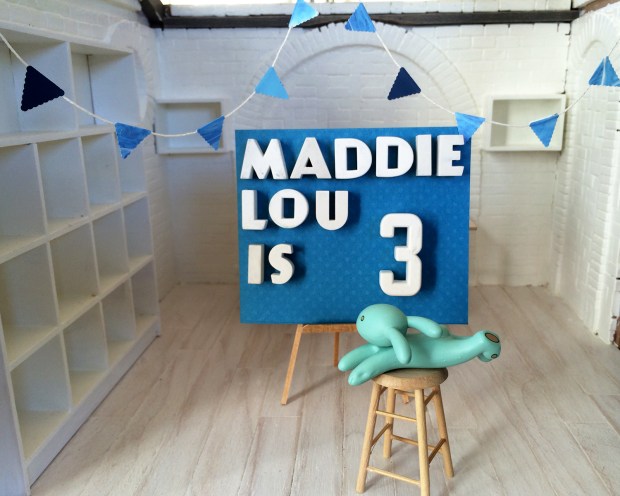
Her favorite color remains blue, and she can fly like this bunny.

My favorite modern miniature of all time.

So happy with the results of Annie Christensen’s echeveria tutorial! Here are a few before adding the chalk detailing. I experimented with watercoloring both sides of gray and light green card stock, as well as a duplex sheet of sage/dark green.
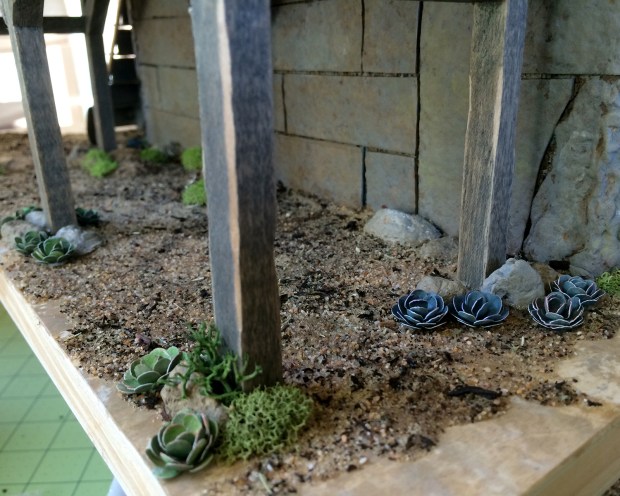
Some in place under the lavender-drying deck (two varieties).

And more around the back. Truly, paper alchemy. I’ve got some micro-punches on order to make smaller ones, and different varieties. With lavender and California poppies growing, this landscaping will be so NorCal.

(This is a peek at one of my succulent beds, so you know I speak true. You can just see some CA poppy in the mid right edge. They should start going off next month :)
