Pots, Yucca, Color

order_071417

My order of kiln-fired terracotta pots arrived from Braxton Payne. Look at this goodness!

tiny_aged_071417

He even included a wee “vintage” hand-finished pot. It is perfect. 

yucca_071417

I’ve potted the first armature yucca proto, and am waiting for the glue to dry thoroughly before arranging the leaves. It stands 5.5 inches (14 cm) in a one-inch cylinder pot.

comparison

Oh, and here’s a color comparison on the four stocks I’m considering (with the tiny pot again, because it’s so dear). Nothing terribly surprising, but a handy reference. I think the yellow stock would be good for Sansevieria, or for yuccas with yellow edges — it’s difficult to outline this shape with markers. I’m excited to carry on experimenting!

Yucca: Armatures, Protos, Colors

deskmess_070917

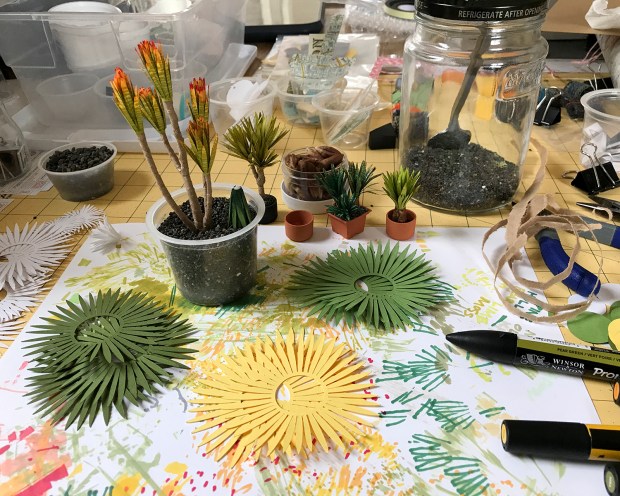
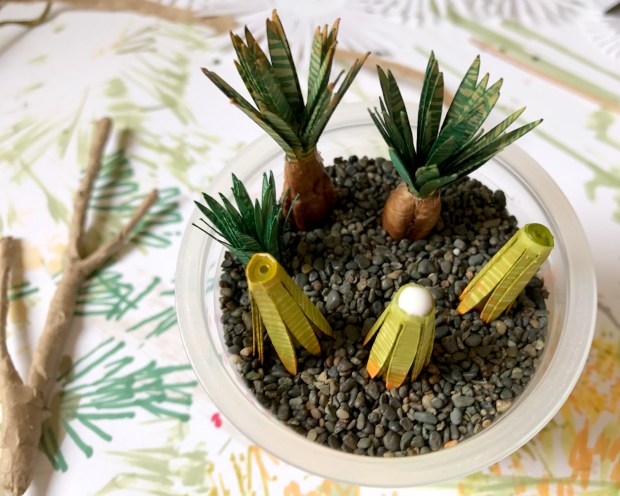
It’s end of day, for now. Made some progress with the yucca exploration.

tearing_paper

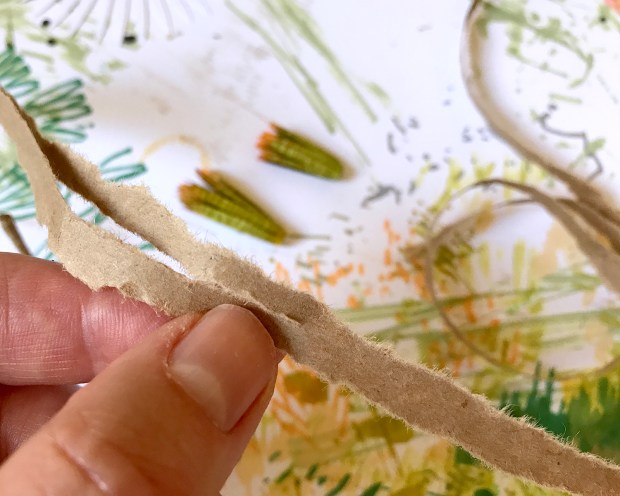
I began with tearing brown paper into thin strips.

wrapping

And wrapping multiple layers over florist wire to build up a convincing yucca stalk-and-stem armature.

color01

Yucca species are varied in color, though not as much as succulents, perhaps. In miniatures, I ascribe less to slavish reproduction and more to evocation of spirit :) Starting with white cardstock for this one, each leaf end gets tipped with Winsor & Newton Promarker Sunflower and Amber, both sides.

color02

Broad strokes of Pear Green color each leaf.

color03

Both sides colored. The inks blend as they build up and mellow as they dry.

color04

Thin cross-leaf striping, in Moss.

color_05

More cross-striping on the ends with Amber, and surprise leaf tipping in Poppy.

gluing_yucca

I snipped through the lower edge, applied a thin line of glue, and began rolling the leaves up into a cluster.

mor_glue

Adding a generous dab of glue to the rolled end to ensure a well-bonded base.

let_dry

Inverted in a cup of fine gravel, I let the leaf clusters dry completely. This makes arranging and styling easier — and more robust — later on.

gluing_on_tops

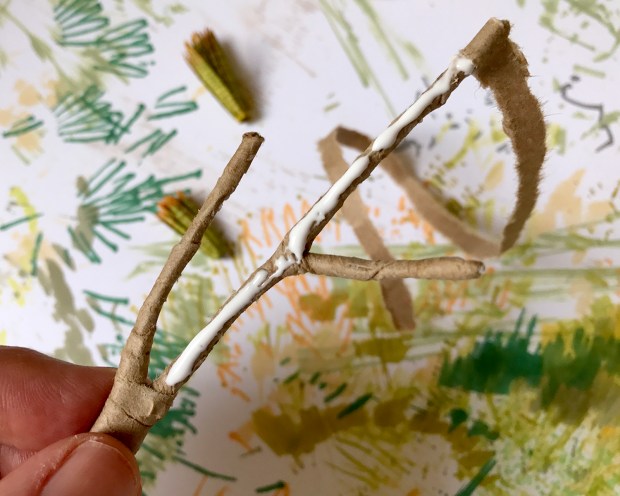
Clipping the end of each armature branch with pliers creates a flat surface on which to glue a leaf cluster. Holding until set ensures uprightyness :)

glue_to_armature

Watching glue dry. Again.

add_more

I added two more trunks, wrapping everything together at the base.

apply_glue_wraps

To improve the transition from leaves to trunk, I cut sections of 7 or 8 leaves and applied glue.

all_joins_wrapped

I wrapped these just below the base of the leaf/trunk join.

all_joins_wrapped

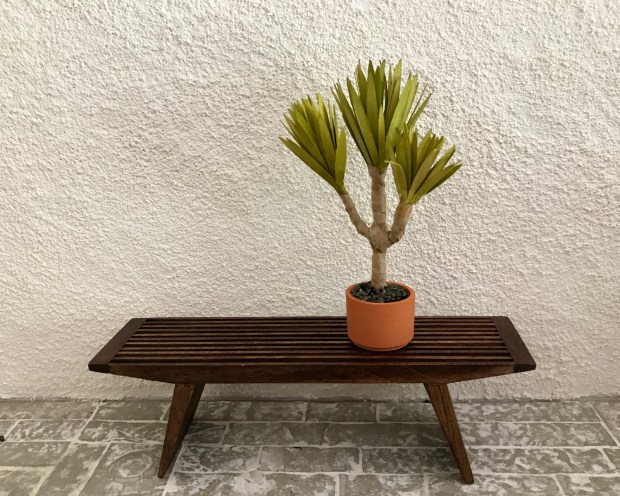
All trunks wrapped with leaves, and drying. I’m awaiting a larger cylinder pot to plant this particular specimen in, before unfurling and styling the leaves — the really satisfying part.

yucca_protos3

I’m fairly happy with the appearance and versatility of this plant concept thus far. They work well on an armature, date pit stem, or just as foliage — and any combination thereof. I even think this pattern and method could work for Sansevieria, with the right colors and a little bit of shaping.

green_stock

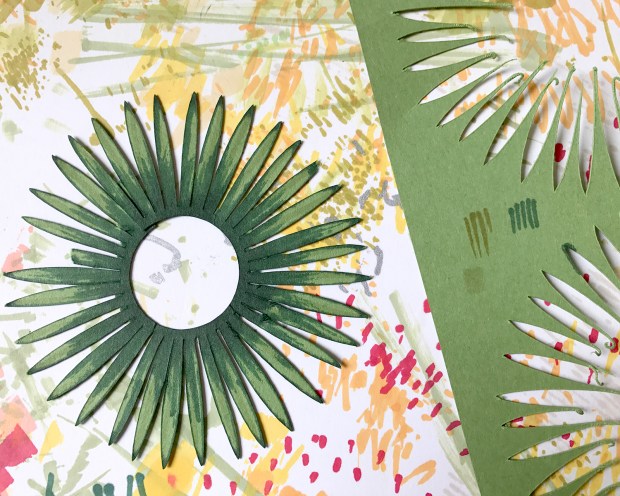
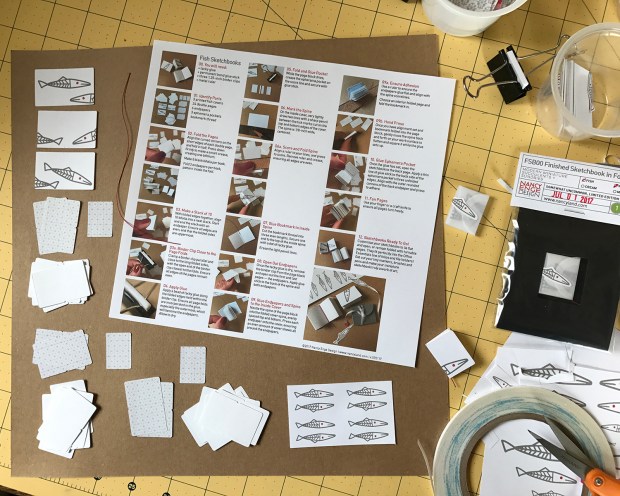
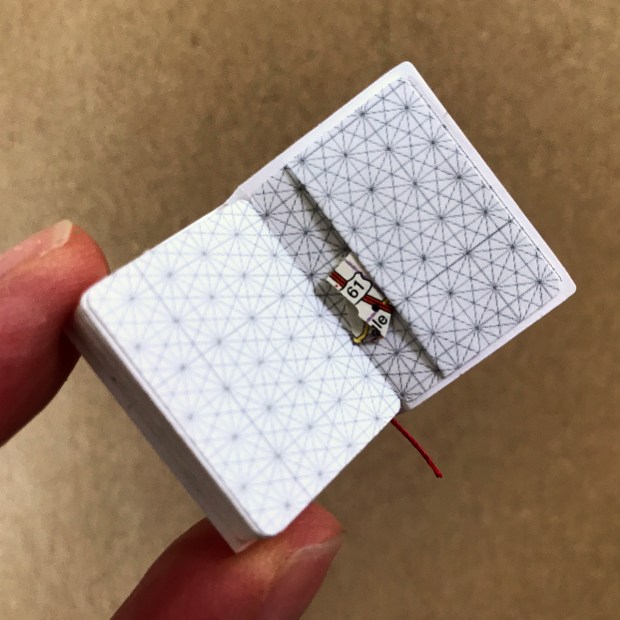
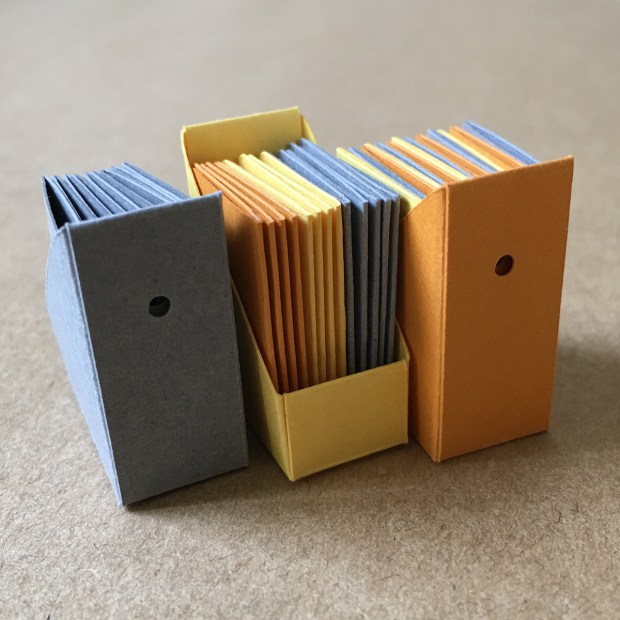
The next step is to explore and evaluate color stock choices, which brings us back to the first photo in this post. Above is medium green cardstock (cut with a dulling blade, resulting in torn, dragged edges and general scuzz. This particular design cut really seems to blunt a blade fast :(

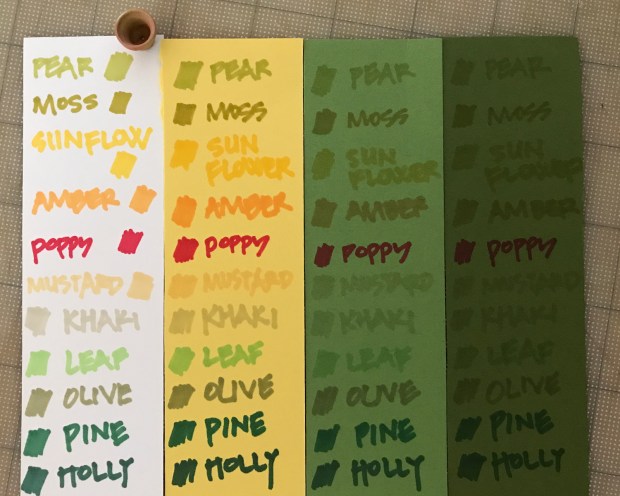
This green leaf set is colored with Holly swashes and edging, and a subtle Leaf Green vertical stripe. Very different than coloring on white. Each stock seems to absorb the inks differently, as well. I’ll show some side-by-side color comparisons next time.


Yucca

yucca_proto_00

New project: yuccas. The trunk is cut from an organic Medjool date pit :)

yucca_proto_parts
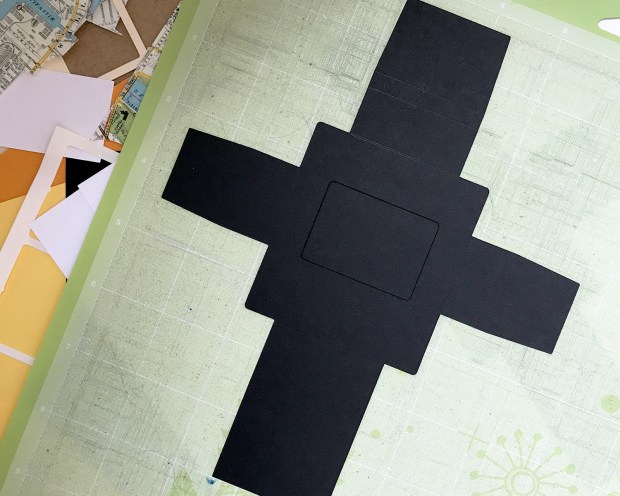
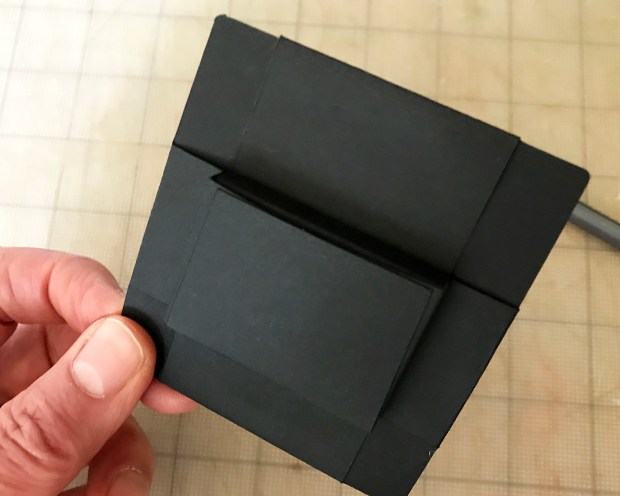
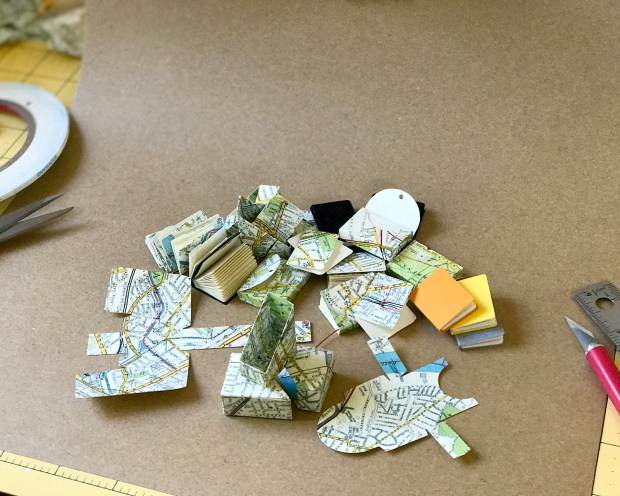
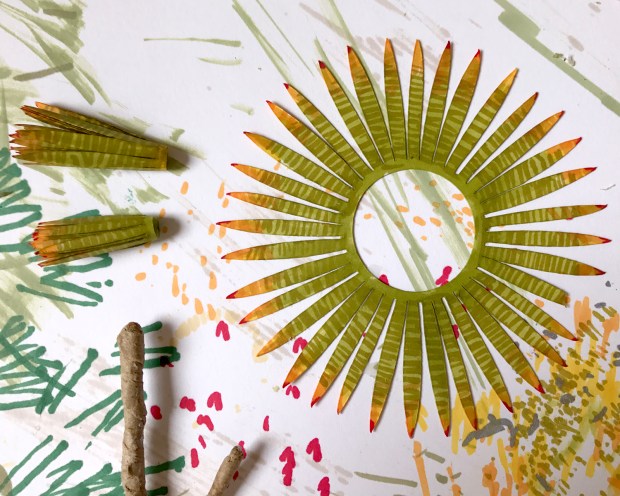
I’ve been thinking about yuccas for a while. They’re such an iconic houseplant, and here in California, many varieties grow in the landscape. Above is the design process: free form shapes cut in paper, then drawn in Illustrator and cut from cardstock with a Cricut Explore Air 2. I’ve got pretty good working models, which will be refined as I build and rebuild. Still a long way to go with colors and details.

yucca_protos

This is an armature from a succulent I had at the ready, and I learned a lot from messing with it as a yucca plant. There are characteristics of the tree-form varieties that will translate well in torn paper-wrapped wire. And Braxton Payne’s exquisite pottery makes for perfect containers.

braxtonpayne_fireplace

(Speaking of Braxton Payne, I just saw he’s making a Southwestern-style beehive fireplace… which I think must replace the Scandinavian-style one currently in use on the MMS+S set.)

yucca_proto_02

Yucca Proto_01 on a Peter Tucker bench. Much as I love terracotta, I think I’ll glaze this pot matte black to match the black sand. And then switch to lighter color sand for future specimens. Imagine this plant much taller and more gracefully limbed. Getting back to work now.


Sealed With A Fish

swaf_01_5x4

I’ve been enjoying making fish sketchbooks, and have finally come up with packaging I like. They’re individually packaged in a cotton fiber vellum folio, and sealed with a fish.

:)

SWAF_contents_5x4

There will also be a kit of three blank fish sketchbooks, with some bonus printed fishes for you to play around with.

swaf_kit_contents_5x4

I have a little more photography to do, then look for them tomorrow in the shop!


Fish, Scarlett, Ruby

1_fish_sketchbook

I have made a new variation of the sketchbook.

3covers_enpaper

Three different covers. Endpapers are cut from one of Recollections “Black Jack” papers. Book pages cut from a nice substantial Southworth paper I’ve had for maybe… *thinks back to the last time we may have actually printed out a résumé* … a really long time. I drew the fish a few years ago when I was dabbling in surface pattern design. So we meet again, eh, fish?

ephemera_pocket

Of course an ephemera pocket.

living_roof_062417

I have been gone a lot lately from my home, and Scarlett especially was not stoked. There was some regressive behavior and acting out.

living_roof2

I was reminded, though, of how much I liked the Sea House Warming Hut living roof, and how much I miss having a current build. But then I remembered the fate of the Argo Wool Works…

sigh_062417

… and sighed. Thus far, the room box that houses the set for Modern Miniature Succulents + Sundries is unravaged, cunningly set atop a bookcase, so that will have to continue to suffice for my construction longings. Scarlett is a year old now — a small cat in stature forever! — and although her depredations have diminished considerably, I am reluctant to reengage with my nemesis.

Maddie_Ruby_062417

The reason for my absence is shown above, in this picture taken by my daughter, of her daughters. Here is four-year-old Maddie reacting to the sounds of her 10-day-old sister, Ruby. We are all so in love.


Packaging Process, In Progress

concept

The new finished open sketchbooks require different packaging than the current MMS+S flat kits. I set about designing an insert for the books’ 3 x 4-inch plastic bags that will provide a protected, recessed container. After roughing out dimensions on paper, I work in Illustrator to draft a model. White cardstock cuts first, with numerous and many revisions.

cut

Once I’ve got a solid working white model, I cut models in my intended paper, a rich black cardstock.

testing

Numerous iterations transpire. Where does the cutout appear? Where will the labels go? How does it fit in the bag? Where are the dominant folds vs. the grain of the paper? How can I best optimize use of paper, given a 12 x 12-inch maximum dimension? How might I make this easier, more elegant to assemble?

variations

Some versions later, I’ve got my best solution (though what’s pictured is not it :) I streamline the pattern in Illustrator for optimal cutting on the Cricut machine, joining paths, eliminating rogue anchor points, and doubling key scorelines. This happens about 11 times.

surprise_flower.jpg

Earlier today I walked out on the back deck to take the mass quantities of paper scrap I generate to the recycling bin, and I noticed this sudden dramatic bloom on one of the new nursling succulents. Dumb angle photo, but what a pleasant surprise!

sideview

A side view of the insert. It’s effectively one layer of cardstock thick on the sidewalls, and three on the bottom, with two on the immediate front face. Sturdy enough to withstand shipping? Do I need to add another layer to the sidewalls? Test mailings will tell.

backview

The backside. Utilitarian!

Sidenote: I work in inches for packaging, and in points and picas for most other applications, such as labels. Graphic designers are bilingual that way.

header00.jpg

Insert sorted for now, my attention turns to labeling. The current 3 x 3-inch labels will not work for this package. I consider two 1-inch labels — enough to order some — when a header card occurs to me. First ideas include, for some reason, a cutout circle to hang on a rack.

v1

But then I wonder why? I’m not a hanging rack sort of shop. The circle is unnecessary.

v2front

I rework the design a bit more. A staple will anchor lower center, through the bag and insert, to secure the header card and further reinforce the package.

v2back

Because this packaging is for a one-of-a-kind, original artwork, a signed certificate of authenticity is included :D

deskmess

And the deskmess to back it up (not included).

Alrighty

1done1_4x5

The first three Vintage Maps organizer kits are up over at MMS+S. There’s combinations of vertical file holders, file folders, and folios, and they all come with cream-colored rounded-corner stationery sized to fit.

VM03_mess_blog

Still to come are Vintage Maps sketchbooks, and combo kits with folios. Of the ten Cavallini & Co. maps I bought from Two Hands Paperie, these five had the scale and style I was looking for: Berlin, London, Rome, Seattle, San Francisco.

berlin

london

rome

I’m still a little iffy on Seattle. A bit too much water and legends.

seattle

SF

Also in MMS+S is an Office Essentials kit of three vertical file holders, 12 matching file folders and 12 sheets of cream-colored, round-cornered stationery. (Additional file folder sets are available separately.) The kit is available in the Warm colorway (orange, yellow and gray) and Grayscale (white, gray and black), as well as all black or all white. The white is perfect if you want to color your own surface patterns with markers or watercolor.

all3_blog.jpg

Granddaughter Madeline is about to have a new baby sister, hence my general distraction/absence from writing and commenting on all your wonderful projects. I miss you.

Remember this succulent flower stalk I posted a while back?

echeveria

This is what it looks like now, fully bloomed.

tiny_succulent_flowers2

(The background looks a little different because I cleared out a bunch of growth that had developed unsightly speckling. Sub-optimal location.)

View from the top:

tiny_succulent_flowers3

There’s a lot of stuff going on! It’s holding its own, with very little insect depredation, stable and very long-blooming. May we all be so blessed.

DeskMess

deskmess0

I have long been a fan of Cavallini & Co. paper products, especially their vintage maps and posters.

I used their map of San Francisco on the underside of the Sea House Pavilion roof.

inside_roof

sleep

And their vintage map of Italy on the back wall of Loft 1961, my first ever miniature build.

Cavallini & Co. print on beautiful cream-colored Italian paper of a substantial, but not too heavy, weight. I finally found a retail source, Two Hands Paperie, that carries *all* of their posters — at the best pricing! — and invested in a supply of lovely vintage city and country maps.

deskmess1

Because we all need vertical file holders to tidy our bookshelves, and journals, folios and file folders made from perfectly-scaled vintage maps of favorite places: London, Berlin, San Francisco, Seattle, Boston, Rome, Paris.

1done1_4x5

Vertical file with file folders. (London pictured.)

all3done3-4x5

The vertical files hold three sketchbooks or travel journals, as well as file folders and the new Vintage Map Journals with jaunty red bookmarks. The files are the same size as the solid-color Office Essentials vertical files, although of a different construction. The vertical files can also house the new Vintage Map Folios that hold fine cream-colored stationery or map file folders. The folios can also act as a slip case for a sketchbook or journal. It’s an elegant system designed to organize the shambles of your miniature office. Look for them real soon over at MMS+S.


04 May 2017

physicalfitness_050417

Stormy is mortified that Zilly has taken up physical fitness, and insists on sharing his progress.

Also, many thanks to our readers who noticed the newsletter has not appeared :) It is late this month, sorry.

Sensational Travel Journals

Oscar Wilde wrote, “I never travel without my diary. One should always have something sensational to read on the train.”

stormy_traveljournal_full

In that spirit, the OE Travel Journals kits are available over at MMS+S. There are two kit options listed, and one secret option at hand. The two listed options are for three blank journals, or one road atlas and two blank journals. I’ve made a video of the secret option:

YES. It is a secret gatefold pages option for both the sketchbooks and the travel journals. They work well with the single pages and maps, and are fun besides. Just add a note when ordering and I’ll include as many as you like with your kit/s, until I’m able to list them properly. Though they won’t be secret anymore, they’ll still be fun.

Production notes: If you like quiet page-turning fx, turn your sound on. The alarming bandage: I bashed my poor knuckle on a boulder rock emptying a cement bird bath. I tried to keep it out of the frame, but it’s like it has a mind of its own.