Interior Floor, Brickwork, Lighting!

interior_floor_012216

I’m using Kiwi Scuff Cover in white to stain the interior wood floors. This is one coat. I wish this kind of applicator was available for all stains! The planks are my beloved Rustic Clapboard Siding Strips from HBS/miniatures.com.

Here it is trimmed.

interior_floor_trim_012216

And again the next morning, with a third application of Scuff Cover, before final weighting to dry flat.

interior_floor_3_012316

I love the light this morning, with a break in the clouds between storms. (Pacifica just declared an official state of emergency from all the big wave damage to our sea walls and cliffs :(

gesso_012316

I’m using my gruzzy pot of gesso as mortar and plaster for the brick walls. This is the first coat. I expect I’ll finish with very light sanding and a wash of mildly warmer white.

And, yay for me!

lighting_plan_012316My first ever lighting wiring plan. Big learns ahead.

Inner Walls

brickwork_012216

The interior walls of the 2016 build are exposed brickwork, which will be whitewashed, with star-shaped tie irons from Old Mountain Miniatures. The bricks are all salvage from the 1906 San Francisco earthquake. More than this is not known.

2016 Build: Messing Around

www.nancyland.com

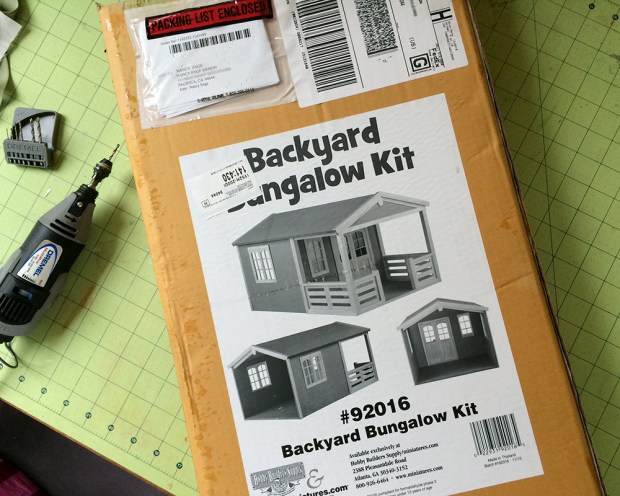
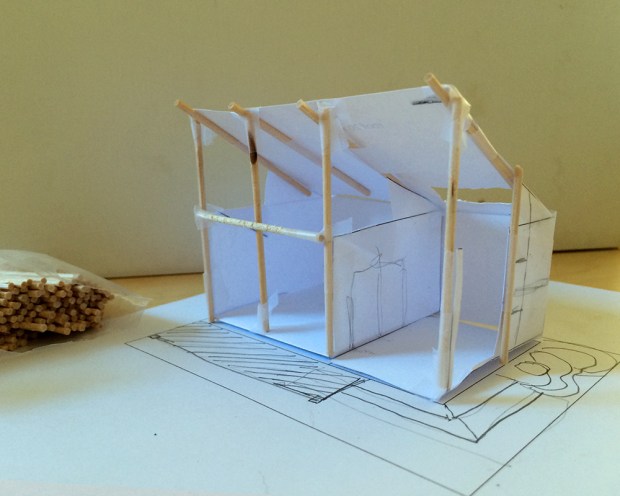
Enjoying sketching and roughing out little idea models for the lamentable 2016 HBS contest base kit. The concept above is very similar to 2012’s MiniTown Loft, my first-ever build, which became Loft No. 1961. For visualizing ideas I work in points and picas (six picas = one inch), because I am a graphic designer and picas are our native measurement system. And, one pica = one foot translates very handily for working in 1:12.

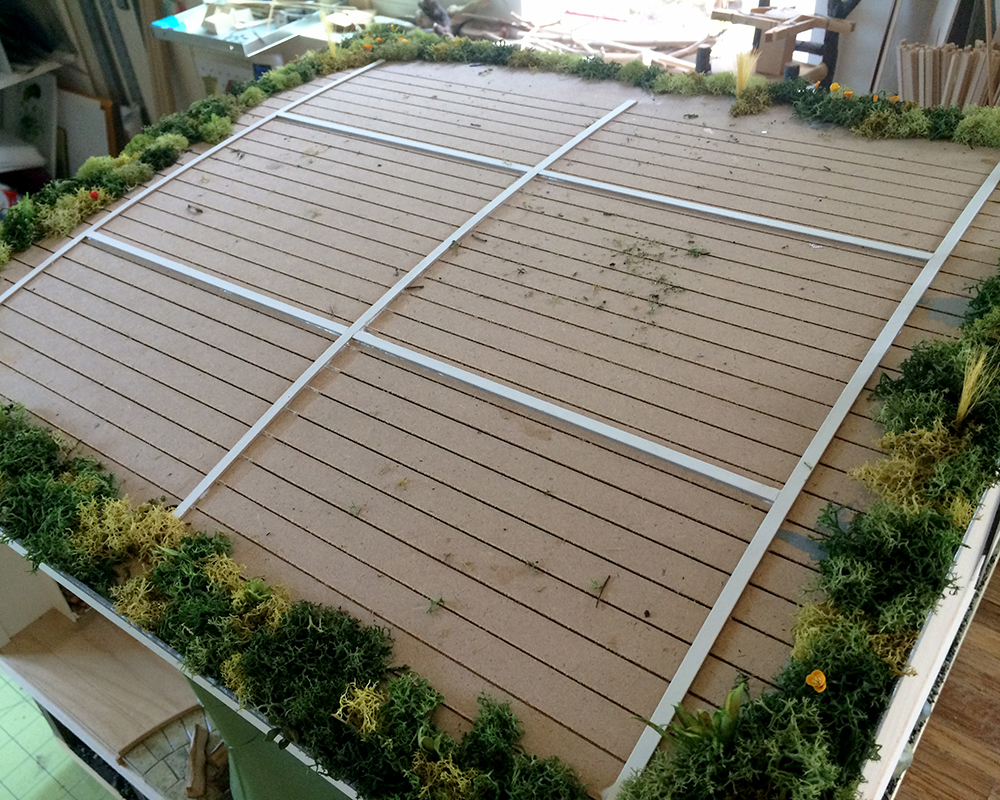
After building — and subsequently giving away, but not before I crated it and moved it across the US — one monster A-frame, I now confine my projects to 20 x 26-inch (51 x 66 cm) hollow core birch-ply drawing boards, with a turntable attached to the underside. They’re sturdy, lightweight, have a nice finished edge, and are reasonably priced. The size restriction helps me plan the site landscaping, which I enjoy as much as building the structure and furniture.

Another thing I’ve realized is that I like to keep a representative amount of recognizable original elements from the base kit. Not sure why. The contest rules are deliciously wide open, so maybe that allows me the freedom to embrace some pre-defined design limitations, and parameters of practicality. Plus, it’s just so amazing to see what everyone comes up with :)

As a wonderful kickoff for this project, a dear family member, who is a custom cabinetmaker, asked me if I wanted any of this stuff that his shop was tossing out:

www.nancyland.com

These four-foot lengths of oak (cut to 1/4 x 3/8- and 9/16-inch, quite near standard dimensional scale lumber sizes :)

www.nancyland.com

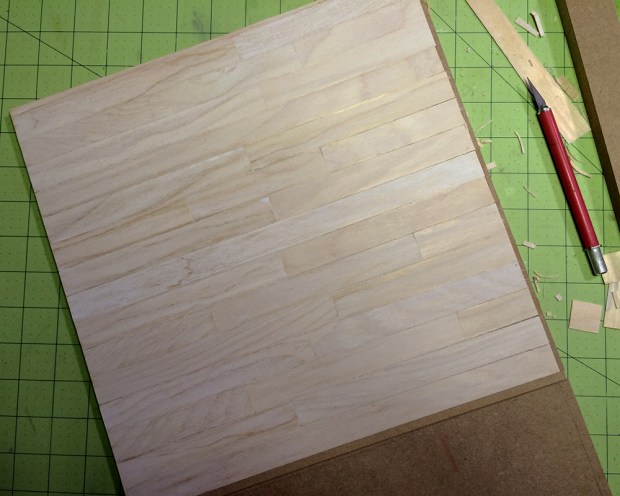
and all these veneer scraps, if you can call three- and four-foot lengths scrap. Only one is labeled (upper left, teak) but they look to be perhaps alder, koa, purple heart?, mahogany?, red oak, birch, spruce… I have a labeled sample kit somewhere, I’ll have to cross-reference to identify. Then he casually mentioned he’d be glad to look out for and save me miniature-suitable wood scraps! I see a yummy wood giveaway in the future to share this bounty. Many, many thanks, T. Happy boxing day.


What We’ll Be Seeing in 2016

www.nancyland.com

www.nancyland.com

Well. HBS/miniatures.com has announced the base kit for the 2016 Creatin’ Contest build: the Backyard Bungalow.

I’m not swooning.

The description reads “Small in size but big in style, this little building can be used for about anything you can imagine!”

And that’s good to remember. Dimensions are 12.5 inches wide x 11 inches high x 20 inches deep, with 8 of those inches being the front porch. Not shipping yet, but we can pre-order.

Ready, set, go, miniaturist citizens! We have big magics to do!


Sea House Warming Hut: Overwrought Iron

www.nancyland.com

I decided to use the remaining section of the JMG Miniatures laser-cut panel to make the ruined remnants of a wrought iron railing, as a part of the original brick foundation. I wanted it to be twisted wreckage with a story to tell, but not faux-Gothic macabre.

www.nancyland.com

Several coats of flat black spray paint, glue globbing, lamp black acrylic, “rust + dust” shaved pastels and tiny dots of opportunistic sage lichens. It’s really fun to crap paint intentionally, for once :)

www.nancyland.com

After smooshing them around in a few places, I opted for the back, with the view into the open hut above. I set them in far enough to be visible, but not a statement beyond “What was deluxe becomes debris.”*

And with that, I think I’ll turn my attention to the interior of the hut for a while (except for the ongoing living roof planting and interminable foundation gravel gluing). I’ve been considering the chairs for ‘round the fireplace, as well as other seating and maps and books and beverages.

*A special prize! for all who *know* the provenance of that… lyric. And care to share it. Googling is informative, but totally cheating in this case. Unless it’s to marvel at the poignant brilliance of this perfect song :)

Sea House Warming Hut: Wroughting Irons

www.nancyland.com

It’s a foggy morning here in Nancyland, and the crew is finishing up installing a vintage wrought iron railing and foundation grate, welcome salvage from the Sea House Pleasure Pier.

I have been looking for a well-designed wave pattern to meld into Warming Hut history and decor, and found it in these laser-cut panels from JMG Laser Engraving. (HBS/miniatures.com carries some of their products.)

www.nancyland.com

For the railing, I cut the section I wanted free, and glued it between two lengths of basswood. After spraying with several coats of flat black paint, I mounted it to the open edge of the deck with glue and brackets made from solid-core black paper. These were bolted with 1/8-inch and 1/16-inch bolts for extra security.

Actually, they’re totally just for appearance.

www.nancyland.com

As it happens, I installed the lower grate first, gently curved and held in place with glue and bolts. I then re-grew the poppies peeking through the bars.

After staring at it for a while, I realized it is far too smooth to be convincing salvaged wrought iron, especially in a marine environment. The railing assembly was still in process, so I mucked it up with tiny dabs of glue and smudges to simulate rust and age. Then I painted it with three different types of black paint. You can kind of see the effect in the first photo of the railing. It’s nice and grody, but well-maintained and hopefully structurally sound. I’ll apply this wroughting process to the grate next :)

After I get my lap back.

www.nancyland.com

Is Napoleon the inspiration for my color palette?

Sea House Warming Hut: Living Roof Drainage

www.nancyland.com

I wanted the rock ley line drainage system to look substantial, but not dominate the living roof. I determined that height was the key, especially so that the plantings did not swallow it.

I measured out a simple grid on the roof, and cut 3/16-inch (5mm) strips of mat board. After gluing these to the roof, I colored them in with a black “Industrial Super Permanent” Sharpie (fine point). Because I am serious.

www.nancyland.com

Then I cut 3/16-inch (5mm)-wide strips of my favorite solid black paper, Canford Raven, made by Daler-Rowney. I put these on the parchment-covered half-sheet tray I use for messy (and/or abstract art).

www.nancyland.com

Ran a stout bead of quick-grab tacky glue.

www.nancyland.com

Then sprinkled them with beach gravel.

www.nancyland.com

After the strips had dried, I excavated them from the gravel.

www.nancyland.com

You might be thinking this is a lot of pictures of tiny rocks, and you’re probably right. It’s because I love them. No, really. I take high-resolution photos, and like to zoom in and look at the individual tiny rocks. Because each one is beautiful.

I glued the rocky strips to the grid frame.

www.nancyland.com

And I’m satisfied with the relative proportions of drainage to (eventual) plantings. I can always trim the mosses as they get closer to the grid if they insist on being too lively.

As for below, I’m almost done with the bracketry. I’ve made like half a million of them.

Also making progress on gluing the gravel ground in, weathering the old brick foundations, and planting California poppies where the wind might have blown them.

www.nancyland.com

I See Rocks

www.nancyland.com

The first batch of the Sea House Warming Hut air-dry clay boulders are nice and dry. Mid-week, I saw that a crack had developed in the largest one, and got the idea to fill it with a quartz vein. I have this lovely pearl white acrylic, and if I mix it with some wood glue and load it in a syringe, I think it will behave convincingly. I’ll wait until I model, paint and salt all the boulders, though.

www.nancyland.com

I know I’m not the only one to buy something because of the packaging. In this case, I had wanted to make domed skylights, and this container — of organic gala apples, no less — at the local big box store was ideal. Although the original project was sidelined, the cut-apart plastic is now making excellent bases for individual rocks. My landscape modeling compound of choice is Crayola Model Magic, and making the boulders hollow  saves a lot of cost.

The apples were very good, too.

www.nancyland.com

Here is an action shot of a boulder in the making, and my dual purpose small metal ruler.

www.nancyland.com

This is 8 ounces (226 g) worth of boulders and rocks — enough to populate the left side of the build. (You can also see my second-favorite multipurpose modeling tool: a silicone wine stopper.) I’ll let these guys dry for a day, then paint a first coat with the same taupe wash. I want to do the additional glazing and salt crystal sprinkling to all of the rock foundation at the same time. If all goes well this week, I’ll see time to continue my elemental play.

In other news, Christina, the winner of the Denise’s City Cottage kit provided by HBS/miniatures.com giveaway, contacted me and it’s on the way to her. Hopefully she’ll post about her build, too. I’m really enjoying seeing so many approaches, and as always, learning tonnes.

PS: I was FaceTiming with my two-year-old granddaughter, showing her the rocks I made from clay and the rest of the build-in-progress. She was listening and studying the screen very intently, then announced, “I want to go there.” Best appreciation ever.

Warming Hut Rockscaping

www.nancyland.com

I’m using air dry clay to sculpt the boulders that populate the Warming Hut foundation. For the largest one I used a small tin and a plastic cup as a base, then coiled unevenly-rolled lengths of clay around it.

www.nancyland.com

I made certain decisions about the type of rock I wanted to see, then used my hands, a small metal ruler and a ball point stylus to make like the earth, wind, water and all the other magics of geology.

www.nancyland.com

This is my model rock for style and color.

www.nancyland.com

Even though the clay’s just one day dry, I’ve put the first coat of acrylic glaze on. There are a lot of rocks to build and paint. Most of them will fit under the foundation, as if the posts have been drilled and set into them, so the painting part will be a wee bit tricksy. (That was part of my conundrum of when best to glue or not to glue the hut in place.)

www.nancyland.com

The gaps between the boulders will be filled with beach gravel and tiny pebbles (from my prized collection), with some driftwood logs wedged in here and there, and small bits of greenery.