Foundation, Sideways

foundation_022016

I’m about to go sideways on another project, so I want to catch up on what progress there’s been on the as-yet-nameless 2016 build. I’ve opted not to enter the HBS contest this year, and so will continue to post freely on this structure. This is a side foundation in progress, integrating the 1906 San Francisco earthquake salvage, which includes rubble as well as dressed stones, aka egg cartons.

foundation_022016-2

Painted in a first coat of “Mudstone” with room for the support post.

bushel_basket_022016.jpg

I made one of Kris Compas’s bushel baskets from this month’s tutorial. Adorable.

2016-02-20 17.24.50.jpg

Here’s the backside of the build. I decided to add a deck off the porch to increase the living area. The main structure is not yet glued to the foundation, so I’m keeping add-ons modular. There will be more foundation elements to the deck, but I’m done with math and power tools for the evening.

Heading into a major multi-birthday month, which I believe in celebrating *fully*. It will include multiple three-year-olds. multiple 60-year olds — and others— as well as baby goats, cheese and fine, fine wine.


Foundation, Ground

ground01_121616

I traced the foundation perimeter outline onto the project board. Because there’s just four inches (10 cm) of clearance, and I learned valuable lessons trying to build out the underneath of the Sea House Warming Hut — only three inches — after it was fixed to its project board, I’m roughing in the base earth now. Using a mixture of glue (actually, old mosaic tile adhesive that I have an excess of — there’s that serial artist thing again) and thin paper toweling, I built up an uneven substrate in the farthest reaches of the foundation. The ground is a mix of fine sand, Irish Breakfast (leafy) and Earl Grey (fine texture) teas. (Which I also have an excess of, because I like tea. I might even collect tea, and these were really old.)

ground02_021616

The paper-glue modeling gives enough unevenness to suggest a convincing ground. I’ll be adding in some plant life where the sun might reach. Beyond that, I don’t know.


Foundation Rock Painting

espresso_wash_021416

Here’s the upside-down foundation with an “Espresso” wash, after drying overnight.

Delta Ceramcoat was on sale for US$0.97 (!) so I stocked up on these gorgeous earth colors:

paint_swatches_021416

If I wore lipstick I would totally want some in “Georgia Clay”.

dabbing_off_021416

I followed up with washes of “Roman Stucco”, “Trail Tan” and “Light Ivory”. Some stones were painted with a heavier wash of the light ivory, then dabbed off.

light_stones_021416

This is what the underside of the floor would like like if you crawled under the foundation and looked up. It will never be seen in the build, but I like knowing it’s there.

ceiling01_021416

I was going to glue in joists and floorboards, but I’m just not feeling that crazy. Look at how different the stone color looks because of the light:

ceiling02_021416

The exterior foundation walls are going to be built from salvaged dressed stone, with the occasional rubble and timber posts. I’ll be using egg carton:

dressed_stones_021416

And must now remember to buy the same kind (Judy’s Organic) to keep textures similar.

exterior_021416

Here’s the start. It will be built at the rate at which I acquire cartons, which is equivalent to driving a rubble-loaded wagon back from San Francisco, so it will take a while. And that’s okay. The scenery is gorgeous :)

Lastly, I’ll share this PSA I made today. In the crafts store parking lot I looked down to see this perfect little horror of the most commonplace litter. Feel free to share :)

toxic_litter_pavement_021416

*steps down from soapbox*

Foundation

foundation_021216

After determining the maximum height of the stairs based on the project board dimensions, I established the height of the foundation, which turned out to be four inches. Using inch-thick styrofoam, I cut and glued it to the bottom of the second base kit.

foundation_021316

I decided on more rubble and salvage from the 1906 San Francisco earthquake, and was pleased to also repurpose some foundation stones from an abandoned early build. I used the recommended Foamtastic glue, which I’m pretty sure is just an extra-thick tacky, and as a result my thumb joint is sore from *squeezing* the bottle all day.

foundation_021316-2

Here’s the upside-down completed foundation, with a first coat of paint drying, an entire two-ounce bottle of Delta Ceramcoat “Mudstone”. (I’ve since added a wash of “Espresso” to good effect, but lost the light and will have to wait until tomorrow to show you.)


Yipes, Stripes; Keystone, Geometry

www.nancyland.com

Work continues on the Yipes, Stripes rug. A new working title has evolved: Stripes Invaded by Checks. It’s a very enjoyable and intuitive process watching it develop. Thus far we have the chaos of irregular stripes organizing themselves into more regular expression, as influenced by the surprise appearance of an upstart checkerboard pattern. I expect I’ll know how it’ll turn out at the end — when the length reaches six inches.

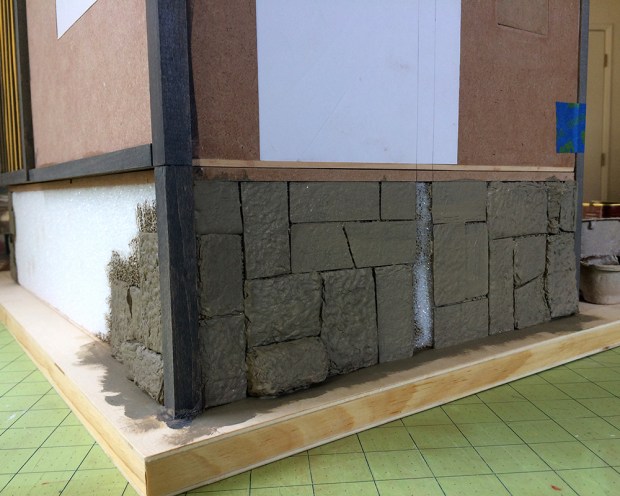
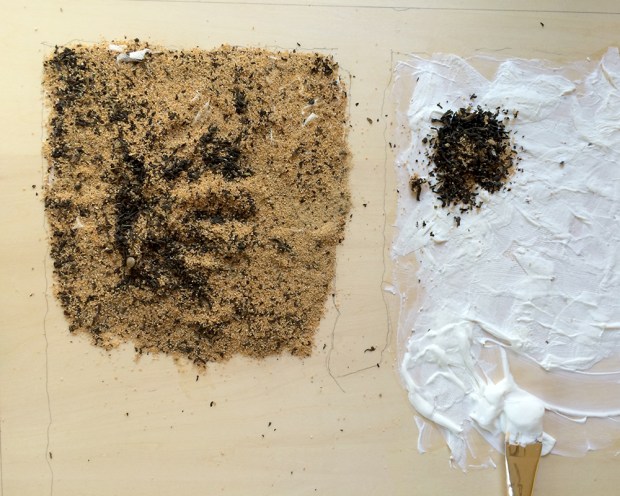
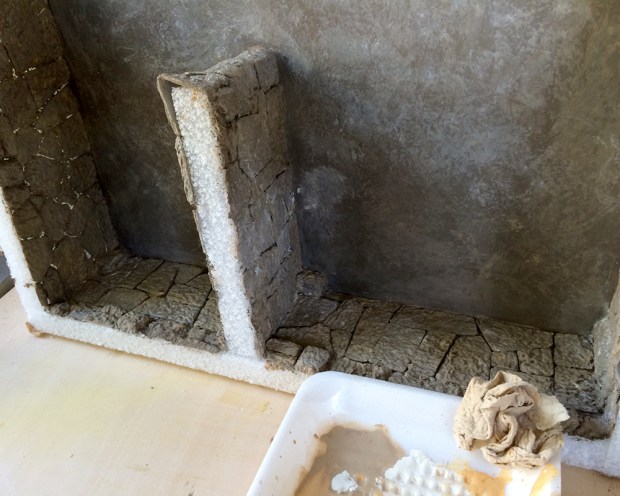
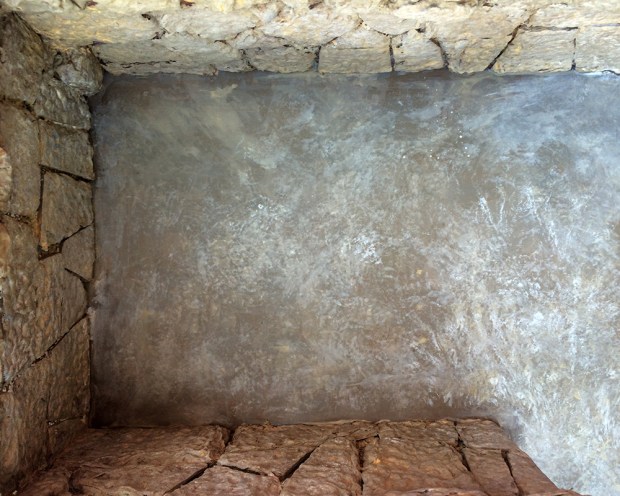
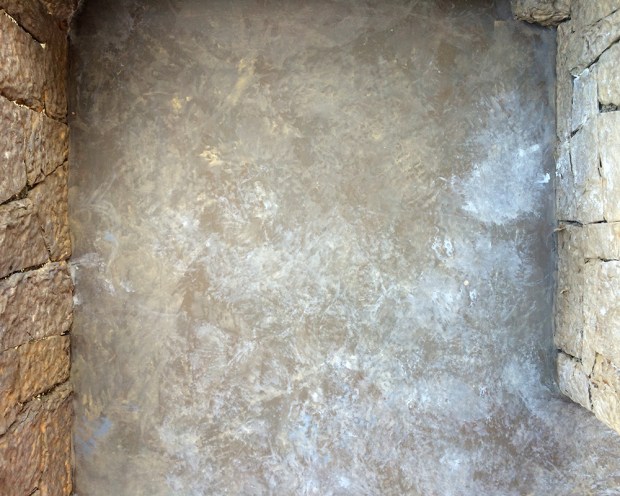
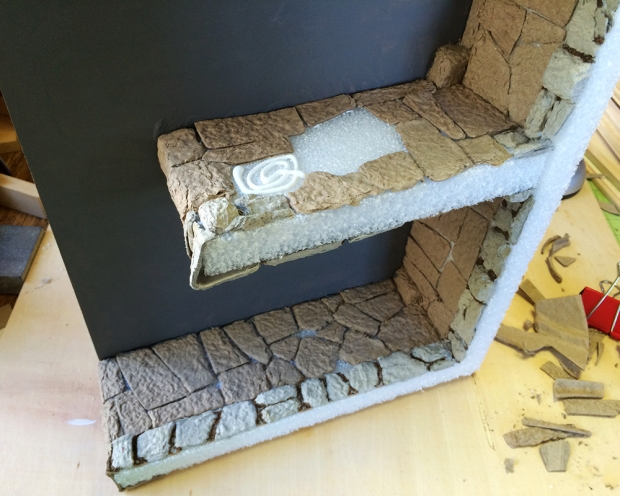
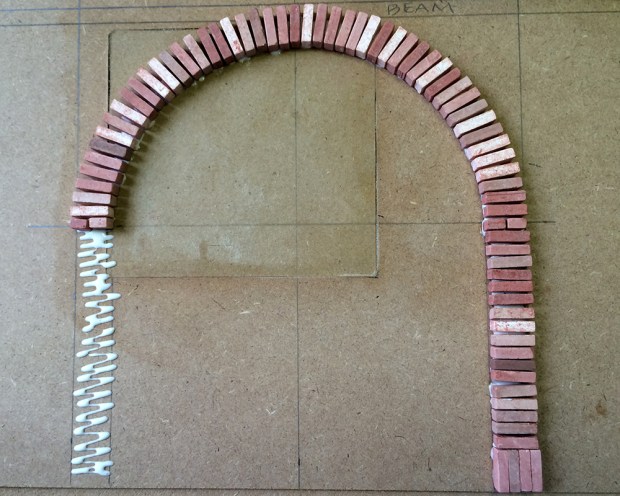
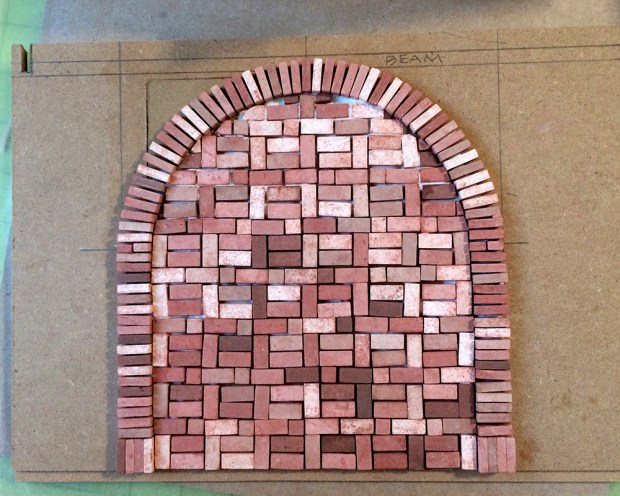
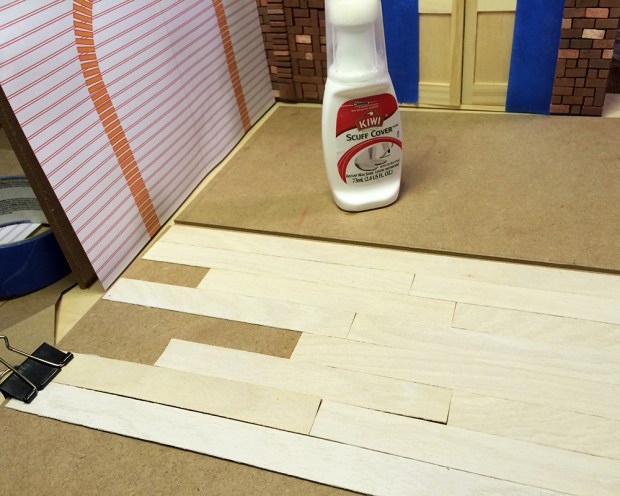
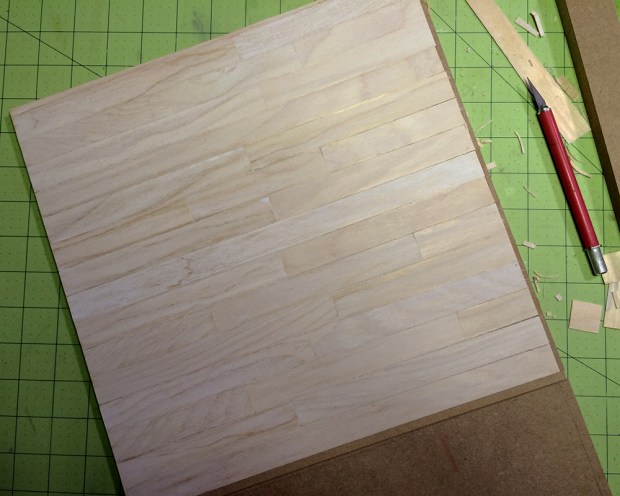
Making steady progress (and regress) on the new build. I finished the interior brickwork, and after a few color assays, decided on a soft white semigloss. There’s like four layers of gesso, some DecoArt Snow-Tex for mortar texture, floor and wall gaps filled with DAP CrackShot, and three layers of acrylic latex enamel paint. That’s authentic, right?

www.nancyland.com

I’ve one more sanding and finish coat to do on the wall cabinet.

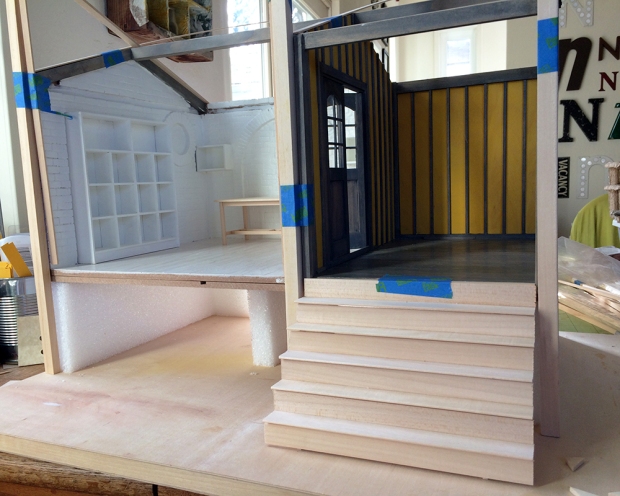
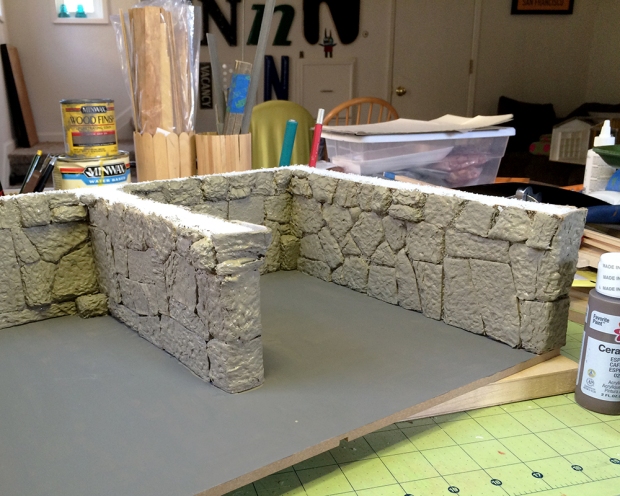
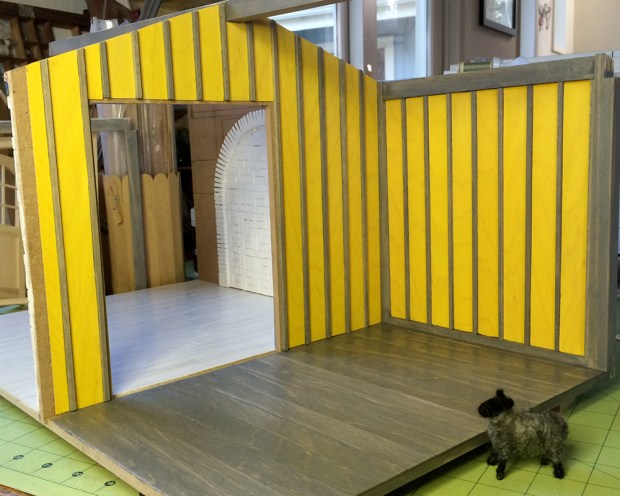
I glued in place the three interior walls, back porch wall and supports, and beams.

www.nancyland.com

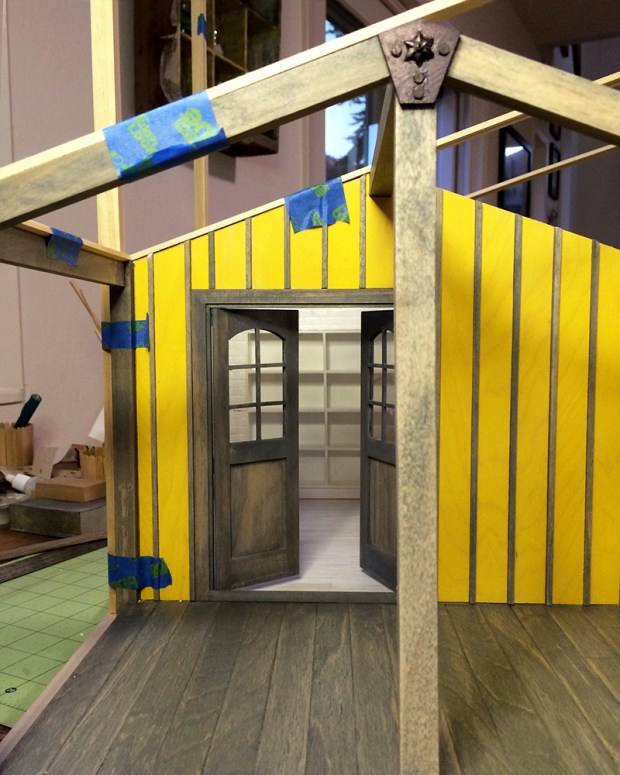
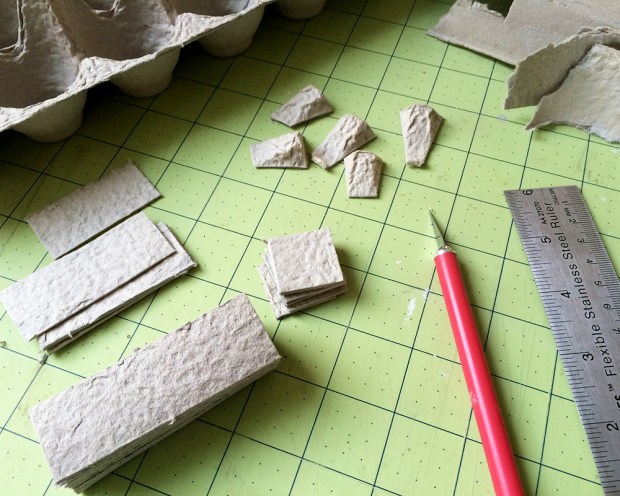
This is by far the most fiddling I’ve done with a base kit and am encountering many delicious measuring opportunities. The keystone pieces provided with the kit make excellent hide-one’s-crap-joinery structural reinforcing plates. I mentioned earlier how delighted I am with the hardware I ordered from Olde Mountain Miniatures. Here you see her star-shaped anchor plates and some punched paper bolts applied to the keystone.

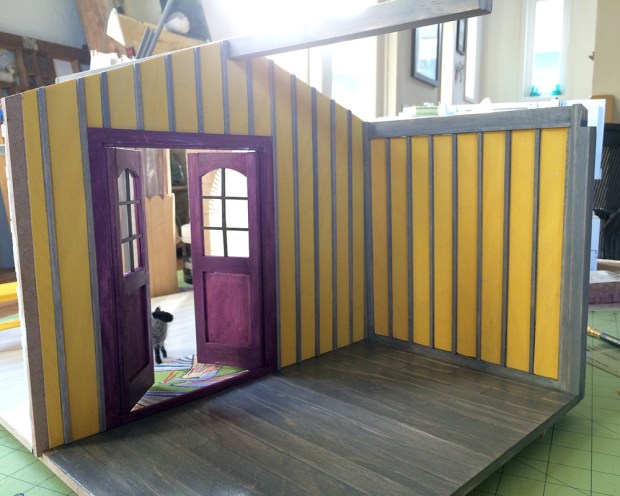
I also stepped away from the aubergine-stained doors, opting instead to carry through with the gray stain. This leaves me far more options for adding color, and as I intend to use this build as a prop for photographing products, the more neutral the better.

www.nancyland.com

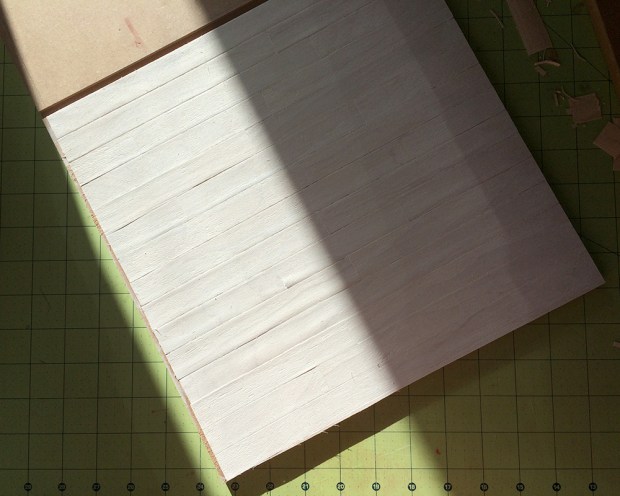
The entire rest of the day was spent figuring out how to build the additional support posts, beams and window casings. I felt like Leonardo da Vinci contemplating Vitruvian Man or something, but I finally worked out the various dimensions (if not the angles; that’s what sandpaper is for). Then it was time to watch the sun set on this warm and mild day with a glass of wine. I’ll sketch out and record my findings tomorrow — many dimensions of strip wood are involved! — and work out how to correct the warp in the kit base board :(

No wait, I mean :) That’s tomorrow.

Gratitude, Framing

Thank you all for your hearty congratulations and encouragement along the way. I really was surprised to win again, and a bit overwhelmed. When I got this comment from Bennie:

comment_020216

Something clicked with “I watched it evolve from beginning to end!” Sharing our work as we did has created a genuinely supportive community for both sharers and viewers, something I value. For me, there are elements of vulnerability and trust in posting imperfect works-in-progress, in letting you see unedited glimpses of my messy studio, my naked un-manicured fingers. One of my motivations is to spark your creativity, as a maker or a viewer. Inspiring appreciation, fostering delight, is another. So thank you for dropping by. Really truly.

The light today is crazy, brilliantly sunny then dark and gray. But I was glad to arrive at this point in the new build:

framing01_020216

I got enough pieces from a second kit to be able to get a basic (and square) frame up, and determine with only minor maths the additional posts and casings that need to be built. Starting with the porch support post (finally).

framing02_020216

Next, I’ll knock it all flat again to finish the interiors and exterior cladding, then reassemble with omg glue.

A peek at the side wall progress:

interior_020216

Now back to bricking.


Aubergine, Overlook

Using the kit’s doors, stained aubergine, with the mullions painted oxidized lead black.

www.nancyland.com

Yesterday I took a picnic lunch (not pictured) to Thornton Overlook, just north of Pacifica. So pleasant to sit outside with mild sea breezes and a majestic view. The Sea House Warming Hut is not far from here, in case a chill fog sets in :)

www.nancyland.com

Looking south, with Pedro Point rocks in the distance.

Floors, Brickwork, Walls, Circus!

www.nancyland.com

I use great books to weight the flooring as it dries flat. I like to think some of the principles and observations seep into the wood and inform the structure.

www.nancyland.com

I filled the voids in the walls with foam core (smooshes into the corners nicely), thin kraft cardboard (looks like MDF, sandable) and wood glue (dries hard). One of the side walls has a large arch that used to open into another room; it’s since been bricked over.

www.nancyland.com

The century-old oak beams are still visible on the interior walls. I whittle-aged them without stabbing myself. Oak is way denser than basswood :)

www.nancyland.com

Oopsie! I mis-measured the height of the arch :/ The century-old oak beam supporting this wall is/was/will be, um, custom fitted.

Then I spent a lot of time staining and sanding. The weather today was mild enough —and not raining! —that I could do it outside. That was nice.

The exterior walls are clad in vertical board-and-batten, stained daffodil Keli yellow and classic gray.

www.nancyland.com

Looks like the circus came to town!

“The circus arrives without warning. No announcements precede it. It is simply there, when yesterday it was not.”
—Erin Morgenstern, The Night Circus


Interior Floor, Brickwork, Lighting!

interior_floor_012216

I’m using Kiwi Scuff Cover in white to stain the interior wood floors. This is one coat. I wish this kind of applicator was available for all stains! The planks are my beloved Rustic Clapboard Siding Strips from HBS/miniatures.com.

Here it is trimmed.

interior_floor_trim_012216

And again the next morning, with a third application of Scuff Cover, before final weighting to dry flat.

interior_floor_3_012316

I love the light this morning, with a break in the clouds between storms. (Pacifica just declared an official state of emergency from all the big wave damage to our sea walls and cliffs :(

gesso_012316

I’m using my gruzzy pot of gesso as mortar and plaster for the brick walls. This is the first coat. I expect I’ll finish with very light sanding and a wash of mildly warmer white.

And, yay for me!

lighting_plan_012316My first ever lighting wiring plan. Big learns ahead.

Inner Walls

brickwork_012216

The interior walls of the 2016 build are exposed brickwork, which will be whitewashed, with star-shaped tie irons from Old Mountain Miniatures. The bricks are all salvage from the 1906 San Francisco earthquake. More than this is not known.