Nope.

s_091916-01

I am not going to meet the HBS bloggers build deadline for September 26, 2016, and I am using cute kitten photos to distract from my mingled sense of failure, regret and self loathing.

s_091916-02

I *have* met all my work and all most of my volunteer deadlines.

s_091916-03

Feel free to judge me, but look at my belly first :)

S_091916-05.jpg

Though I will continue — and finish —  the build, I’m more than a bit scattered and distracted with other projects.

S_091916-04.jpg

Sweet dreams, best beloveds.


Retro Sofa, Fairy Surprise

sofa_061916

The retro sofa made from one of Kris Compas’s excellent kits, and upholstered in silk cut from a gentleperson’s tie, is finished. The legs are painted a medium gold, a tone somewhere between the multiple shades of butter yellow and tan in the fabric.

sofa_piping_061916

For the piping I corded three strands each of a blue and gold DMC floss. I liked the variegated result more than a single color.

I love the design of the sofa, but I’m disappointed in my fabric choice. I now see that a simpler, far less patterned fabric is called for, one that does not compete with the rhythm of the sofa’s luscious curves. Oh well.

In other news, I walked out in the garden this afternoon to find that the fairies had vacated their backyard terrace location, leaving their outdoor furnishings and accessories behind.

moved_061916

A short tour found their dwelling relocated to the front southside terrace, an area I have been working on clearing of its irredeemably overgrown lavender, rosemary and other shrubberies.

moved_front_061916This is a street-facing, far more public location, and I’m frankly surprised. What will the neighborhood make of the new inhabitants?

And finally, a wee acknowledgement. Today is 19 June, or 619, which was my house number in a faraway sojourn, an amazing house in a now enchanted place. The *best* water, phenomenal night skies, and the site of epic revelries. To all of you who enjoyed Plain Meeting House Road, salut!


Retro Sofa Upholstery

sofa_batting_061116

I did as much as I could last night on the retro sofa kit from Kris Compas, before I needed to decide on the fabric. This is the base, seat and back cushions padded out with batting, and the back (being held in place with rubber bands until the glue cures). The dots mark the tufting positions (with a small correction).

bottom_cover_061116

I surprised myself somewhat by going with the gold and blue fans — originally I thought the Paisley. Thank you all for your input. It was fun and interesting to hear what you would choose. This piece is the covering for the bottom of the sofa.

back_061116

Here is the curved back. There is rather a lot of triangular notching to do.

back_on_061116

The back glued on to the seat base. Silk is slippery to cut and glue straight!

sofa_061116

The sofa so far. Next up is tufting and covering the back cushion, making the buttons (with the cute button press supplied with the kit), making the piping or braid, and painting and attaching the legs. Oh, and pillows. More tie silk fabric choices!


Retro Sofa

kit_061016

Kris Compas had two new kits up in her Etsy shop, this sofa and some equally awesome chairs. I chose the sofa kit for the Argo Wool Works showroom porch.

porch_061016

I want to use tie silk for the upholstery. But which one? Thanks to the generosity of friends, I have a curated collection of about 30 ties from which to choose. I’ve narrowed it down to these six:

escher_061016

Blue, gray and black Escher flying fish.

dots_061016

Ivory and black dots, which I used on this bench:

bench_silk_050516

fish_061016

Leaping trout on a burgundy background

paisley_061016

Blue and white Paisley on black

rounded_rectangles_061016

Multicolored truncated ovals on burgundy

pale_yellow_061016

Gold and blue fans on pale yellow

MLR_061016

I feel like my granddaughter, Maddie Lou, making decisions with the happy abundance of choices.

Which one would you pick?


Foundations, Éclairs

backwall_brick

Attempting to integrate the show-through back wall brick arch, I built a few brick foundation ruins.

backwall_brick_frosted

After sealing the bricks, I mortared them with DAP CrackShot.

front_frosted.jpg

They have been since grunged, weathered and eroded, and cast into the background.

More importantly, we celebrated my husband’s birthday with the question, What is your spirit animal éclair?

spirit_eclairs

We received so many heartfelt responses, mostly off the list of the available tiny animal figurines. Sloth, hyena, bunny… nope. Thus far, B has resonated with rhino and lion. I found the tiger encased on its side in delicious dark chocolate this morning; I’ll leave you to draw your own conclusions.


Back Brick Arch

back_brick_arch1_050616

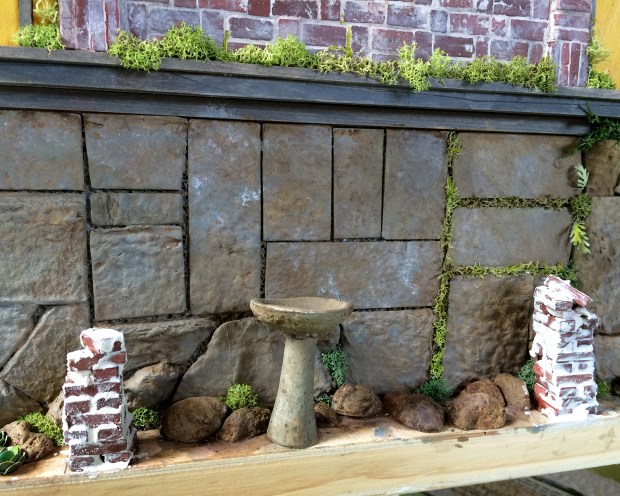
After tipping the build backside up, and using the same pattern as on the inside wall, I glued on the bricks and sealed them with Mod Podge. I favor these bricks by Andi Mini Brick & Stone because they’re a solid color throughout, well-priced, and easy to cut.

back_brick_arch2_050616

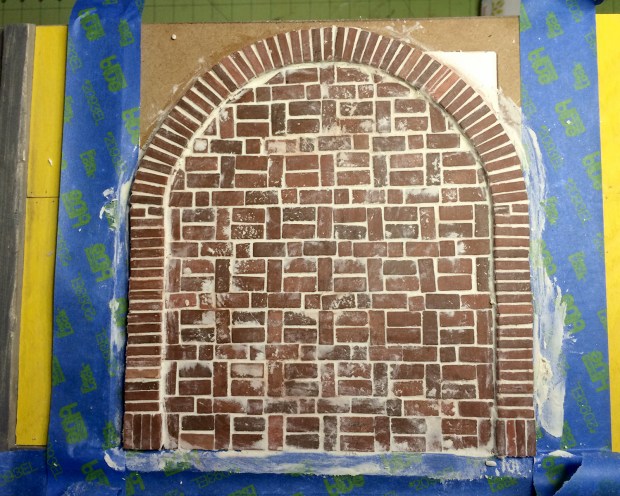
Mortared with a palette knife and gloved fingers, using DAP Crack Shot. This and the following shot were photographed at night by ambient light of my Luxo lamp, hence the color variations.

back_brick_arch3_050616

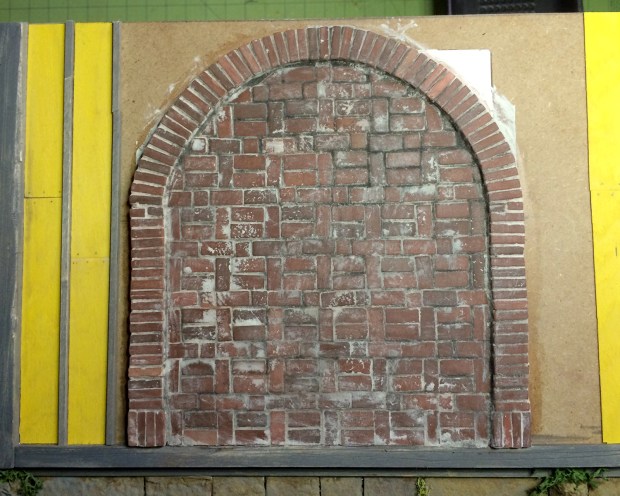
Gruzz brushed on with gray and deep green powdered pastel.

back_brick_arch4

Finishing out the rest of the farmer style board-and-batten siding. Yay for using up offcuts. Fooling around with preserved reindeer moss, mostly roots and mid-structure  (rather than the rounded top mounds) to give a slightly more lichen-y feel.

back_brick_arch5_050716

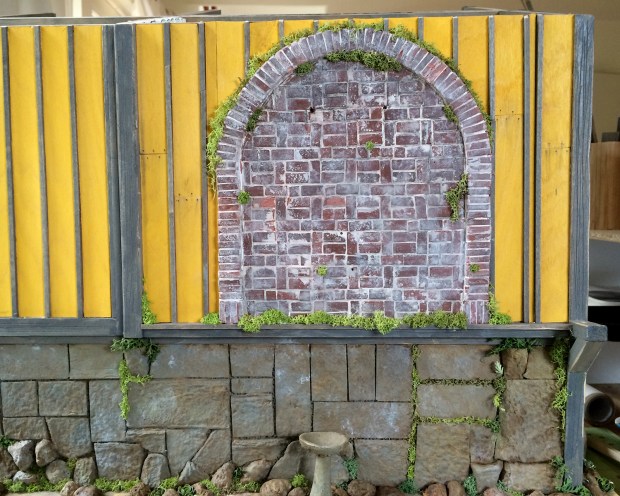
The finished-for-now back wall. I added some floor board remnants and foundation elements to the existing structure. After carving out a lot of mortar and rounding all the exposed brick corners, I sea-sponged on a thin white wash of white acrylic, then re-scrubbed individual bricks clean. The siding nailheads are made with a soft-leaded pencil tip rotated in place, then wiped downwards with a fingertip to create stain trails. Convincing!

Now I have to do a bit of research on street names and sign styles of 1906 San Francisco. I’m tempted to use my old address, but have to see if the area was even developed then. (It was in the outer Richmond, near the backside of Sutro Park.) Alternately I could cut a very fine stencil of the Argo Wool Works logo

AWW_logo

to paint on the bricked-in arch, which might look something like this:

back_brick_arch_AWW

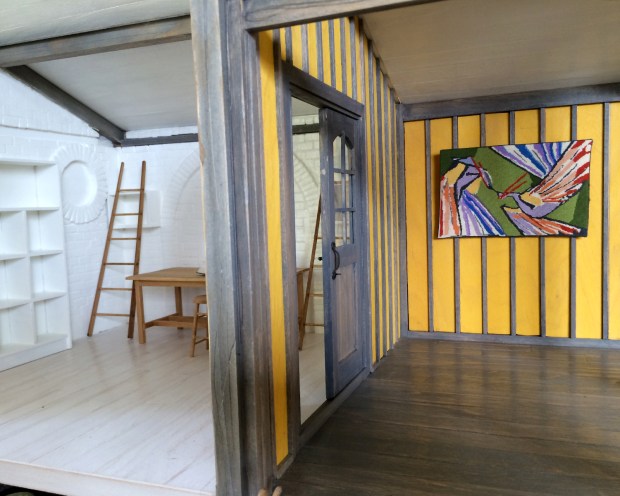
My final offering is this delightful piece filled with the pure light of truth, by one of my very favorite contemporary writers, Mallory Ortberg of the-toast.net

http://the-toast.net/2016/05/05/everything-thats-wrong-of-raccoons/

It’s satisfying to read aloud.
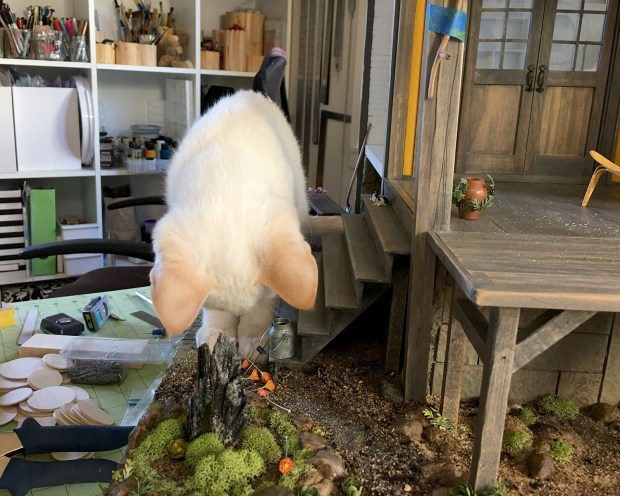
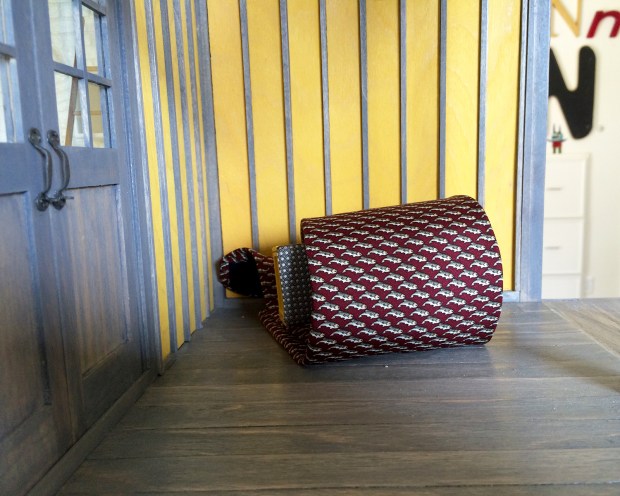
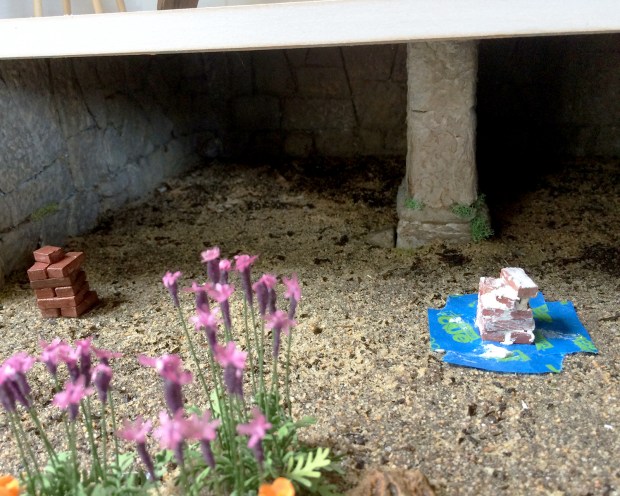


Ceiling, Standing Stone, Brick Arch, Yipes Stripes, Bench

ceiling_050316

For the Argo Wool Works showroom ceiling, I glued the two roof sections from the Backyard Bungalow base kit together, and edged with half- by quarter-inch (13 x 6 mm) basswood to extend the overhang. I measured the placement of the beams and walls in dry fit like three or four times, encountering anomalies each time.

roof_dryfit_050516.jpg

Yet another dry fit, this time with the upper window frames in place, and one section of ceiling planks. I’ve decided a 1/16-inch wiggle room is acceptable, especially since the whole ceiling and under eaves will be semigloss white, and any gaps will blend into the painted bricks… or something. I’m using the ever versatile 3/4-inch rustic clapboard siding from miniatures.com to cover the ceiling.

In the lower right of the photo you can see this standing stone feature I’m working on:

upright_rock_050516

It’s two gorgeous crystalline mineral shards that I promptly forgot the name of, found at a very eccentric bead and rock shop here in Pacifica.

back_brick_arch_050516

The back of the build was to be clad with the yellow and gray siding, but I decided today to have the bricked-in arch from the interior carry through to the outside wall for interest. I might mess with the foundation to suggest remnants of more of the building, too. There’s only just over an inch of space on the base, but I think it’ll be enough :)

yipes_stripes_050516

Small progress on the Yipes, Stripes rug, at 2.5 x +2.5 inches, it’s a bit more than half finished. It’ll fit well in the showroom. (Stitched on 48-count silk gauze with ten colors of Gütermann silk; making up the design as I stitch :)

bench_silk_050516

And here, lit by the westering sun, is my first bit of tie silk upholstery — nothing too challenging. Our dear BW sent a vintage Daisy House bench kit (so sad they’re no longer in business), and the fabric is a lustrous gray, black and ivory woven dot pattern. Thanks again, BW and Suz and Dave!

California Poppies

poppies_start_040216

Native poppy season is well underway here in Northern California. One of my art supply stockists (thank you, Britain, for that great word) was selling Letraset markers for $0.67 (!) so I laid in a fresh supply of flower colors. The 3/16-inch (4–5mm) petals — four per flower — are punched from inexpensive 20 lb. paper. Stamens are a thin strip of paper tinted deep yellow, cut into a fine fringe and rolled around the stem tips. I’m using 28-gauge paper-wrapped wire cut to approximately .75 to 1.25-inch (19–31mm) lengths.

poppies_02_040316

Here’s the first clump of poppies in with the lavender. The color with these markers when dry is a bit muted, so I’m going to mix in some Sharpie for vibrancy in subsequent propagation. I’m using small mounds of preserved moss to suggest their foliage, as I did on the Sea House Warming Hut living roof. There is continuity in Nancyland :)

poppies_040316

The yummy bench is from Peter Tucker, found at the Good Sam show a few years back.

You are welcome to come sit and watch the gardens grow :)