Lavender, Ties

lavender_031916-1
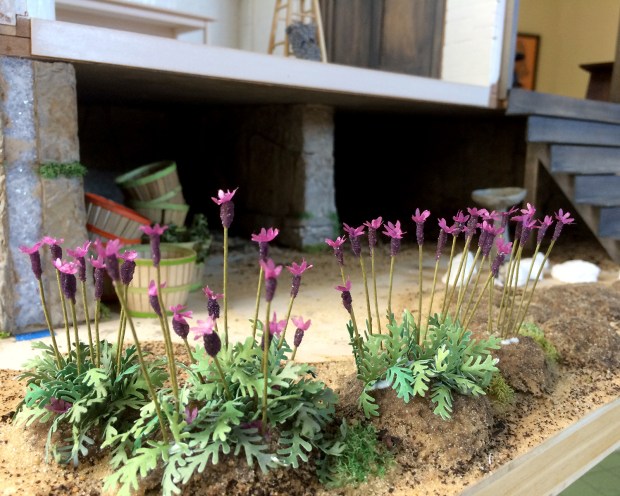
I mentioned that Argo Wool Works also grows lavender. There are a few good approaches to making miniature lavender, and after a thoughtful review, I’ve adopted a hybrid technique. This is always the question in miniatures: how best to convey a feeling, an illusion of the real thing? Absolute adherence to reality, or a simpatico synthesis of appearance? Answers often surprise me, as did this lavender.

lavender_031916-2
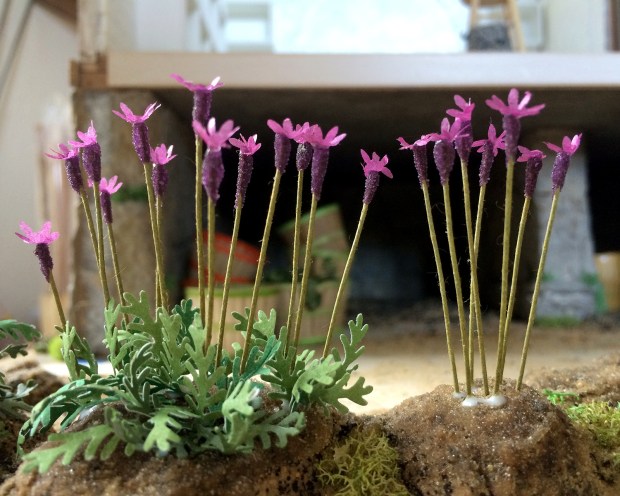
These are the start of the demonstration lavender beds outside the AWW showroom, as planted in the egg styrofoam and sand-covered mounds established earlier. I’ll post a more step-by-step later, when I’ve more available time. I think the method is worthwhile :)

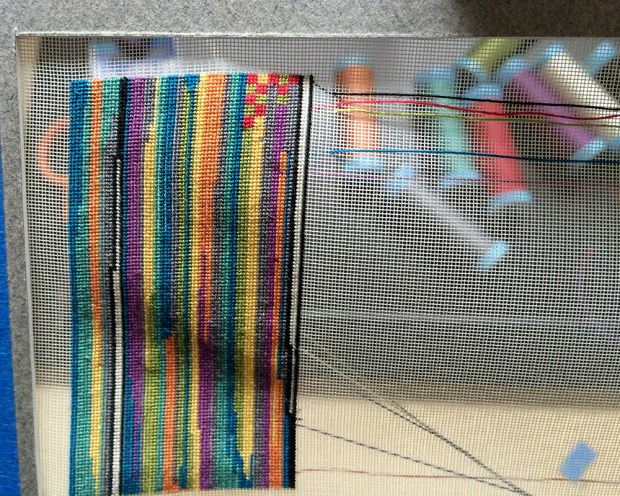
The final observances of my family’s multiple March birthdays have been celebrated. I was delighted to receive an unexpected gift from one of my oldest, dearest friends, who noted my quest for fabulous silk ties with a large bag of said items. Her husband — another oldest, dearest friend — is a professional wearer of ties.ties_031916.jpg
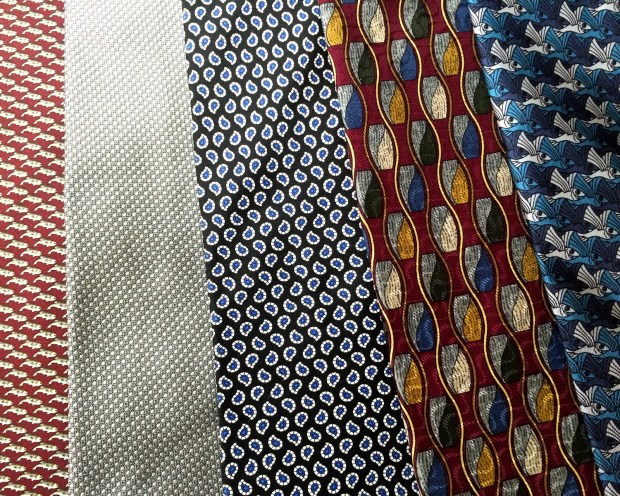
These are the top five I pulled out for the squiggly vintage Chippendale sofa, and/or throw pillows. The far left is out of focus, but is a delightful fish pattern. The next is an exquisite gray/black circular motif… on through a classic understated Paisley, a retro-looking I don’t even know what, and a brilliant Escher tribute.

Adding to the Spring bounty is another bestowal of wood veneer and samples that would have otherwise gone into landfill, from family member Tony. This is a large roll of oak veneer, and samples of bamboo, cut both horizontally and vertically.more_veneer_031916So, so beautiful, and interesting! May your cups runneth over with unexpected gifts and bounty to share.

The Thing Missing From My Life

Short answer? Paperclay. Long answer follows.

back_wall_030516

I settled in to finish the long back foundation wall, literally before the storm and power went out. Above you see the carton materials wrapped from the left side wall and primed in Ceramcoat “Mudstone”, then the beginnings of the long traverse using various parts of egg carton. Then I noticed something.

A while ago, our thoughtful reader and observer Barbara W. had sent me a mold from Woodland Scenics. Although sized as “boulders” it occurred to me that at 1:12 scale they would make excellent rubble, the kind I was using in the foundation.

paperclay_rocks_030516.jpg

I reviewed my on-hand options and chose a pouch of Creative Paperclay. I had never worked with this material before, though it was on my list. I chose some of the larger boulder forms and filled the mold. I forgot about it until I started the back wall foundation masonry. Then I noticed that the molded boulders had a similar texture to the carton materials I was using. Like, really similar.

The dried paperclay is a remarkable material. It is extremely stable and lightweight, easy to trim, and as I was soon to find out, paints very well.

back_wall_rocked_030616.jpg
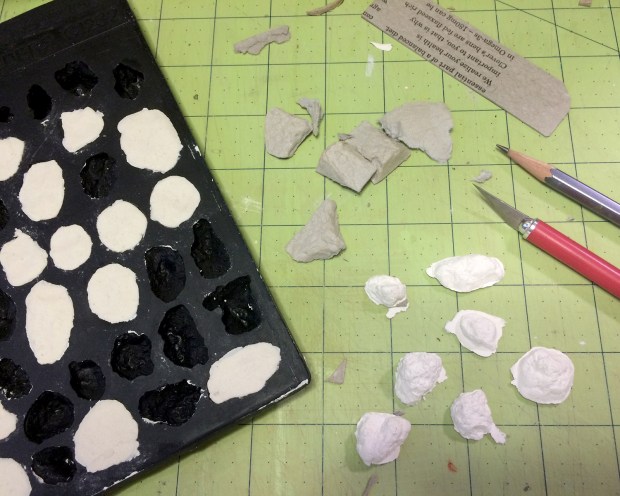
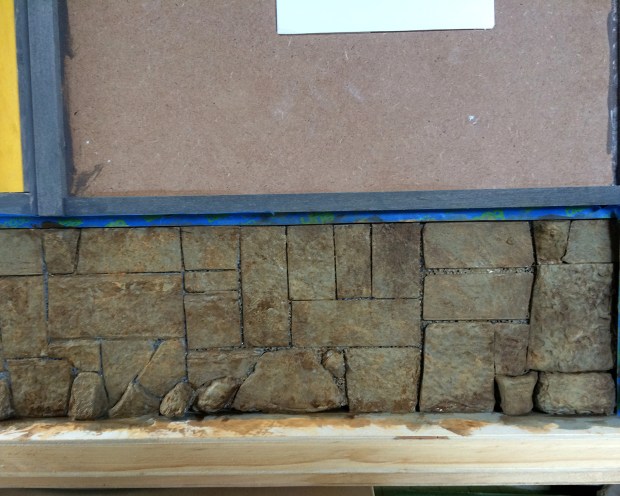
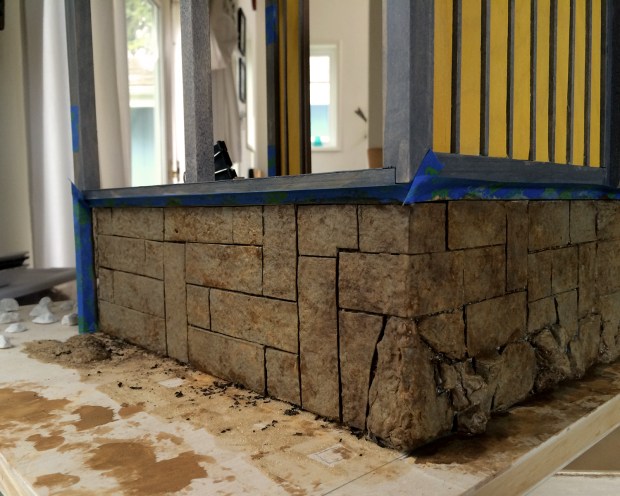
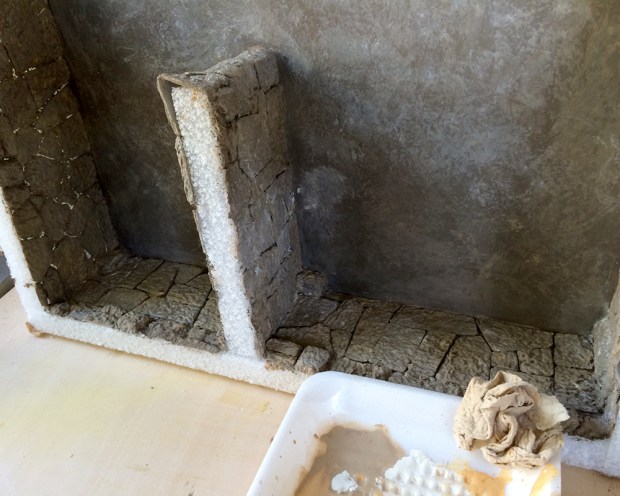
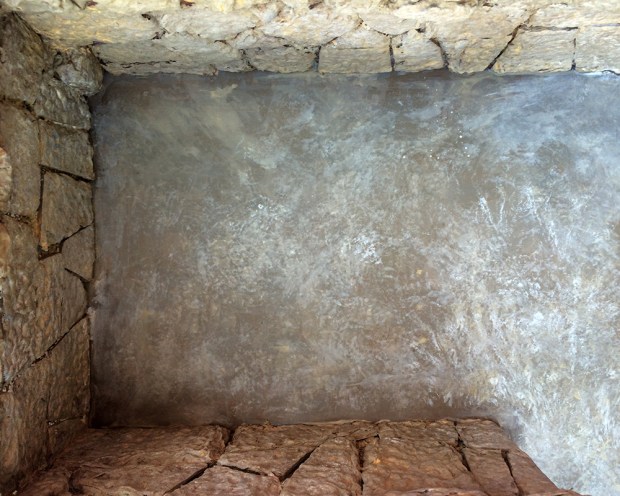
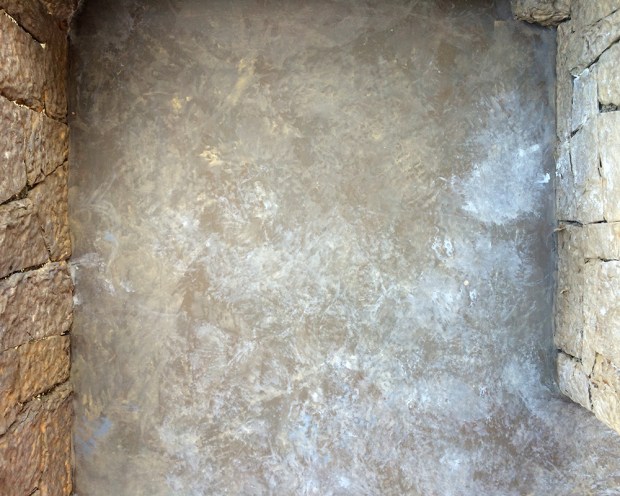
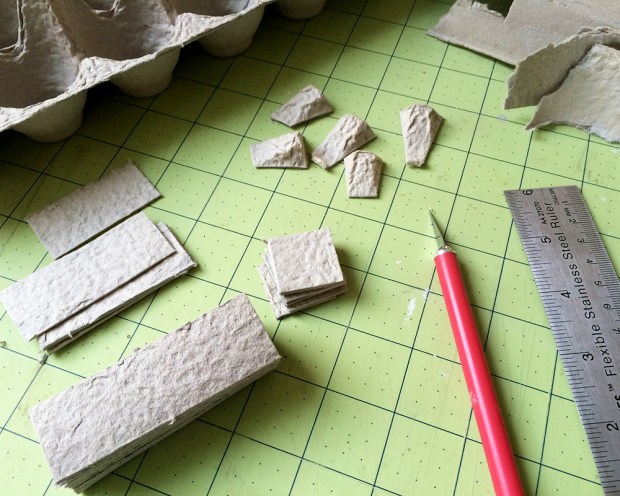
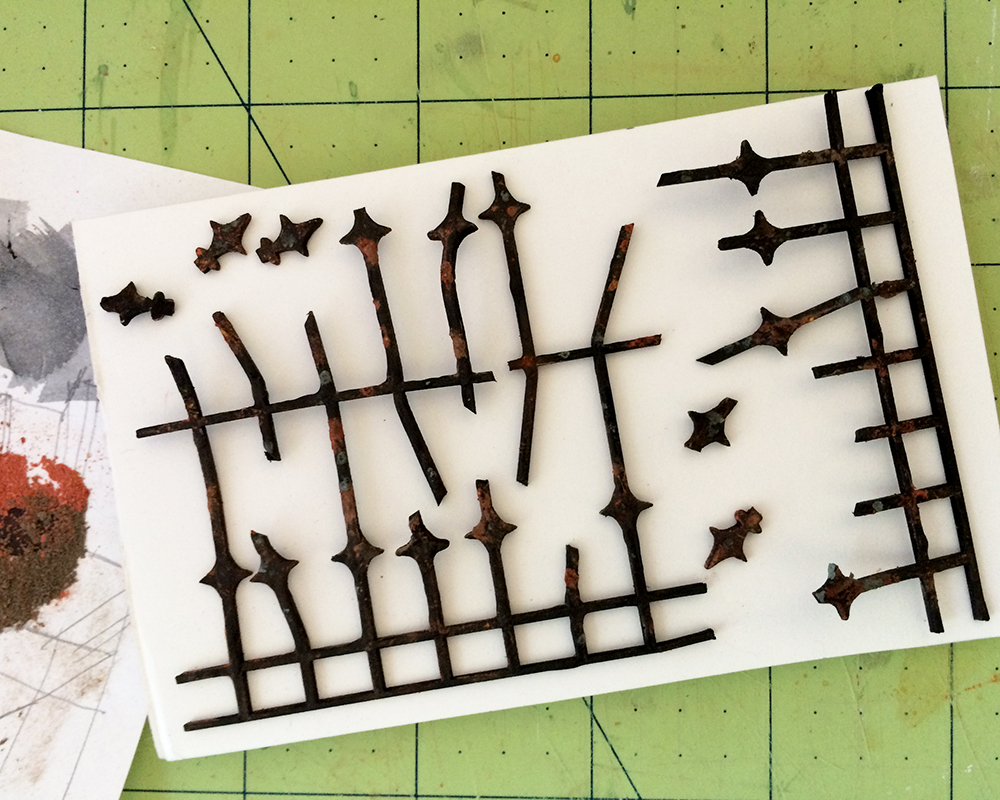
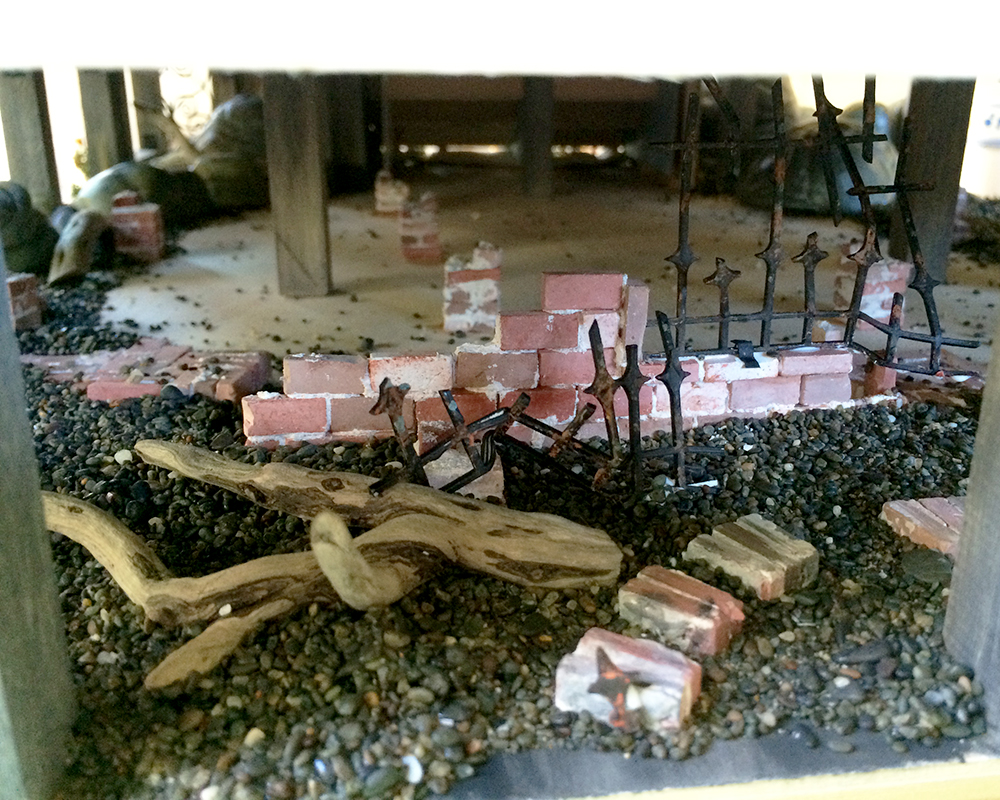
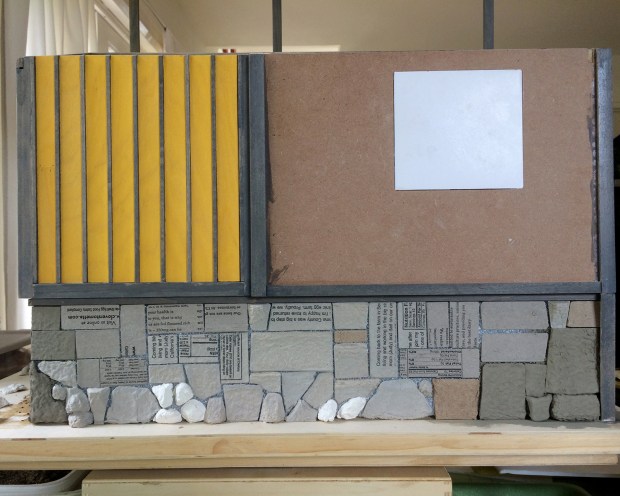
I reloaded the mold with the full set of rocks in paperclay to use around the rest of the foundation, and finished out the back wall with the few that had already dried (those in white), along with egg carton and packaging forms. It seems to take two or three days for the paperclay to dry thoroughly.

back_wall_washes_030616

I applied the same set of acrylic layers and washes as the interior foundation.

corner_030616.jpg

Here’s a dramatic corner shot.

back_wall_030616

And the entire finished back foundation wall.

back_moss_030616

Although there is additional touch up and detailing to add, this needs to dry thoroughly. I could not resist gluing in some moss, though, to make it come alive. Thanks, BW, for the gift of the mold and allowing me to discover paperclay. The fun has just commenced.

Foundation Rock Painting

espresso_wash_021416

Here’s the upside-down foundation with an “Espresso” wash, after drying overnight.

Delta Ceramcoat was on sale for US$0.97 (!) so I stocked up on these gorgeous earth colors:

paint_swatches_021416

If I wore lipstick I would totally want some in “Georgia Clay”.

dabbing_off_021416

I followed up with washes of “Roman Stucco”, “Trail Tan” and “Light Ivory”. Some stones were painted with a heavier wash of the light ivory, then dabbed off.

light_stones_021416

This is what the underside of the floor would like like if you crawled under the foundation and looked up. It will never be seen in the build, but I like knowing it’s there.

ceiling01_021416

I was going to glue in joists and floorboards, but I’m just not feeling that crazy. Look at how different the stone color looks because of the light:

ceiling02_021416

The exterior foundation walls are going to be built from salvaged dressed stone, with the occasional rubble and timber posts. I’ll be using egg carton:

dressed_stones_021416

And must now remember to buy the same kind (Judy’s Organic) to keep textures similar.

exterior_021416

Here’s the start. It will be built at the rate at which I acquire cartons, which is equivalent to driving a rubble-loaded wagon back from San Francisco, so it will take a while. And that’s okay. The scenery is gorgeous :)

Lastly, I’ll share this PSA I made today. In the crafts store parking lot I looked down to see this perfect little horror of the most commonplace litter. Feel free to share :)

toxic_litter_pavement_021416

*steps down from soapbox*

Considering

albie_wound_012016

I wasn’t going to lead with this picture, but it’s affecting everything I’m trying to do, as is the way with a large jagged wound on a primary finger. I was playing Prey Under The Covers with my usually gentle cat and one of us miscalculated… It’s a 3-bandaid kluge :(

kit_hack_012019

And now, presented without justification or explanation is my beginning foray into the HBS 2016 contest base kit. I almost always order a second kit for parts, but somehow didn’t this time. As you can see, I’m mid-trial, but I can’t really go much further, or even see if it will work at all, until additional parts arrive. It keeps collapsing.

My consumptive work deadlines are over — met, even! — and the startup company I’m working with has officially launched, so I can share a peek of what I’ve been doing (logo, packaging, manual, web imagery, panel design) for the past few months.

rossum_electro

This is from their website. Watch the video! Very cool stuff.

Yipes, Stripes, Stuff

www.nancyland.com

This pattern variation appeared after watching 20,000 Days on Earth, a good, if mildly self-indulgent film chronicling memory, writing and performing — made unbearably, poignantly tragic by the recent death of Mr. Cave’s son, Arthur.

One of my favorite scenes is Warren Ellis’s recounting of Nina Simone’s backstage pre-performance requests. Many thanks to Austin Kleon for pointing us to this worthwhile talkie.

Then the next day I woke up and David Bowie was dead. I am sad.

I made a little yellow table from the stain test. This shot is for Keli.

www.nancyland.com

I don’t often do adorable, but when I do, it’s one of Janet Granger’s tea cozies. I love this design (and the cat one). The only thing that’s sad is that it’s worked on 32-count silk gauze, and there’s more gauze show-through than I’d like to see. I might actually go back and do full cross stitch (rather than tent), or start all over on 49-count with silk. Probably when monkeys fly out of my butt, as Wayne so cheekily observed :)

www.nancyland.com

And since I’m stuck on miniature needlepoint, at least until I start a new build, all you sewists, beaders and book artists should check out Thread Heaven, a quite effective thread conditioner in a wee cobalt blue box that has made my stitching tangle-free. A merciful reprieve. Because science! And, as their site proclaims, it’s non-petroleum-based, and vegan :) ? !

www.nancyland.com

Wait! Everything just changed:

www.nancyland.com

Looks like it should arrive near the end of my current, um, fierce vigorous fiery set of work deadlines, so yay!


Sea House Warming Hut: Overwrought Iron

www.nancyland.com

I decided to use the remaining section of the JMG Miniatures laser-cut panel to make the ruined remnants of a wrought iron railing, as a part of the original brick foundation. I wanted it to be twisted wreckage with a story to tell, but not faux-Gothic macabre.

www.nancyland.com

Several coats of flat black spray paint, glue globbing, lamp black acrylic, “rust + dust” shaved pastels and tiny dots of opportunistic sage lichens. It’s really fun to crap paint intentionally, for once :)

www.nancyland.com

After smooshing them around in a few places, I opted for the back, with the view into the open hut above. I set them in far enough to be visible, but not a statement beyond “What was deluxe becomes debris.”*

And with that, I think I’ll turn my attention to the interior of the hut for a while (except for the ongoing living roof planting and interminable foundation gravel gluing). I’ve been considering the chairs for ‘round the fireplace, as well as other seating and maps and books and beverages.

*A special prize! for all who *know* the provenance of that… lyric. And care to share it. Googling is informative, but totally cheating in this case. Unless it’s to marvel at the poignant brilliance of this perfect song :)

Sea House Warming Hut: Wroughting Irons

www.nancyland.com

It’s a foggy morning here in Nancyland, and the crew is finishing up installing a vintage wrought iron railing and foundation grate, welcome salvage from the Sea House Pleasure Pier.

I have been looking for a well-designed wave pattern to meld into Warming Hut history and decor, and found it in these laser-cut panels from JMG Laser Engraving. (HBS/miniatures.com carries some of their products.)

www.nancyland.com

For the railing, I cut the section I wanted free, and glued it between two lengths of basswood. After spraying with several coats of flat black paint, I mounted it to the open edge of the deck with glue and brackets made from solid-core black paper. These were bolted with 1/8-inch and 1/16-inch bolts for extra security.

Actually, they’re totally just for appearance.

www.nancyland.com

As it happens, I installed the lower grate first, gently curved and held in place with glue and bolts. I then re-grew the poppies peeking through the bars.

After staring at it for a while, I realized it is far too smooth to be convincing salvaged wrought iron, especially in a marine environment. The railing assembly was still in process, so I mucked it up with tiny dabs of glue and smudges to simulate rust and age. Then I painted it with three different types of black paint. You can kind of see the effect in the first photo of the railing. It’s nice and grody, but well-maintained and hopefully structurally sound. I’ll apply this wroughting process to the grate next :)

After I get my lap back.

www.nancyland.com

Is Napoleon the inspiration for my color palette?

Sea House Warming Hut: Living Roof Drainage

www.nancyland.com

I wanted the rock ley line drainage system to look substantial, but not dominate the living roof. I determined that height was the key, especially so that the plantings did not swallow it.

I measured out a simple grid on the roof, and cut 3/16-inch (5mm) strips of mat board. After gluing these to the roof, I colored them in with a black “Industrial Super Permanent” Sharpie (fine point). Because I am serious.

www.nancyland.com

Then I cut 3/16-inch (5mm)-wide strips of my favorite solid black paper, Canford Raven, made by Daler-Rowney. I put these on the parchment-covered half-sheet tray I use for messy (and/or abstract art).

www.nancyland.com

Ran a stout bead of quick-grab tacky glue.

www.nancyland.com

Then sprinkled them with beach gravel.

www.nancyland.com

After the strips had dried, I excavated them from the gravel.

www.nancyland.com

You might be thinking this is a lot of pictures of tiny rocks, and you’re probably right. It’s because I love them. No, really. I take high-resolution photos, and like to zoom in and look at the individual tiny rocks. Because each one is beautiful.

I glued the rocky strips to the grid frame.

www.nancyland.com

And I’m satisfied with the relative proportions of drainage to (eventual) plantings. I can always trim the mosses as they get closer to the grid if they insist on being too lively.

As for below, I’m almost done with the bracketry. I’ve made like half a million of them.

Also making progress on gluing the gravel ground in, weathering the old brick foundations, and planting California poppies where the wind might have blown them.

www.nancyland.com

Sea House Warming Hut: How does your rooftop grow?

www.nancyland.com

The rooftop perimeter is established, and I’m still considering what, if anything, the interior might contain as a “feature”. Miniamalist me thinks more of the same: low-growing poppies, random clumps of wild grass (from Woodland Scenics www.scenearama.com), dried thyme clumps, the odd cut-silk succulent nestled in amongst the preserved moss.

Mosaicist me is visualizing the Sea House logo done in tiny granite tiles, for the pinpointing of passing pilots, while Gratuitous Decorator me thinks a simple checkerboard of square pavers might add some flair.

As for the California poppies, I’ve made 31 so far. Maybe 200 more to go?! I’ve graduated from the lovely, convenient kit to crafting from scratch, using crepe paper for the petals and 30-guage thread-wrapped bead wire for the stems (what I had on hand). At first I painted the paper with watercolor, but finally arrived at *blush* using Sharpie markers as a best solution.

www.nancyland.com

I punch 3/16-inch (5mm) circles from ivory crepe, then dab colors on the four petals that make each poppy. The centers are made from a thin strip of printer paper colored yellow, snipped into a very fine fringe and rolled around the top of the stem wire. These four Sharpies are giving me all the tints I need, as they saturate and bleed on the crepe paper and thread-wrapped wire beautifully. Who knew?