Seriously.
Your lap is wasted. Go to sleep. These are not the 1:12 ideas you’re looking for.
Seriously.
Your lap is wasted. Go to sleep. These are not the 1:12 ideas you’re looking for.
Recently, HBS/miniatures.com wondered
So, again, we ask … How many of y’all use sketches to “concept” your mini projects? We’re wondering if this is the exception or the norm?
Here are some sketchbook notes from January, when I started the build:
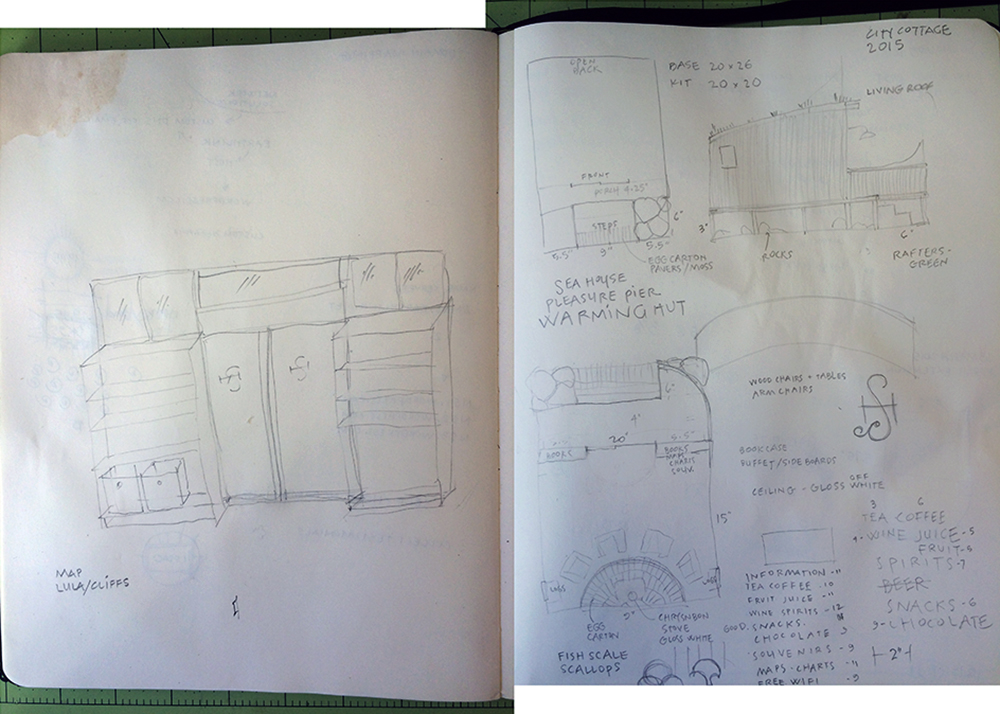
It’s a pretty clear — and typical — reveal of both my initial ideas and process: sketches, doodles and notes. Working with approximate dimensions helps keep things feasible. I have to sketch out furniture and cabinets and make cut lists.
I keep a paper folder of ideas, swatches and snippets of possible “things” as well as digital files for research and reference.
What’s unusual about these sketches and this build is how little I’ve diverged from my original concept thus far.
I made the front shelves and the wood storage under the back windows from inch wide x 1/16-inch basswood, and painted them the same Simply White as the rest of the trim.
Today I took a pleasant meander around my yard looking for the right branches to make the logs. I chose a woody bottlebrush shrub (Callistemon) and pruned out several offshoots. These I cut into 1.25-inch logs and stacked into the wood holder with glue to fix them in place.
Then I sat with a glass of sparkling water, the lemony scent of the wood and the invigorating fragrance of eucalyptus mingling on the afternoon breeze.


The first batch of the Sea House Warming Hut air-dry clay boulders are nice and dry. Mid-week, I saw that a crack had developed in the largest one, and got the idea to fill it with a quartz vein. I have this lovely pearl white acrylic, and if I mix it with some wood glue and load it in a syringe, I think it will behave convincingly. I’ll wait until I model, paint and salt all the boulders, though.

I know I’m not the only one to buy something because of the packaging. In this case, I had wanted to make domed skylights, and this container — of organic gala apples, no less — at the local big box store was ideal. Although the original project was sidelined, the cut-apart plastic is now making excellent bases for individual rocks. My landscape modeling compound of choice is Crayola Model Magic, and making the boulders hollow saves a lot of cost.
The apples were very good, too.

Here is an action shot of a boulder in the making, and my dual purpose small metal ruler.

This is 8 ounces (226 g) worth of boulders and rocks — enough to populate the left side of the build. (You can also see my second-favorite multipurpose modeling tool: a silicone wine stopper.) I’ll let these guys dry for a day, then paint a first coat with the same taupe wash. I want to do the additional glazing and salt crystal sprinkling to all of the rock foundation at the same time. If all goes well this week, I’ll see time to continue my elemental play.
In other news, Christina, the winner of the Denise’s City Cottage kit provided by HBS/miniatures.com giveaway, contacted me and it’s on the way to her. Hopefully she’ll post about her build, too. I’m really enjoying seeing so many approaches, and as always, learning tonnes.
PS: I was FaceTiming with my two-year-old granddaughter, showing her the rocks I made from clay and the rest of the build-in-progress. She was listening and studying the screen very intently, then announced, “I want to go there.” Best appreciation ever.

The winner of my extra Denise’s Cottage kit, the limited edition starting point for the 2015 Creatin’ Contest sponsored by HBS/miniatures.com is Christina. Thank you to all who expressed interest and/or encouragement. I wish I had kits for all of you. (HBS/miniatures.com still does :)
Christina, please contact me by 07 April with your zip/postal code, and I can provide a shipping cost estimate. Congratulations! The contest deadline is 16 December this year, so there’s still plenty of time to get your build on.

I’m using air dry clay to sculpt the boulders that populate the Warming Hut foundation. For the largest one I used a small tin and a plastic cup as a base, then coiled unevenly-rolled lengths of clay around it.
I made certain decisions about the type of rock I wanted to see, then used my hands, a small metal ruler and a ball point stylus to make like the earth, wind, water and all the other magics of geology.

This is my model rock for style and color.

Even though the clay’s just one day dry, I’ve put the first coat of acrylic glaze on. There are a lot of rocks to build and paint. Most of them will fit under the foundation, as if the posts have been drilled and set into them, so the painting part will be a wee bit tricksy. (That was part of my conundrum of when best to glue or not to glue the hut in place.)

The gaps between the boulders will be filled with beach gravel and tiny pebbles (from my prized collection), with some driftwood logs wedged in here and there, and small bits of greenery.
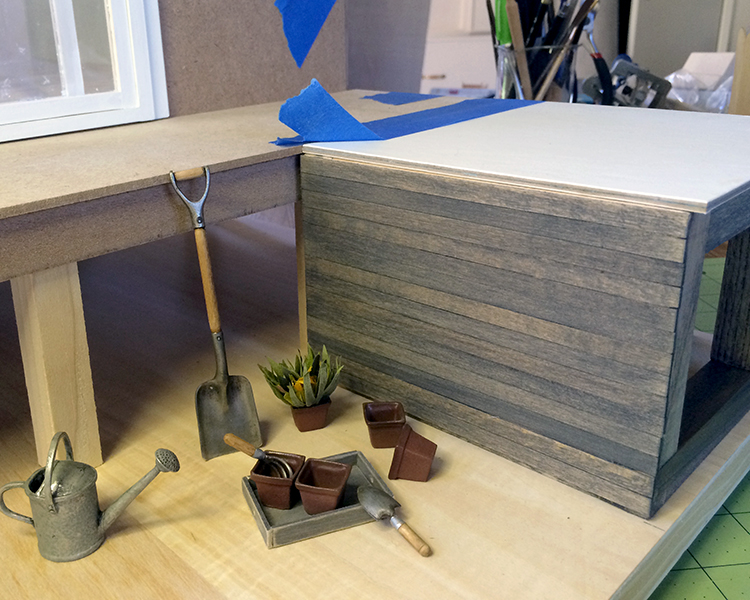
I began staining and applying the siding to the front entry. Some of us would rather be gardening.
There is a broad, deep stairway leading up to the Warming Hut. I glued up two lengths of one-inch x 1/16-inch basswood for each step. For the risers, I only had 1/32-inch x 3/4-inch stock, so I glued those two up.

I fiddled with math on paper, and then in Illustrator, then printed out the pattern for the stringer. (Which made me think of Stringer Bell from The Wire. Always a pleasant, if complicated thought.) I put a fresh blade in my Xacto knife, and cut three support forms from illustration board.

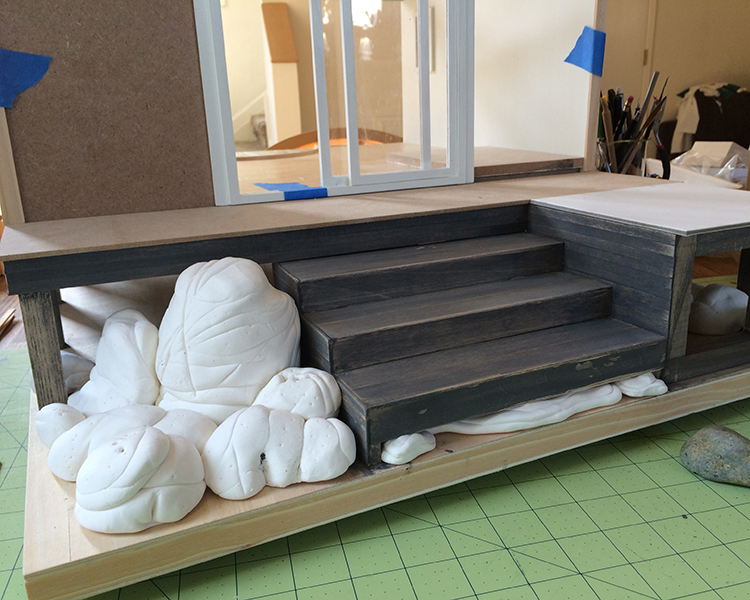
While waiting for the glue to dry on the staircase assembly, I stained the foundation posts. Then I hurt my brain trying to think through the building process. I make so much up as I go along, it’s hard to solve for all potential problems. Finally I determined I should glue the Hut to the project board before proceding with the air dry clay boulders. The deck extension and stair case are too fiddly not to have the main structure set in place.
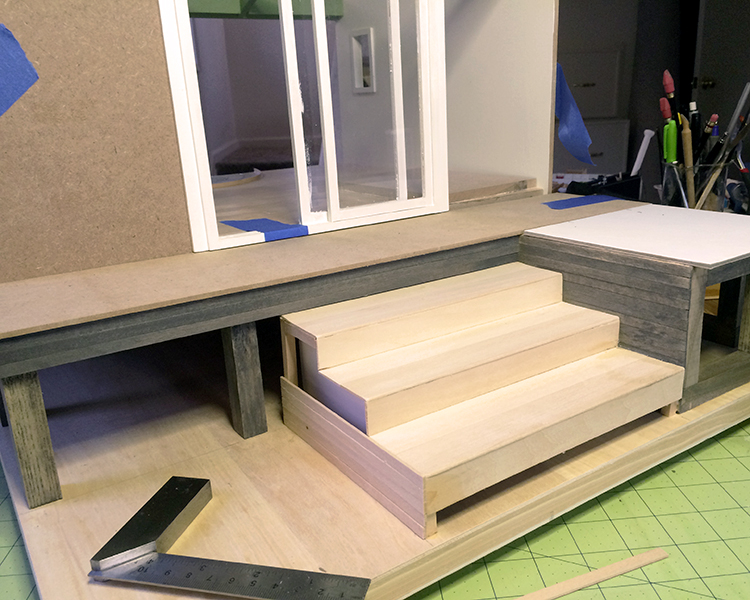
Here is the stairway glued in place, and the beginnings of the siding applied. As you can see in the photo, I’ve lost the light and it’s past time for dinner.
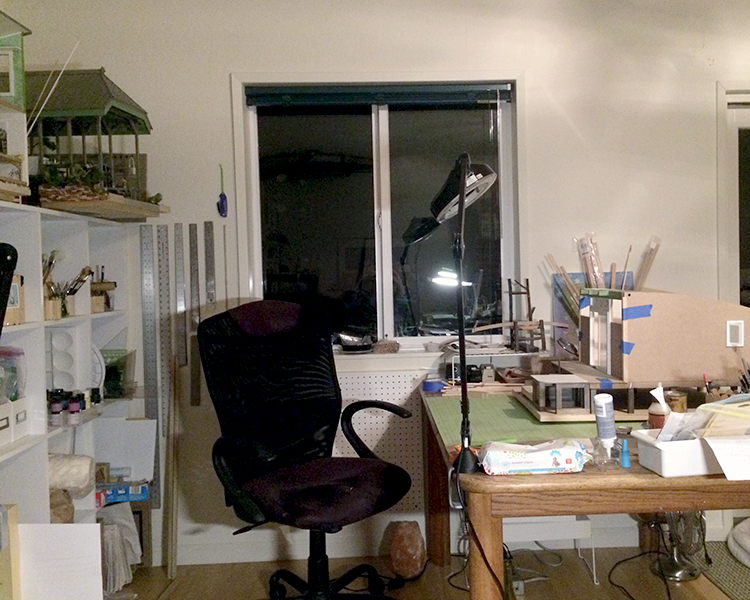
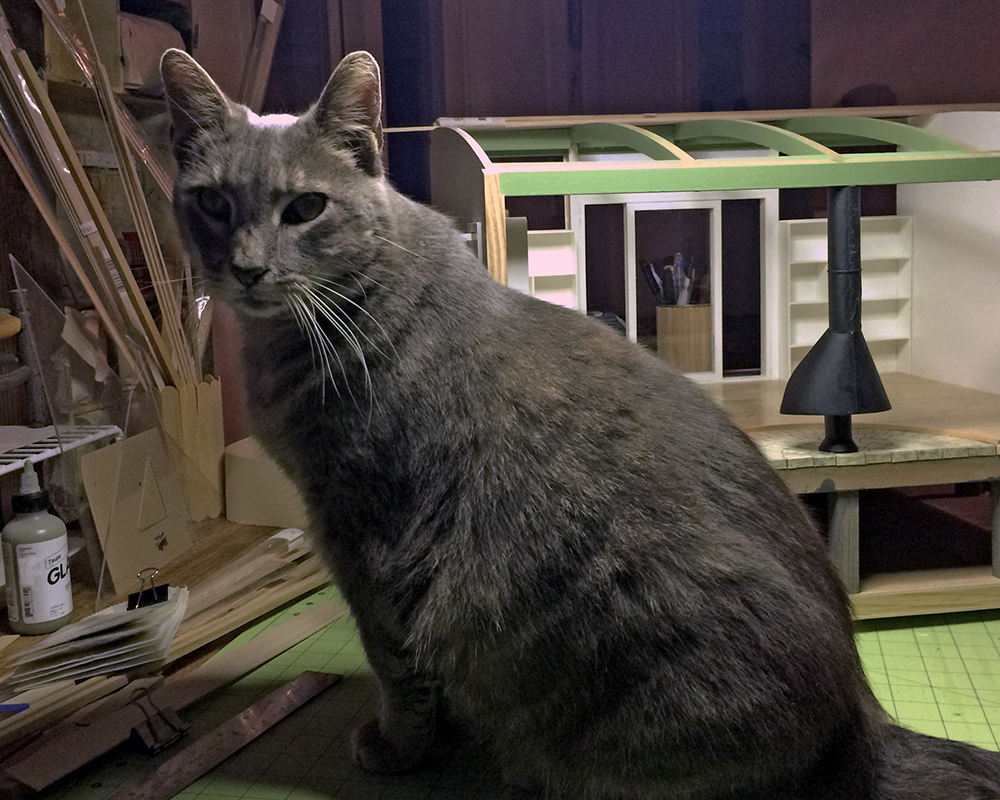
I’ve cleaned my tools and cutting mat. Here’s my work table with the Warming Hut, on the other side of my studio/office (itself a work in progress.) Finally the glue will get a good chance to dry.

Floor and foundation plan for the deck extension
For the Warming Hut front deck extension, I glued two pieces of illustration board together with wood glue to make a 1/8-inch (3 mm) thick subfloor. I let it dry thoroughly, then sanded the edges smooth and even.
You can also see one of my preferred pencils, the Palomino Blackwing 602. (“It’s not just a pencil, it’s an experience.”) If you like pencils like I do, it lives up to the hype.
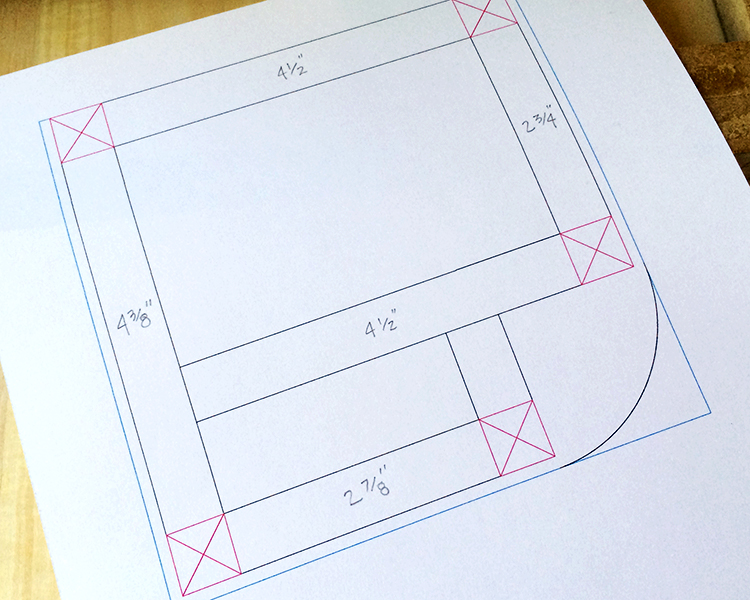
Deck extension plan v2
For various reasons, including some mistakes aberrations with the front wall alignments, I decided to switch the deck extension to the right side of the Hut, and inset the foundation so the deck overhangs consistently with the base kit. I remeasured and cut the pieces from 5/8-in poplar (which is what I had on hand).
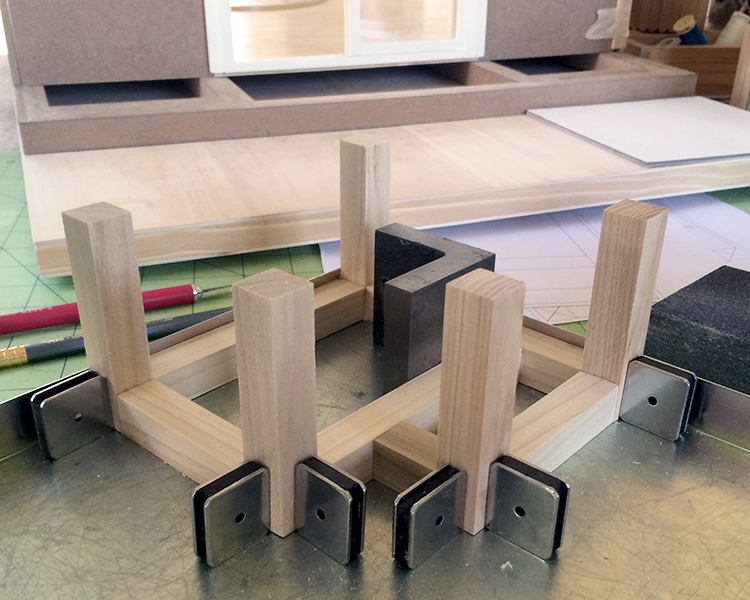
Gluing up the deck extension foundation
Of course I forgot to flip the plan back over to account for building it upside down, but the glue had not yet set and it was easy scrape it off and reconfigure the layout.
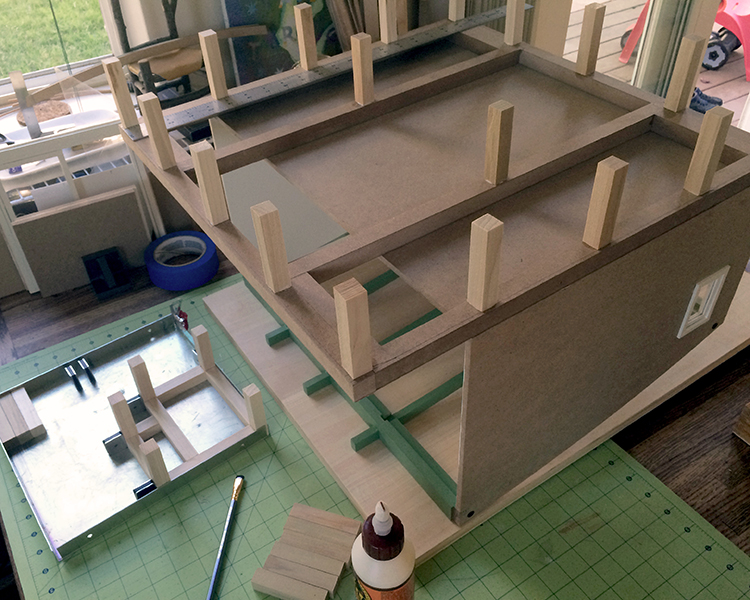
Adding the support posts to the rest of the Warming Hut
While that was drying, I measured for placement and glued the main structure posts to the foundation.
After the glue set, I flipped the hut back over onto the project board, and set the extension foundation in place. Most of the posts will be obscured by the boulders and bedrock of the site, and for now I’m leaving the build loose from the board. I plan to model and mold the boulders with air dry clay, which worked so well — and are so fun to make! — for the Sea House Pavilion. After the clay dries and shrinks in place, which seems to take several days, I’ll glue the posts to the project board.

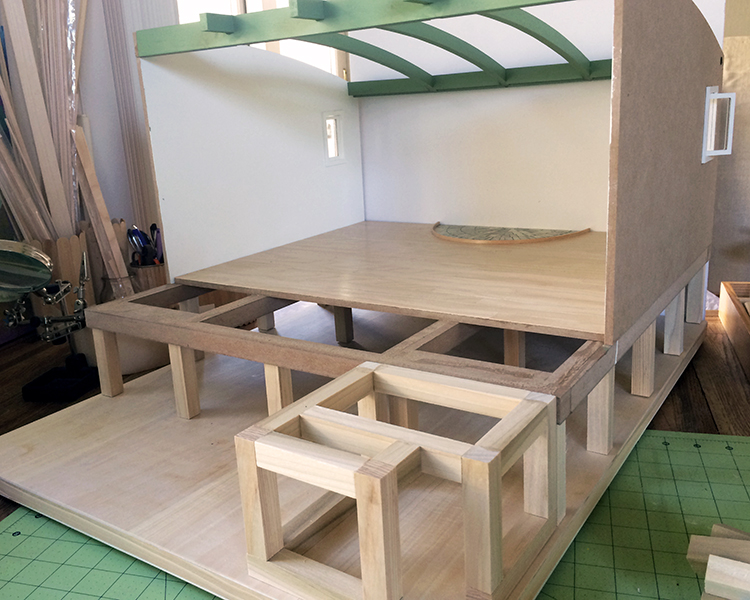
Sea House Warming Hut deck extension, vision in progress
Here’s the kit deck and my illustration board extension subfloor. I’m glad it’s still March and the contest deadline is not ’til December 16.
Which also reminds me: I have the whole beautiful unopened base kit HBS/miniatures.com sent me, which I’d like to pass on to one who wants to join in the miniature madhouse of real imaginary world building. Just leave a comment, and I’ll randomly select from the respondents on 31 March, 2015. Please! Thank you!
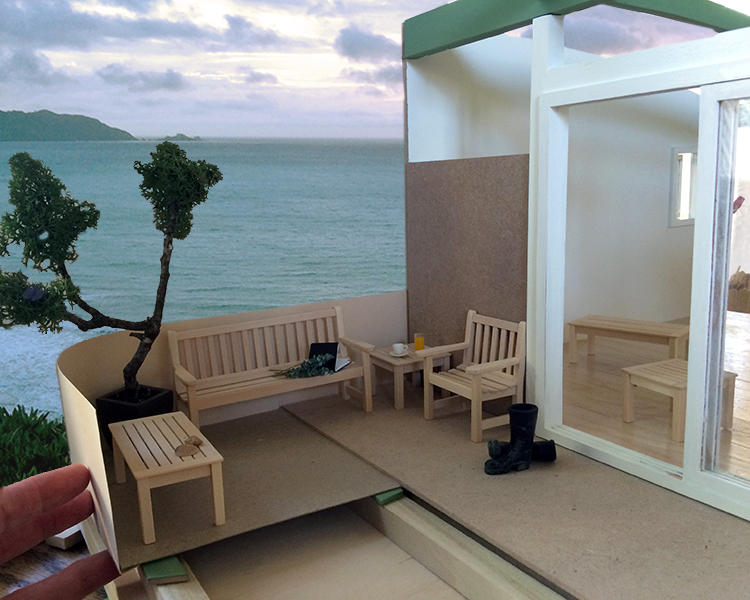
Mockup of the Warming Hut deck extension, with a little Photoshop tomfoolery
The Sea House Warming Hut is snugged into a rocky outcrop on the cliffs, and will have an L-shaped front deck. Here’s a cardboard mockup of the extension, with the Bruce Dawson benches in place for scale.
I drew a plan in Illustrator to work out the measurements, based on the 5/8-inch square poplar I’ll use for the additional foundation and the supporting pillars. I like using Illustrator because I can enter exact dimensions, and easily move stuff around.

Deck extension plan (not to code)
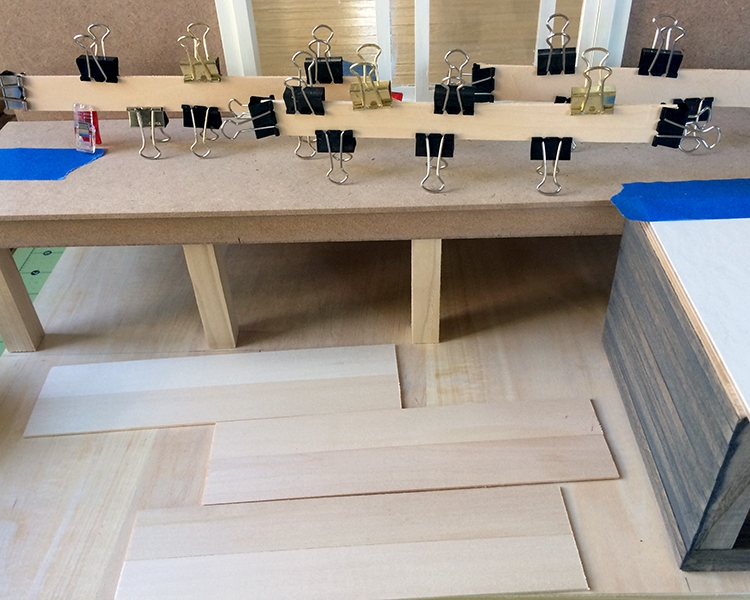
The exterior siding is going to run horizontally, and my plan is to wrap it around the curved deck wall in a seamless run. We’ll see how that goes.
There will be a wide stair leading up to the entry, either of wood or stone. Going to try the salt trick on the painted air-dry clay boulders and bedrock that supports the entire hut. And to top it all off, a living roof of moss, grasses and California poppies :) I ordered some flower kits from Georgie Steeds’ Miniature Garden Center Etsy shop. Love her stuff, as well as SDK Miniatures’ kits. HBS/miniatures.com used to carry some of the SDK kits, not sure if they still do.
I knew you were wondering. The rock formations you see in the ocean shot above is Pedro Point, southern-most in Pacifica, as seen from the cliffs at Mussel Rock, to the north.

The limited edition 2015 HBS/miniatures.com Creatin’ Contest starting kit
Like some of the other miniaturists who were enticed to participate in HBS/miniatures.com build blog-along, I had already purchased and begun to build this year’s starting kit. And I’ll enter the Sea House Warming Hut in the contest come December 16, even though I have no aspiration of winning, having been honored with the Grand Prize in 2013 for my Sea House Pavilion. (Note to all those who don’t enter their projects because you think you have no chance: no one was more astonished to win than I was. Truly. So show your work and enter! It’s way fun.)
So what to do with this second kit provided by HBS?
Much as I’d like to, I haven’t the time (or space) to do another project. I’d like to offer the kit as encouragement to anyone who might be hesitant to enter the contest, or undertake miniature world building. Leave a comment, and I’ll randomly draw a name on Tuesday, March 31, 2015 from those who respond. I ask only that you consider using the kit to enter the contest, and that you pay shipping costs (I’m in Northern California, and the kit weighs about 11 pounds). What say you?
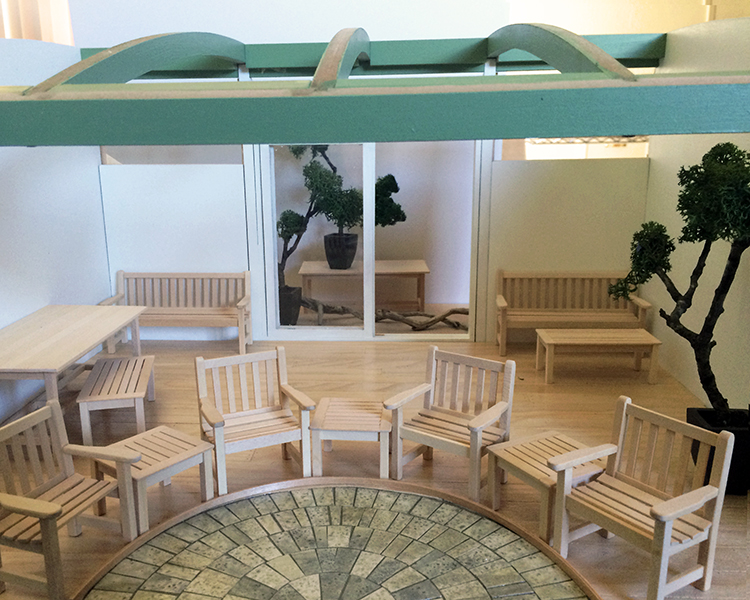
Perfect furniture by Bruce Dawson, who has shuttered his studio and is closing out inventory :(
Not a lot of progress on the Warming Hut, what with all the March birthday celebrations.
I did see that one of my favorite miniature furniture builders, Bruce Dawson, is retiring (again) and closing out all his inventory through his Etsy shop bedMiniatures. Shown above are the unpainted 1:12 basswood items I picked up. (He has some half-inch scale pieces as well.) Do check out his shop. His prices are more than reasonable. There are still a few cherry Mission style tables and bookcases that are especially wonderful. Don’t miss this opportunity! You’ll be very, very glad.
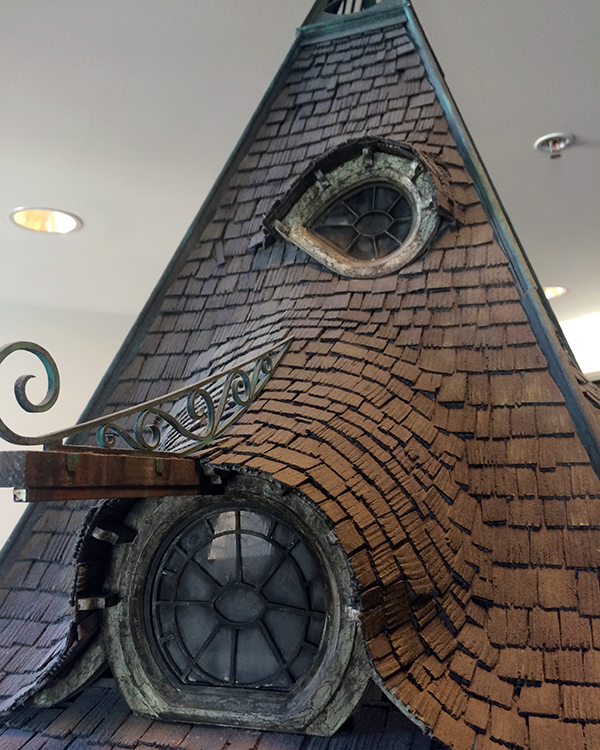
I got to take a behind-the-scenes tour at Letterman Digital Arts Center in the Presidio, and encountered the model of Count Olaf’s house used in the 2004 movie Lemony Snicket.

Count Olaf’s house movie prop, built at ILM
It randomly occupies half of a small lobby, and stands maybe seven feet (2.1 m) tall. It is fabulous. The sign says it took three months to build in the Industrial Light and Magic model shop, and another two weeks to light and film it on stage.
This is how it appears in the film:
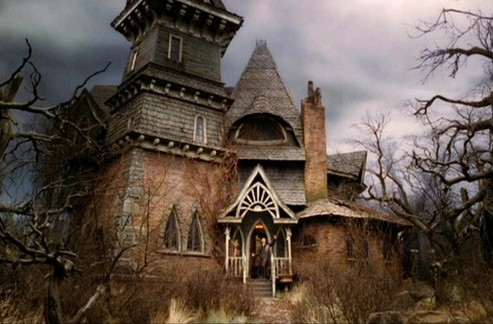
image from the Lemony Snicket wiki
Says the Lemony Snicket wiki:
The house is described as a dilapidated mess. The bricks are stained with soot and grime, the front door needs repainting (and contains a carving of an eye), and the entire building sags to one side. Rising above the house is a tall and dirty tower. In The Bad Beginning: Rare Edition, Lemony notes that his sister Kit has proposed that some of the eyes in Olaf’s house contain secret peepholes, cameras, or microscopic lenses.
Fittingly, they have let the model accumulate dust :)
The ruined chimney:
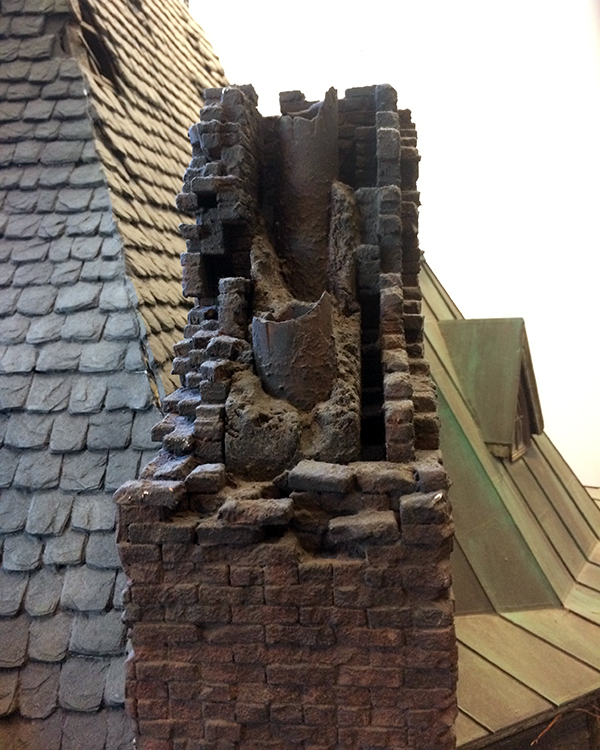
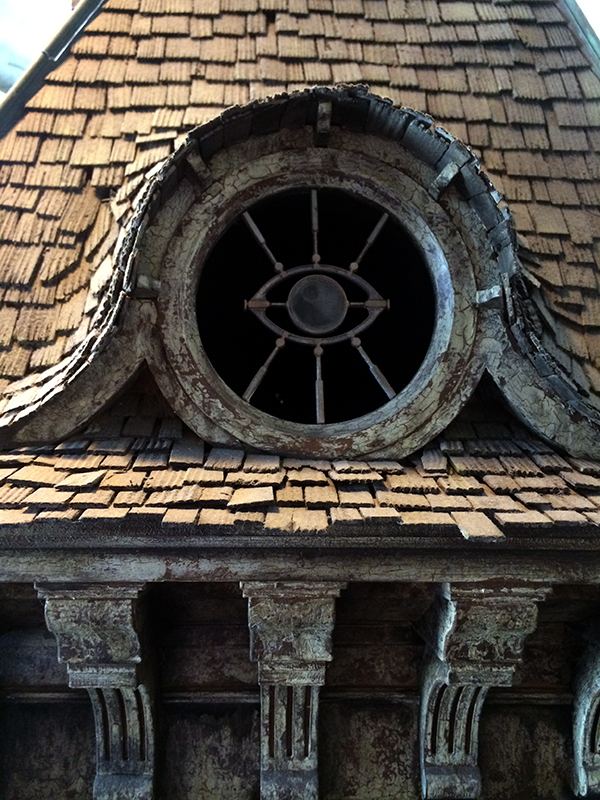
A disheveled downspout, a course of eye motif blocks, and a great circular window with web panes. Looks like the model builders used bermuda grass roots or something similar for the dead vines creeping up all over the house. (Minus one point, though, for the not-in-scale tattered lace curtains :)

The front door (with reassembly notes :)

Here you can see the dust coat and teeny, tiny rivets. I was particularly taken with them.
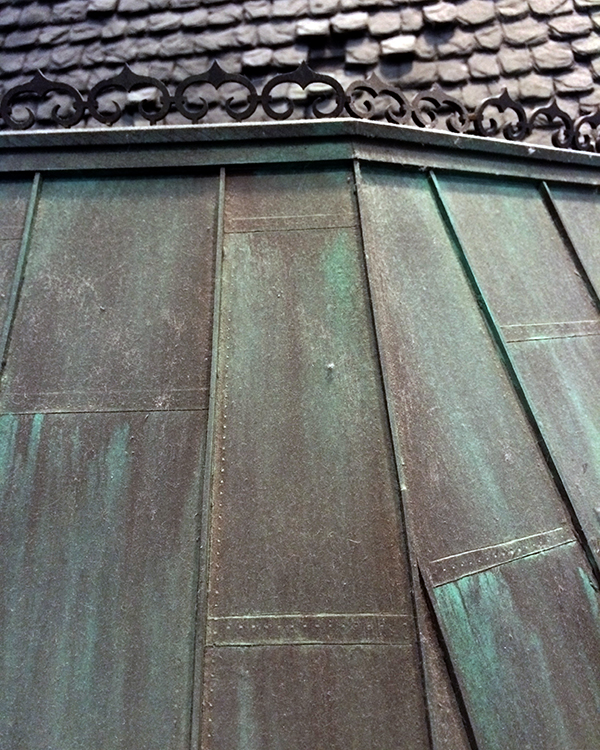
The inadequately-repaired drafty dome, with more rivets (and dust):

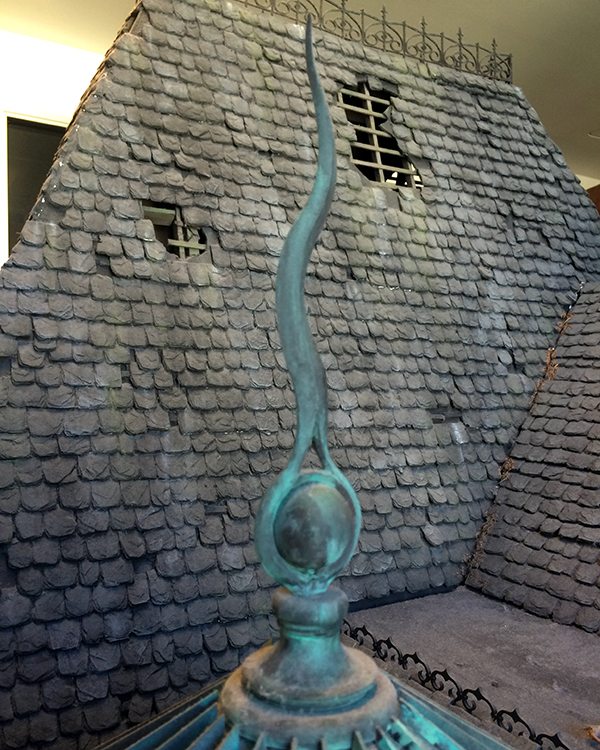
and its finial topper:
This is a particularly fine eye-paned window, and a closer look at the corbels. Such great distress and weathering.
And finally, a closer look at some of the tower eye windows: