V: Vagary

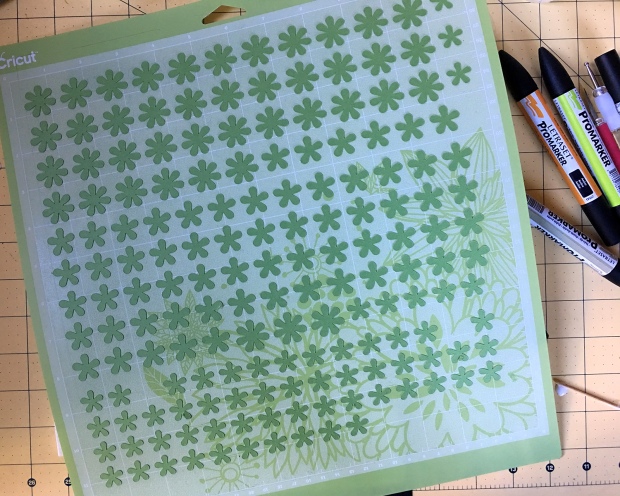
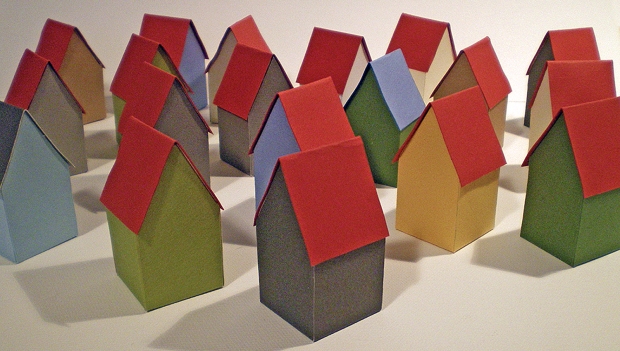
V is for Vagary. Fluctuation, variation, quirk, peculiarity, oddity, eccentricity, unpredictability, caprice, foible, whim, whimsy, fancy.

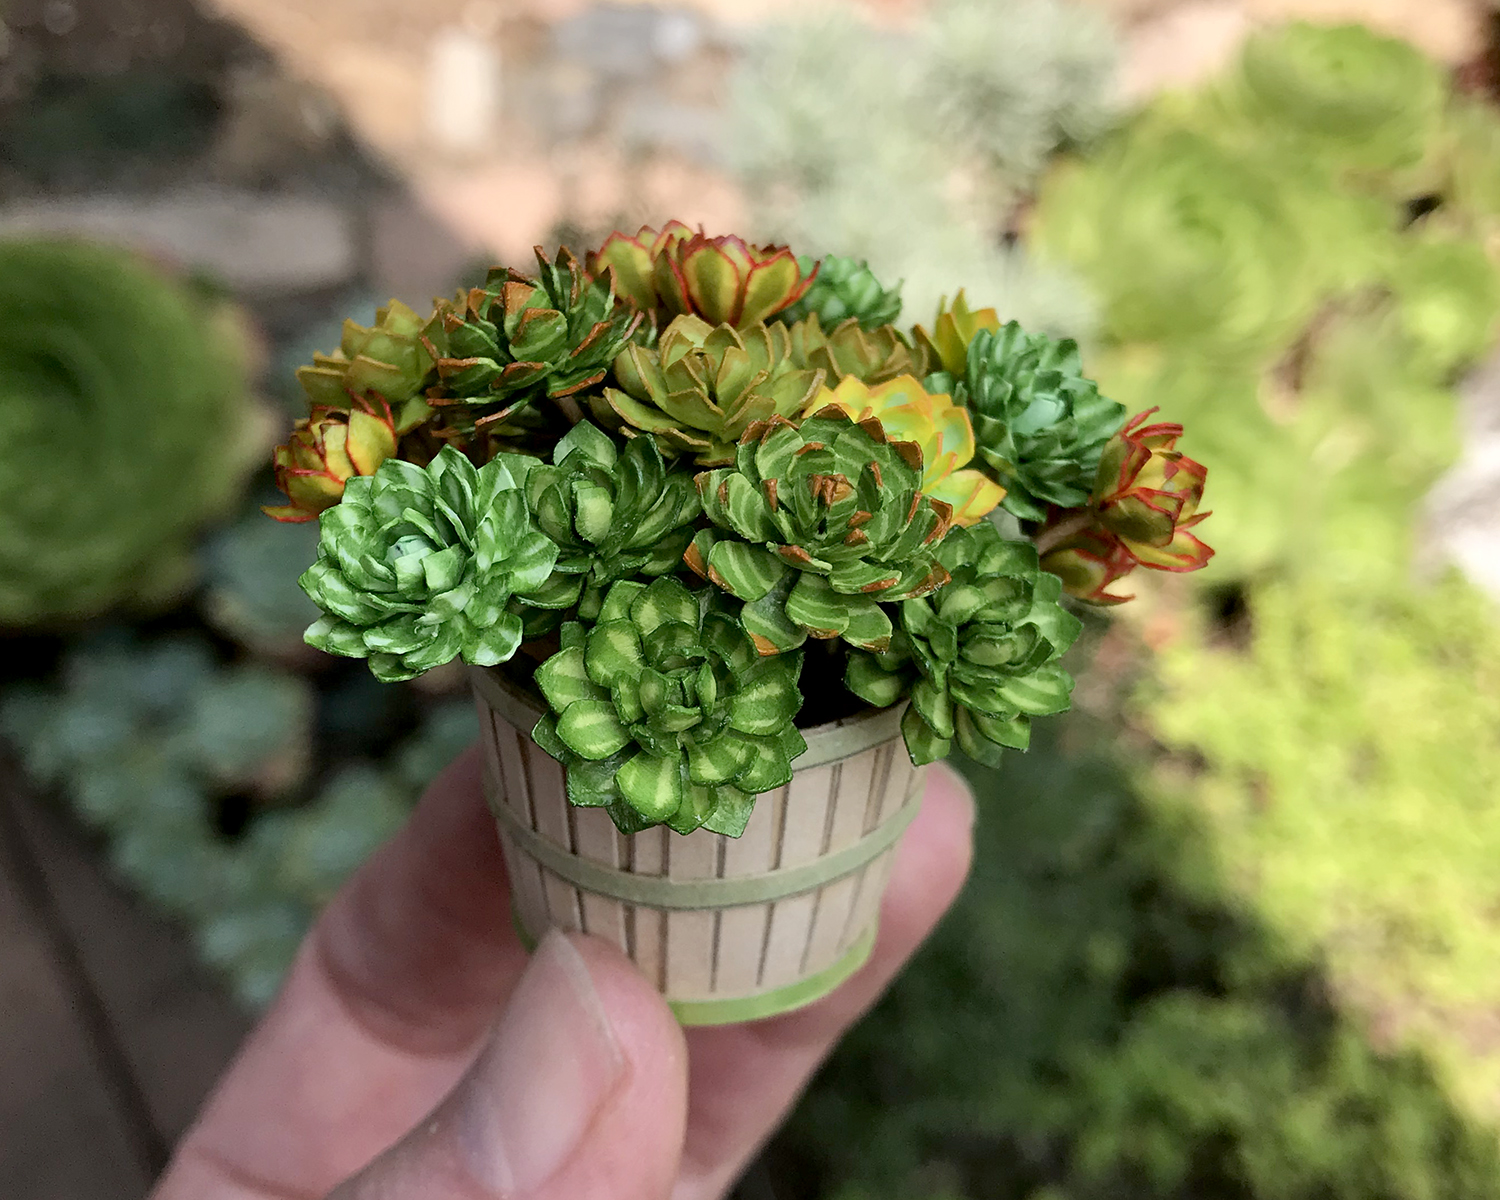
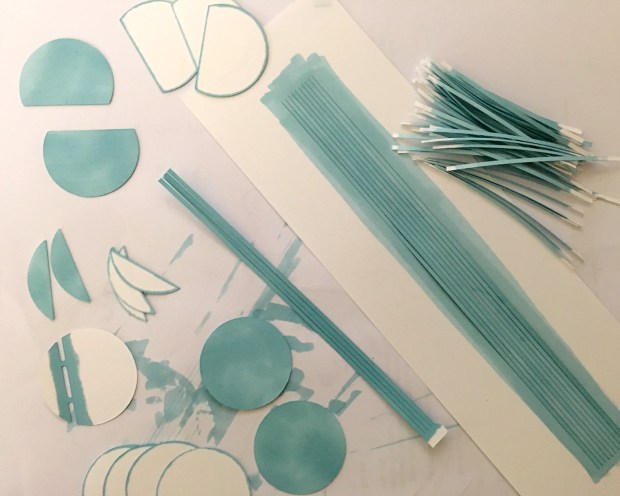
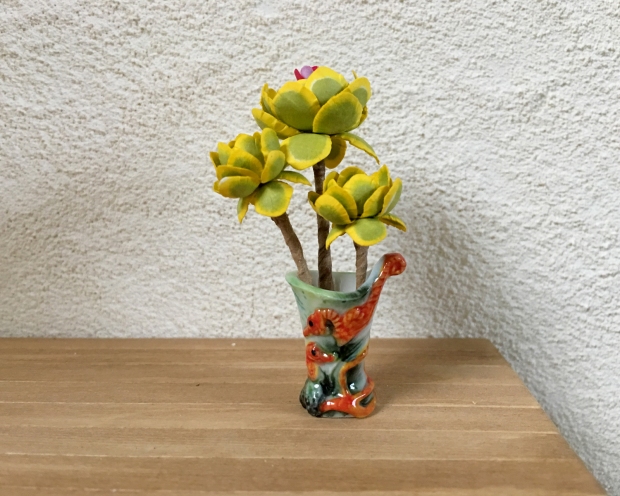
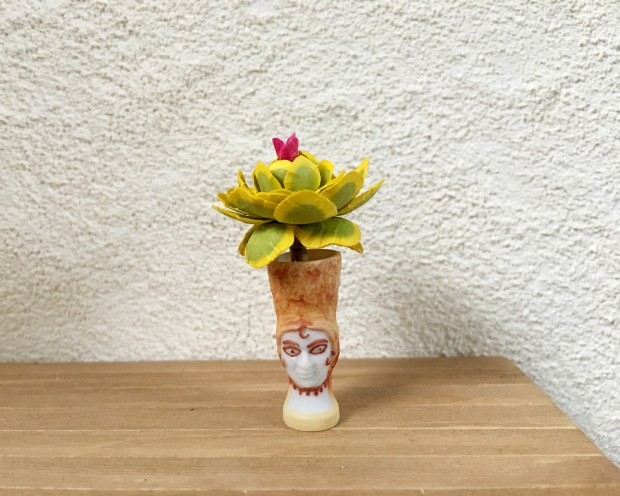
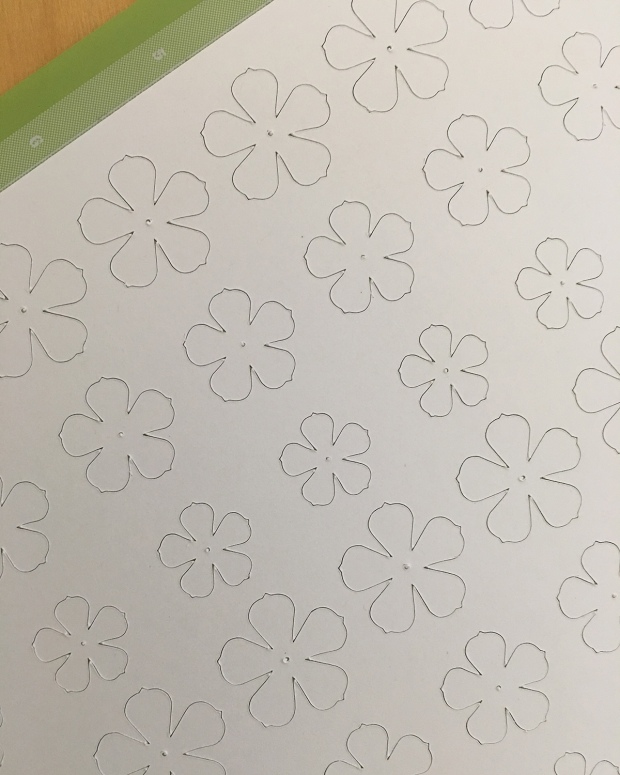
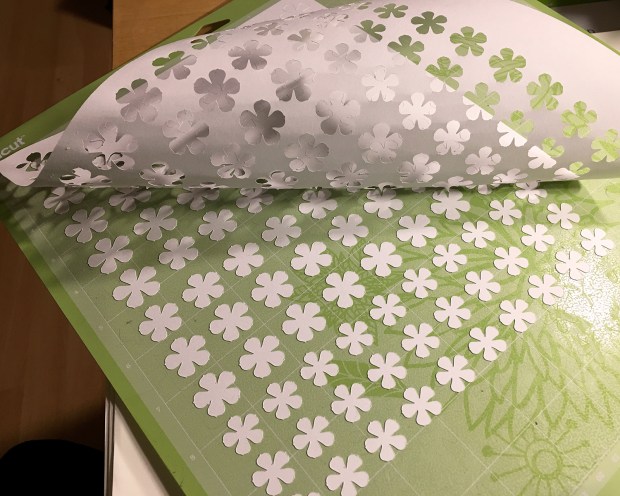
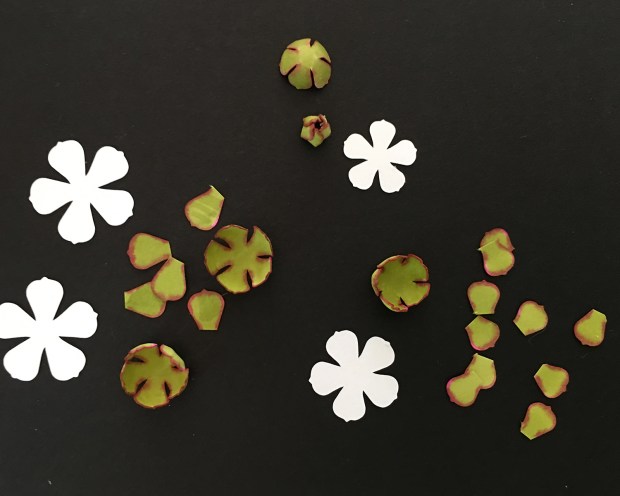
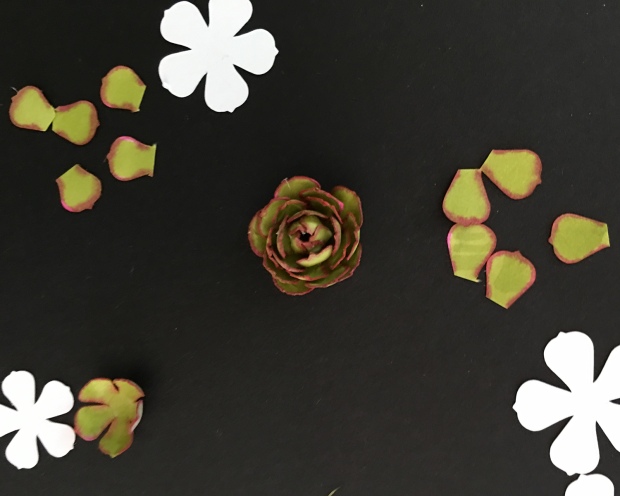
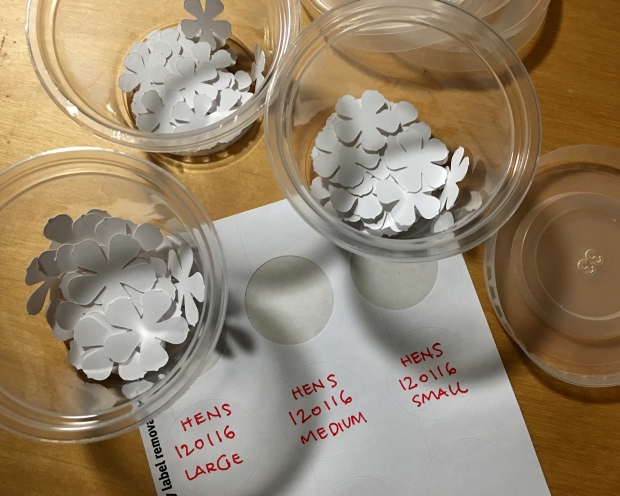
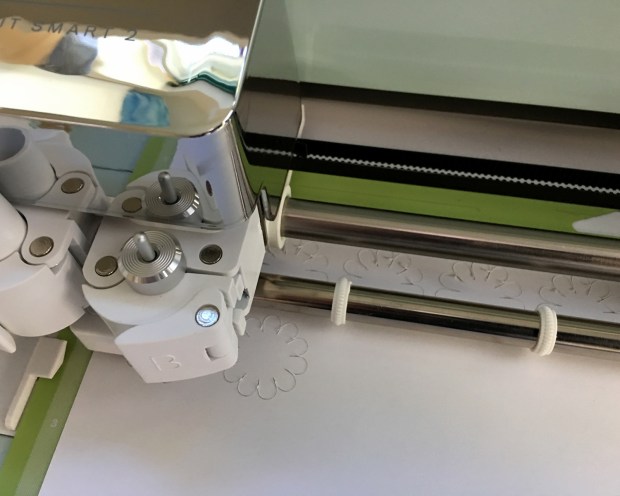
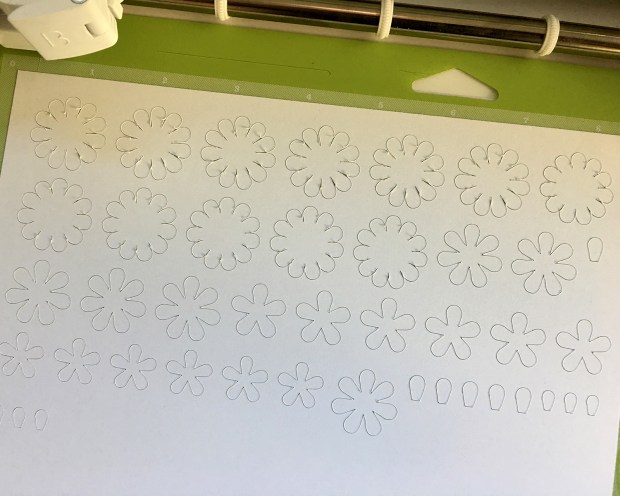
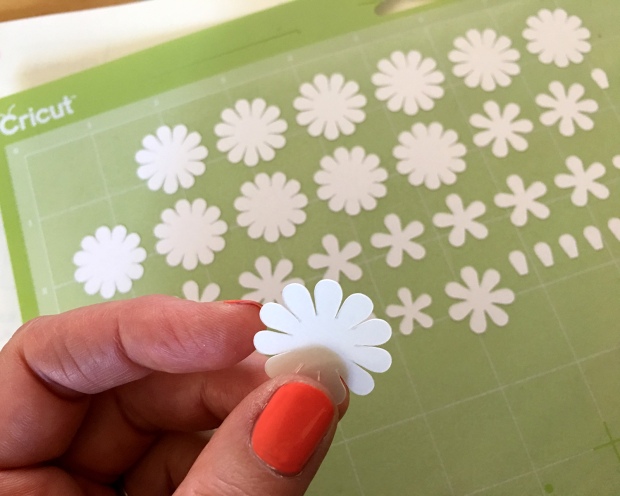
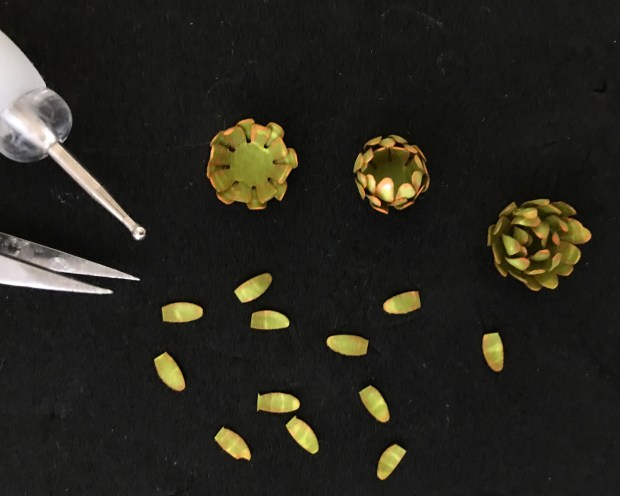
I can’t think of a better word, or set of synonyms, to describe the new 1:12 scale echeveria kit available now over at MMS+S. There are no fewer than five leaf sizes and shapes that combine to make three sizes of a charming pointy-leaf echeveria. I’ve redesigned the build method, too, to start on a fine paper-wrapped stem wire (included in the kit), which is perfect for armatures (gnarly-armed structures) and general ease of shaping the plants.

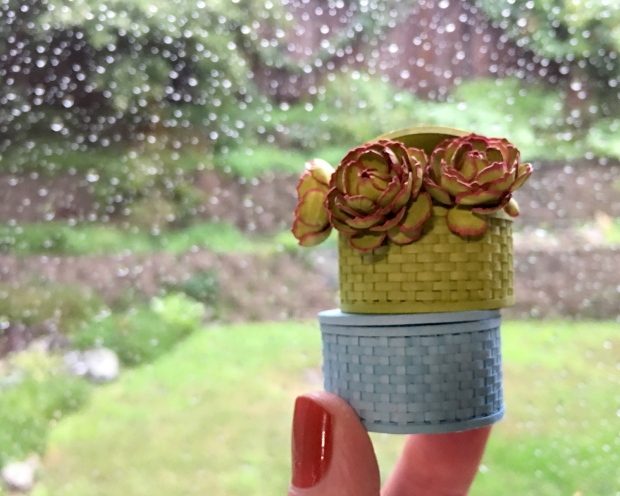
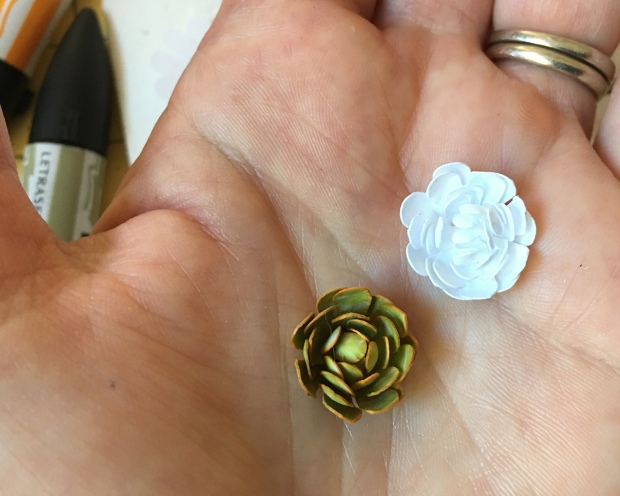
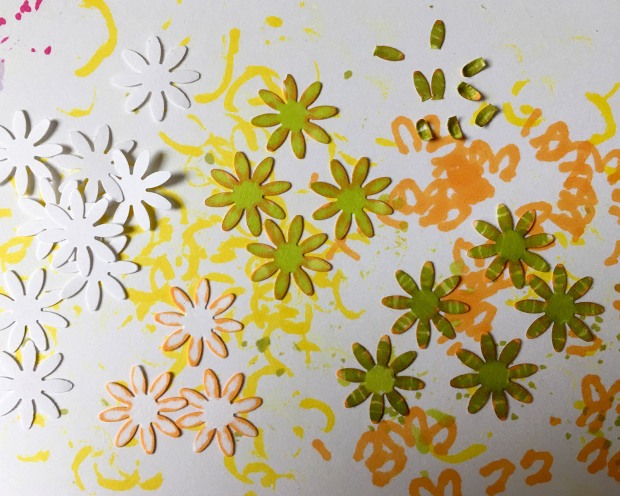
Here is a bushel basket of prototypes, using both of the base colors — white or apple green — colored with alcohol-based markers. (If you want true reds and yellows — or blues and purples — order the white stock. If you’re good with more muted tones and want to spend less time coloring, choose the green :)

Possibilities of color combinations are endless (and fun).

This is a versatile kit, and a form to make a succulent wreath is available soon!

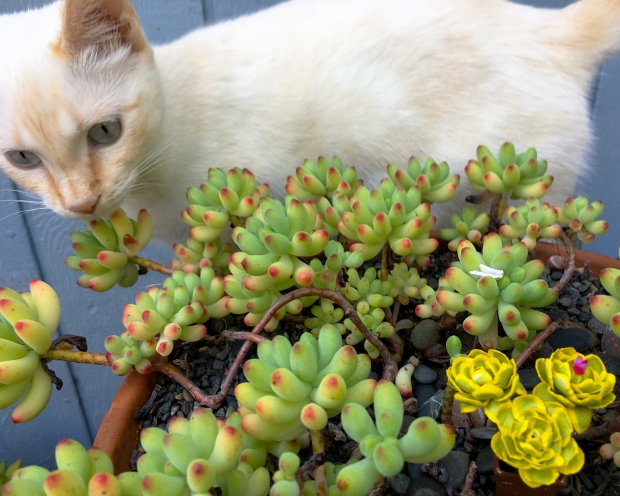
Let Scarlett’s tail and rabbit feet, seen here in complete repose, be your inspiration.

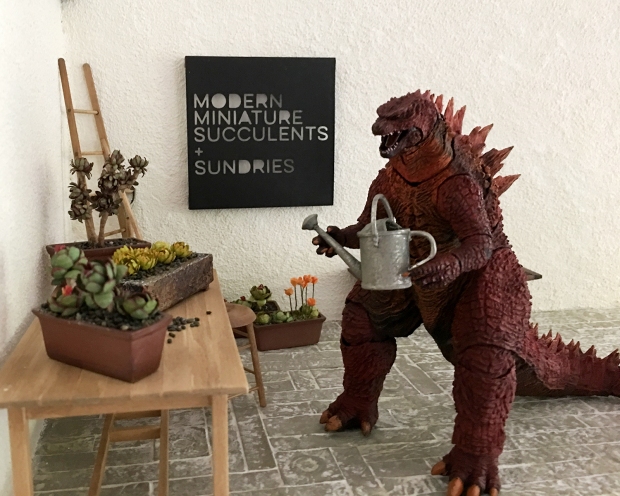
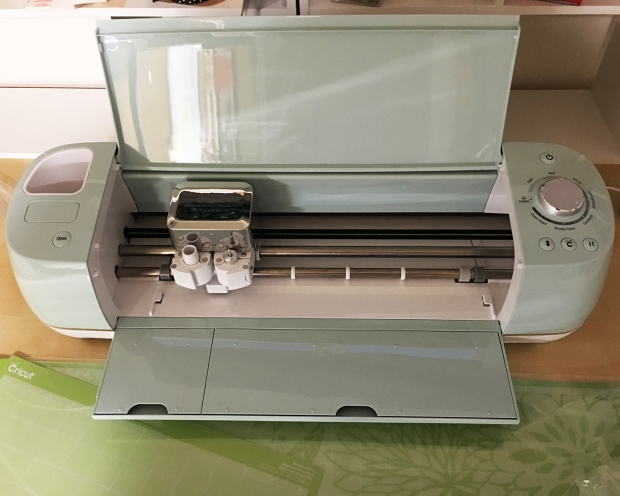
I recently re-found this unfinished Henri Rousseau-inspired collage panel, and glued it to the side back of the Modern Miniature Succulents + Sundries set.

The MMS+S set is in disarray, like many aspects of my life, but potentially still functional.

Zoom out now, please, to 1:1. The former owners of our house built this charming, funky wave-topped gate (seen here from the back). But, inexplicably, they painted the front of it the same dispirited brown as the rest of the decks, and completely ignored the back. For four years, it has *nagged* at me.

Yay go me. Here it is finished in four shades, by the light of the silvery security beacon.

Albie and I survey the change. You can just see that sad brown deck color peeking out under cat and mat.

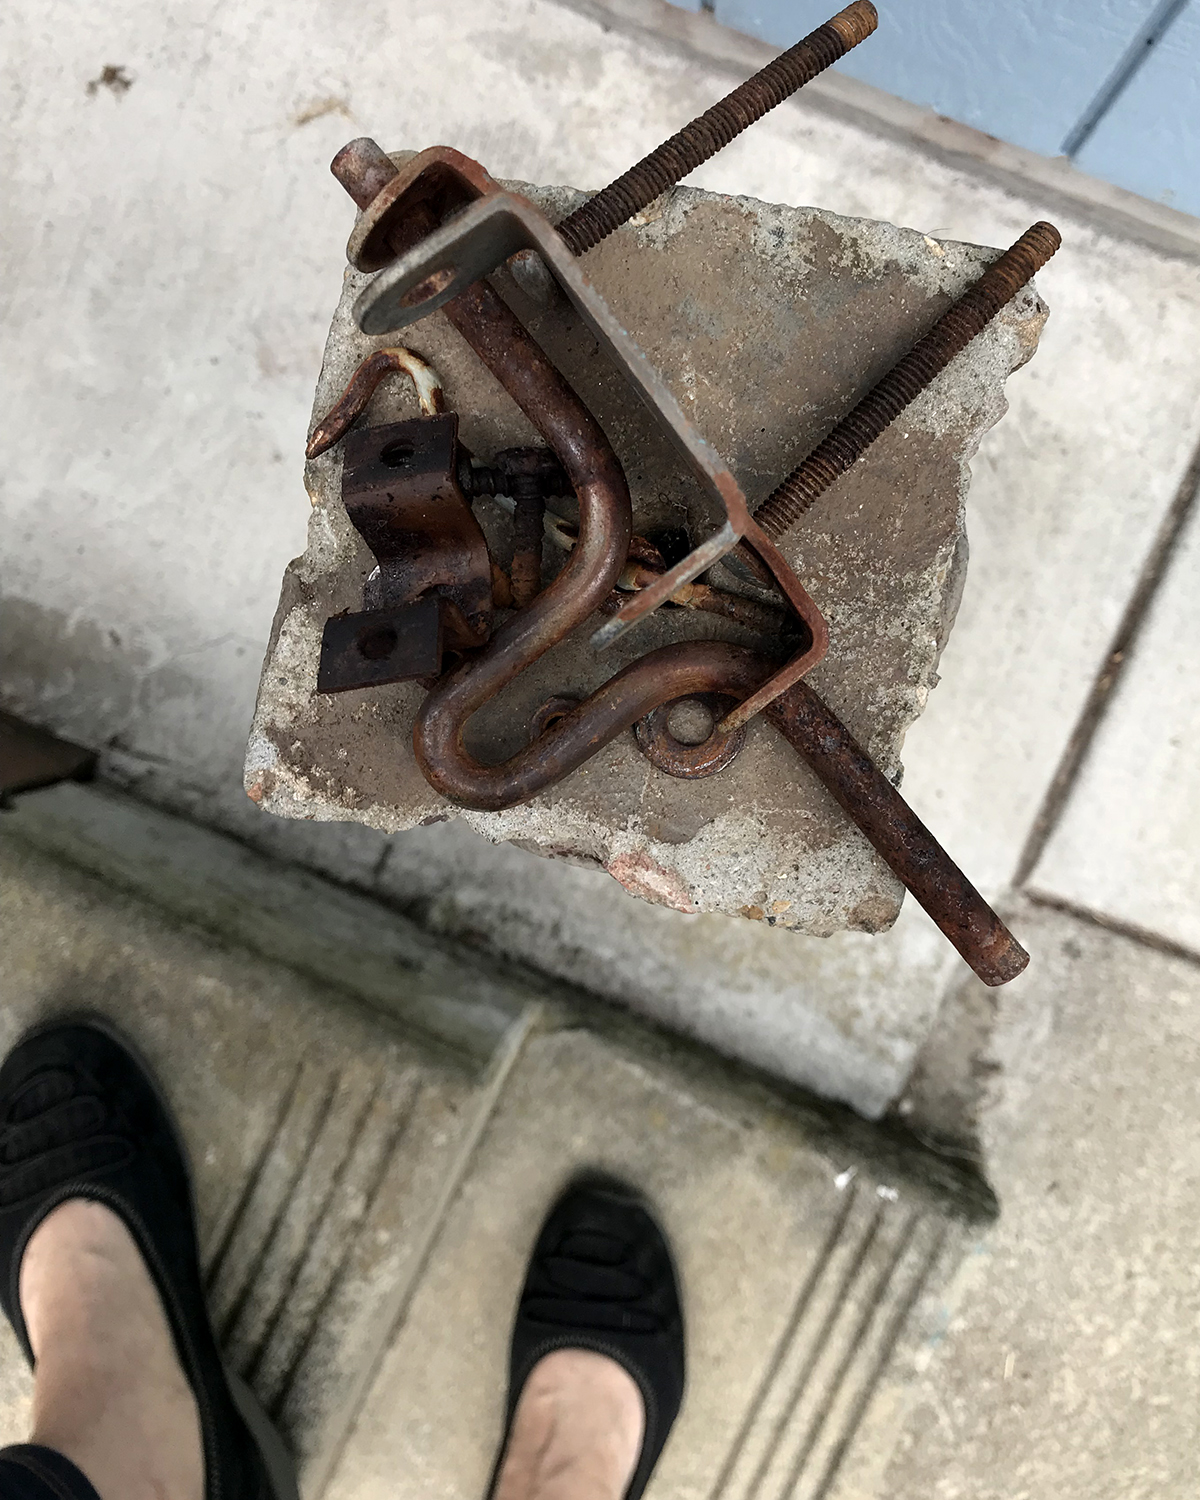
This is the old hardware, atop the treacherous birdbath pedestel, for those of you/us interested in these things.

And finally. Keli and I have been challenging ourselves to … not let the bastards drag you down draw a random thing and post it on Instagram, until, for each of us, momentous events transpire. (For me, that’s undergoing replacement surgery of both hips, on 01 October, 2018.) I have chosen Crayola and ink as my drawing medium. We are #messy_k_enge and #curlymuenich, if you care to follow along (+also under our regular names @iseecerulean and @nancy_k_enge). We are expecting phat coffee table art book publishing contracts to swamp our respective agents.

How could they not?


Prototyping Complete

purple

Feeling confident about the rightness of the basket kit patterns, I move on to test-coloring the white base cardstock. My charming husband gifted me a set of Winsor & Newton water colour markers, and I’ve been eager to use them. This is, um, not exactly — nor even close to — fine art, but watercolor tints differently than either stain or alcohol markers. I used an intentional kind of crosshatch to fill the larger pieces. Gorgeous color/colour, yeah? W&N Mauve 398.

pear

I built the purple mauve watercolor basket, and moved on to an alcohol marker. These bleed and blend much more readily into the cardstock. W&N Pear Green Y635.

most

Here are our happy fellows to date. In this picture you can see the difference between the heavier-weight yellow basket, and the slightly lighter-weight, tinted and white cardstock ones.

duck_egg_blue.jpg

I realized that tinting the outer edges of the lid pieces (even though they are eventually covered) helps mask any gluing misalignment, so had to test-make one more basket. This is W&N alcohol marker Duck Egg.

green_blue_rain

And here are the last two basket prototypes, with some hen succulents, held up to the last of our stormy, freaky light. I noticed a similarity between the terracing of our wee hillside backyard, and the woven fabric of the baskets. Huh.

Courtyard Set

floor

I wanted to build a courtyard set in which to photograph the miniature succulents, and I didn’t want to spend a lot of time doing it. I mulled it over conceptually for a few days, then remembered I had this egg carton paved floor from a few years ago. It had been sealed, so I grouted it with DAP spackle.

end_wall

I spent about half a day going through all my MDF scrap, windows, doors and gates, dry-fitting various combinations to fit the floor. And getting frustrated when they inevitably collapsed, as all dry-fits do. All the while sighing with that sinking feeling of I really don’t want to do all the work of cutting, patching, painting, sanding. Then I remembered I didn’t have to, and settled on a peaked end panel from a garage kit, and a length of half-inch foamboard for the long back wall. I mixed up a stucco slurry from some fine texture medium, thinned acrylic paint and a little tacky glue. It was a very enjoyable application :)

drying

After gluing the pieces together, I put it on the floor in front of my wee-yet-powerful Dyson heater to dry overnight.

done

Today I added a few pieces of wood trim — a cross beam and some posts — all stained leftovers from Argo Wool Works, and called it done. Actually, tomorrow I’ll drill some holes and add small nails and dowels for increased stability. Also I’m currently incubating designs for building anchor stars to cut on the Cricut and a few implementations of MMS+S signage :)

deco_vase

Here are some vases that will be available real soon over at Modern Miniature Succulents + Sundries. (These are just my prototype succulents; the actually plants have thinner stems.) Above is a turquoise-glazed porcelain Art Deco vase, about an inch tall.

seahorse_vase

This is a glazed porcelain vase sculpted with cavorting sea horses.

lady_face_vase

And one of my freaky favorites, a reproduction of an ancient 15th–13th century vase marked Chypre (Cyprus). Fierce! Nasty!

cyrpus_vessel

Update: Original vessel is in The British Museum, whose website is impossibly slow, but I found this image on a Pinterest board. “Glazed composition vessel in form of woman’s head. Ancient Cyprus in the British Museum”.

cyprus_zoltar

For you, Pepper.

hens test

hens_holes

Hen and chicks are one of the first succulents I fell in love with, so this design is dear to my heart. And I felt like a right genius because I figured out how to get the machine to cut a hole in each center. It is not an automatic process and involves what Cricut calls “attaching” layers. (The above holes are three points in diameter; I’ve since upped it to four.)

hens_fun_part

This is the fun part. Removing the waste from the sticky mat makes a musical plinking sound that is very satisfying. And as I soon learned and as Nora suggested, it’s far easier to remove the cut shapes after the mat has been “de-sticked” a bit — which seems to happen with use.

hens_shaping

Color test and shaping. The little point on the end of each leaf adds such sweet realism. My inspiration:

live

These guys are in a bit more shade now in my early winter backyard, so they’ve lost most of their edge-leaf color.

hens_proto

Prototype hen. Next up is to draft a smaller-leaved pattern set for the chicks, so we can build happy succulent families. This one is about 5/8-inch (16 mm) across.

hens_storage

And this is how I’m keeping all the very many parts organized and identified. I’ve long kept a stash of these useful little containers from takeout food, but ran out quickly. Dollar store to the rescue! Ten cups with lids/$1. I should probably cost them out in greater quantities :(


Testing

first_test_cut_120116

I drew some succulent patterns in Illustrator and exported them as SVG. The Cricut Design Space, the app the cutter uses, is fairly straight forward and easy to navigate. First cuts! The sticky cutting mat smells like a toxic headache, though.

more_120116

Here’s the first batch. The software arranges the cuts for best use of the material.

shapes_120116

By far the most difficult and tedious task is removing my many, many small shapes from the cutting mat.

stack_120116

A proposed stack. As it turns out, the two 11-leaved pieces don’t work well at all for miniature succulents.

prototype_120116

Here’s a first model and prototype. I’ll need to make some several before I work out the best construction techniques.

12x12_120116

After revising the patterns, I cut a 12 x 12-inch sheet of colored stock. That’s a lot of prying off to do. Best tool I’ve used thus far is a thin, flexible wedge-shaped palette knife. The next thing I want to determine is if the pen can have a broader tip, and can outline the cut line, and hold registration with the cutter. Learning!

New Echeveria Kit in Development

ec01_color_113016
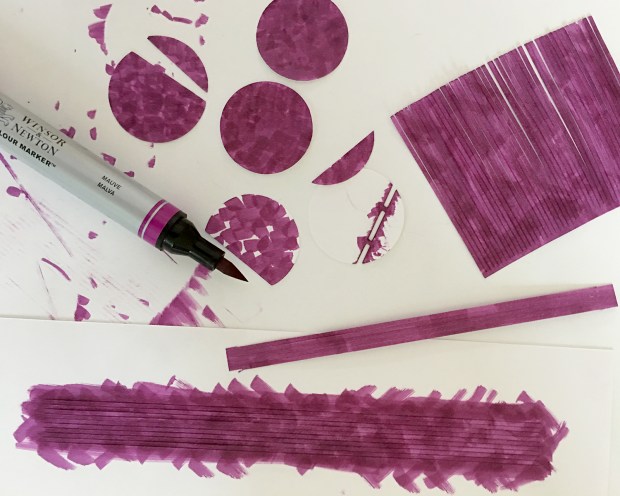
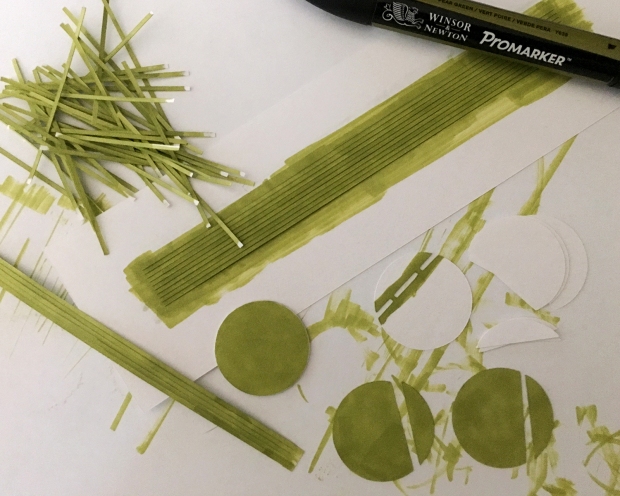
Experimenting with color for a new echeveria kit for
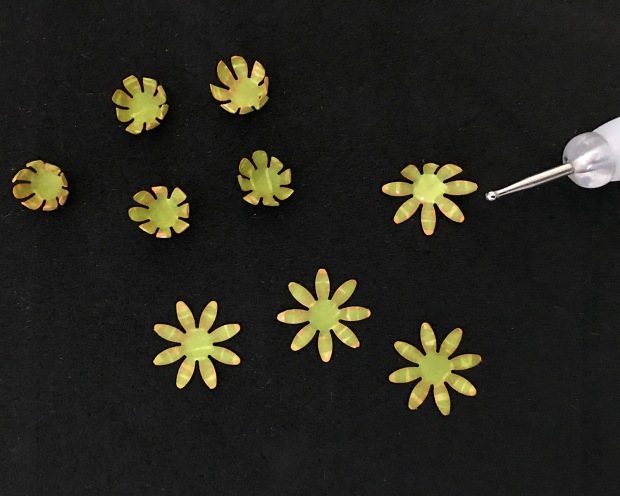
 the shop. This is two shades of green and an orange on white stock.

ec01_shaping_113016

Shaping with a fine point stylus.

ec01_building_13016

Trying out construction techniques and build sequences. This succulent is wonderfully small, just a half-inch (13 mm) in diameter.

houses_blog

The first issue of my newsletter, Cut, Fold + Make, goes out tonight! Look for it in your inbox on the first of each month. Included is a free pattern to make these iconic, and very versatile little paper houses.

arrived_113016

And possibly most exciting of all the things: this just arrived. Let’s get started.


New Kit

scarlett_sv02_112716

Listed another kit in the Etsy shop, a larger, more-specimeny succulent that pairs nicely with SV01. Continued heartfelt gratitude and thanks for your warm wishes and interest. I wish I had like a whole line plan to lay out — and I do! In my head! — instead of this kit-by-kit piecemeal showing. And soon, on offer, completed specimens, in some of the most wonderful containers I’ve ever seen! However. I am learning by doing, and this is bootstrap crafty business making. Rhetorical question: would we have it any other way?