
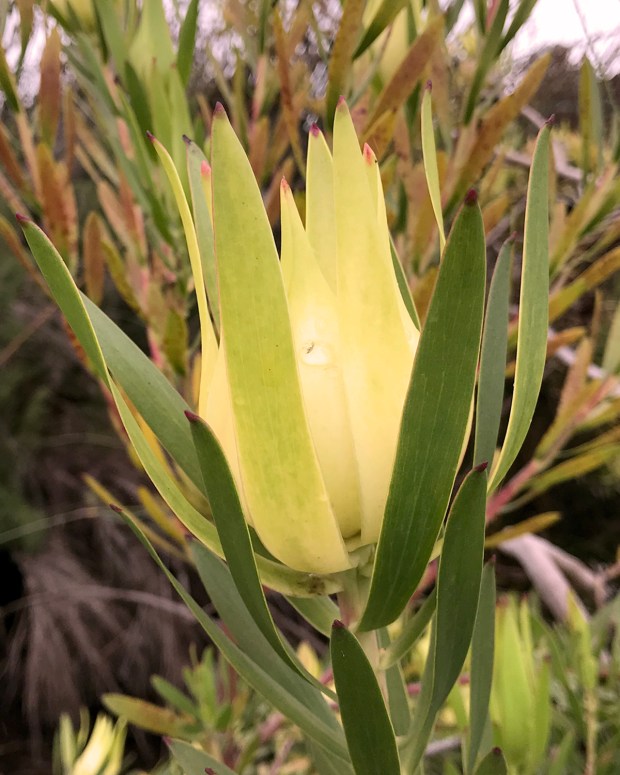
I is for inflorescence.
Noun: the complete flower head of a plant including stems, stalks, bracts, and flowers. Protea neriifolia (Narrow-leaf Sugarbush), UCSC Arboretum
I is for inflorescence.
Noun: the complete flower head of a plant including stems, stalks, bracts, and flowers. Protea neriifolia (Narrow-leaf Sugarbush), UCSC Arboretum

E is for echeveria (unsurprisingly). Except, this is an aeonium. So, this E is for except.
Marion Russek kindly sent some protea family photos from her visit to the Kirstenbosch Botanical Gardens in Cape Town. Though the peak bloom season is from June to November there, she still got some sumptuous shots. I cropped them pretty tightly, and sampled some colors from the flowers for additional eye candy :)

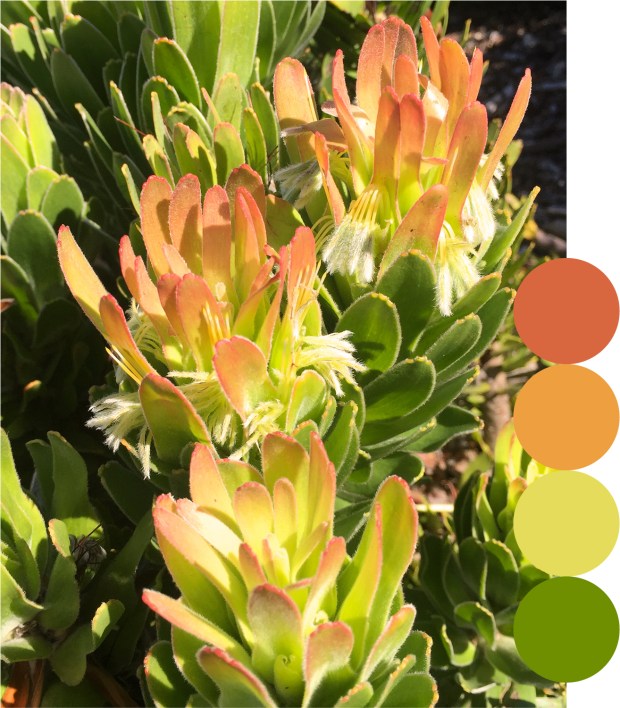
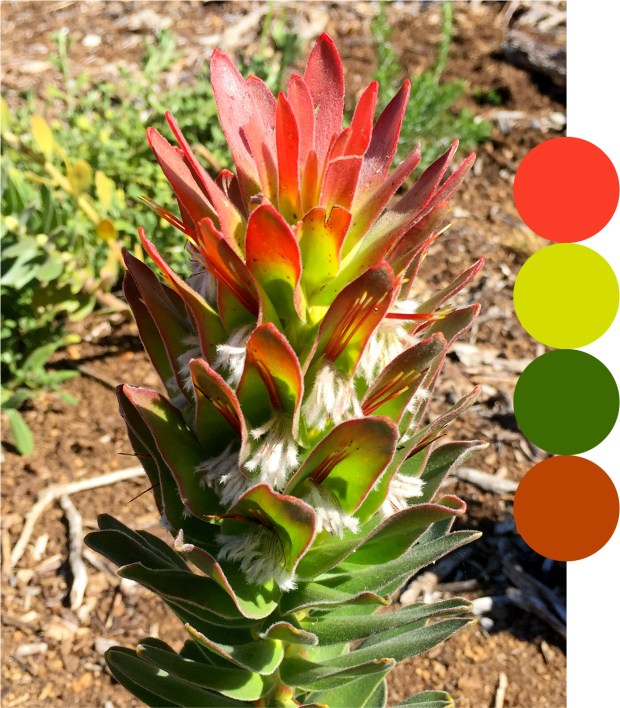
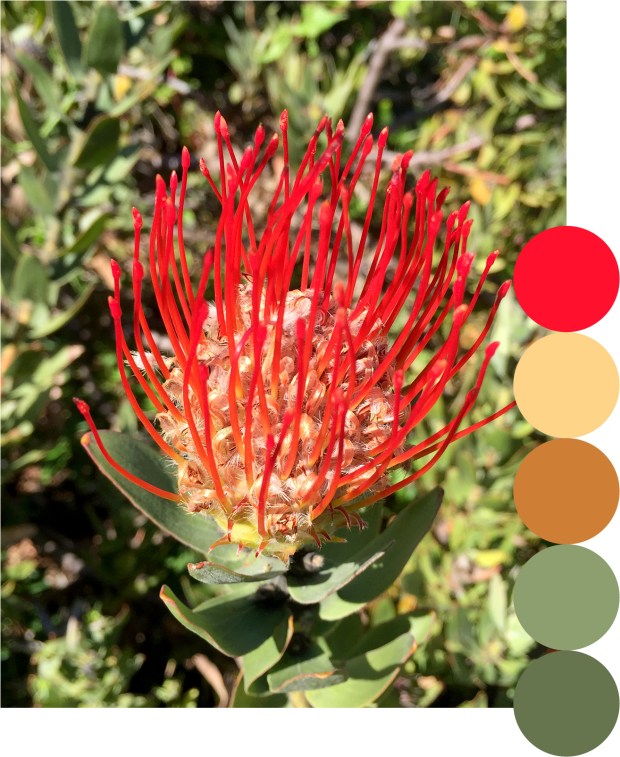


Pulling swatches really helps me understand what colors are going on, and provides a natural starting palette. Many, many thanks, Marion, for sharing the warm sunlight of South Africa with us. Plus! I learned a new word: fynbos.

Spent a drizzly hour+ marching around the South African garden at UCSC Arboretum, taking reference photos of proteas for the upcoming kit, inspired by Keli’s free-style flowering.

So many other-hemisphere plants to see. Not all are in peak bloom, but I was more interested in surveying the range of protea forms, their structures and colors.

I didn’t even concern myself with recording variety names, since I plan a sort of hybrid form for the kit. But the colors, the colors!
This one is a Leucadendron, “Inca Gold”. So luminous.

In the transition zone between South Africa and succulent gardens, there were flowering eucalyptus. The scent was heavenly! There’s nothing quite like being in a deserted botanical garden on a rainy day, with only hopping bunnies and many small brown birds.

Look at the subtle coloration and bold pattern of this succulent.

Again, but with the spiral nature of growth (and decay).

These were quite a surprise. Smallish, leathery, spiky, but what?! If I had done these colors I would call it a mis-step, but now I am emboldened.
This field trip was a wonder. I’ve many more examples of natural plant colorations that will probably necessitate having to buy more markers.
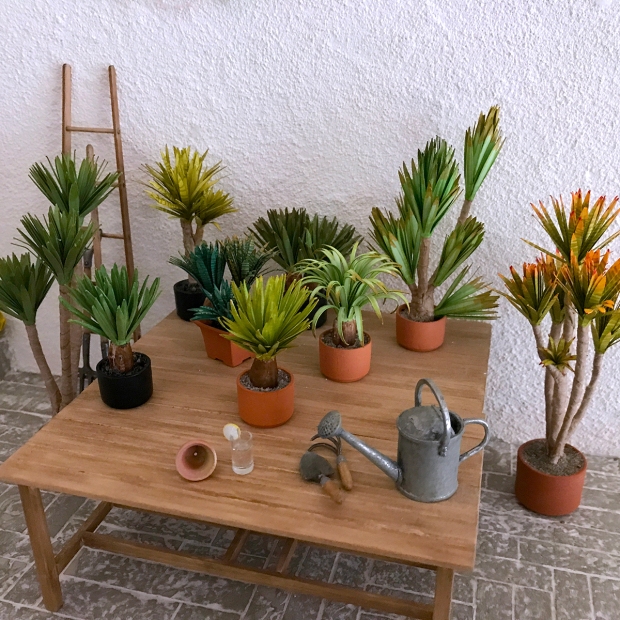
I’m excited to share photos of some incredible yuccas, made by two different miniature artists, both starting from the same kit.*
*Uhh, to clarify: each had her own kit. Two artists, two kits, two locations. Nancy B finished first. Not that it was a contest.

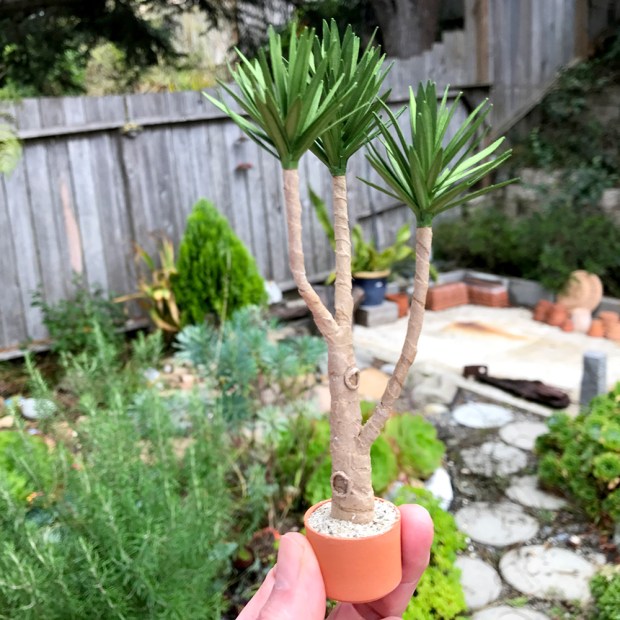
This is Nancy Bristow’s work. (Nancy has been making miniatures since the 1970s, and it was she who finally identified the Braxton Payne pots I had bought at auction, and pointed me to his obscure website.) She hand-colored the leaves using markers, and I love that she styled them curling out and upward. So pert and jaunty! They’re planted in BP pots she “aged”, and used bird grit as gravel.

Here’s a shot of Nancy’s work-in-progress, adding knot holes to the stems. I noticed she chose to curl the leaves first, before attaching to the stem. Brilliant! It is so gratifying — and informative — to see how other makers work with my kits. One can learn so much.

This is Keli Minick’s interpretation of the yucca tree kit. Look at those colors! I love the graceful trunk, and the stubby branch. Two completely different plants! She suggested using round nose pliers to separate and shape the leaves after attaching — which makes the process much less tedious. And she kindly pointed out a typo in the armature instruction sheet. Argh!

Here’s what the Broad Leaf Yucca Tree kit looks like to start. This is the green leaf variation; cream and white are also available. (I believe Nancy B started with white leaves; Keli with cream?)
What would you make of it?
Sincere thank-yous and expressions of humbled awe to Nancy B and Keli for allowing me to share their work.
Maddie drew a treasure map. The iconography is bold and challenging on many levels, not the least of which is her rendering of the letter “R”. Type designers, bow down, maybe even despair a little bit, that you might ever envision an “R” this way. I’ve not yet heard her telling of the map story, only that the thing that looks like a Crusader shield is an “X marks the spot”.
I’ve listed the first yucca tree kit over at MMS+S. It includes both an armature kit and a leafy clusters kit, with a choice of three base colors: white, manila or green. I plan on making kits of just the leafy clusters available, for those who want to make their own armatures, and eventually just supply packs of leafy clusters sans instructions, for those who get it and want to build more yucca plants. Every build needs at least one good yucca :)
So many possibilities! There’s one more versatile yucca houseplant kit in the queue, and after that, it’s on to making specimens. I’ve drawn a different leaf cluster, longer and finer, and am working with a smaller gauge armature, just for the finished trees and plants.
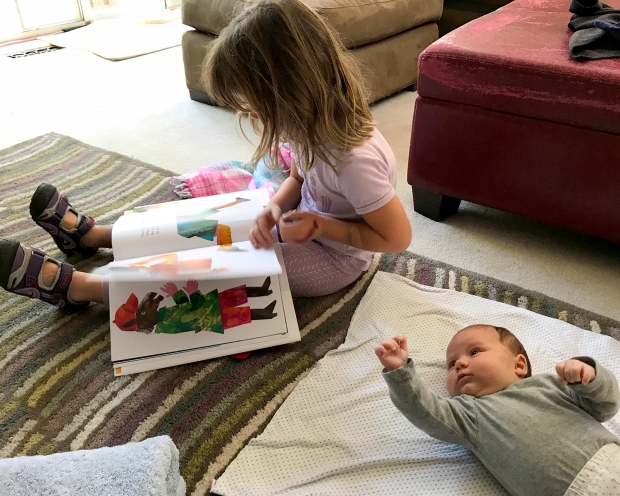
Here is Maddie, studying the most recent Eric Carle book, and Ruby, being what contented two-month old humans are. Kind of my world right now :)

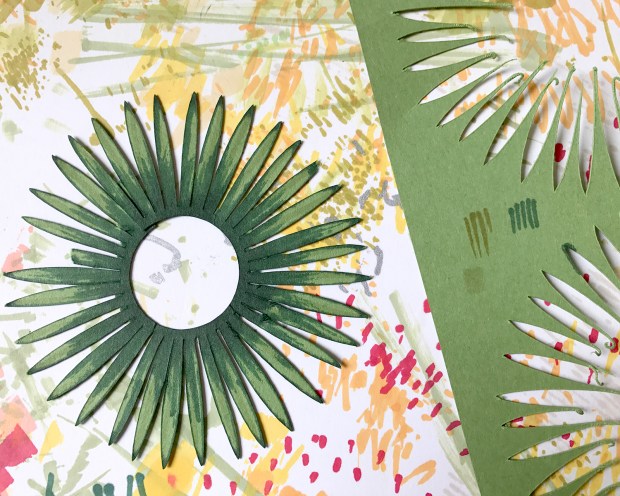
I sketched out and constructed a palm plant motif in Illustrator, then reversed a copy of it to make the most of the painted papers.

Here are my first cuts of the pattern from two of the painted papers, flung onto the wall. I was working against the losing of the light (because hey, Game of Thrones). They will work splendidly as a middle background layer, when arranged.
Still undecided how I will stick them down.

It took me a couple of cuts to get it right, but here is what a (partial) painted paper looks like after four passes of cutting. Still plenty of material for hand cutting parts available.
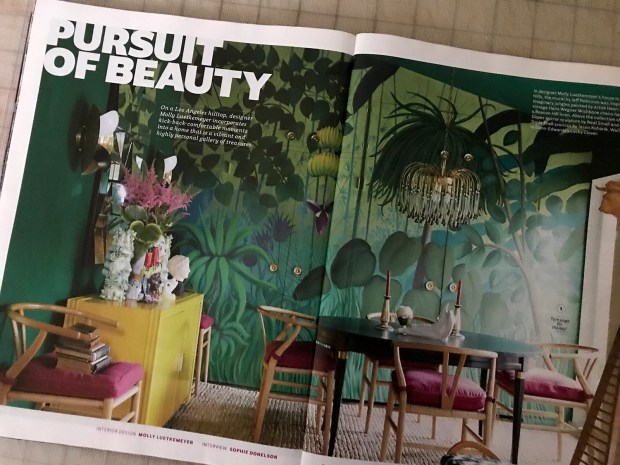
A few weeks ago I came across this spread in the April 2017 issue of House Beautiful. It’s a wall mural inspired by the imaginary jungle paintings of Henri Rousseau. Designed by Laurel Canyon homeowner Molly Luetkemyer, it was painted by LA artist Jeff Robinson.
I was instantly smitten, and thought a miniature version could be the perfect third wall for the MMS+S set. Since I am currently very keen on repurposing and/or drawing from my considerable hoard stockpile of materials and supplies, I grabbed a peaked MDF wall from — um, actually I no longer remember what build it was from.
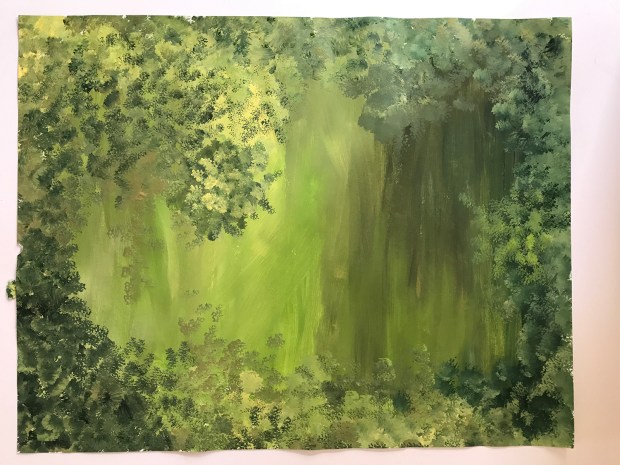
Years ago, I dabbled in some cut painted paper collage paintings, inspired by Eric Carle. I love this method of illustration. For this 1:12 wall, I plan on using hand- and machine-cut painted papers augmented with markers.

Here is the wall (MDF, 12 x 17 inches) with the preliminary foundation background painted in acrylics. I’ve been studying Rousseau’s jungle paintings, and making note of elements I want to include: light to dark background gradations; sky, moon/sun, jungle; exaggerated plant details; simple two-tone object shading. In Luetkemyer’s inspiration mural, she says the plants are based on California’s landscape, and I plan to do the same. What an awesome opportunity to draw all my favorite plants and flowers: yucca, ficus, succulents, sansevieria; gorgeous orange and red mystery fruit; outrageous florid orange and yellow flowers.

Using 14 x 11-inch medium-weight drawing paper and acrylic paint, I’ve begun making my papers, starting with the greens.

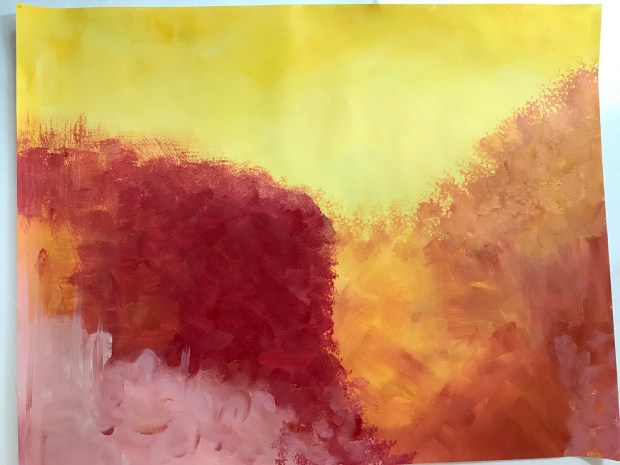
And then some warms:
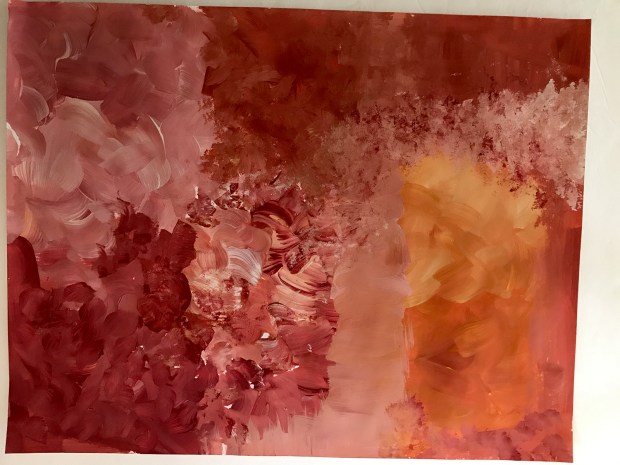
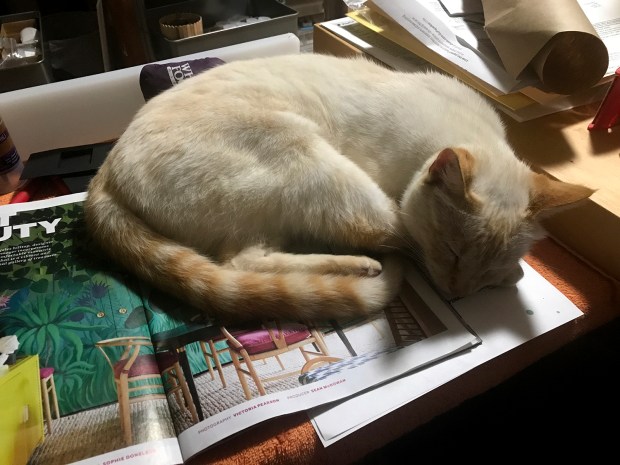
It’s getting late, and I’ve run out of room on my drying rack, so my helper cat and I are calling it a night.
Nancyland’s August (or Fogust, as we say here in the Bay Area) home page splash image is made from two of the above painted papers, layered using the magical “Lighten” blending mode in Photoshop.
The lyric snippet is from Grouplove’s “Colours”, a song Maddie and I both enjoy singing along to when it comes on the radio :)Lyric snippet update: The National’s “The System Only Dreams in Total Darkness”. Listening to on repeat.

My order of kiln-fired terracotta pots arrived from Braxton Payne. Look at this goodness!

He even included a wee “vintage” hand-finished pot. It is perfect.

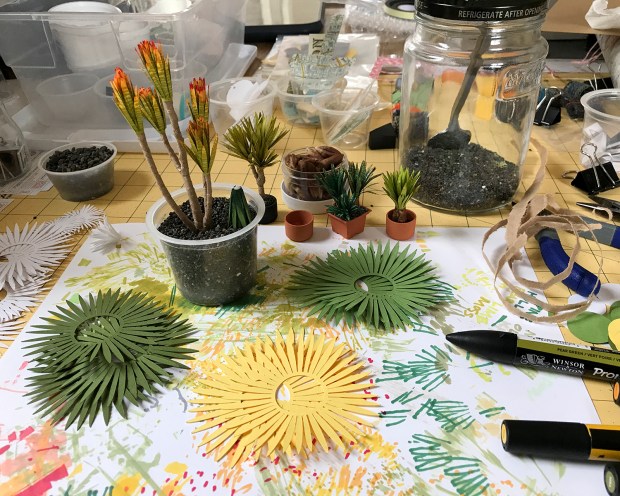
I’ve potted the first armature yucca proto, and am waiting for the glue to dry thoroughly before arranging the leaves. It stands 5.5 inches (14 cm) in a one-inch cylinder pot.
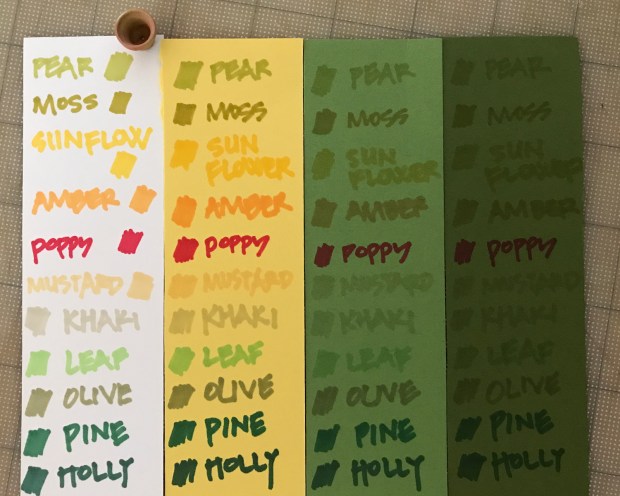
Oh, and here’s a color comparison on the four stocks I’m considering (with the tiny pot again, because it’s so dear). Nothing terribly surprising, but a handy reference. I think the yellow stock would be good for Sansevieria, or for yuccas with yellow edges — it’s difficult to outline this shape with markers. I’m excited to carry on experimenting!
It’s end of day, for now. Made some progress with the yucca exploration.
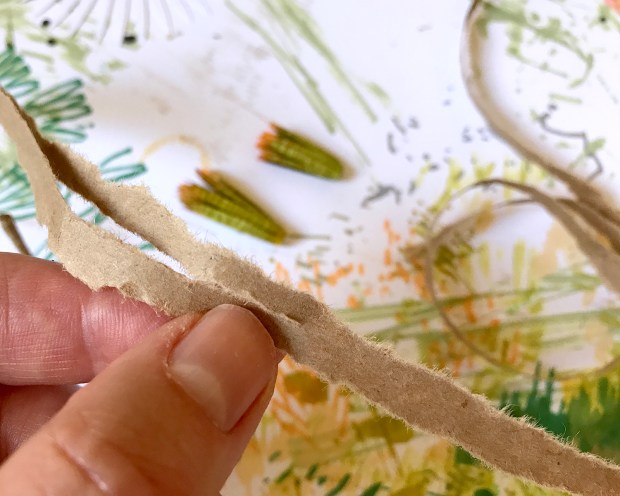
I began with tearing brown paper into thin strips.
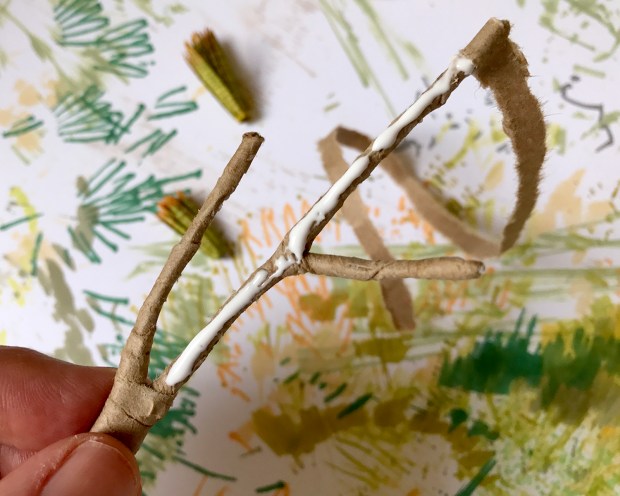
And wrapping multiple layers over florist wire to build up a convincing yucca stalk-and-stem armature.

Yucca species are varied in color, though not as much as succulents, perhaps. In miniatures, I ascribe less to slavish reproduction and more to evocation of spirit :) Starting with white cardstock for this one, each leaf end gets tipped with Winsor & Newton Promarker Sunflower and Amber, both sides.

Broad strokes of Pear Green color each leaf.

Both sides colored. The inks blend as they build up and mellow as they dry.

Thin cross-leaf striping, in Moss.
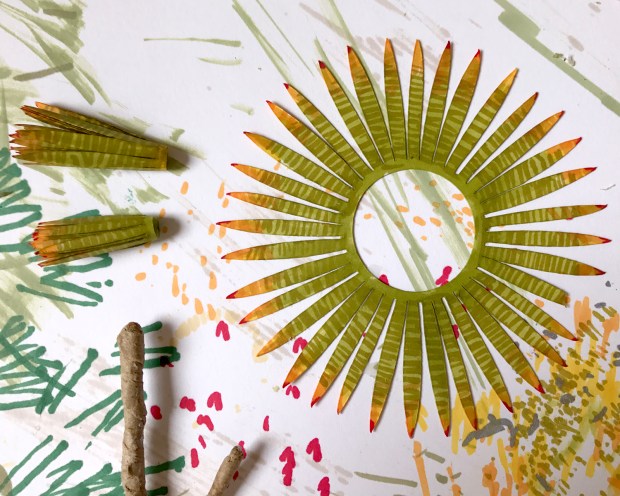
More cross-striping on the ends with Amber, and surprise leaf tipping in Poppy.

I snipped through the lower edge, applied a thin line of glue, and began rolling the leaves up into a cluster.

Adding a generous dab of glue to the rolled end to ensure a well-bonded base.
Inverted in a cup of fine gravel, I let the leaf clusters dry completely. This makes arranging and styling easier — and more robust — later on.

Clipping the end of each armature branch with pliers creates a flat surface on which to glue a leaf cluster. Holding until set ensures uprightyness :)

Watching glue dry. Again.

I added two more trunks, wrapping everything together at the base.

To improve the transition from leaves to trunk, I cut sections of 7 or 8 leaves and applied glue.

I wrapped these just below the base of the leaf/trunk join.

All trunks wrapped with leaves, and drying. I’m awaiting a larger cylinder pot to plant this particular specimen in, before unfurling and styling the leaves — the really satisfying part.

I’m fairly happy with the appearance and versatility of this plant concept thus far. They work well on an armature, date pit stem, or just as foliage — and any combination thereof. I even think this pattern and method could work for Sansevieria, with the right colors and a little bit of shaping.
The next step is to explore and evaluate color stock choices, which brings us back to the first photo in this post. Above is medium green cardstock (cut with a dulling blade, resulting in torn, dragged edges and general scuzz. This particular design cut really seems to blunt a blade fast :(
This green leaf set is colored with Holly swashes and edging, and a subtle Leaf Green vertical stripe. Very different than coloring on white. Each stock seems to absorb the inks differently, as well. I’ll show some side-by-side color comparisons next time.
