Sea House Conservatory Railing

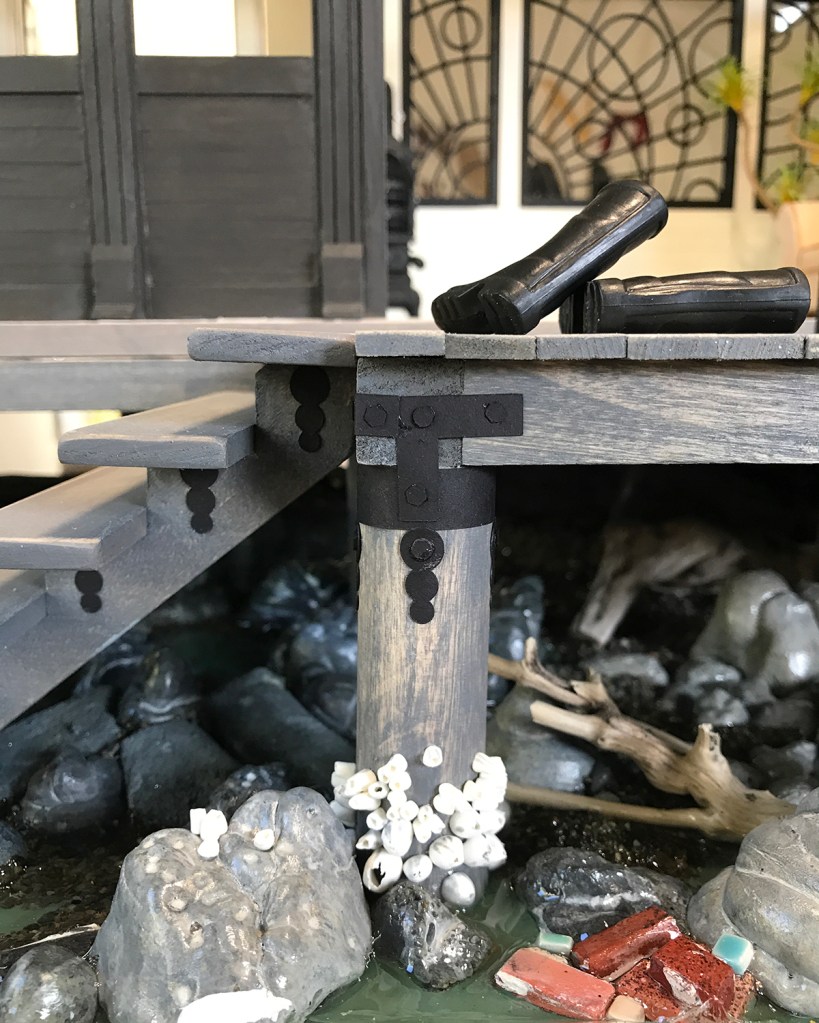
The Sea House Conservatory deck needed a railing.

So I built one.

SH Conservatory railing, under construction

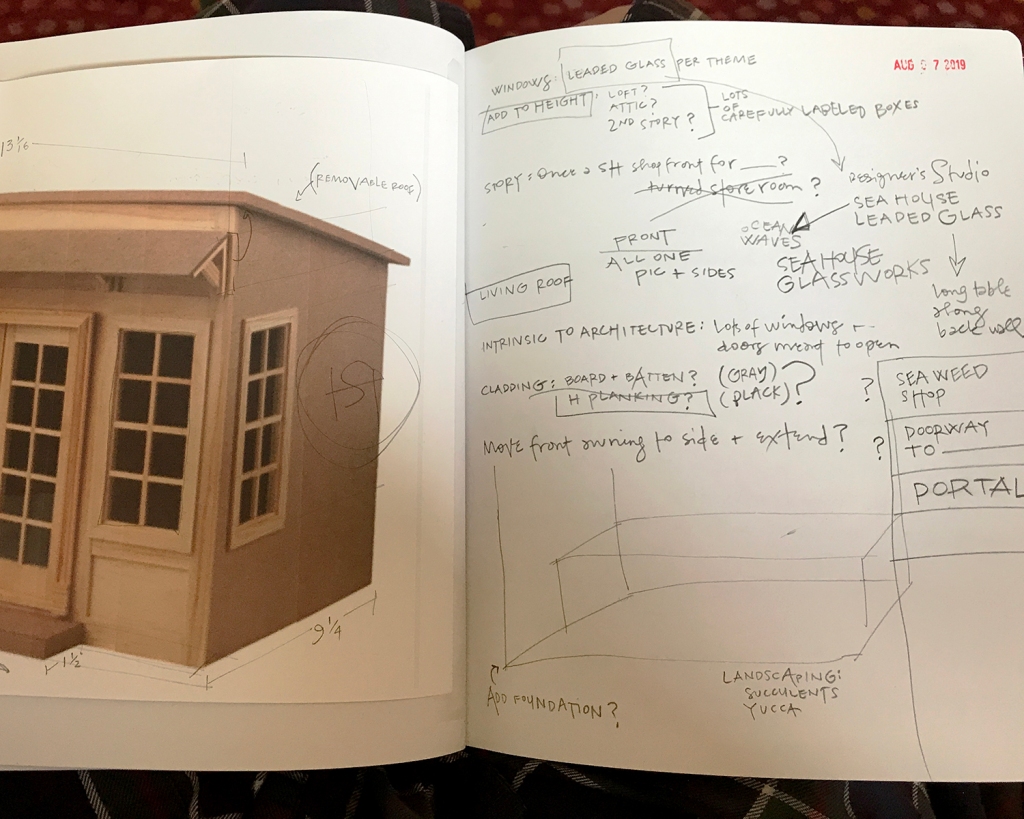
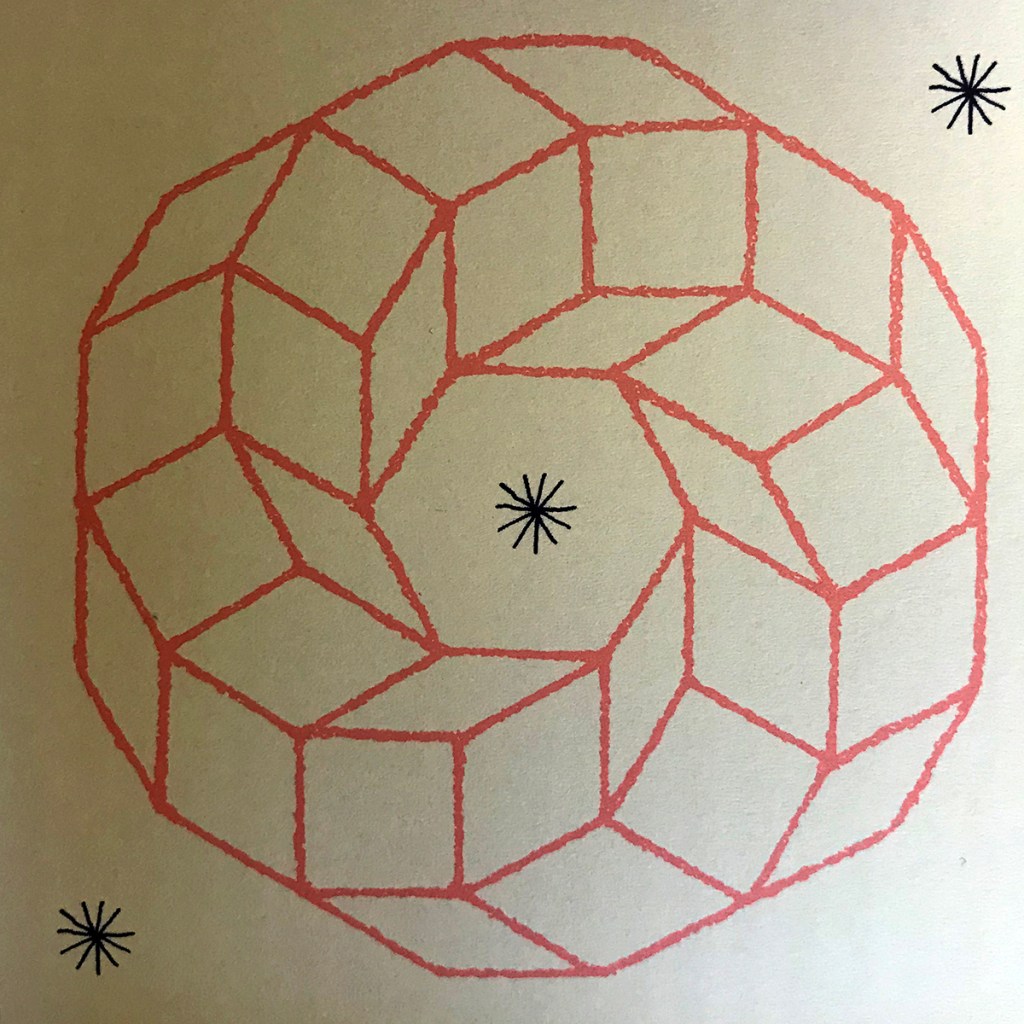
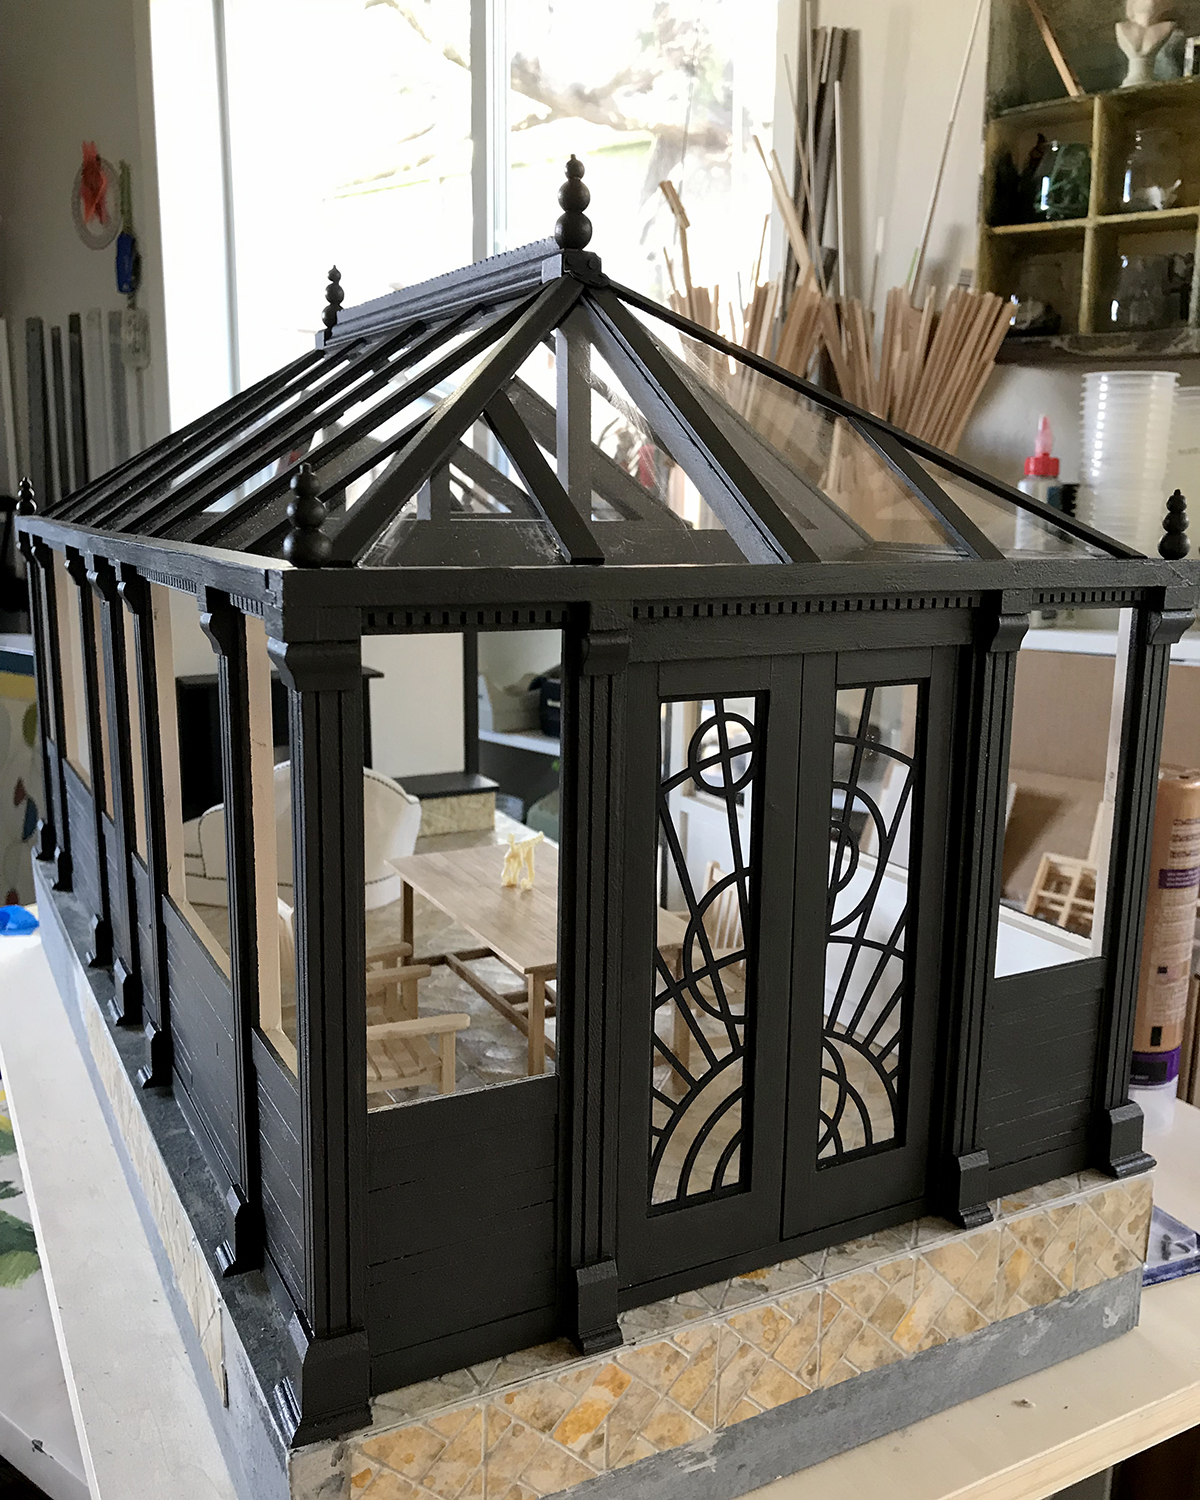
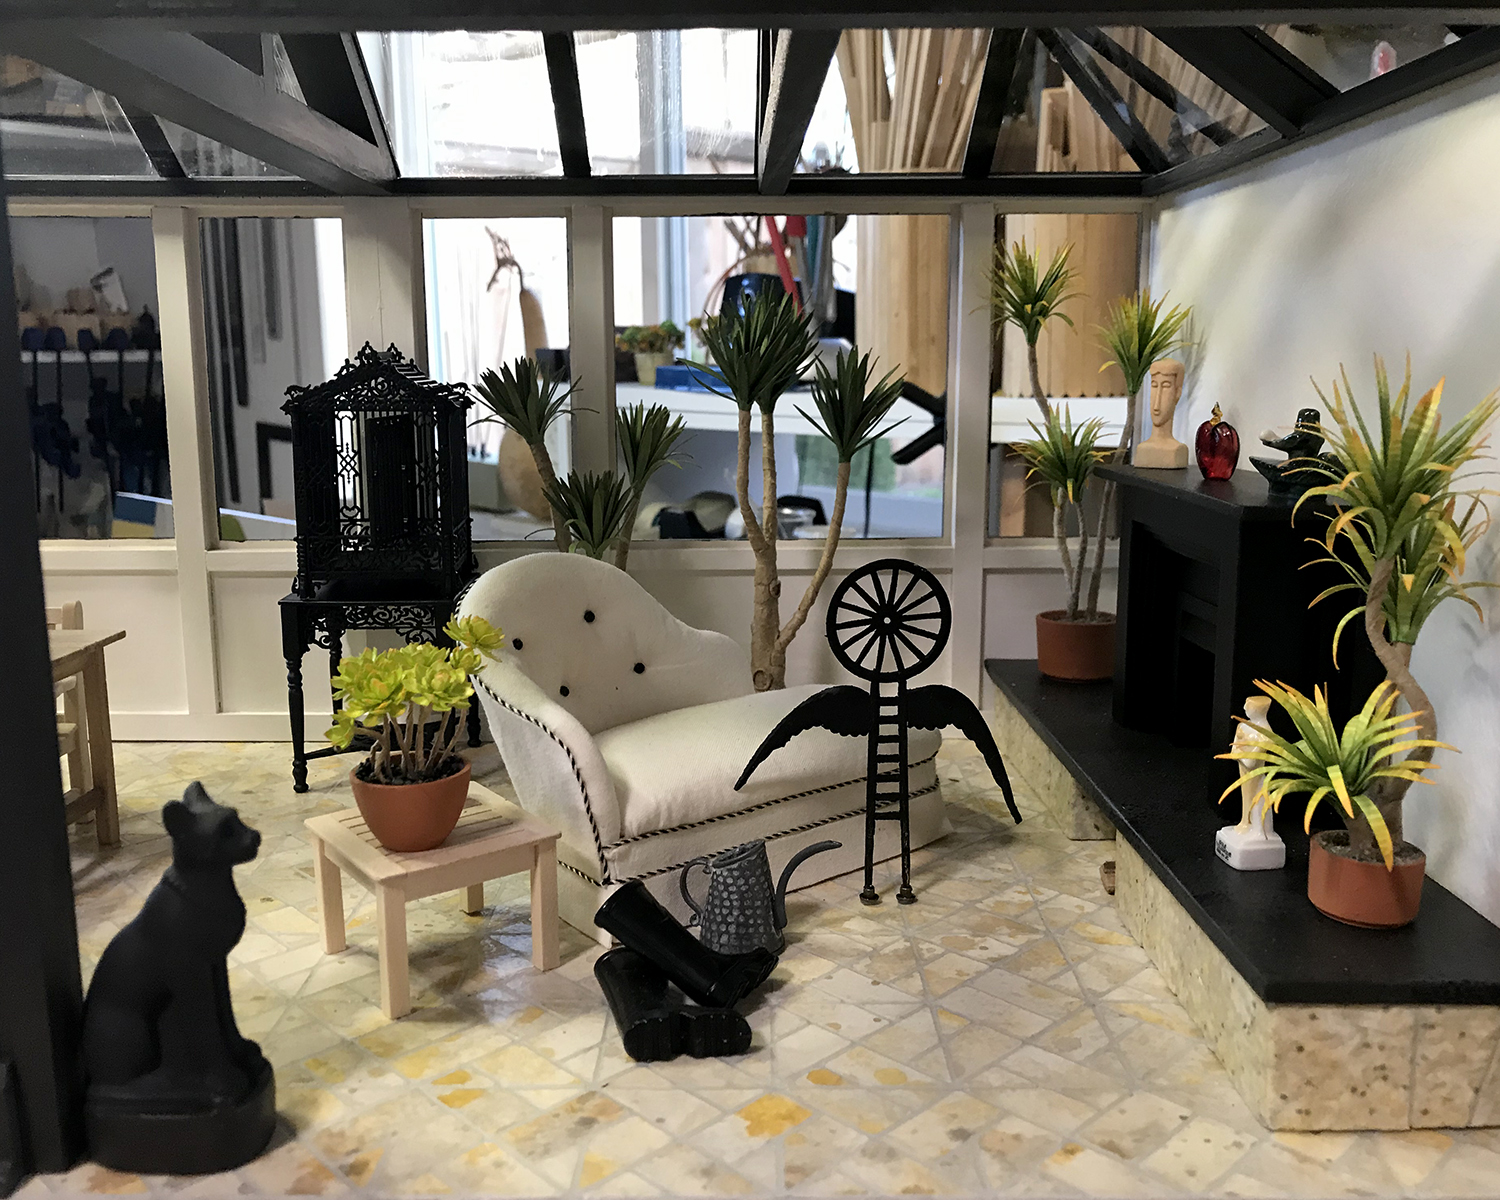
The Conservatory has a celestial motif in the leaded windows, which is carried through in the railing panel design.

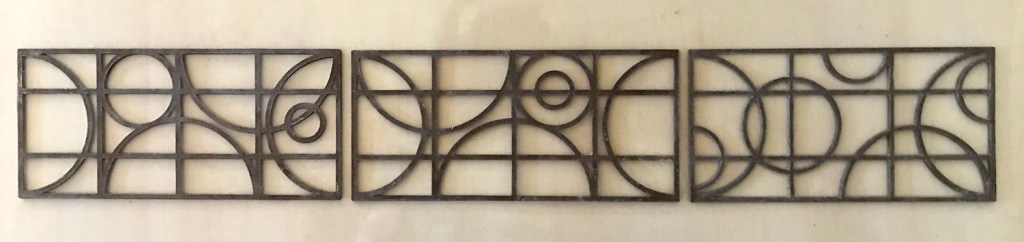
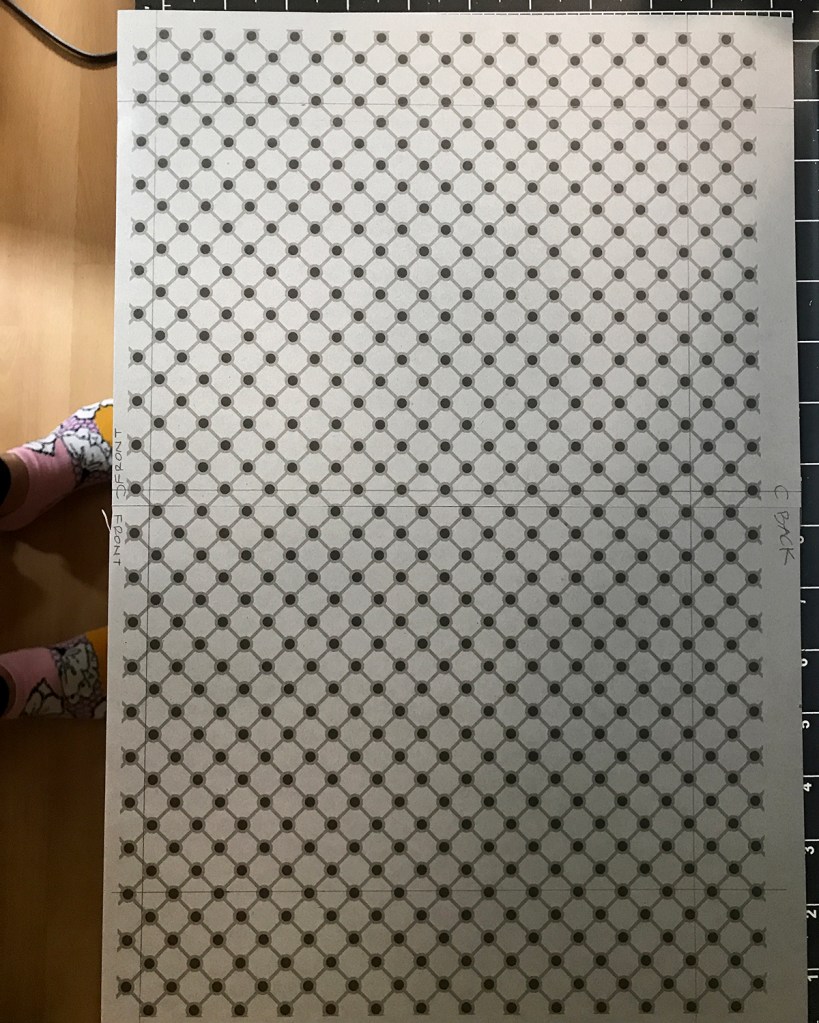
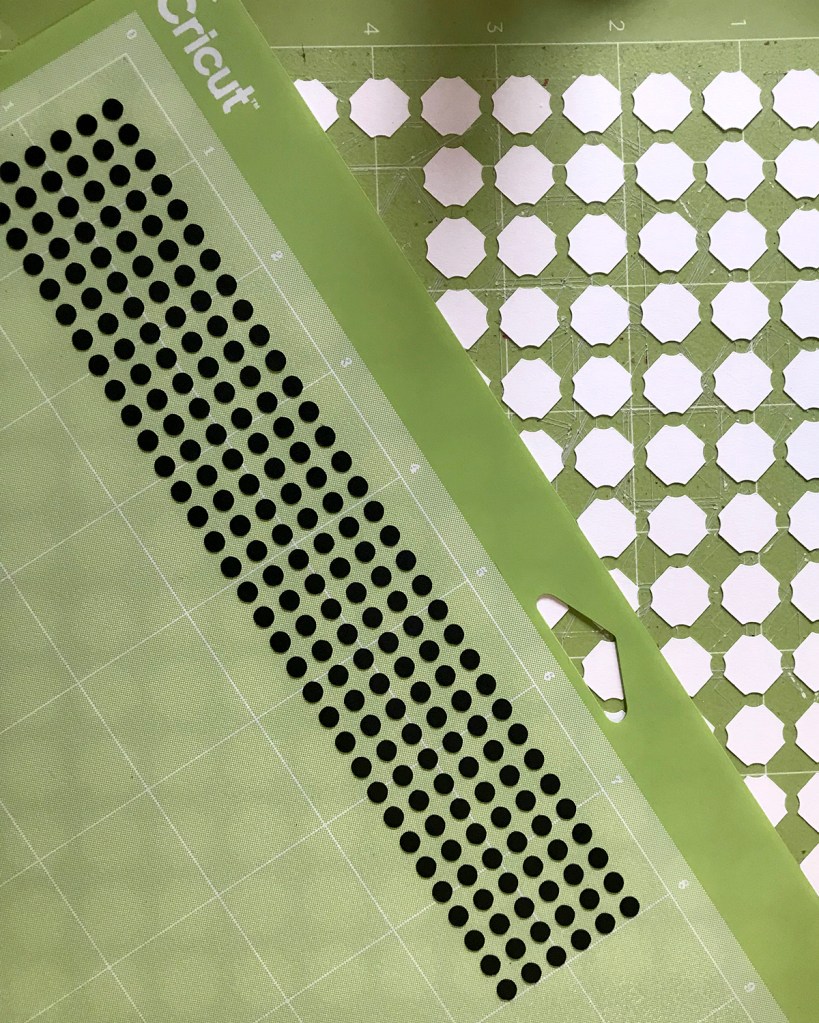
I cut multiples of each panel from chipboard on the Cricut Maker. (Side note: I get the best results from editing the cutting presets, after a test cut on my chosen material.) I decided on a double, rather than triple layer, to lessen the alignment errors.

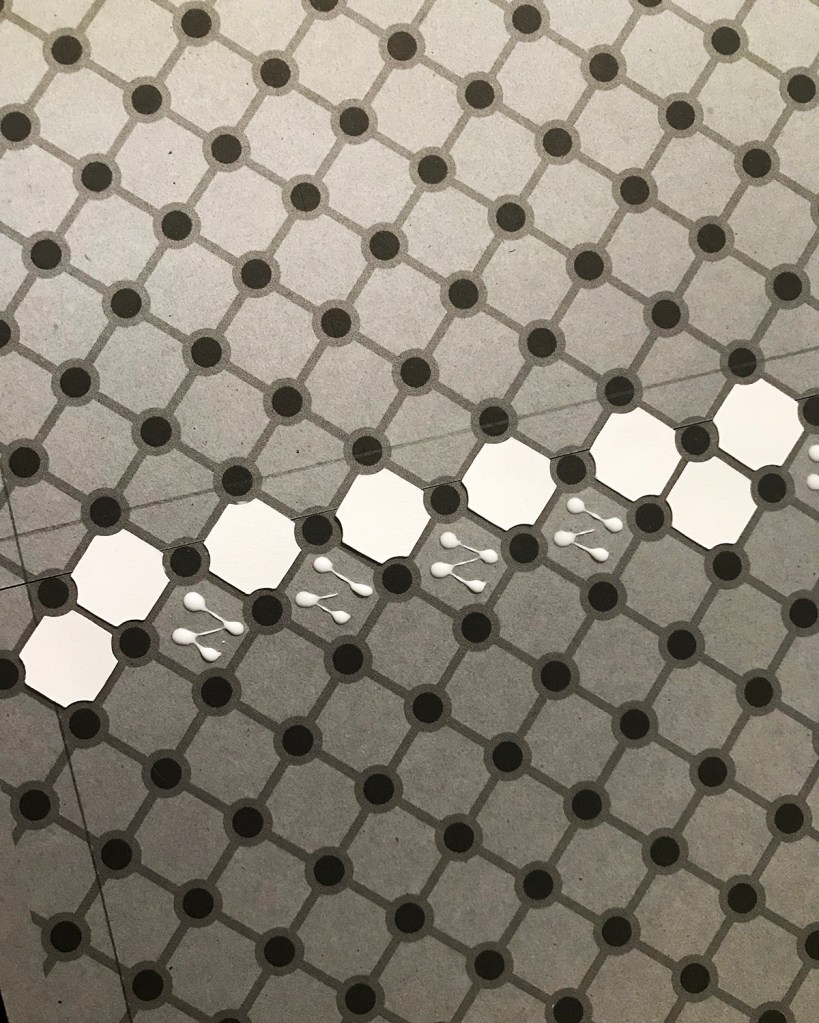
I used a lamination technique I learned from the talented Heather Tracy at Thicketworks. She uses thin cyanoacrylate on her intricate chipboard pattern pieces to seal, strengthen and stabilize the material. When dry they are easily sanded and very, very hard, and take acrylic paints beautifully.

Wheelbarrow pattern design by Heather Tracy of Thicketworks

To learn the nuances of the technique, I used one of Heather’s patterns she generously makes available free of charge. (She also has an Etsy shop, a YouTube channel of tutorials, and a maker club.) I made the blue wheelbarrow first, and then the red, slightly improving my results. It is a worthwhile technique, but messy. (Also, to me cyanoacrylate is one of those devil’s bargain products.) If you’re not familiar with Heather’s work, I encourage you to check it out!

After sanding the panels smooth — paying particular attention to the outside edges — I glued (using wood glue) them into post and rail surrounds.

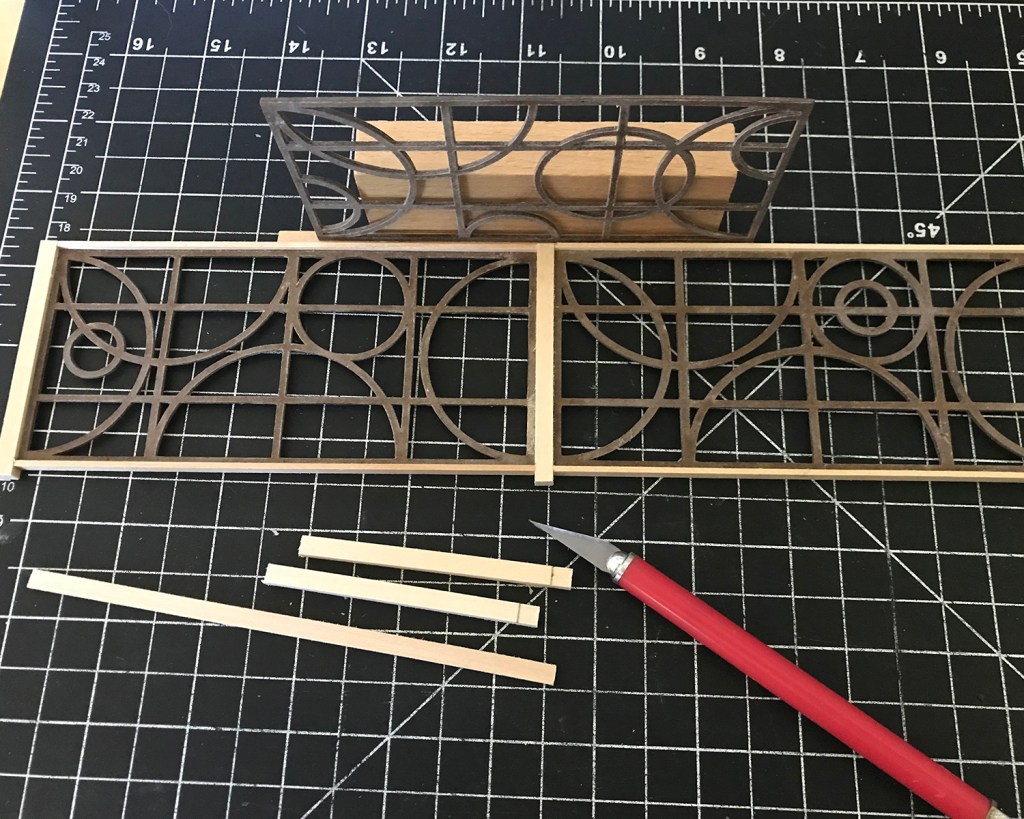
These were then joined into the L-shaped railing.

I sprayed the assembly with multiple light coats of matte black primer + paint, to seal and increase attachment bonds. After the glue and paint cures overnight, I’ll finish sand it and paint a final coat, then give it a matte seal.

I like a good wide top railing, for cats to lounge, elbows to lean, and drinks to be set upon, so I used 3/4- by 1/8-inch basswood. Thinking now of bracket designs to be cut from card stock to attach the railing securely to the deck, but that’s for tomorrow.

Having just finished watching the Amazon series Tales From The Loop, I’ll leave you with this image of Point Montara Light.

This, That and Another

HBS 2020 contest base kit dry fit

Late one night I decided to dry fit the HBS contest base because I needed to look at something new. I like the kit, but am undecided if I can responsibly build it. Ideas abound, and it’s currently on a turntable next to the studio thinking couch. It also makes a grand morning coffee cup platform.

UPDATE: Next morning. See?
Sea House Conservatory under-pier detail

Here’s a glimpse of the under-pier, under-stair Sea House Conservatory setting. Barnacles by Keli, air-dry clay boulders, and flotsam from the natural and manufactured worlds.

Sea House Conservatory bioluminescence

When I saw just how much of the low tide water is in the shadow of the Conservatory structure, I thought some bioluminescence might add charm. This is four flickering LEDs set in the back corner, under the pier.

More Sea House Conservatory bioluminescence

The effect is subtle, but smile-worthy, especially in the dark.

Sea House Conservatory light trickery

Here’s a shot of preliminary bulb placement. You can see some of just how much is unseen.

Thar be monsters

A night view of the mystery.

I indulged the rare decorative impulse to design pier piling hardware that echoes the Conservatory finials.

Oh wait, another what-lies-beneath shot.

Looking west from Point Montara Lighthouse, 07 March 2020

This was one of my birthday views, taken from Point Montara Lighthouse in early March, on a day-long field trip with my Greater Farallones Naturalist class. There was a large pod of dolphins cavorting not far offshore, visible through the very many pairs of binoculars and spotting scopes.

The pandemic was already getting real, but that was the last time I sat by the ocean, side by side with my classmates, eating our bag lunches together in the intermittent sun and light rain.

Here’s an image from a series Keli and I have been punting about. It started when Keli found a scale model canoe builder in Maine who makes these beautiful 1:8 paddles. We each bought one and the challenge is on Instagram #littlepaddletales and #paddlehomage. It’s been fun.

Retrospective: Sea House Leadlights

Albie oversees receipt of Serendipity Shed base kits, 16 August 2019

I thought it might be interesting to review building highlights of the Sea House Leadlights studio office, from start through submission. (Can’t really say “completion” because things never stay done ‘round here.) There are links back to original posts — if any were made — with more details. I wasn’t very bloggy :)

First ideas

I spend a lot of pages thinking, sketching, dreaming, considering and working out dimensions and story.

The starry floor in process

The first floor idea, though fun to design, paint and assemble, did not work well in the space. So it goes.

Two base kits mashed together

Height was added to the starter kit with parts from a second. I like to retain recognizable elements of the kit, so the roof angle and footprint, as well as door and lower window placement remained unchanged.

Loft wall detail

I glued cold press 140 lb. watercolor paper to the walls for texture before painting, and added a whitewashed aged brick back wall in the loft.

Adding siding to the new front
Half-loft installed, supported by faux beams

I opted to make the front façade removable as well as the roof… this makes it so much easier to photograph the interior.

Bench tops and bottoms

I cut the built-in benches from 1/16-inch basswood on the Cricut Maker. These were glued together and supported with 1/8-inch dividers.

Interior space begins to come together
Tree Frog green was the only possible finish color, with black leather cushions

I thought and sketched about the window designs for some time. The Pavilion is bubble-themed; the Conservatory celestial… for the Leadlights design studio I went Egyptian Deco. Mostly sort of.

Sea House Leadlights front doors and front/side windows
Sea House Leadlights upper window

The upper window is a stylized scarab. Very.

The “leading” designs for the windows are cut from lead black cardstock, glued front and back to the plexi, then framed in black on the exterior (and tree frog on the interior). I like to see wood grain, so I use a 1:1 ratio of acrylic paint and staining medium.

The scarab window at night

If one looks straight on, the window frames the bricked loft wall and the old Sea House logo. With sacred scarab wings.

Side building signage

I — or rather the Cricut Maker — cut the signage from matte black vinyl. The stars in the design are meant to resemble anchor plates used to reinforce old buildings. I love them.

In this backlit photo, the vinyl letters appear to float off the side of the building. It’s not quite so unnatural-looking in person, but knocking back the synthetic smoothness is on my eternal learn-to-do list, to find ways to tone down the material. (Transferring wee letters and figures is a fiddly, fussy business, especially onto an uneven surface, and I am not eager.)

Side sign
View from above

Here’s a roof’s-eye look at the progressing build. The holes are drilled for the LED light fixtures that will illuminate the work space below. (The wiring to be concealed beneath a custom rug and other stuff stored in the loft.) A narrow shelf beneath the scarab window on the removable front might support batteries if I ever add lighting to the front. Floor tiles gleam softly with scuff-resistant utility. Leather window seats beckon.

To be continued…

Sea House Leadlights Interior, Roof; Scarlett

Hello Sea House Leadlights office

The entrance to the Sea House Leadlights office is up a few stairs and across the deck to the left of the fireplace. A set of leaded glass doors opens into a snug but functional design studio.

Details: Terra cotta pot by Braxton Payne. Basswood deck and siding stained with Minwax Classic Gray. Pumpkins made from tissue paper and thread. Boulders sculpted from air dry clay painted with acrylic washes and sealed with ultra matte varnish. All succulents, yucca and other plants hand colored with W&N Promarkers. Many are prototypes; some available as kits at Modern Miniature Succulents + Sundries.) 

Desk and bulletin board

Beneath the half-loft a large tabletop desk has plenty of room to roll out plans and inspiration. Low built-in cabinets with black leather cushions provide more seating, storage and level surfaces for tea trays.

Details: The ceiling lights are 12V modified for warm white LEDs. Bulletin board is made from cork sheet framed with basswood stained to match. Sketchbooks made from my kits at MMS+S. Various meaningful artifacts including original leaded glass designs for other Sea House buildings, and a drawing of a cat by my then 4-year old daughter. Fèves, prized vintage Monopoly shoe, and an anodized earring from the 1980s.

The white-washed brick loft stores window frames, tools, Sea House memorabilia and miscellaneous treasure — as well as the switch (lift the black basket) and battery pack (hidden in a custom box) for the LED lights.

Details: Oh yeah, the baskets and boxes are also available as kits at MMS+S.

A gazebo-style roof welcomes natural light. (I’ll detail more of that happy construction in another post.) I made the 1:144 scale basswood model of the source kit for the original Sea House Pavilion, built some years ago. The Egyptian cat is a porcelain fève. Best of all is the vibrant painting by Jim Tracey that commands the studio — also another post.

Finally, of course, Scarlett. Here she has somehow managed to fluidly infiltrate an impossibly small entrance to the Sea House Sea Rise Pavilion loft (my ongoing remodel of the original 2013 build.) I swear she does these things just to remind me she can.

Oh, how she makes me laugh.

Tile floors

Impeccable book design by Giulia Garbin.

I noticed this book in the “New” section of the library, mostly because the design aesthetic is so similar to my own. Star Power, A simple guide to astrology for the modern mystic by Vanessa Montgomery, was designed and illustrated by Giulia Garbin.

Illustration by Giulia Garbin.

This figure in particular captured my imagination, and I decided to redraw it as a pattern, and see if I could get it into repeat.

Geometry is elegant and perplexing.

It was tricksy, but I persisted.

I added a six-pointed star to the hexagram center of the pattern to make it even more swirly.

The blue is near impossible to photograph true.

Inspired by a ceiling mosaic I once saw in Ravenna, Italy, I mixed up a nice deep blue, and painted the smooth side of cold press watercolor paper.

Metallic gold spatter is universally understood.

After printing out the pattern with 3 point-wide ground lines, I cut the individual tiles with my desktop cutter and pasted them up.

This was a fun pattern to build!
The finished floor.

I sealed, grouted, cleaned and finished the floor with a few coats of satin varnish. It is so pretty! But unfortunately, not at all in the scale or perceived style of its intended build.

Diamond squares. With dots.

So back to the drawing board. I eventually arrived at this design, and also with a new idea for finishing it.

The new floor base, with Bombas socks.

On multiple sheets of card stock a few shades lighter than the grout color, I printed out and taped together the pattern base.

Dots. And cut-corner squares. Or diamonds.

The individual tiles were cut.

And glued to the printed base with my signature glue pattern :)

All in all, it went much faster than I thought it would. And by printing the grout lines on an in-between background color to disguise any minor off-placements, I was able to skip the whole monstrous grouting process, and just finish the floor with a few coats of sealer and varnish.

I’m more than satisfied with the results, and feel like this is a new and simpler technique for future floor fabrication. There’s a satisfying dimensionality to the card stock tiles that is wholly appropriate to 1:12 scale, and all without the mess and dulling of a traditional grouting process.

I hope to use the blue-and-gold floor some where, some time, maybe as a patio?

Sea House Conservatory, Pacifica, Santa Cruz

Sea House Conservatory, in progress, February 2019

The Sea House Conservatory removable plexiglass and faux iron beam roof is assembled. It is supported by iron pillars and wood siding painted N-C16 Midnight Stroll by Clark+Kensington. I made new finials from wooden beads and toothpicks.

Brackets join and support the faux iron roof beams

Where the two corner beams met the center beam and roof ridge there was an inelegant gap, so I cut iron brackets and bolts from two layers of black card stock, to reinforce both the roof structure and the illusion :)

Wheelie at the fireplace end of the Conservatory

The fireplace and hearth underwent yet another color change. I wanted something more working/utilitarian looking, less living-roomy. Picture the chaise draped in reference books and aprons and a seaweed drying rack hanging from the rafters.

Sea House Conservatory leaded window design, 3 of 11

Turning my attention now back to the many windows, cutting the original kit grid mullions out of the frames with a Dremel. Tedious. Then sanding, painting, and fitting the cut leaded designs into the frames, front and back. Oh, and finishing (but not mitering) the outsides with 1/16-inch square trim. Ugh.

Pacifica sunset, between storm fronts, 15 February, 2019

We’ve been getting breaks between rain storms, glimpses of the sun, and some beauty clouds.

Ruby at 20 months, shopping in her sister’s vest for her mama’s birthday present

Spent a long weekend in Santa Cruz with my daughter and younger granddaughter Ruby, while her papa and older sister Maddie were in Lake Tahoe getting Xtremely snowed on. Ruby’s choice of outerwear was her sister’s vest. Ruby on the runway.

I like me. Print this out and hang on your refrigerator, lest you forget

Maddie, who turns six next month, is loving Kindergarten. Her mother shared some pages of the journals the children keep. The first remarkable is that upper and lowercase writing is still being taught — yay! So for Maddie, already proficient in capital letters, this manifesto represents challenge, learning, practice. And then the everything else: the sentiment, and the exuberantly joyful self-portrait. Perfect expression, I’d say.

Sea House Conservatory: More Floor Tiles

I added more pattern sections to the tile floor template.


To facilitate a smooth transition between tile colors, when I began to run low on the first set I glued them randomly further out on the template to integrate with the as-yet-to-be-painted new batch of tiles.

Using the same paints as before, I splattered up a new sheet to cut into tiles.

Meanwhile, I’ve got a working idea for the back fireplace wall, so I can alternate experimenting on that with setting floor tiles.

Sea House Conservatory: Tiled Floor

painted_paper

I painted a couple of sheets of 11 by 15-inch 140 lb. cold press watercolor paper with washes and splats of neutral gray, tan and yellow oxide acrylics, then pressed them flat between two drawing boards weighted with books.

pattern_test

The tile pattern and grout lines were refined through several test cuts and pasteups. I added a 3-point corner radius to the tiles to suggest age and wear.

final_tile_cuts

After a few more test cuts, I loaded the painted watercolor paper and began cutting tiles. Because this paper requires three passes of the deep cut blade for each tile, I used masking tape on the edges to hold the thick paper to the cut mat to ensure adhesion. (Lessons learned through bitter informative experience.)

pasteup_01

I’m gluing the individual tiles to prints of the pattern layout showing the grout lines. The process is far less tedious than I anticipated, a pleasant surprise. It *may be* that I won’t have to actually add grout after they’re all assembled and adhered to the subfloor. I plan to add one final light gray wash and some delicate speckling to the whole floor to unite the separate assemblies. And with pressing and a coat or two of matte varnish… we shall see.

in_place_01_

The final tile floor won’t be put in place for some time — so much painting to do! — and the ideas for its total design still floating need not be finalized at this point. Which is good, because I’m still kind of all over the place, design-influence-wise. Right now I’m trending from Art Deco back to Bauhaus, and how that might all fit in with the larger Sea House story, sea level rise, and a crow named Clary.

W: Weaving, Waxing, Waning

baskets _091518

W is for weaving. I’ve been playing with hand-tinting the looms of the round basket kits in spectral and hombré shades. I started with black weavers and rims, then went to a medium warm gray. After a few baskets, I thought the offcuts would make good banners or samples of the colorways, and then the idea was born for the Basket Circus + Exposition.

BCE_sign_v1

Many thanks to Keli for participating in the totally legitimate focus group which determined this name.

black_weaver_warm

What a difference between black and gray for the contrast. I love them both.

gray_weaver_greens.jpg

gray_green_basket

sunset_091418

We’re getting to the glorious sunset colors time of year here in foggy-summer Pacifica. I remain in awe. Nature, you know she don’t mess around.

Albie_sunset_091418

Albie joined me a short time later on the front deck. This picture is significant because it answers the question, “What phase is the moon in?” Each September, my husband and I celebrate the anniversary of our marriage on the full moon. This year, it seems we have 10 or so days to go. (Hope we remember.)

gravity

And finally — as if you’ve ever doubted — here is proof that cats can defy gravity. Even when they’re sleeping.

M: Mandala, Map + Other Baskets, ShelleyB Weavings, Mystery

M_mandala

M is for mandala.
I love this shade of green outlined in white tracery, punctuated with thorns. And that a blue jay tucked an acorn inside. Good cache, jay!

VM_basket _01

M could be for maps woven into baskets.
I’ve been fooling around with taller/wider looms. This one is woven from a vintage map print of Berlin. Really liking the subtle colors and patterns.

VM_basket_00

Another view straight on, where the cream colored paper core catches the light less.

shelley_B_021218-1

M is for mind-boggling.
ShelleyB has continued to experiment with her fantastical weaving patterns as well.

Shelley_B_021218-2

More of her madness carefully plotted charts. Love the houndstooth!

black_and_whites

(I’m also working on a set of black and white storage baskets for the pavilion remodel, using black looms and plain old white weavers. And a jaunty circle-dot lining :)

rockaway_dollshouse_00

M is always for mystery.
Another of the Rockaway Beach abandoned dollhouses. Who or what is behind that open door?