Dresden Trim, New Avatar

2018_glued_vellum

I was given a wonderful pack of assorted Dresden Trim, as well as an entire sheet of fish. I spent a pleasant few hours sorting through the scrap, snipping and arranging the bits and pieces. Things got interesting when I started combining parts of one with another. Above is the beginning of an illustration for 2018.

avatar_layout_mat

I cut the wings from a bird in flight (a swift? a swallow?) and this happened. I felt an instant sense of recognition, like I had met a new old friend.

avatar_constructed_front

I made the ladder longer, and glued the pieces together.

avatar_back_mat.jpg

The back is reinforced with toothpicks and cardstock circles cut to the wheel dimensions, stacked and glued together, then glued to the outer rim.

avatar_01

Because I’m not a stamped gold foil kind of girl, I spray painted her matte black. Please say hello to my new avatar.

avatar_02

She shows up strikingly against many backgrounds.

avatar_SH_front_01

I gifted her shoes made of black eyelets and tacky wax. She stands freely, observant, curious and full of questions.

avatar_SH_interior_01

However… sometimes it’s hard being 2.5D in a complex 3D world. You can lose touch with essential parts of yourself.

avatar_cloud_box

We believe it’s good to have your head in the clouds, and your feet on the ground.

avatar_n

And have your heart wide open… but sheltered by something good.

(These particular Dresden trim pieces came from Castle in the Air, but I have since found three other good online sources: Rose MilleDresden Paper Crafts; and Walter Kunze.)

Wrought Iron Sign Salvage

SH_roof_122017

I wrought Sea House emblems for the landward and sea-facing sides of the pavilion roof. They’re meant to be salvage from the old Sea House Pleasure Pier and Estate. And so they are.

SH_logo_roof_122017.jpg

Sized to fit between the raised seams on the metal roof, I cut seven copies of the emblem from 65 lb. black cardstock and glued them together. After drying under weight, I sanded the edges even, and slightly beveled the top edges. I added fastening “bolts” then lightly stippled and dry brushed some wear and weathering. Not too much. The caretaker is diligent about her conservation duties.

front_122017

Then I had to make a smaller version to mount on the fireplace.

SH_fireplace_122017

It looks splendid, don’t you agree? (Well, except for the ripply rug. There’s always something.)

kitchen2_122017

I bashed out the support column in front of the kitchen, and felt much better about the space, even though it still looks like every other ELF kitchen ever made, ever. (Not that there’s anything wrong with that.) I’ll scrape away the brackets on the floor, patch where the post was, and it’ll be an intentional remodel artifact :) I found the LED pot lights I ordered, then lost, so next step will be the ceiling/roof, and then the exterior siding.

gh_122017.jpg

In the greenhouse, the hydroponics have been relocated to an anchored barge just off the rear utility deck.

lowercase_n_121817

Meanwhile, I got to open an early present, a vintage sign hollow aluminum lowercase n, about 12 tall by 3 inches deep. Feeling the love. Thank you, my B.

Boxen, Handles, Slipcases

FF24_pavilion_02

There’s a new set of boxes over at MMS+S, reminiscent of the “dish pack” size, for all your miniature packing needs.

I installed ELF handles set in reversed eyelets on the Sea Rise Pavilion front doors, and then glued the whole panel into the frame. I think I’ve finally worked out which components will be attached together, and which will remain removable. Rethinking having the hydroponics inside the greenhouse; they might get moved to the lower back utility deck. There is still much I don’t know.

slipcases_kitchen

Working on a simple slipcase kit to fit single and triple sketchbooks, in the classic and smaller sizes. Adds a nice finishing touch, and keeps your shelves and bookcases looking tidy. (And yes, that’s an April Wright mug — her pottery is wonderful! The wee bear bowls being used as bookends are feves from Laurel’s ValueARTifacts shop.)

Other stuff in progress and in sketch phase, brimming and swimming with ideas and plans. Focusing now on finishing up work projects for the year, and spending the holidays with family, and taking some time off.

Be good to yourselves, dear imaginary friends!


An Exaltation of Yuccas

I’m excited to share photos of some incredible yuccas, made by two different miniature artists, both starting from the same kit.*

*Uhh, to clarify: each had her own kit. Two artists, two kits, two locations. Nancy B finished first. Not that it was a contest.

yucca_02_nancy_bristow

This is Nancy Bristow’s work. (Nancy has been making miniatures since the 1970s, and it was she who finally identified the Braxton Payne pots I had bought at auction, and pointed me to his obscure website.) She hand-colored the leaves using markers, and I love that she styled them curling out and upward. So pert and jaunty! They’re planted in BP pots she “aged”, and used bird grit as gravel.

yucca_3_nancy_bristow

Here’s a shot of Nancy’s work-in-progress, adding knot holes to the stems. I noticed she chose to curl the leaves first, before attaching to the stem. Brilliant! It is so gratifying — and informative — to see how other makers work with my kits. One can learn so much.

yucca_keli_111917

This is Keli Minick’s interpretation of the yucca tree kit. Look at those colors! I love the graceful trunk, and the stubby branch. Two completely different plants! She suggested using round nose pliers to separate and shape the leaves after attaching — which makes the process much less tedious. And she kindly pointed out a typo in the armature instruction sheet. Argh!

YU01_contents

Here’s what the Broad Leaf Yucca Tree kit looks like to start. This is the green leaf variation; cream and white are also available. (I believe Nancy B started with white leaves; Keli with cream?)

What would you make of it?

Sincere thank-yous and expressions of humbled awe to Nancy B and Keli for allowing me to share their work. 

Sea House Pavilion Remodel: Flitting About

front_exterior_111717

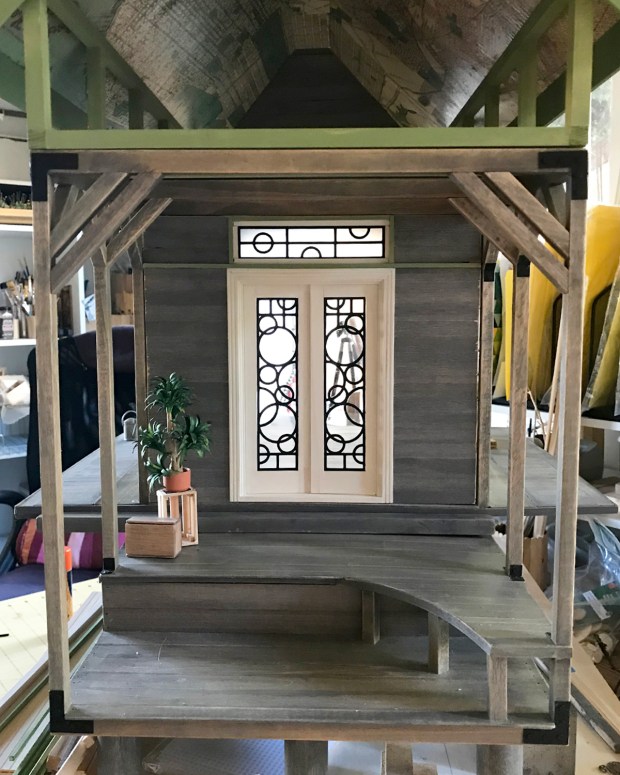
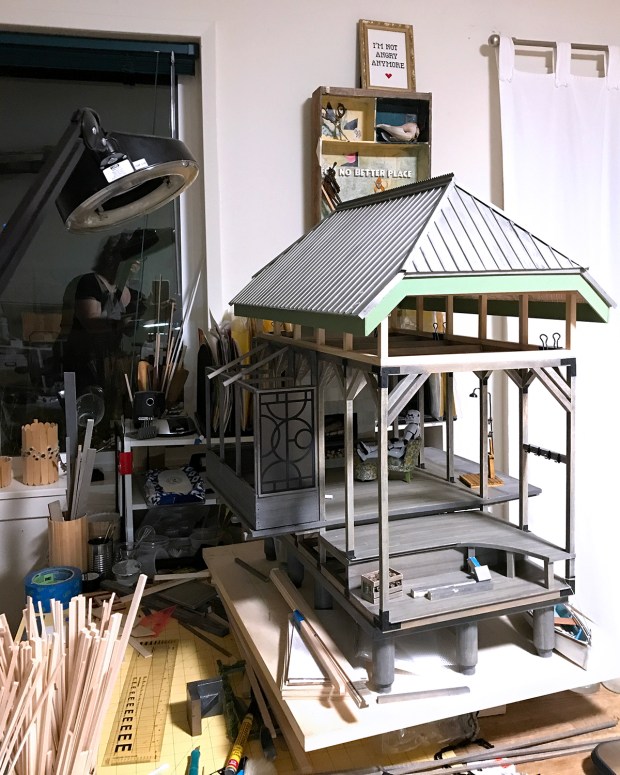
I finished planking the Sea House Pavilion front entry remodel — though there are still stain touchups to do. This build is very different in that components will remain modular, to facilitate access and photography, rather than be a single, connected structure.

front_110617

Inside walls are stained eggshell white. The main living area ceiling (the underside of the sleeping loft) is in, made from bead-board paneling. (Here barely seen, as IRL).

front_interior_110617

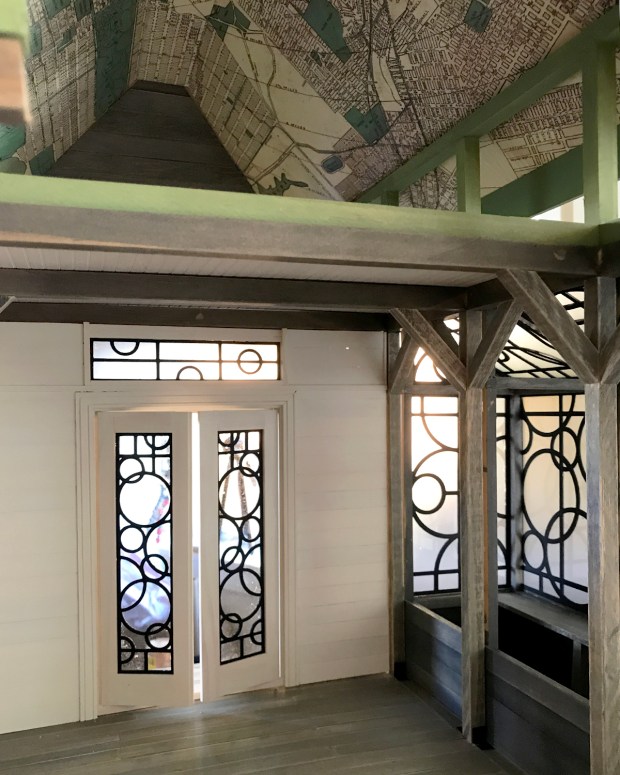
You can glimpse the original Pavilion roof ceiling, now lifted to accommodate the sleeping loft.

front_interior2_110617

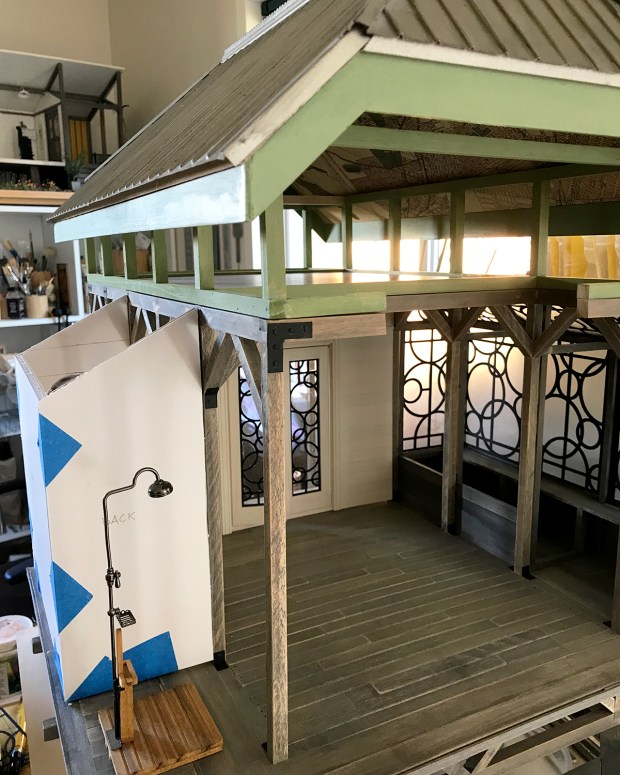
A view of the sleeping loft addition, and a roughed-in kitchen wing and shower stall (fireplace removed.)

loft_floor_111117

After deliberation, I chose varnished cork for the sleeping loft floor, which occupies three bays. Many more decisions remain, especially since I’m thinking ‘nest’ rather than traditional bedroom. Think ‘sleeping in a pile’ (my favorite!) from Where The Wild Things Are. Because post-sea-level-rise living will probably benefit from that.

elf_trolley_111917

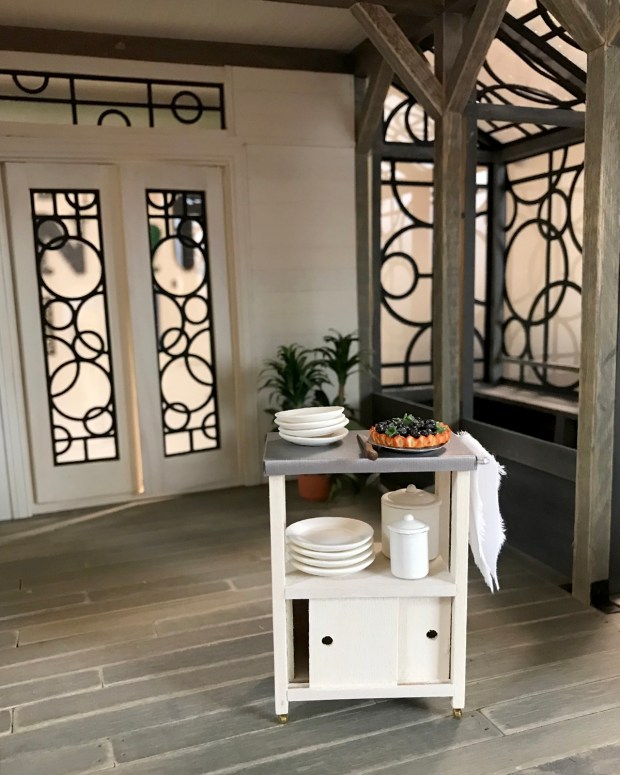
I made my first-ever ELF Miniatures order, for this kitchen trolley kit, as well as an under-counter sink and 2-burner stovetop surface for the kitchen wing. I am smitten.

kitchen_3walls_111517.jpg

The kitchen wing occupies two bays, and will have a countertop with sink, prep area and the two-burner electric stove (powered by rooftop solar panels.) There’ll be non-opening cupboards below, and an under-counter refrigerator. Two walls are paneled in horizontal bead-board, to which there will be shelves attached; the third wall is papered in the same vintage San Francisco map as the ceiling. The window is made from this weird thick glass disc, a bag of which I found in the crap/craft store.

hydroponics_planning

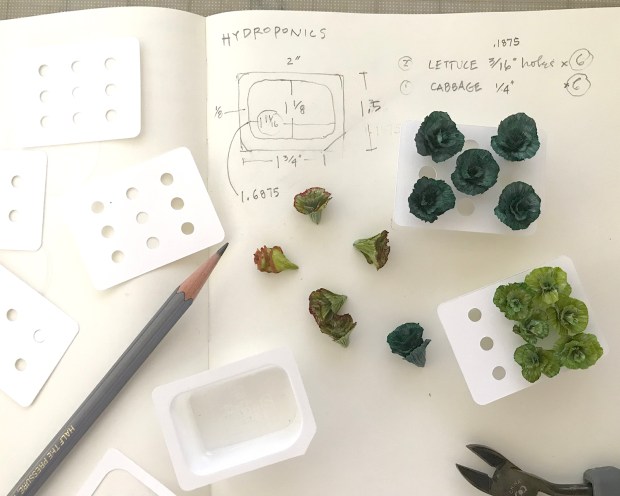
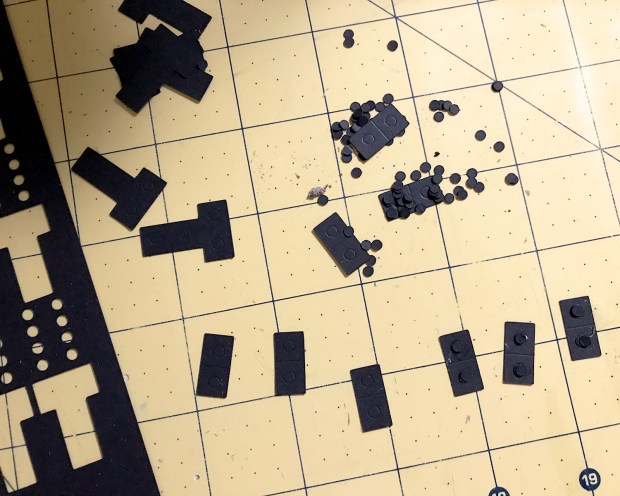
Moving on to greenhouse hydroponics. I did a bunch of research to arrive at an aggregate vision of what a system might look like on an off-the-grid tiny home scale. The grow vats are restaurant jam tubs. I made some wonderful Georgie Steeds lettuce and cabbage kits, and from there worked out optimum growing layouts. I fiddled with the vat top layouts, and used the Cricut machine to cut the final patterns.

hydroponics_lettuce_cabbage

I noticed many hydroponic systems had these sort of “grow rings” around the cutouts. They appeal to my graphic sensibility, so I laboriously added them to the system. They can barely be seen beneath the lush growth, but we and the devas know they are there.

hydroponics_rings

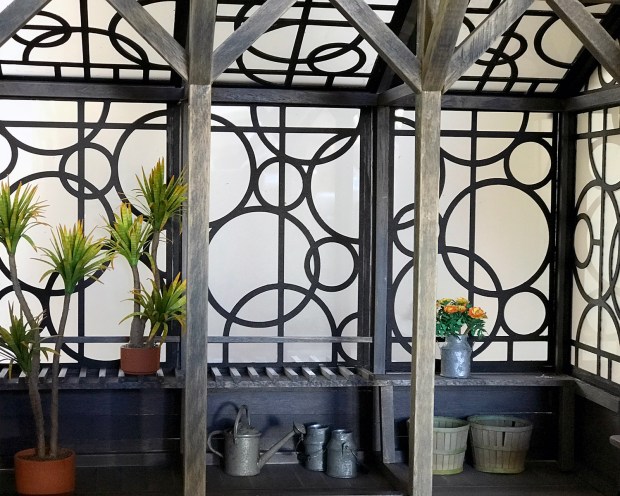
To the greenhouse I added rails and slats to support the grow vats. I’m experimenting with wire and shrink tubing to evoke a water and nutrient circulation system. One of the challenges is keeping each of the wings modular, yet connected as a whole. In that the greenhouse and kitchen wings need to connect to the solar panels and water collection systems located on the pavilion roof and aft deck. As do the roof gutters need to funnel rainwater into the cisterns located under the pavilion. And so on.

hydroponics_111717

I leave you with a view of Georgie Steeds’ Nasturtium kit. It’s just barely finished, plonked in a Braxton Payne pot and glop-waxed to the bench. I love nasturtiums; they’re ubiquitous in NorCal gardens. I’d very much like to twine these throughout the greenhouse wing, while also keeping it detachable. We’ll see.

nasturtium_111517


Sea House Pavilion Remodel: Greenhouse Wing Leaded Glass Windows Complete

greenhouse_102717

The leaded glass windows for the Sea House Pavilion greenhouse wing are completed and installed.

greenhouse_2_102717

Here’s a mildly different view. (It’s late, and my studio lighting is rubbish.) But if you were the caretaker of an historic heritage seaside resort that was abandoned because of sea level rise, wouldn’t you want a place to grow fresh greens and fruit to supplement your subsistence gatherer lifestyle?

I know I would.

gh_all.jpg

And I would want it to be beautiful.


Sometimes, things work out better than hoped for

gh_front_03

The topic of this and last week’s Santa Cruz commute thinking time was about how to render the Sea Rise Sea House Pavilion’s greenhouse windows. I knew I wanted to do something leaded (or leaded-esque), and I knew the inevitable off-square measurements of the actual structure would be a nightmare to fit.

gh_front_04

I’ve built two wing extensions on either side of the main deck to increase the living space area. One side is the greenhouse, and the other will be the shower and sleeping alcove. For the greenhouse leaded glass, I drew my designs using 9-point (1/8-inch) lines, which seem reasonably robust for a seaward structure. They’re cut from black cardstock, and glued front and back to non-glare Plaskolite, which provides a semi-opaque — and salt-spray burnished — surface.

gh_front_02

My initial approach was to tediously center the Plaskolite within the 3/16-inch framing. (Of course if I was more dedicated, I would have routed a channel in the one million each of the frames, or, have built them with three layers of stock. But I’m not.) As I was fiddling about with measurements and drawing and cutting prototypes, I realized the best — and squarest — way is to cut the panes and cardstock leading a scant larger than the outside window openings, and glue them atop the frames. Then, trim out with thin strip wood.

gh_front_01

It looks just fine! Intentional, even. The two layers of cardstock, glued to the Plaskolite front and back, look believable. Even the little schmutzes of glue make sense in a marine environment (although they are easily cleaned up.)

gh_front_05.jpg

Here’s the whole structure-in-progress, including the new roof extension, which might be where the sleeping quarters wind up.

Ruby_101217

And here is the main — or one of the many — reasons I drive down to Santa Cruz each week: for Ruby, now four months old. She lights up a room, no batteries, routing or wires required.

Skiff, Brackets

skiff_building

Scarlett has grown into a far more helpful studio cat. Here she continues the weathering process on the underside of the Sea House Pavilion Squat roof, while I work on building a wee skiff.

skiff_box

I eBayed this circa 1989 Midwest Products skiff model. I love this kit for many reasons: The superior 36-page construction manual and a full-size plan. Each of the 117 steps has a little checkbox next to it, to track one’s progress. And shipbuilding vocabulary: inwales, cleats, chafing plank, stem and false stem, strongback, painter, breasthook, skeg, knee and quarter knee, transom, fairing.

Here is step 109, Inwales:

skiff_building2

Even with the apprentice skill level 1 rating, there was still plenty of late night swearing, especially setting up the framing. I realized very early on how glad I was that the finished model would be heavily weathered.

skiff_weathered

Making the oars was possibly my favorite part. They’re built from dowels and stripwood, whittled and sanded into final shape. (Still have to varnish the second one.)

brackets_00

The outdoor shower is old Reutter Porcelain, tragically discontinued. One of my all time favorite pieces!

At some point, the Sea House Pavilion was retrofitted with sturdy brackets, much like the foundation of the SH Warming Hut.

brackets_parts

This time, made much easier by cutting the components on the Cricut machine. I used the scoring tool to mark angle folds and placement of the bolts, which are two dots thick. (Note to self: hmmmm, maybe make available to sell? Have good metallic cardstock by Neenah. Am thinking of drawing contemporary and or retro wrought iron patterns, too?)

scarlett_092117

Recently, most of my building has been in the quiet of late night. Scarlett keeps me company on the studio thinking couch. Good kitty.


Fiesta Yucca

FY01-02_both2
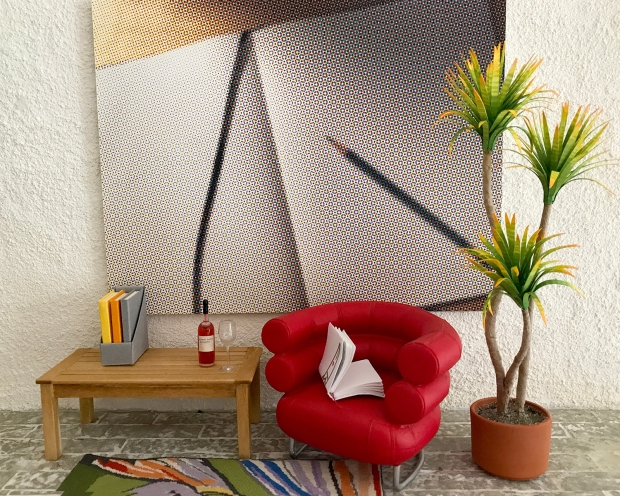
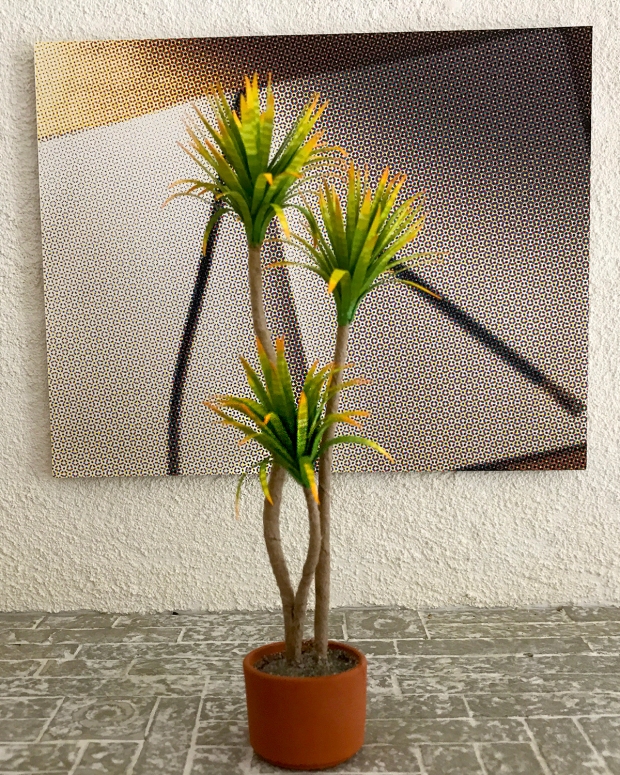
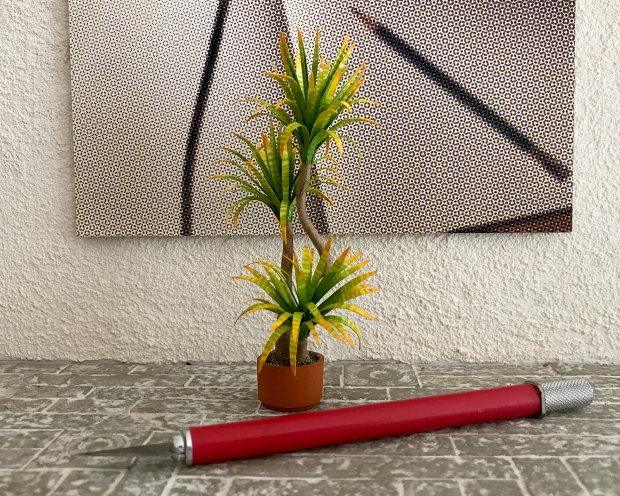
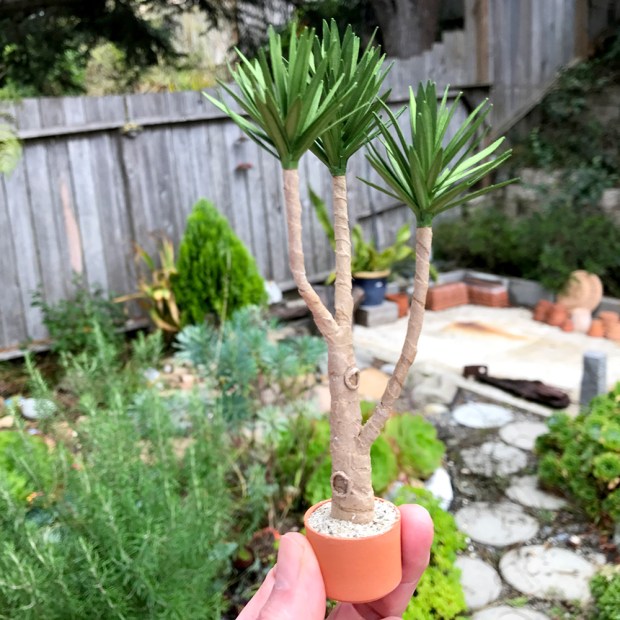
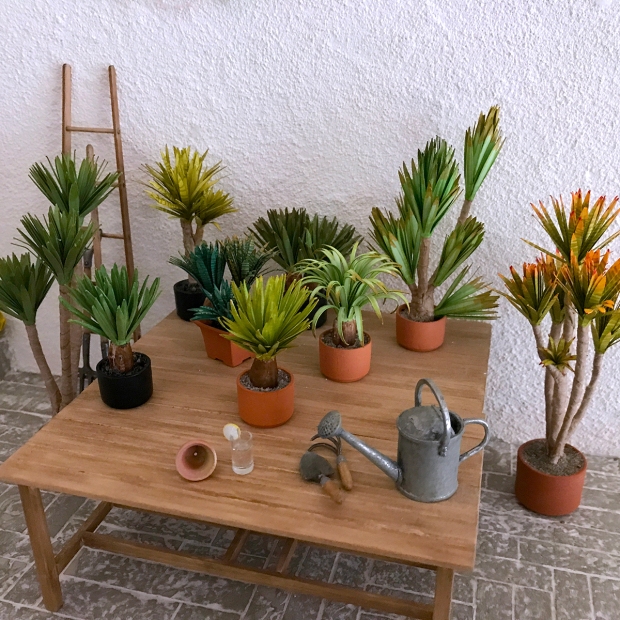
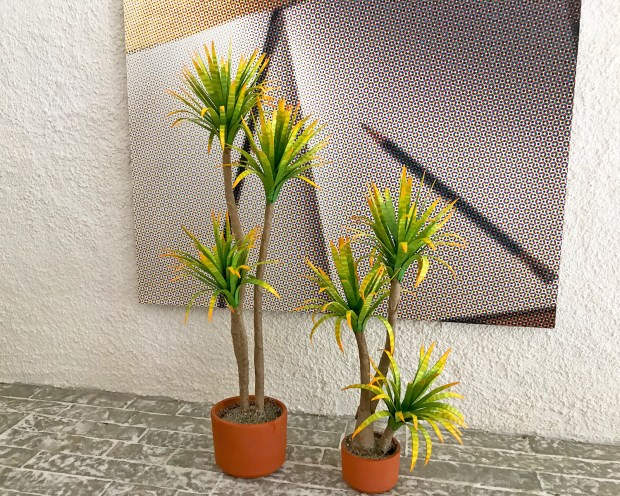
Two first-ever specimens of yuccas — finished potted plants, not kits —  will soon be available over at MMS+S. I’ve boldly named them Fiesta Yuccas, a taxonomy unique to nancyland, which means they’re not strictly exact replicas of yuccas one might encounter in this mortal coil. The leaf pattern graduates from a rich medium green to lime to sunflower, tipped in gold and striped with moss. The flat leaf pattern looks like a very appealing mandala. Sure to add light and life to your arrangements.

FY01-1

The taller of the two is slender and graceful, with three branching trunks. Both specimens are potted in Braxton Payne terra cotta cylinder pots. Of course.

FY01-5

FY02-2

The shorter one, potted in a slightly smaller cylinder, has the same three-leaf cluster structure as its taller sibling, and projects a powerful presence. The trunk armatures remain pliable and can be curved or straightened into most any form.

That I have arrived at not one, but two! specimens that tilt my acceptance meter to ‘yes, this is worthwhile’ is a tremendous achievement (she who regularly invites to tea the three-headed monster of perfectionism/paralysis/procrastination).

So that means I get to post a cat picture.

rectangle_082817

Here is our yearling+ Scarlett, sleeping out the very foggy summer on a side deck bench. Every time I walk by she rouses enough to meow some variation of “Mao, wow!”

I smile every time.


Treasure Map, Yucca Kit

treasure_map_081317

Maddie drew a treasure map. The iconography is bold and challenging on many levels, not the least of which is her rendering of the letter “R”. Type designers, bow down, maybe even despair a little bit, that you might ever envision an “R” this way. I’ve not yet heard her telling of the map story, only that the thing that looks like a Crusader shield is an “X marks the spot”.

YU01_outside

I’ve listed the first yucca tree kit over at MMS+S. It includes both an armature kit and a leafy clusters kit, with a choice of three base colors: white, manila or green. I plan on making kits of just the leafy clusters available, for those who want to make their own armatures, and eventually just supply packs of leafy clusters sans instructions, for those who get it and want to build more yucca plants. Every build needs at least one good yucca :)

_scene03

So many possibilities! There’s one more versatile yucca houseplant kit in the queue, and after that, it’s on to making specimens. I’ve drawn a different leaf cluster, longer and finer, and am working with a smaller gauge armature, just for the finished trees and plants.

Maddie_Ruby_081417

Here is Maddie, studying the most recent Eric Carle book, and Ruby, being what contented two-month old humans are. Kind of my world right now :)