
Floor and foundation plan for the deck extension
For the Warming Hut front deck extension, I glued two pieces of illustration board together with wood glue to make a 1/8-inch (3 mm) thick subfloor. I let it dry thoroughly, then sanded the edges smooth and even.
You can also see one of my preferred pencils, the Palomino Blackwing 602. (“It’s not just a pencil, it’s an experience.”) If you like pencils like I do, it lives up to the hype.
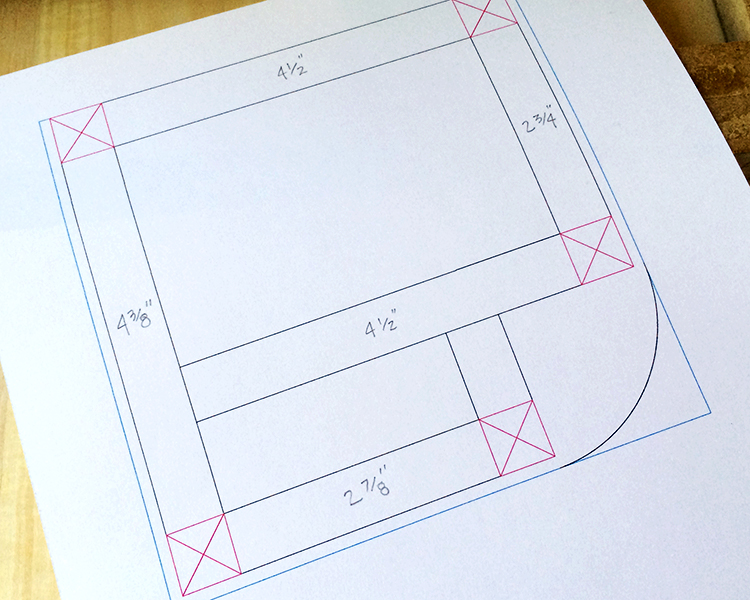
Deck extension plan v2
For various reasons, including some mistakes aberrations with the front wall alignments, I decided to switch the deck extension to the right side of the Hut, and inset the foundation so the deck overhangs consistently with the base kit. I remeasured and cut the pieces from 5/8-in poplar (which is what I had on hand).
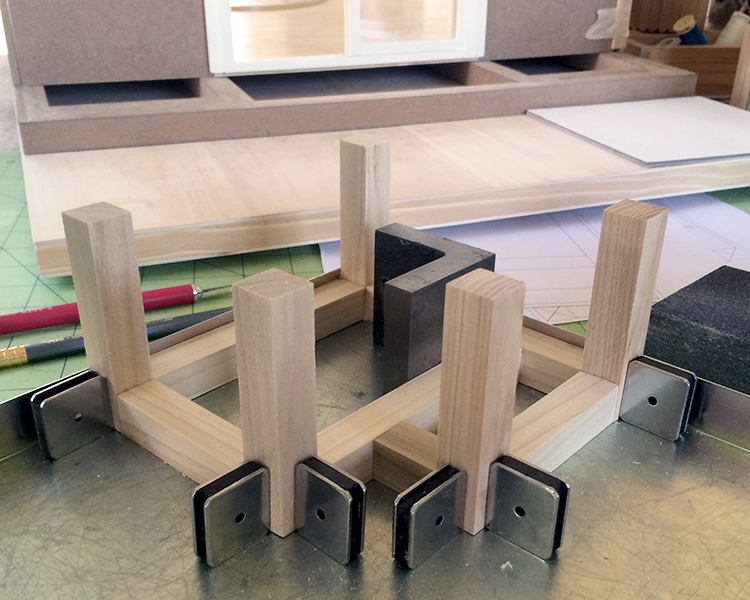
Gluing up the deck extension foundation
Of course I forgot to flip the plan back over to account for building it upside down, but the glue had not yet set and it was easy scrape it off and reconfigure the layout.
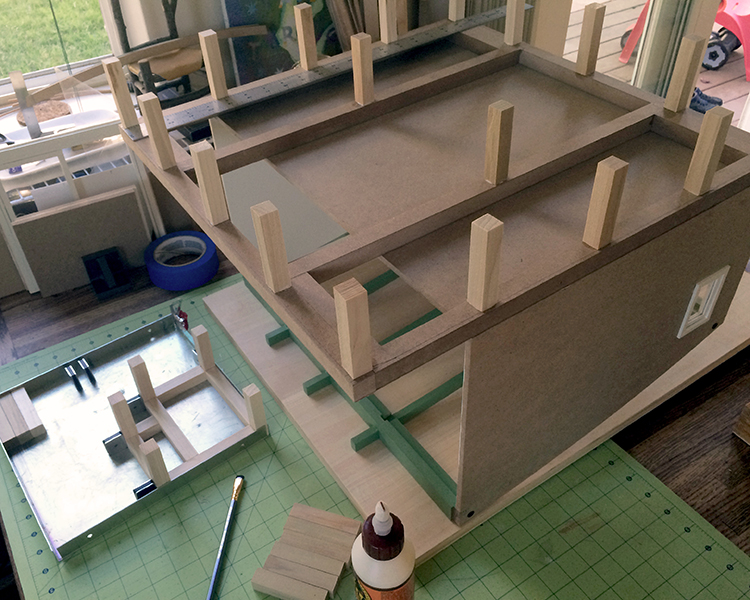
Adding the support posts to the rest of the Warming Hut
While that was drying, I measured for placement and glued the main structure posts to the foundation.
After the glue set, I flipped the hut back over onto the project board, and set the extension foundation in place. Most of the posts will be obscured by the boulders and bedrock of the site, and for now I’m leaving the build loose from the board. I plan to model and mold the boulders with air dry clay, which worked so well — and are so fun to make! — for the Sea House Pavilion. After the clay dries and shrinks in place, which seems to take several days, I’ll glue the posts to the project board.

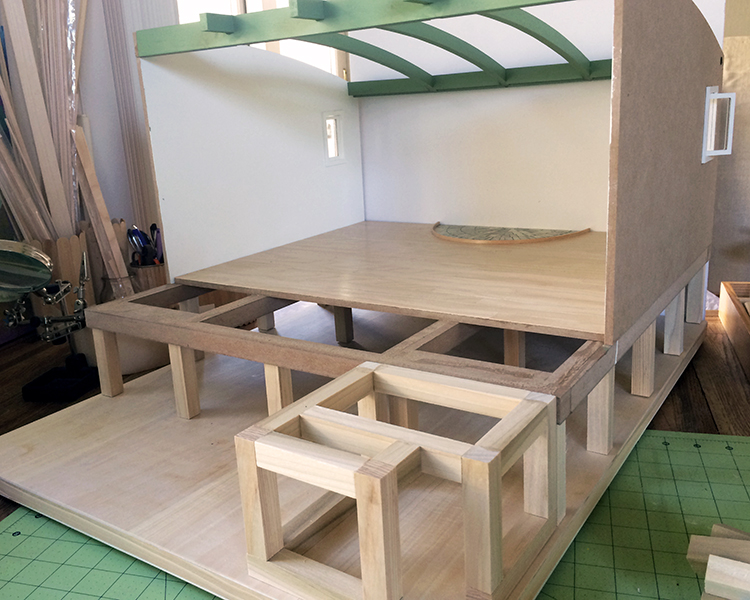
Sea House Warming Hut deck extension, vision in progress
Here’s the kit deck and my illustration board extension subfloor. I’m glad it’s still March and the contest deadline is not ’til December 16.
Which also reminds me: I have the whole beautiful unopened base kit HBS/miniatures.com sent me, which I’d like to pass on to one who wants to join in the miniature madhouse of real imaginary world building. Just leave a comment, and I’ll randomly select from the respondents on 31 March, 2015. Please! Thank you!

It’s looking good, really coming together.
Bennie, thanks, I appreciate your acknowledgement!
Oh neat! I like your magnet “clamps”. Is those magnets and the tray a pre-made kit or did you build that yourself? Thanks for sharing your process – I love learning more! Some things I would never dream up on my own – like using magnets for clamps… brilliant! :)
It’s a standard, very useful and reasonably priced gluing jig from Micro Mark. It makes keeping things square and tight whilst the glue dries very easy to accomplish. Get their catalog! There are so many solutions and tools I never knew existed.
I love how you raised the whole thing.