Although this photo was taken during high tide, this is the water feature look I want to emulate on the Sea House Conservatory low tide build.

After watching countless hours of video demonstrations from a variety of sources, I started my experiment with a small area at the front of the Leadlights landscaping that seemed natural for a water incursion. I glued a 2-inch tall length of acetate to the project board to form a dam, several inches longer than the intended 4-inch-wide pour, reinforced with masking tape below and tape holdfasts above.
Several deep breaths and I poured a scant quarter-inch of Realistic Water ™ from Woodland Scenics into the prepared area. Recommendation is an eighth-inch, but hey, it pours fast. So far so good.
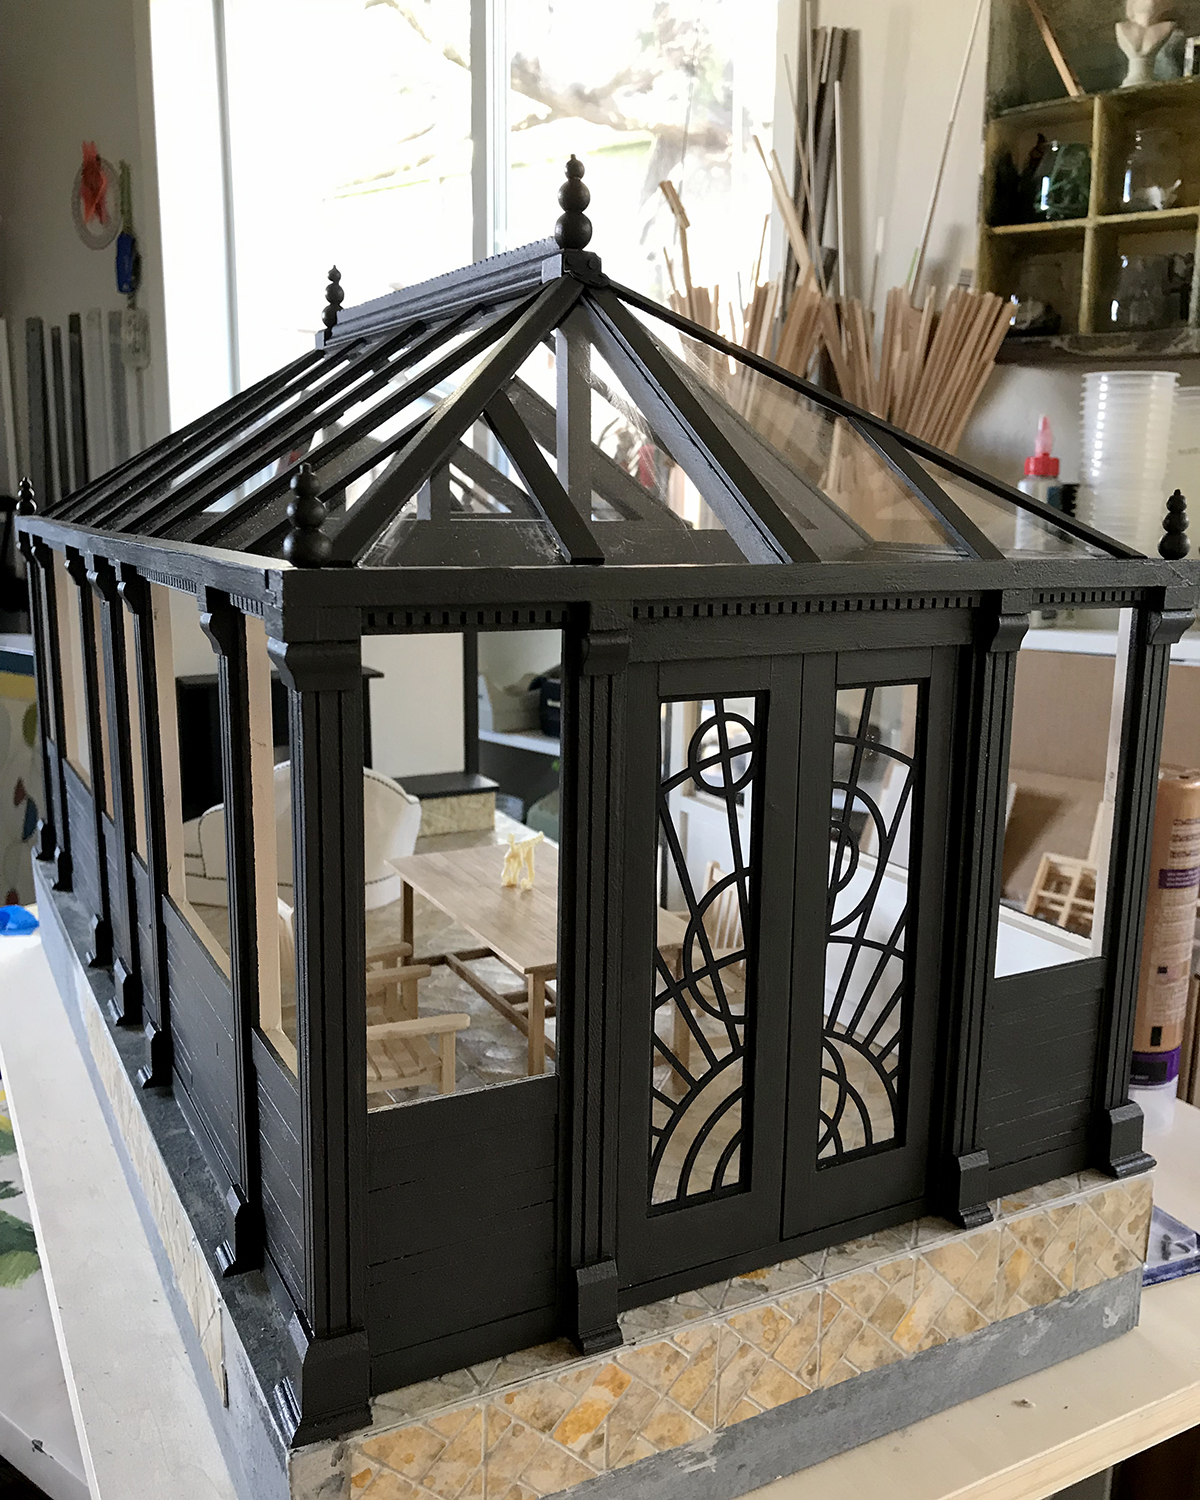
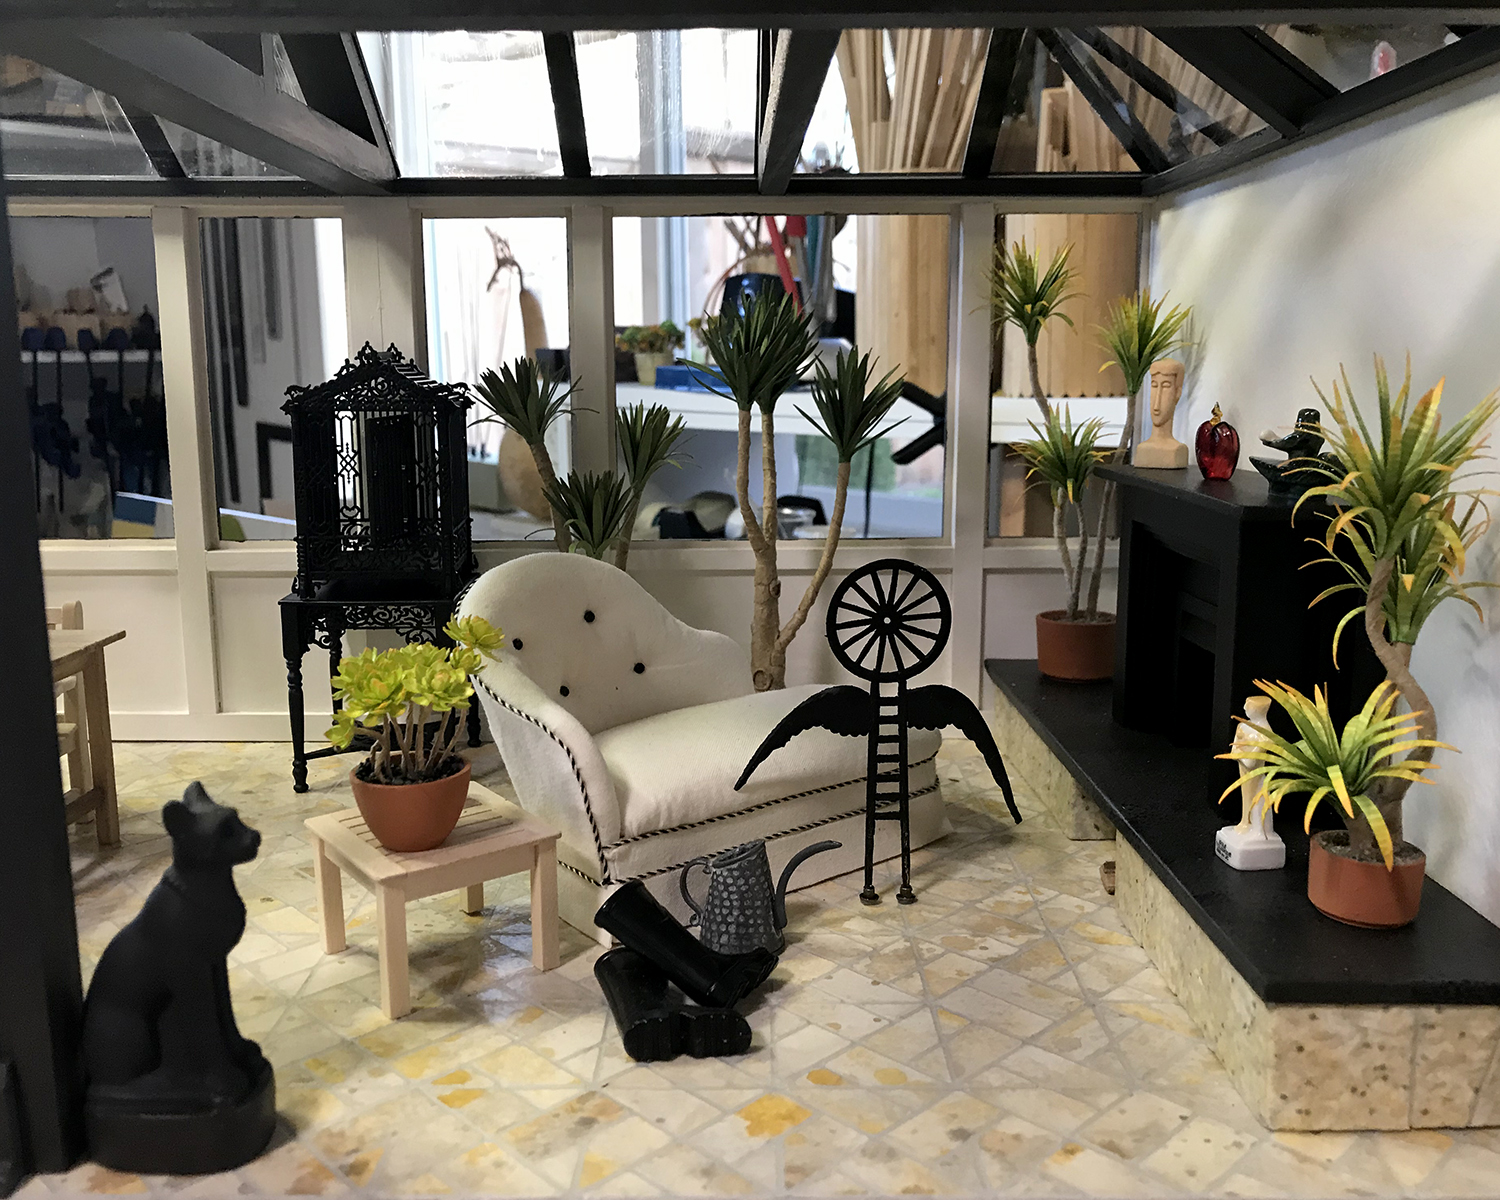
I did the same prep on the Conservatory project board.

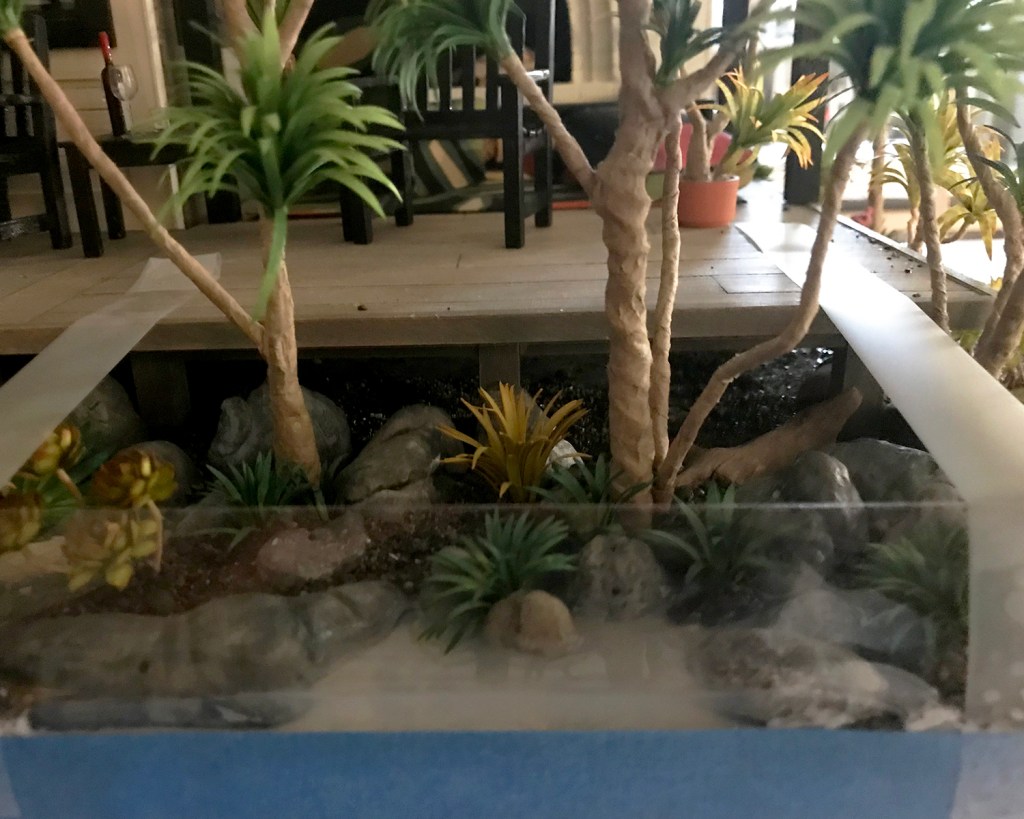
One tricky situation encountered is when any element of the landscaping extends past the base, even a little. I had some time to consider ways I will do it differently next time, as I held the acetate to the base while the glue set adequately.

When the glue seemed set, I boldly — yet delicately — poured the first course of water into the prepared base. Altogether, five or six individual glugs into each tide pool and basin.

Unsurprisingly, as I looked and marveled at the swampy effect and the no-going-back-nowness, a few small, very slow leaks began to develop. I used wide painter’s tape to further seal — more on that later — the acetate dam to the base. Checking again about two hours later I added more tape, and also noticed a few small areas where the glue I had used to cement the gravel and boulders to the base seemed to be turning opaque white.
Hmmm.
The recommendation for the water product is to let each layer dry at least 24 hours. It was very late by this time, so I called it a night very early morning and went to bed.

Next morning, not 24 hours later, I was encouraged to see the water was turning clearer, but the small white areas were still present, noticeably in the transition areas of gravel I had applied a few days earlier.

So I re-read the product label instructions.

Not for use with PVA glue. I’ll shorten my whole lengthy tirade — who doesn’t commonly use PVA glue? Why wasn’t this the very first caveat on the label, and why was this condition never mentioned in any of the company’s instructional videos on use of the product, etc… and lots of swears and unkind, rude assumptions and declarations. But then there was the offhand “Cure above 70°F.” Thankfully I have a wise and patient bitch buddy to vent to with whom I can vent. You know who you are are.
Then I calmed down enough to embrace that since there was nothing I could do about it now, I’d wait and see what would continue to happen. After all, it had not been even 24 hours yet, and it is a rather larger area and blah, grumble, blah.
I wasted more time did more research on pouring water, this time with a variety of mediums and preparation techniques, and even grubbed around in some forums, which I detest, and learned that yes/no there are some/not any problems with PVA glue that can be gotten around by sealing everything with — and here again suggestions vary — some sort of varnish, and, most valuably, some clever ways to build and seal dams for water feature success. One involved swamp water.
Time passed, and my watery problems with this product mostly resolved themselves. I continue to steep myself in the experiences of others.

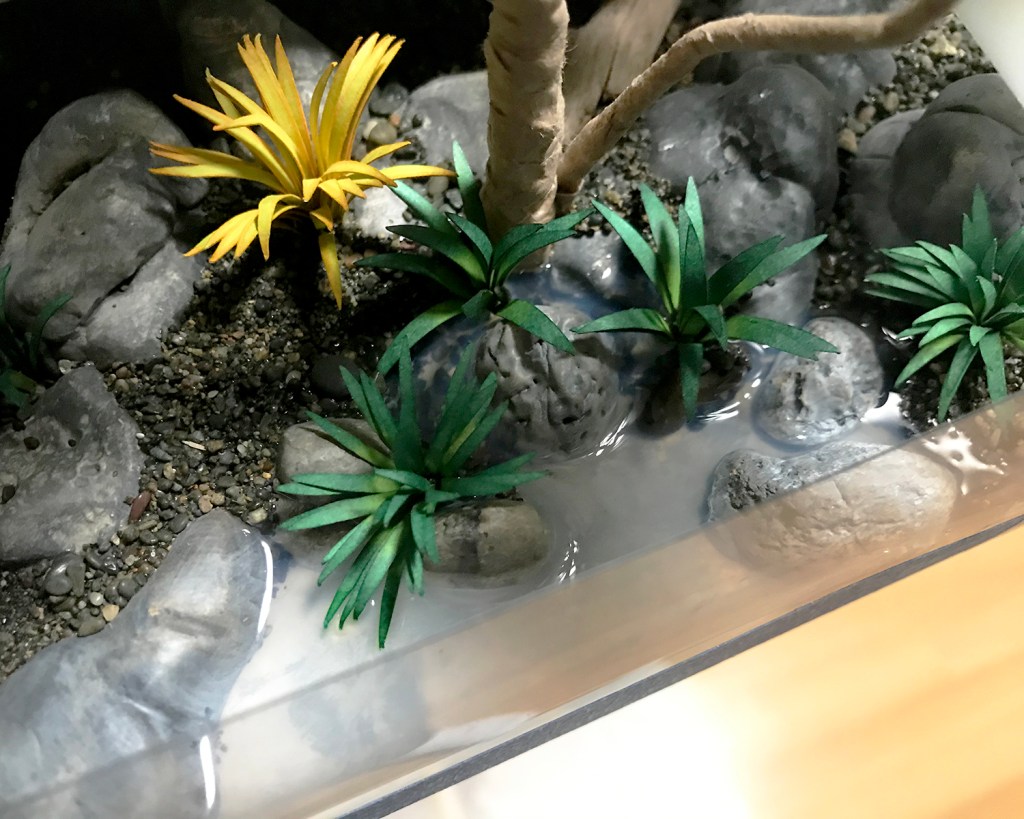
I did a second pour on Leadlights, and a second and third pour on areas of the Conservatory. Above you can see the dam removed to reveal the fully cured water. (One of the plants bled a little color into the water, but I don’t mind.) I wanted a “live edge” to the water, and used an Xacto knife to carve away the lip. The project base itself will be edge-banded with thin basswood for a finished look :)

All in all, I am happy with and consider the results a success. I’ll know so much more on the next one.
Check out the light shimmer on the right pier piling, a reflection from the late afternoon light. Magical realism, which validates my efforts :)
I’ll leave you with this image found in Bolinas, on the estuary marsh/riparian transition on a winter afternoon hike at low tide. (Very low and long ago for this guy.)