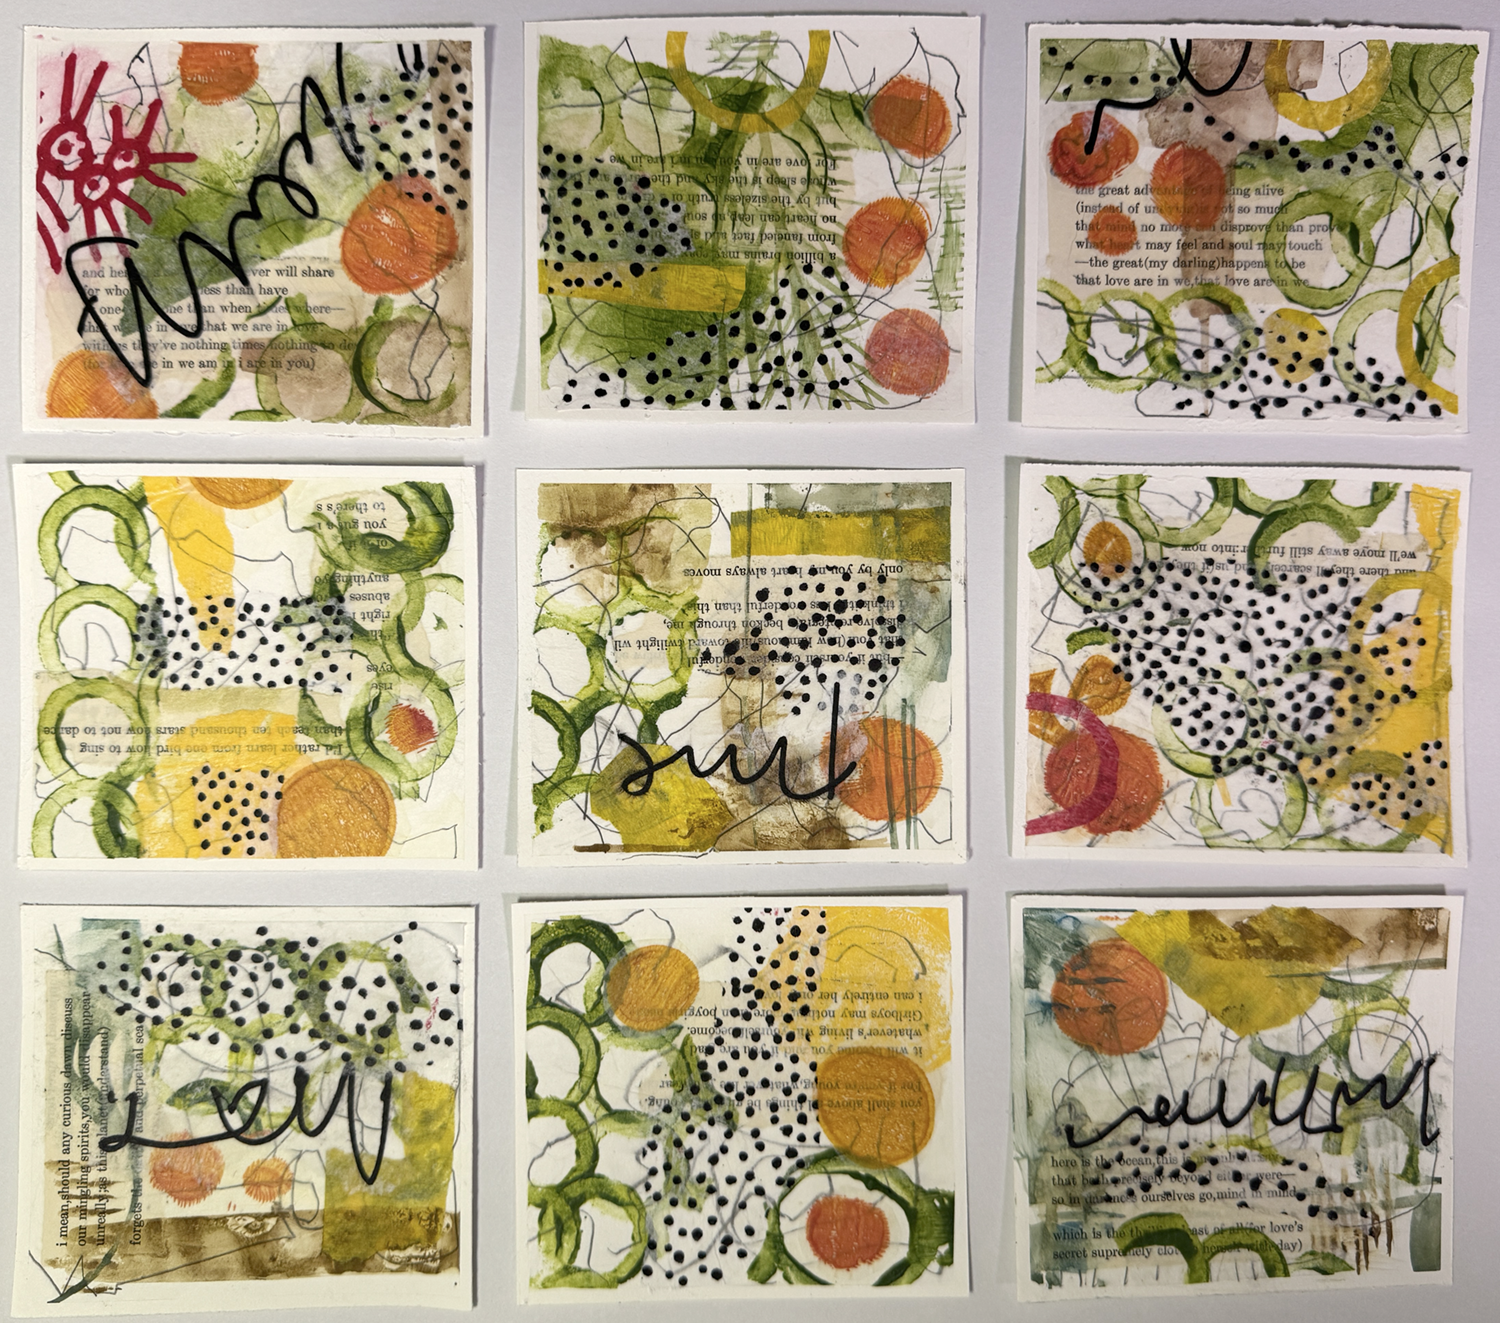
Working in Series, small format collage studies, each 4.5 x 4 inches
I’ve been enjoying a really good, fun class from Fibre Arts Take Two featuring multi media artist Eva Kalien. Her approach to art making is thoughtful, eccentric, and encouraging — and the concept of working on several pieces simultaneously, to iterate quickly and freely, is a game changer!
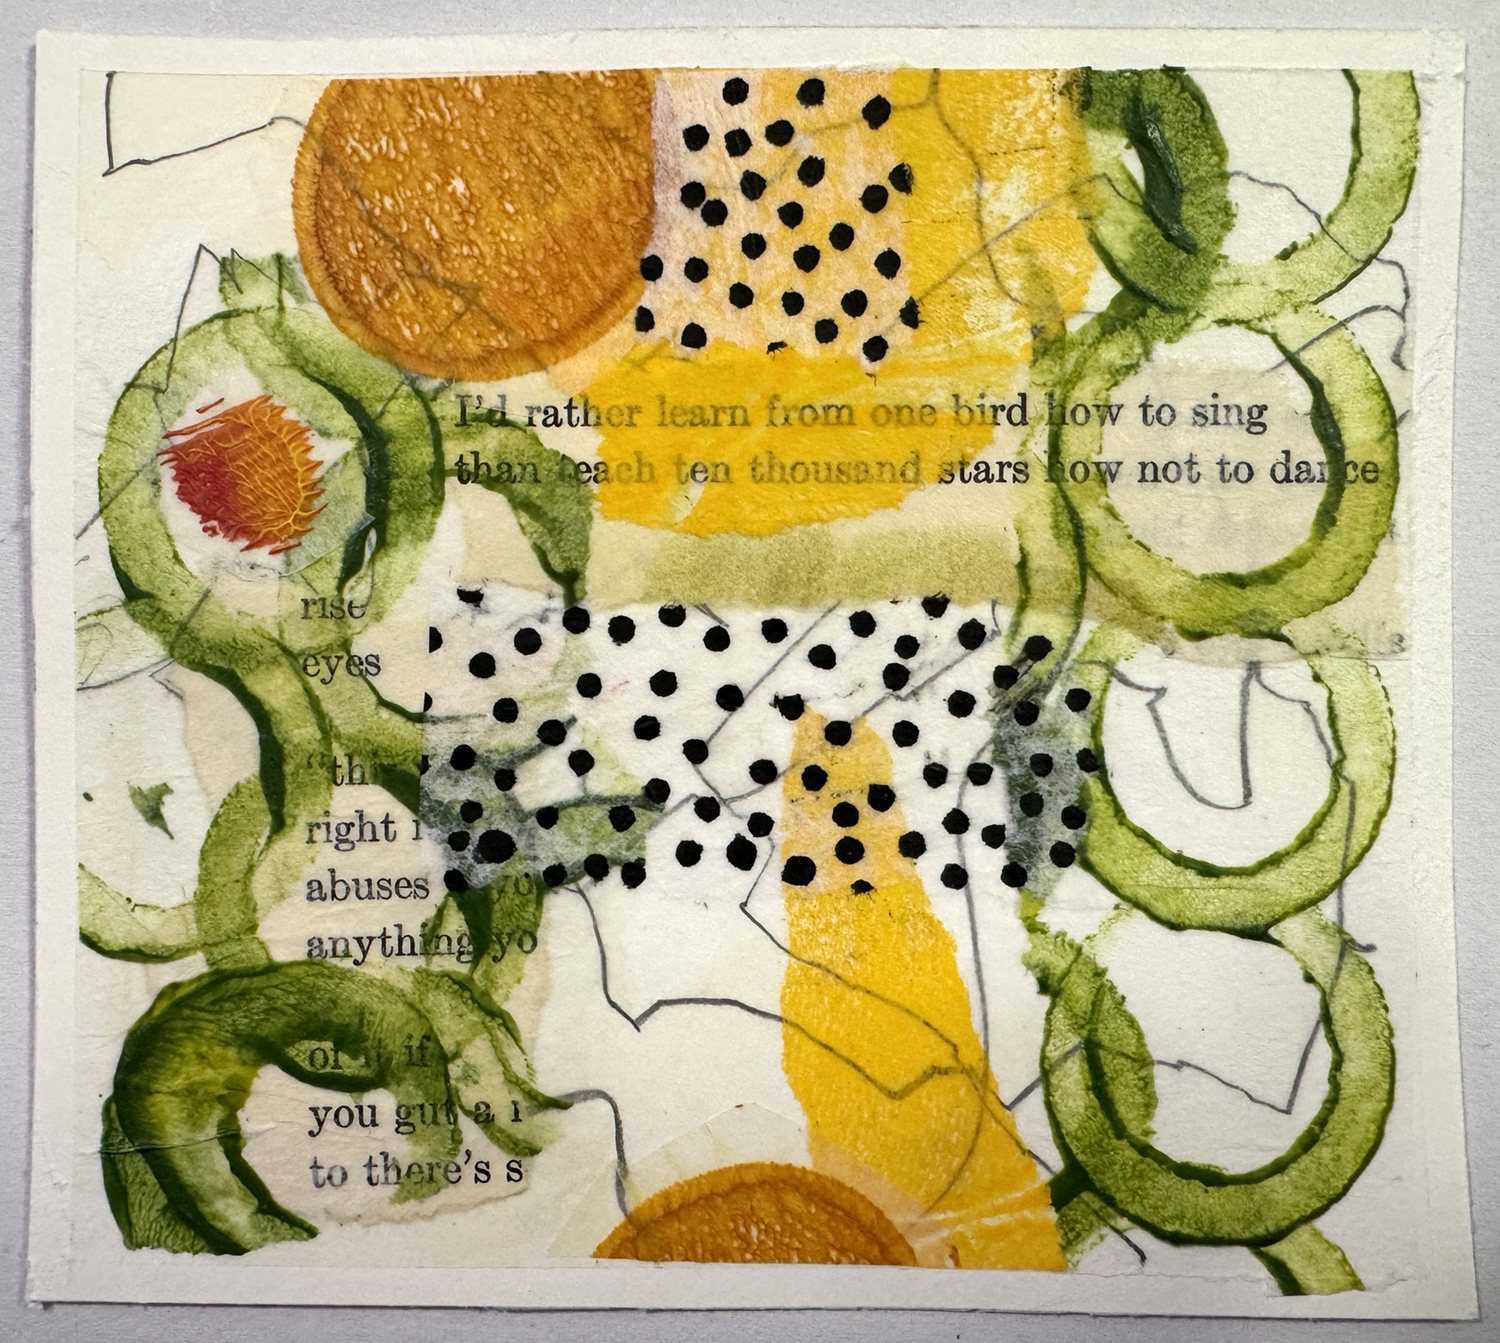
I’d Rather Learn From One Bird, study, 4.5 x 4 inches
Here’s a closeup of one of a series studies. Eva likes to use printed text in her process (for many reasons) and I chose to follow… with my high school copy of ee cummings’ poetry. (Yes, I tore up a beloved book I’ve been carrying around for many years.) Although the text may not be legible, I know it’s there, a foundational layer of meaning and message, and it’s strangely powerful. She also suggests to “stop before you’re done”, another concept of surprising benefit.
In other news, I’ve ordered an early birthday present — a special thing I’ve been considering for some time: a build it yourself printing press from Provisional Press. Check it out! So very exciting, and I’ll keep you apprised. (It also means I’m going to have to clean off (and defend!) a work bench in the garage for it to live on… no small task.)
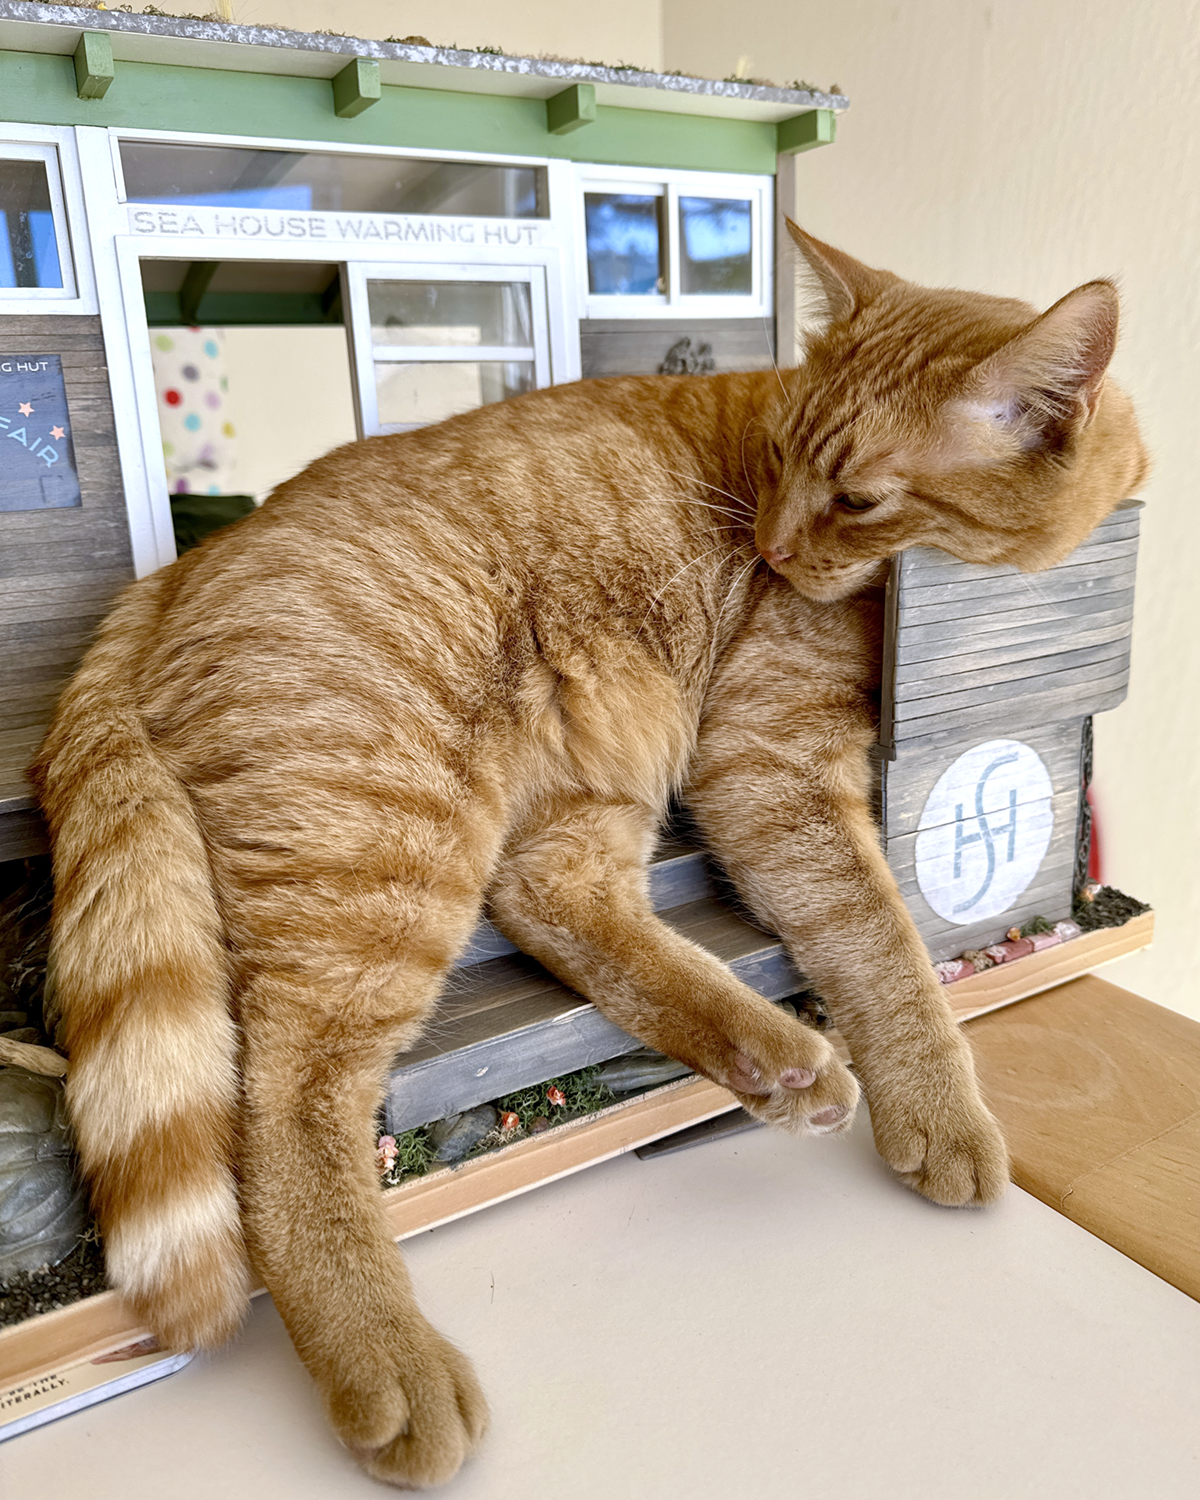
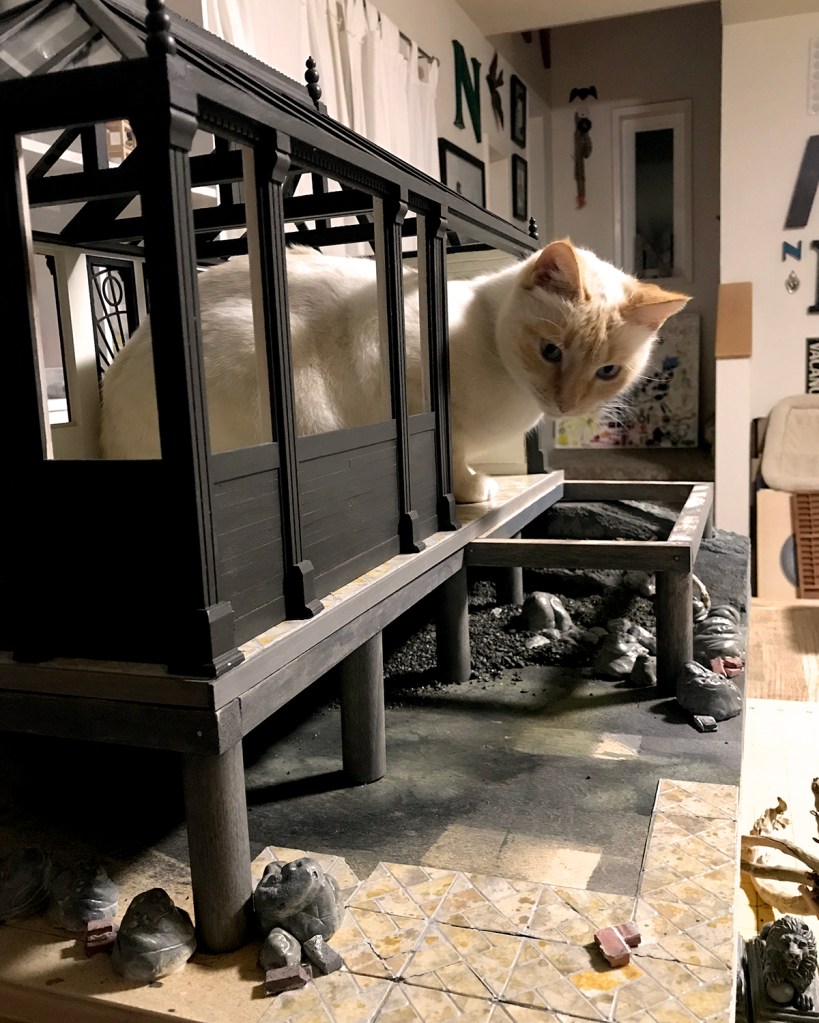
Mateo Napping on the Warming Hut Porch
He also likes to rearrange the furniture, and crop the “living” roof :/
Mostly a lot of standing and staring, and getting distracted going through the many bins of collected miniature treasure, but I’ve constructed my dream standing-height work surface along the back wall, and assembled a pair of paper storage units from Melvins Miniatures, very satisfying. Alpha Stamps has a set of mini rulers and triangles that make the work surface more functional and desky. Having fun printing out scaled versions of my collages and mounting them on boards to hang and/or display on an easel. Adorable! The exquisite leather cowboy boots are vintage, handmade way before everything was 3D printed; sadly artist unknown to me. One of my paper bags serves as a temporary trash bin. (I’ll have to throw a lot of paper scraps on the floor around it for realism.) The pumpkins are one of the first miniature things I ever made that I was happy with, from wads of plastic film bound tightly with thread and covered in small shreds of tissue paper and acrylic medium. Potted yuccas and succulents are production samples from the MMS+S kit days, all in Braxton Payne terra cotta pots. And the vintage Kunstlerschutz Wagner flocked pig is an old dear friend who’s come to live in the studio to keep us all company.
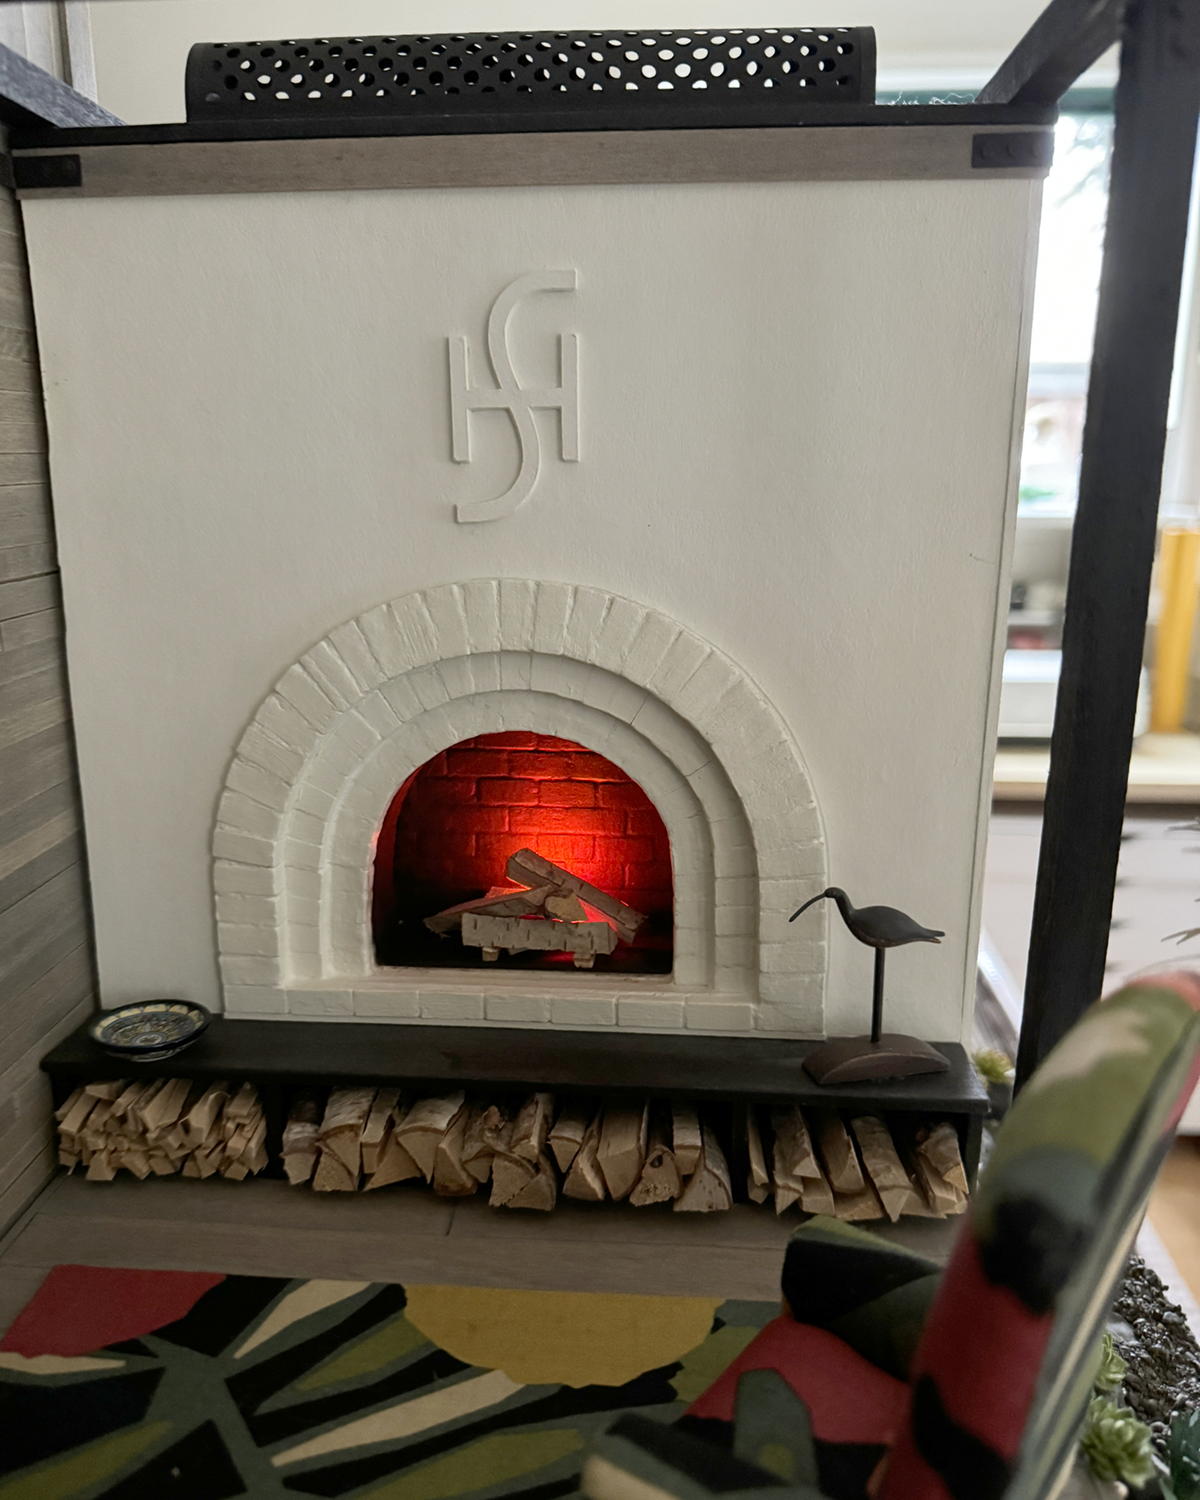
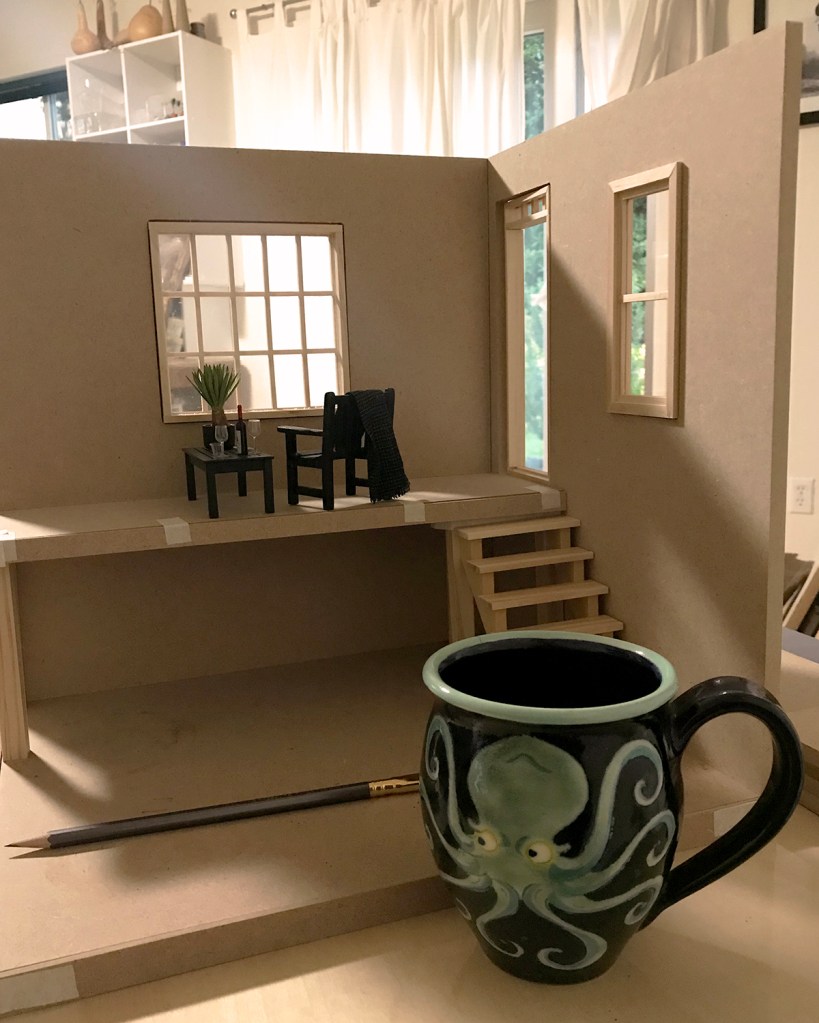
Well this is exciting! Studio Inki is moving into the old Sea House Leadlights building. (Leadlights needed more space and moved into the imaginary milking barn near the Warming Hut.) Interior design planning is in process, and will feature an open concept to maximize the abundant natural light and epic views. The famous Leadlights-designed windows and doors will remain. “I still really love them,” enthused the new owner.
At this point, the adobe and brick fireplace on the side deck will remain largely unchanged, aside from a thorough cleaning and new limewash. I’m very looking forward to actually completing the set of Kris Compas estate chair kits with the Pescadero thrift store dress fabric upholstery… very Studio Inki.
One day all your resistance is absent, and you want to write again.
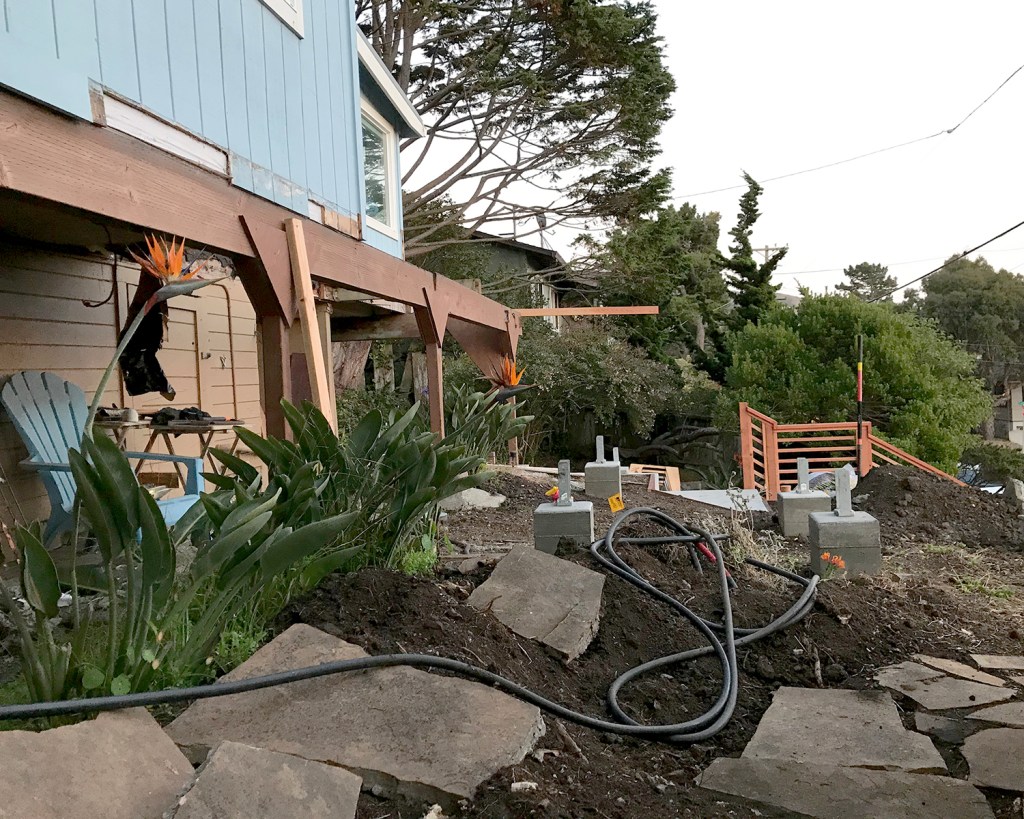
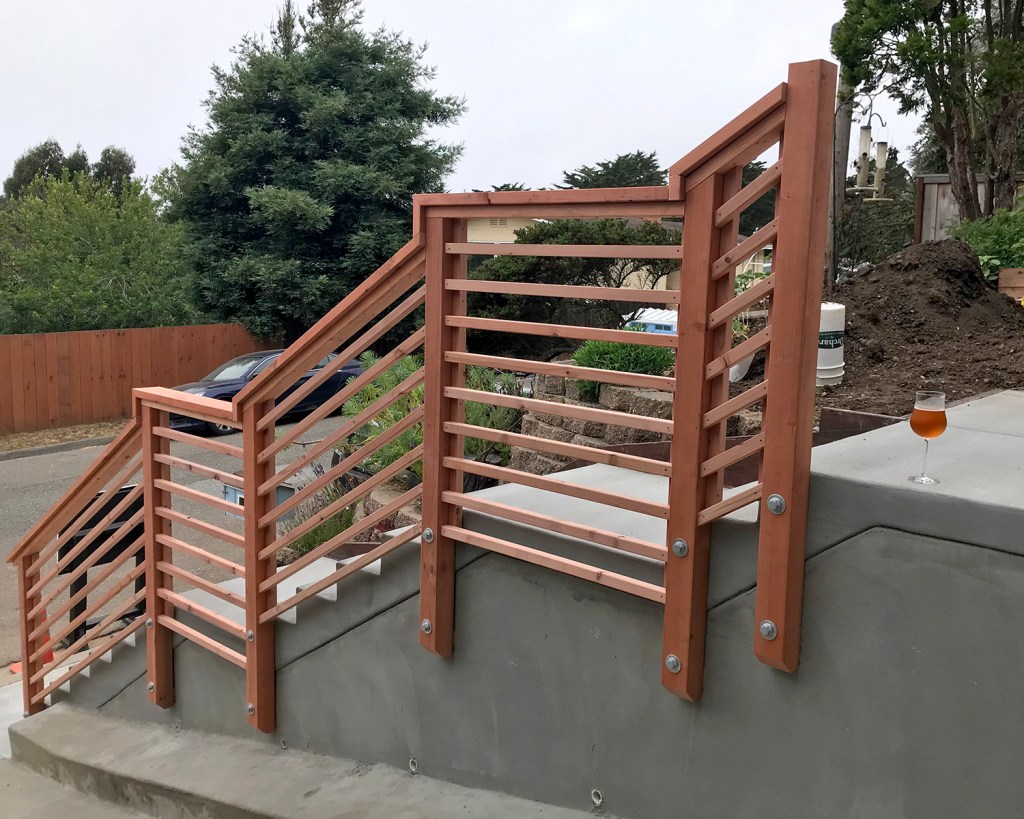
So you start with what the resistance to writing might be about, and you find a lot of pictures of your house in the chaotic and interesting process of having its weatherworn decks rebuilt. I did not anticipate this level of mess and disruption, and beyond that: the delays wrought by the current supply chain disruptions. Few could have, but still. Here we are: disrupted.
We have the best and most artistic contractor in the world, and what they have been able to accomplish is stunning. California Bay Area building code is stunning in its requirements in a whole other way (can you say hiway woberry, overkill, way overkill, pirate nepotism, CYA and institutionalized bureaucratic job security in one long choking overdrawn breath?)
I prefer not to.
Of course that’s not all. I’m readying some new kits based on semi-popular demand at MMS+S. Above is the institutional mid-century modern-inspired set of file folders and papers meant to fill every beleaguered bureaucrat’s or scientist’s desktop. *Cigarettes not encouraged.*
I’m trying to keep my investment in forever plantings in tune with the remodel, but that’s basically been thrown right out the window. I could not resist this baby fig tree “Celeste” variety for the southwest corner of the top terrace.
Likewise a few of these baby Leucadendron “Jubilee Crown” — a dream come true! — for the first and second tiers. Tag says they grow to six feet… UCSC Arboretum says otherwise, but let the best plant in the most beloved garden grow to what it will. I have kelp, and worm compost tea to help you be your best selves in quirky, foggy Pacifica.
This is a bull kelp washed up on the beach. They are a rich source of nutrients for all kinds of ecosystems, and I take only a small part home for my garden alchemy.
I’ll end where I started, with an image of Scarlett, this one of her distracting my attention, trying to make me laugh, making the Sea House Sea Rise Pavilion her own — and succeeding. In these times, I’m grateful.
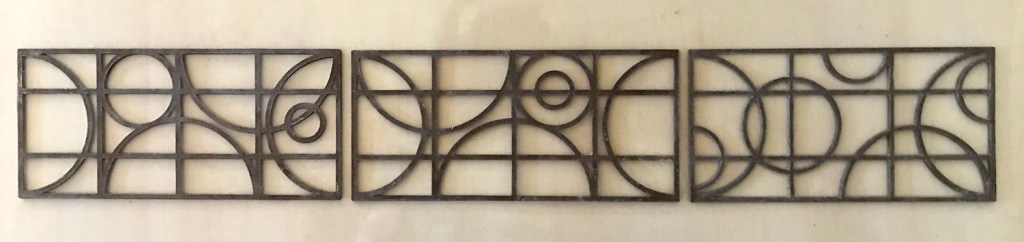
The Conservatory has a celestial motif in the leaded windows, which is carried through in the railing panel design.
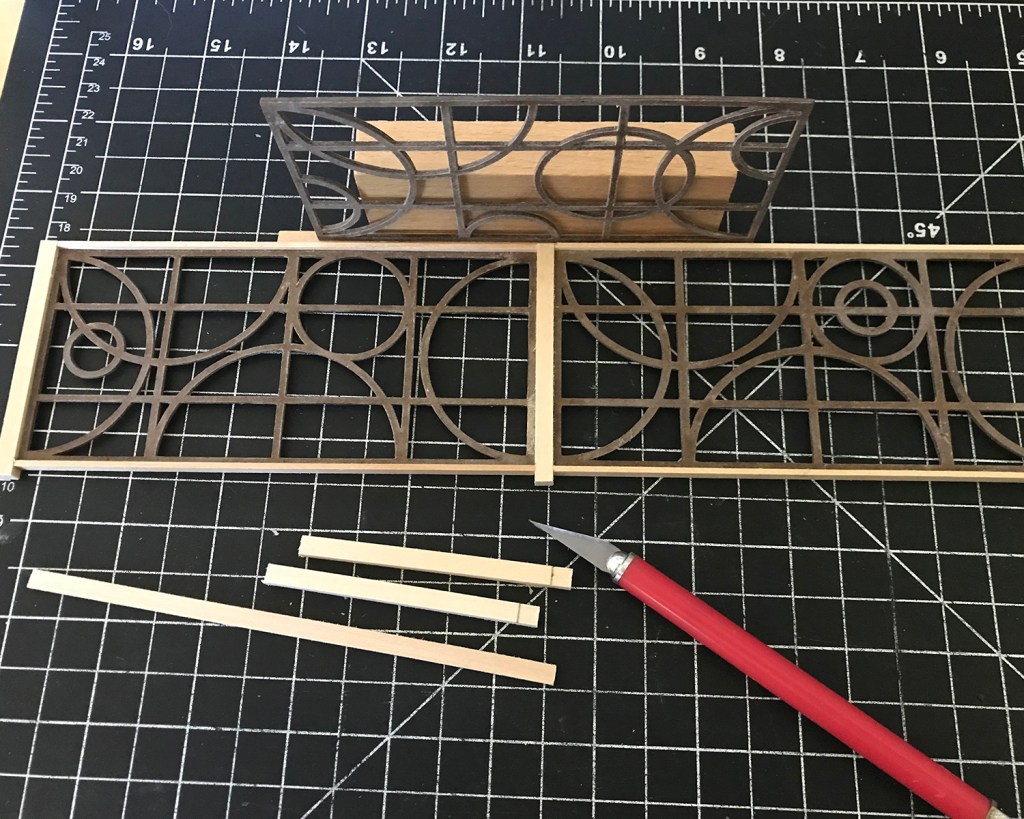
I cut multiples of each panel from chipboard on the Cricut Maker. (Side note: I get the best results from editing the cutting presets, after a test cut on my chosen material.) I decided on a double, rather than triple layer, to lessen the alignment errors.
I used a lamination technique I learned from the talented Heather Tracy at Thicketworks. She uses thin cyanoacrylate on her intricate chipboard pattern pieces to seal, strengthen and stabilize the material. When dry they are easily sanded and very, very hard, and take acrylic paints beautifully.
Wheelbarrow pattern design by Heather Tracy of Thicketworks
To learn the nuances of the technique, I used one of Heather’s patterns she generously makes available free of charge. (She also has an Etsy shop, a YouTube channel of tutorials, and a maker club.) I made the blue wheelbarrow first, and then the red, slightly improving my results. It is a worthwhile technique, but messy. (Also, to me cyanoacrylate is one of those devil’s bargain products.) If you’re not familiar with Heather’s work, I encourage you to check it out!
After sanding the panels smooth — paying particular attention to the outside edges — I glued (using wood glue) them into post and rail surrounds.
These were then joined into the L-shaped railing.
I sprayed the assembly with multiple light coats of matte black primer + paint, to seal and increase attachment bonds. After the glue and paint cures overnight, I’ll finish sand it and paint a final coat, then give it a matte seal.
I like a good wide top railing, for cats to lounge, elbows to lean, and drinks to be set upon, so I used 3/4- by 1/8-inch basswood. Thinking now of bracket designs to be cut from card stock to attach the railing securely to the deck, but that’s for tomorrow.
Having just finished watching the Amazon series Tales From The Loop, I’ll leave you with this image of Point Montara Light.
Late one night I decided to dry fit the HBS contest base because I needed to look at something new. I like the kit, but am undecided if I can responsibly build it. Ideas abound, and it’s currently on a turntable next to the studio thinking couch. It also makes a grand morning coffee cup platform.
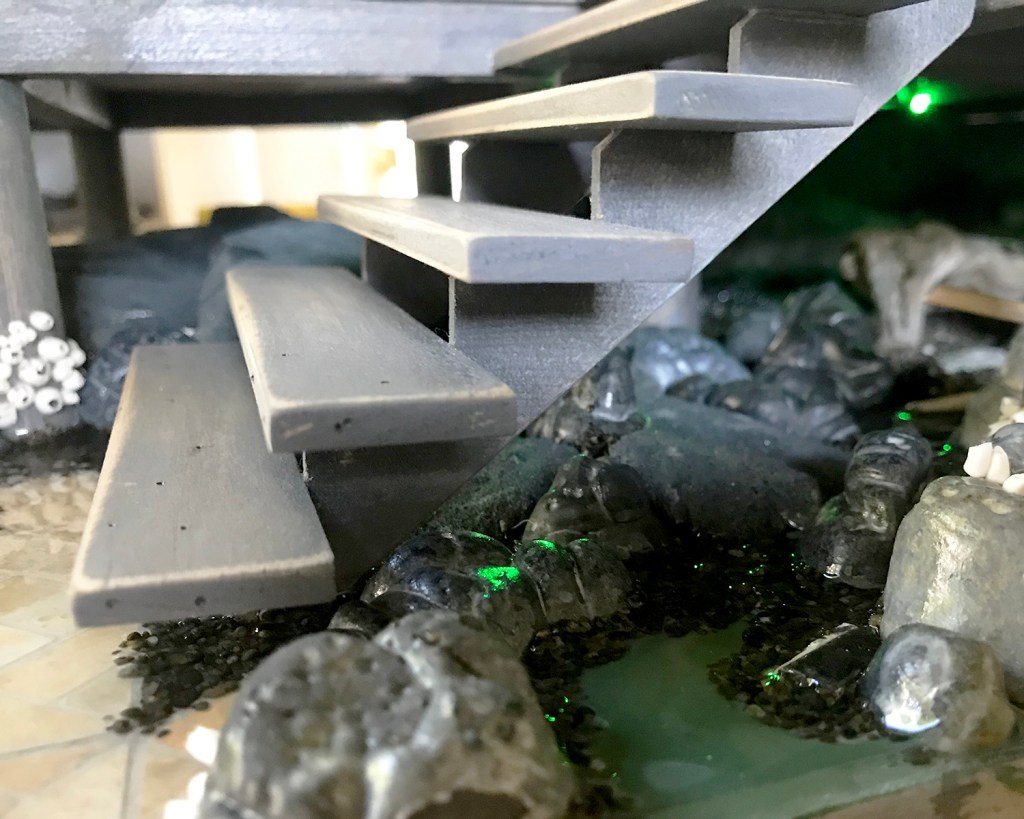
UPDATE: Next morning. See?Sea House Conservatory under-pier detail
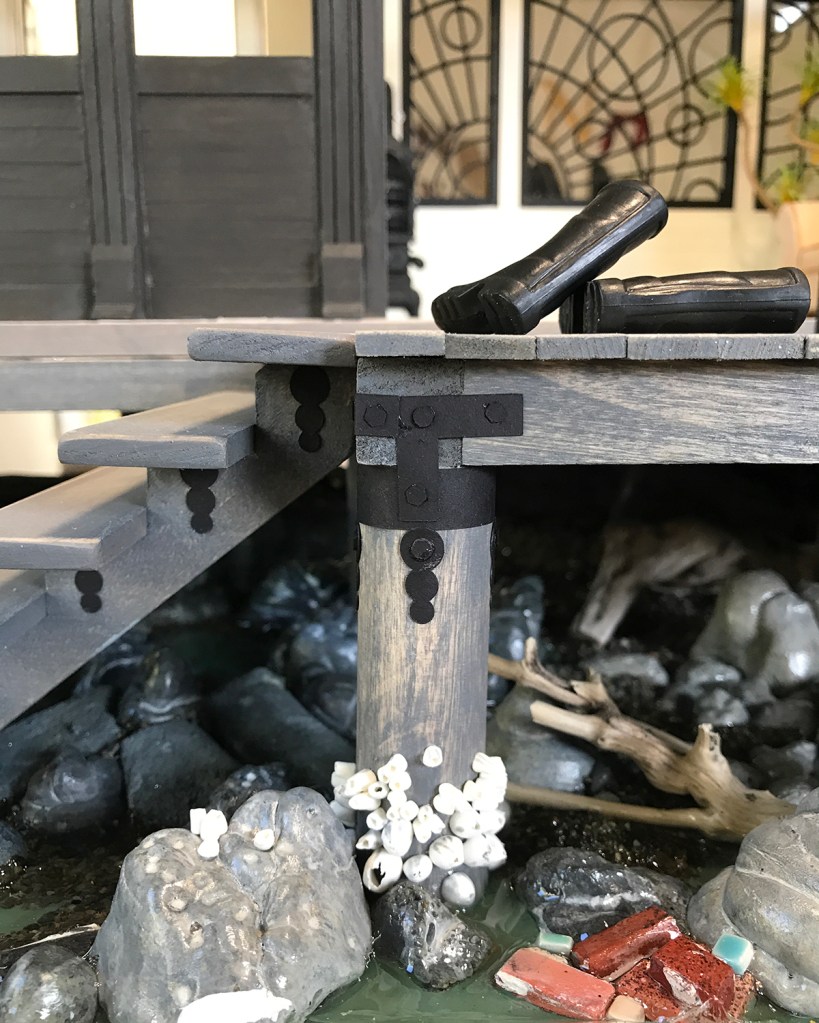
Here’s a glimpse of the under-pier, under-stair Sea House Conservatory setting. Barnacles by Keli, air-dry clay boulders, and flotsam from the natural and manufactured worlds.
Sea House Conservatory bioluminescence
When I saw just how much of the low tide water is in the shadow of the Conservatory structure, I thought some bioluminescence might add charm. This is four flickering LEDs set in the back corner, under the pier.
More Sea House Conservatory bioluminescence
The effect is subtle, but smile-worthy, especially in the dark.
Sea House Conservatory light trickery
Here’s a shot of preliminary bulb placement. You can see some of just how much is unseen.
Thar be monsters
A night view of the mystery.
I indulged the rare decorative impulse to design pier piling hardware that echoes the Conservatory finials.
Oh wait, another what-lies-beneath shot.
Looking west from Point Montara Lighthouse, 07 March 2020
This was one of my birthday views, taken from Point Montara Lighthouse in early March, on a day-long field trip with my Greater Farallones Naturalist class. There was a large pod of dolphins cavorting not far offshore, visible through the very many pairs of binoculars and spotting scopes.
The pandemic was already getting real, but that was the last time I sat by the ocean, side by side with my classmates, eating our bag lunches together in the intermittent sun and light rain.
Here’s an image from a series Keli and I have been punting about. It started when Keli found a scale model canoe builder in Maine who makes these beautiful 1:8 paddles. We each bought one and the challenge is on Instagram #littlepaddletales and #paddlehomage. It’s been fun.
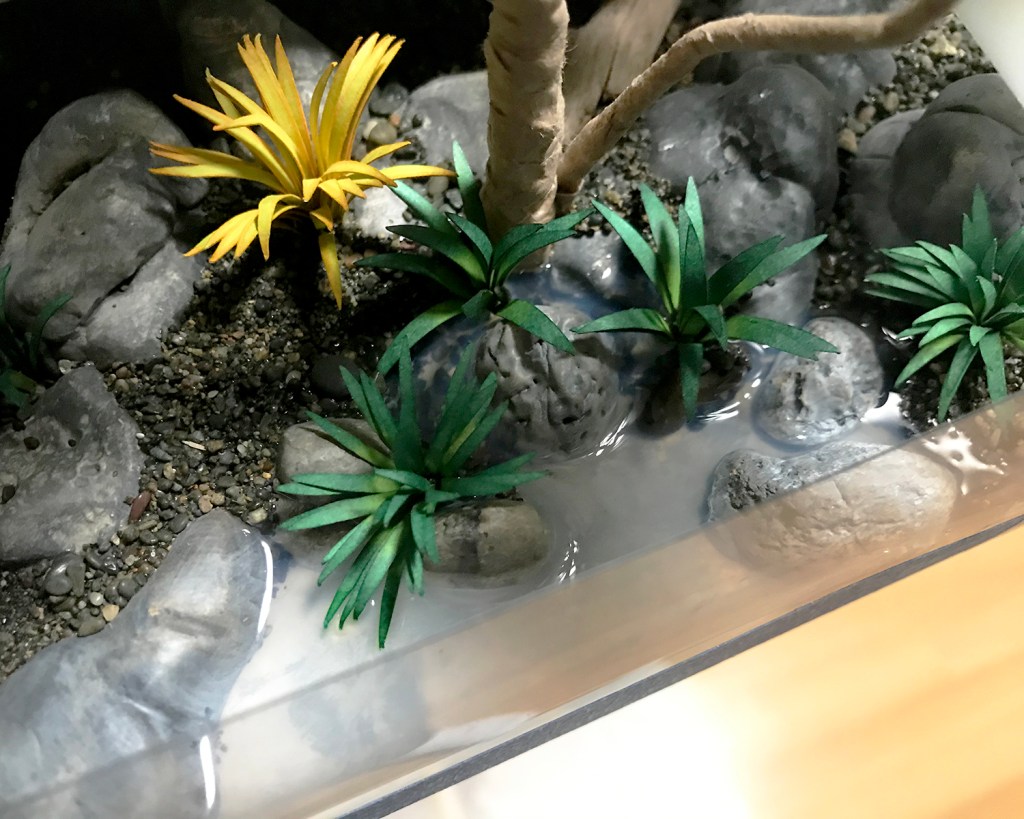
Although this photo was taken during high tide, this is the water feature look I want to emulate on the Sea House Conservatory low tide build.
Sea House Leadlights
After watching countless hours of video demonstrations from a variety of sources, I started my experiment with a small area at the front of the Leadlights landscaping that seemed natural for a water incursion. I glued a 2-inch tall length of acetate to the project board to form a dam, several inches longer than the intended 4-inch-wide pour, reinforced with masking tape below and tape holdfasts above.
First pour
Several deep breaths and I poured a scant quarter-inch of Realistic Water ™ from Woodland Scenics into the prepared area. Recommendation is an eighth-inch, but hey, it pours fast. So far so good.
Not any different 5 minutes later
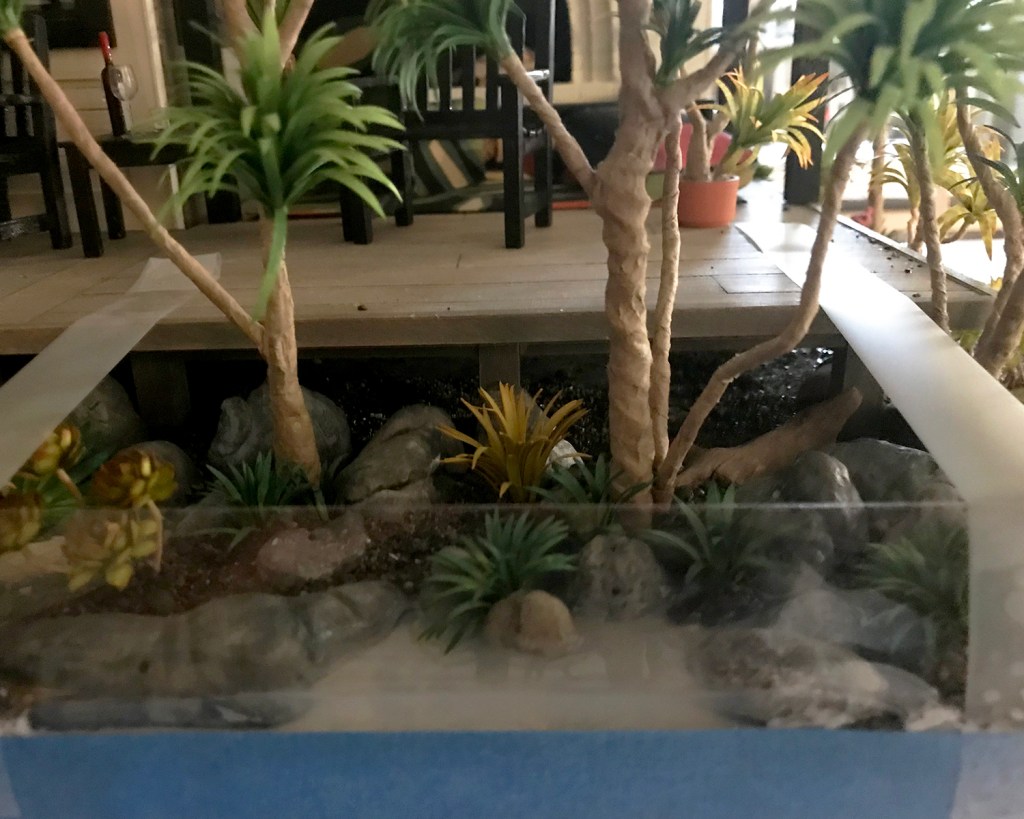
I did the same prep on the Conservatory project board.
Constructing a dam around the Conservatory pier
One tricky situation encountered is when any element of the landscaping extends past the base, even a little. I had some time to consider ways I will do it differently next time, as I held the acetate to the base while the glue set adequately.
The indispensable Hand Clamp
When the glue seemed set, I boldly — yet delicately — poured the first course of water into the prepared base. Altogether, five or six individual glugs into each tide pool and basin.
The first pour
Unsurprisingly, as I looked and marveled at the swampy effect and the no-going-back-nowness, a few small, very slow leaks began to develop. I used wide painter’s tape to further seal — more on that later — the acetate dam to the base. Checking again about two hours later I added more tape, and also noticed a few small areas where the glue I had used to cement the gravel and boulders to the base seemed to be turning opaque white.
Hmmm.
The recommendation for the water product is to let each layer dry at least 24 hours. It was very late by this time, so I called it a night very early morning and went to bed.
Hmmmmm. Should I be concerned?
Next morning, not 24 hours later, I was encouraged to see the water was turning clearer, but the small white areas were still present, noticeably in the transition areas of gravel I had applied a few days earlier.
What is causing those weird areas of white in the gravel?
So I re-read the product label instructions.
What?!
Not for use with PVA glue. I’ll shorten my whole lengthy tirade — who doesn’t commonly use PVA glue? Why wasn’t this the very first caveat on the label, and why was this condition never mentioned in any of the company’s instructional videos on use of the product, etc… and lots of swears and unkind, rude assumptions and declarations. But then there was the offhand “Cure above 70°F.” Thankfully I have a wise and patient bitch buddy to vent to with whom I can vent. You know who you are are.
Then I calmed down enough to embrace that since there was nothing I could do about it now, I’d wait and see what would continue to happen. After all, it had not been even 24 hours yet, and it is a rather larger area and blah, grumble, blah.
I wasted more time did more research on pouring water, this time with a variety of mediums and preparation techniques, and even grubbed around in some forums, which I detest, and learned that yes/no there are some/not any problems with PVA glue that can be gotten around by sealing everything with — and here again suggestions vary — some sort of varnish, and, most valuably, some clever ways to build and seal dams for water feature success. One involved swamp water.
Time passed, and my watery problems with this product mostly resolved themselves. I continue to steep myself in the experiences of others.
Leadlights water feature, with live edge!
I did a second pour on Leadlights, and a second and third pour on areas of the Conservatory. Above you can see the dam removed to reveal the fully cured water. (One of the plants bled a little color into the water, but I don’t mind.) I wanted a “live edge” to the water, and used an Xacto knife to carve away the lip. The project base itself will be edge-banded with thin basswood for a finished look :)
I have made a water effect!
All in all, I am happy with and consider the results a success. I’ll know so much more on the next one.
Check out the light shimmer on the right pier piling, a reflection from the late afternoon light. Magical realism, which validates my efforts :)
I’ll leave you with this image found in Bolinas, on the estuary marsh/riparian transition on a winter afternoon hike at low tide. (Very low and long ago for this guy.)
Sea House Conservatory Pier, ready for her water feature!
In preparation for creating the tidal water surge under the Sea House Conservatory, I mixed up a nice ocean green base color and painted it generously on the project board. I made sure the whole 26 x 20-inch base — foam cliff landslide, boulders, cobble, gravel, old tiled patio — was well-sealed with glue or paint to prevent water leaks. Two-inch tall heavy acetate strips were cut, ready to glue to the base to form a (removable) perimeter dam.
I estimated an area about 18 by 18 inches would be covered an inch deep, then used the Woodland Scenics water estimator to see how much product I needed to buy. Two, maybe three bottles?
Um, no. No, no, no. Depending on whether I chose “Realistic ($24 for 16 ounces)” or “Deep Pour ($30 for 12 ounces)” the estimated 180 ounces required 12 or 15 product bottles, costing a total of $288 or $450. For a feature, however awesome, mostly obscured beneath the Conservatory deck, this makes no sense. Back to the proverbial literal project board to drastically reduce surface area.
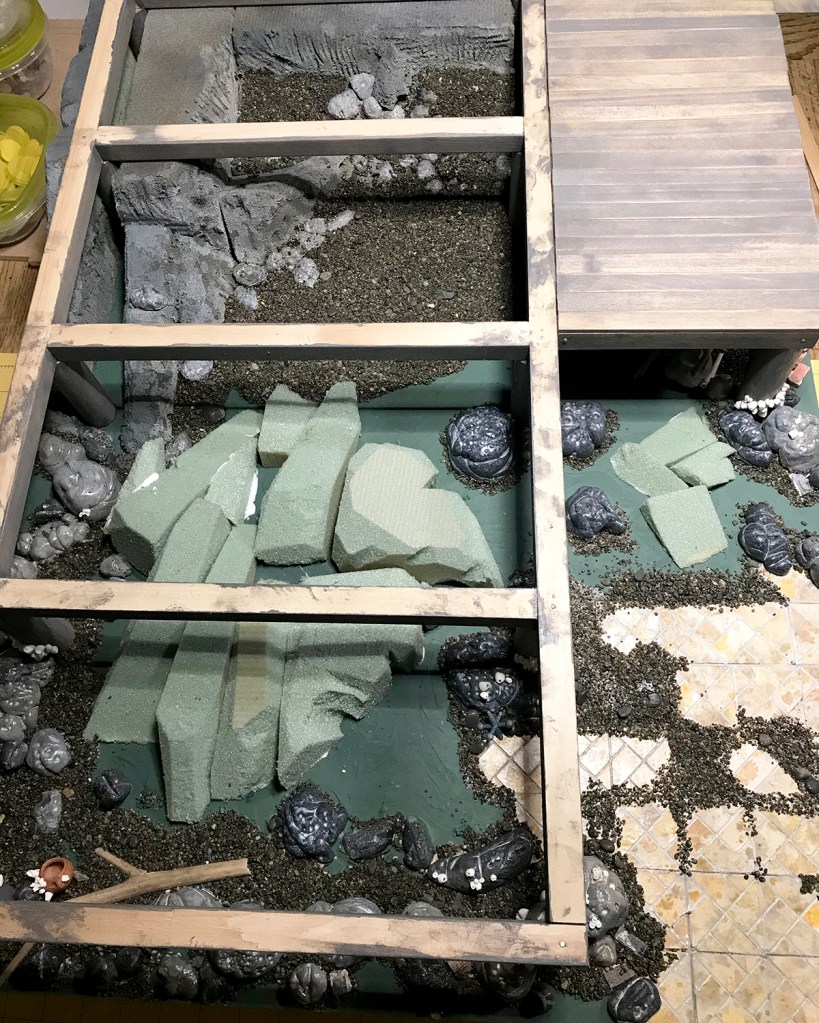
More cowbell! I mean, more reefs and rocks!
After fashioning more florist foam into reefs and rocks, I glued them to the project board.
Black Model Magic rocks and cobble
Starting this time with black Model Magic, I forged another batch of accent rocks.
Rocks, mid-wash and spray processThe open water feature base is realistically and financially reduced.
The foam shoreline formations were generously sealed and detailed with a few shades of warm and cool gray acrylic and stabbing holes with a pointy thing. All base edges were given a transitional application of gravel, cobble and accent rocks. These were allowed to dry, excess gravel brushed out, and the process repeated.
Barnacles make everything better.
“What are those white cone things?” I can hear those of you looking at this photo on your phone exclaim. What, yes! Those white things are perfect barnacles, crafted by Keli of iseecerulean.com.
Rocks to Keli
(I am not ungrateful. We have a longtime water-influenced exchange going on.)
Sea House Conservatory, under the pier
I did a final brushing and shaking off loose gravel after the glue dried over my (1:1 life) front deck, just as the sun was setting.
Kansas remembers me nowThe lunatic is on the grass
You know how it is when maybe you fall a little bit too much in love with your build? That’s how it is for me right now with these sunset light photos. I have about a dozen that made first, even second cut, and they are all epic. One more, please indulge me.
Will be largely unseen
I sighted through all the open viewpoints, and as I mentioned earlier, most all will be obscured once the Conservatory is in place. But I know, and now you do too, what lies beneath.
The first of two estate chairs for Sea House Leadlights. Probably.
I bought two of Kris Comapas’s Estate Chair kits because I wanted to use more of this thrift store dress fabric, which I love.
From a Pescadero thrift store strapless, bubble-hemmed dressHappy little estate chair, work in progress
It’s a rather large scale print for miniature upholstery, as well as being a very fine and lightweight fabric, but did I mention how happy it makes me feel?
Though legless and unpiped, still a very welcoming estate chair
Kris includes good instructions and cord to make fabric-covered piping in her kits, but I generally prefer a twisted cord made from 3 strands of embroidery floss.
Yes, K-2’s eyes light up (when he sees me)
Here you can see my associate K-2SO inspecting the floss piping with his massively articulated fingers. (I love him, too.)
I find attaching tiny piping gracefully onto miniature upholstery to be a tedious task, so I’m putting it off until I feel more… um, articulated dextrous. And patient.
Sea House Leadlights design studio
The Leadlights design studio also has a new chair. Makes it look way more office-y, don’t you think? I’m really pleased with the level of quality and detail in this chair. (Ack! This photo also reminds me I want to finish tricking out the desk accessories, and to trim that orange bookmark on the last-minute-made sketchbook!)
That brick rubble is glued down Scarlett. (Yes, she checked.)
Work continues on the Sea House Conservatory build, with a sea level rise remediation support pier in place.
Model Magic air-dry clay rocks and boulders
Geologic rock and boulder construction is underway. My preferred material — think I’ve tried just about all of them — is Model Magic air dry clay, made by Crayola. It is lightweight, inexpensive, readily available, pleasant and responsive to sculpt, accepts all kinds of pigments well, and dries with virtually no shrinking.
Spatters and washes and sprays, oh myLots and lots of boulders and rocksGranite-veined black rocks
With this last batch of rocks, I experimented with adding black acrylic paint or India ink to the white clay before sculpting. One batch had fine black gravel mixed in. The paint or ink initially made the compound stickier to work with, but it was nice to start with a pre-tinted base. These have green and gray washes spritzed on. When dry (takes a day or two depending on size and relative humidity) with a fine brush I painted the surf erosion holes and granite veins with white acrylic, diluted 1:1 with water.
As I was ordering new clay, I learned Model Magic also comes in black, gray, and “Earthtone, Bisque and Terra Cotta”. So stoked to use these colors on the next exploratory rock and boulder sets.
Closeup before the tide comes in
The finished rocks are slicked with a satin multi-purpose sealer, as they’re meant to look wet. The final Conservatory project base will have about an inch of water in tidal flow. (I’m excited about that, too, as I’ve never worked with a “water feature” before :)
Sea House Conservatory, in progress, February 2020
Deck planks are installed, and I’ve finally arrived at a stair design that makes sense and blends into the overall structure.
Yesterday I was at Chrissy Field in the Presidio, and took a bunch of pier photos for genuine detail ideas. It was a perfect winter’s day, cool, clear and sunny, with very little breeze.
Looking north to the Golden Gate Bridge and MarinChrissy Field, Presidio. See the fog horse galloping over the City?
Albie oversees receipt of Serendipity Shed base kits, 16 August 2019
I thought it might be interesting to review building highlights of the Sea House Leadlights studio office, from start through submission. (Can’t really say “completion” because things never stay done ‘round here.) There are links back to original posts — if any were made — with more details. I wasn’t very bloggy :)
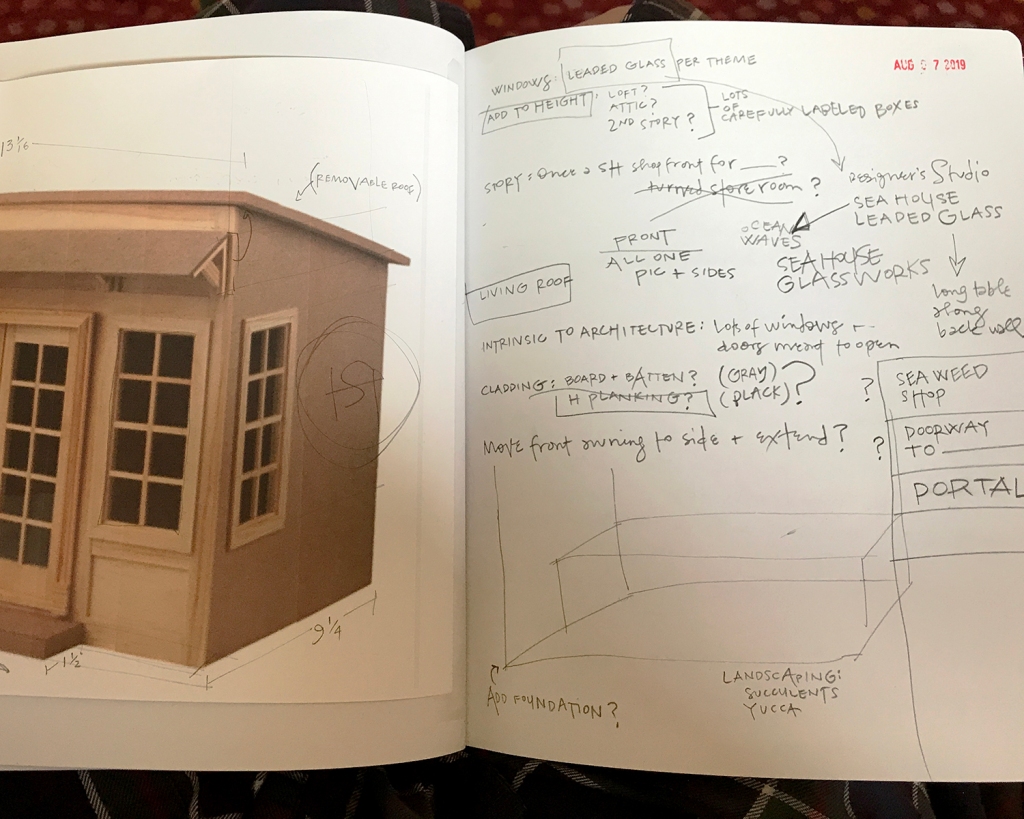
First ideas
I spend a lot of pages thinking, sketching, dreaming, considering and working out dimensions and story.
The starry floor in process
The first floor idea, though fun to design, paint and assemble, did not work well in the space. So it goes.
Two base kits mashed together
Height was added to the starter kit with parts from a second. I like to retain recognizable elements of the kit, so the roof angle and footprint, as well as door and lower window placement remained unchanged.
Loft wall detail
I glued cold press 140 lb. watercolor paper to the walls for texture before painting, and added a whitewashed aged brick back wall in the loft.
Adding siding to the new frontHalf-loft installed, supported by faux beams
I opted to make the front façade removable as well as the roof… this makes it so much easier to photograph the interior.
Bench tops and bottoms
I cut the built-in benches from 1/16-inch basswood on the Cricut Maker. These were glued together and supported with 1/8-inch dividers.
Interior space begins to come togetherTree Frog green was the only possible finish color, with black leather cushions
I thought and sketched about the window designs for some time. The Pavilion is bubble-themed; the Conservatory celestial… for the Leadlights design studio I went Egyptian Deco. Mostly sort of.
Sea House Leadlights front doors and front/side windowsSea House Leadlights upper window
The upper window is a stylized scarab. Very.
The “leading” designs for the windows are cut from lead black cardstock, glued front and back to the plexi, then framed in black on the exterior (and tree frog on the interior). I like to see wood grain, so I use a 1:1 ratio of acrylic paint and staining medium.
The scarab window at night
If one looks straight on, the window frames the bricked loft wall and the old Sea House logo. With sacred scarab wings.
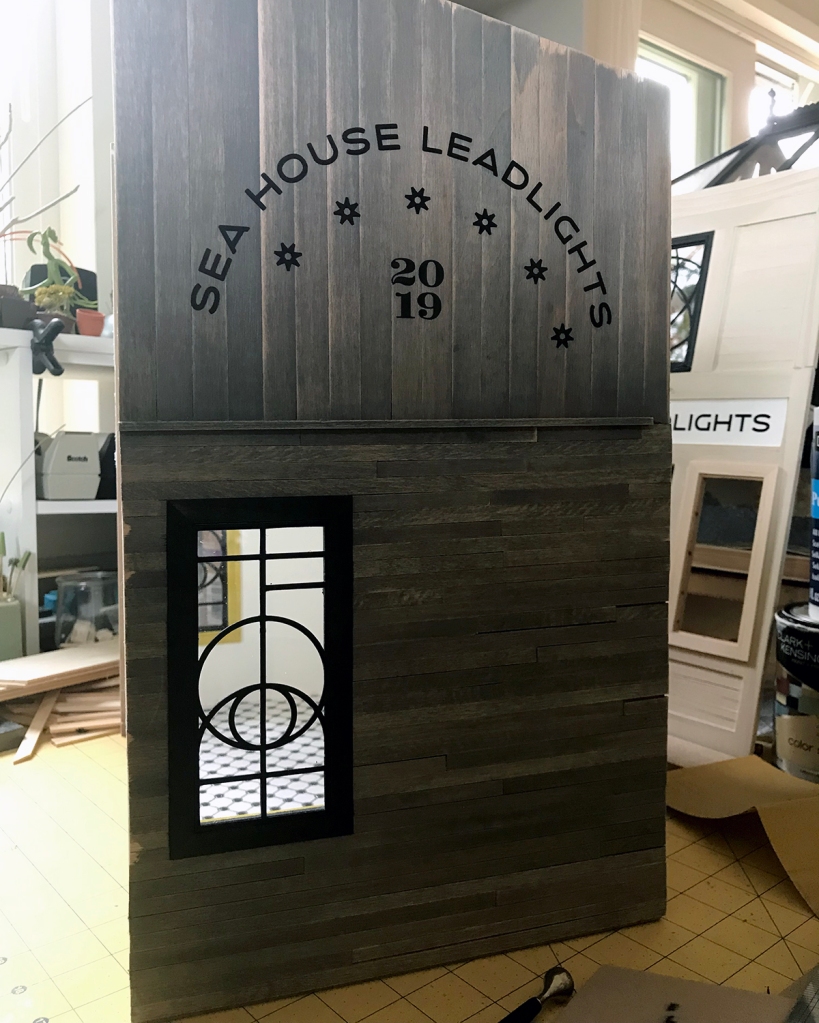
Side building signage
I — or rather the Cricut Maker — cut the signage from matte black vinyl. The stars in the design are meant to resemble anchor plates used to reinforce old buildings. I love them.
In this backlit photo, the vinyl letters appear to float off the side of the building. It’s not quite so unnatural-looking in person, but knocking back the synthetic smoothness is on my eternal learn-to-do list, to find ways to tone down the material. (Transferring wee letters and figures is a fiddly, fussy business, especially onto an uneven surface, and I am not eager.)
Side signView from above
Here’s a roof’s-eye look at the progressing build. The holes are drilled for the LED light fixtures that will illuminate the work space below. (The wiring to be concealed beneath a custom rug and other stuff stored in the loft.) A narrow shelf beneath the scarab window on the removable front might support batteries if I ever add lighting to the front. Floor tiles gleam softly with scuff-resistant utility. Leather window seats beckon.