This is the piece I showed at the Art Guild Annual Members Exhibit. Glimmering Girl. Found metal objects, hand-stitched cotton thread, mono printed torn and cut paper collage, 8 x 10 inches
Here’s a closeup peek at the piece I’m working on now. The patinas and colors are so luscious. I’ve been collecting the found bits for years, and the process of messing around assembling them into beings is enjoyable. Something wants to emerge.
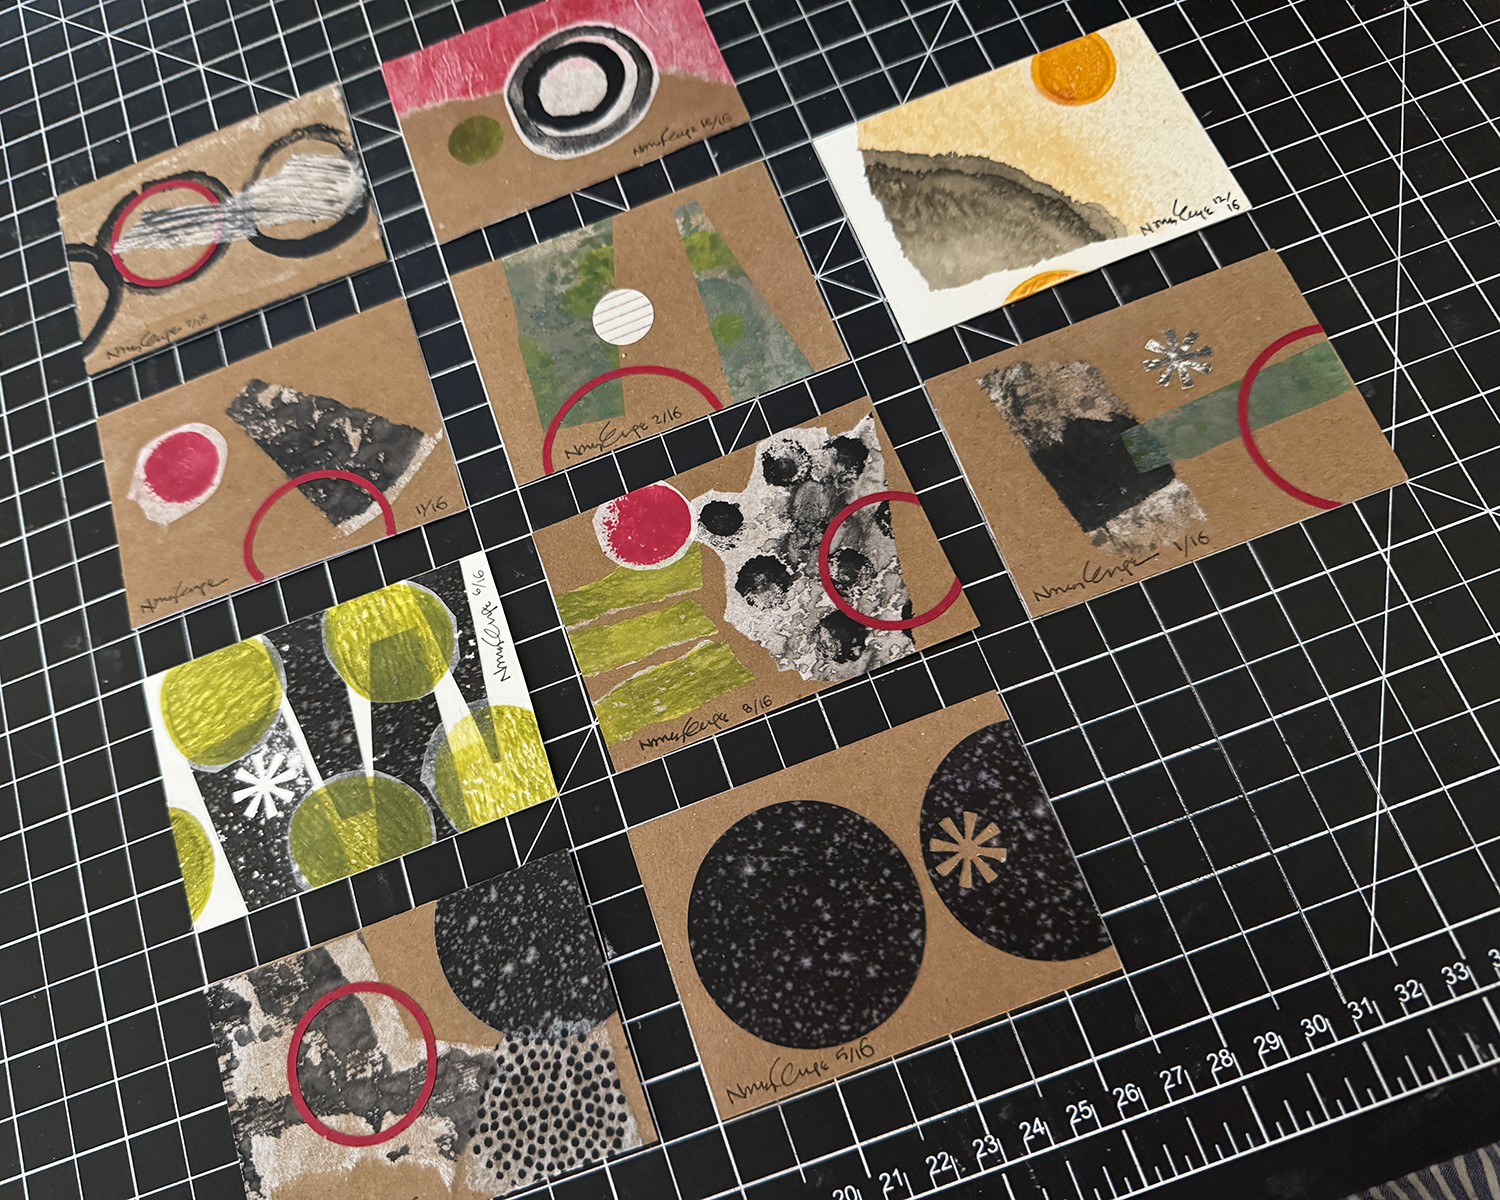
In the monthly discussion group I attend, we decided to exchange Artist Trading Cards. Fun to make, pulling out all the old scrap materials, and working small and fast.
So fun that I decided to do the backs as well. And afterwards, I was moved to tidy up and get rid of so many bits and pieces and better organize what remains.
Sharp Park winter sun beach walk, high tide, storm clouds gathering
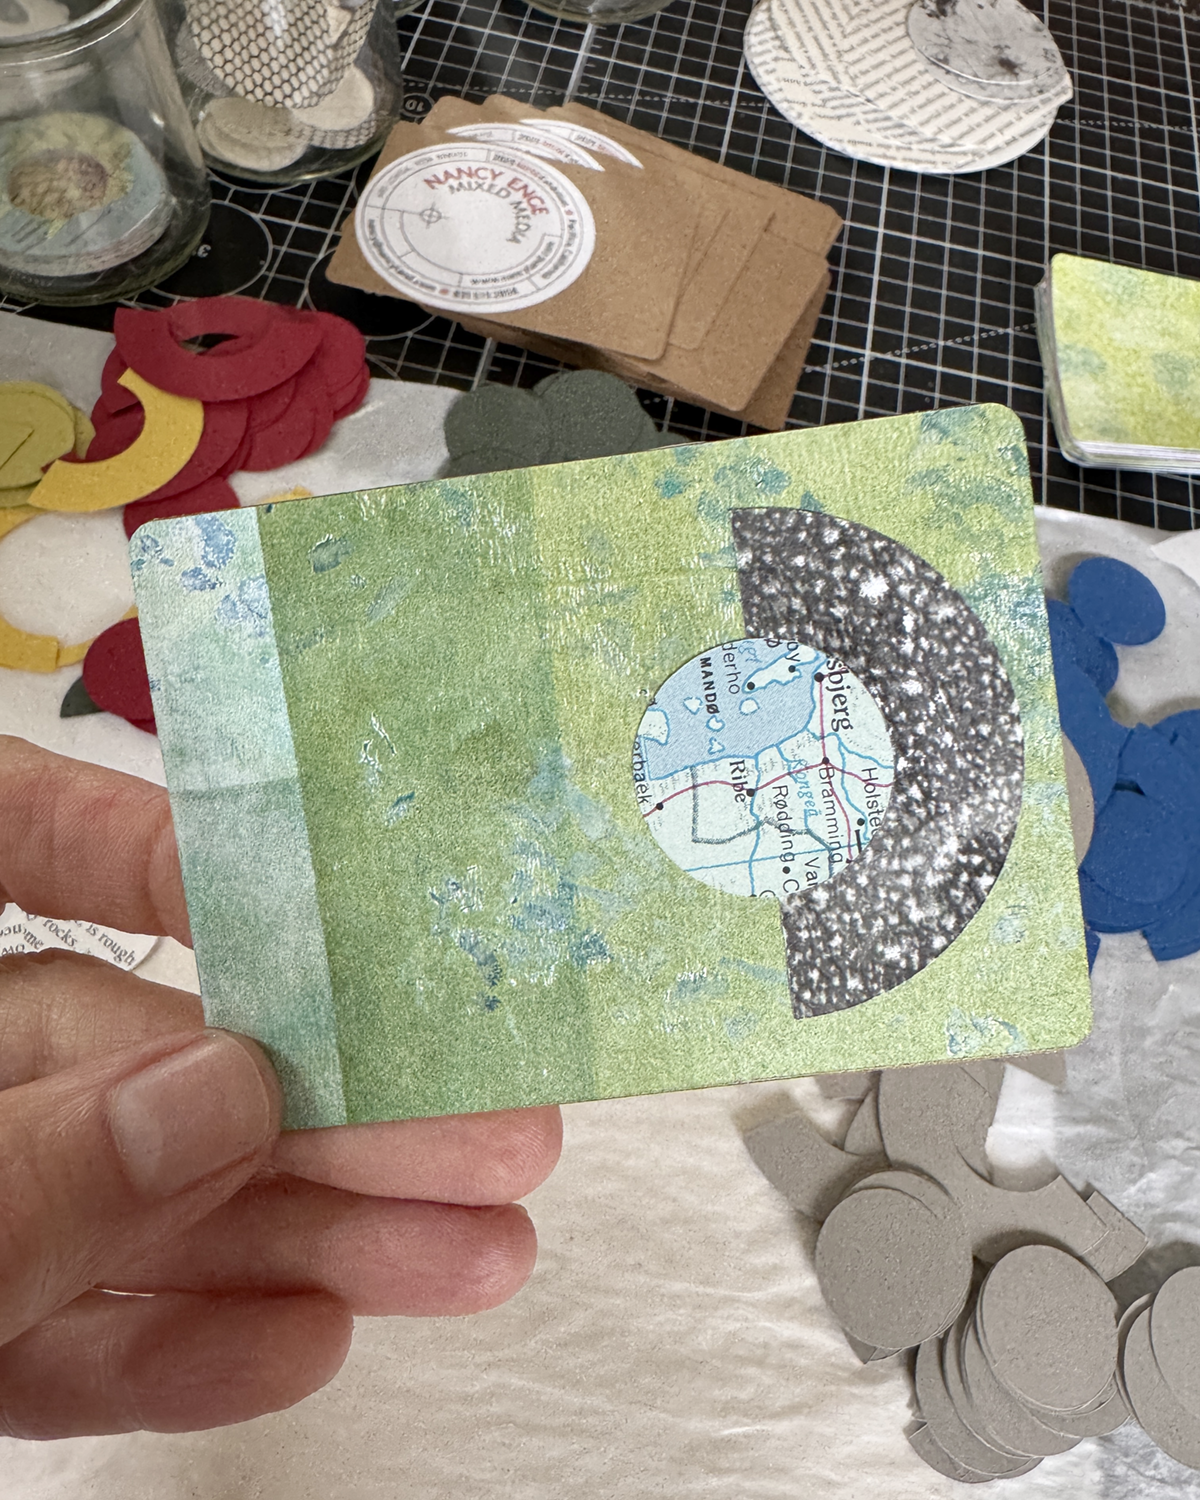
I decided to make an edition of 50 Artist Trading Cards with some of the leftover cut shapes and monoprinted papers for background. It’s a fast, fun and carefree process; no rulers, grids or light boxes involved.
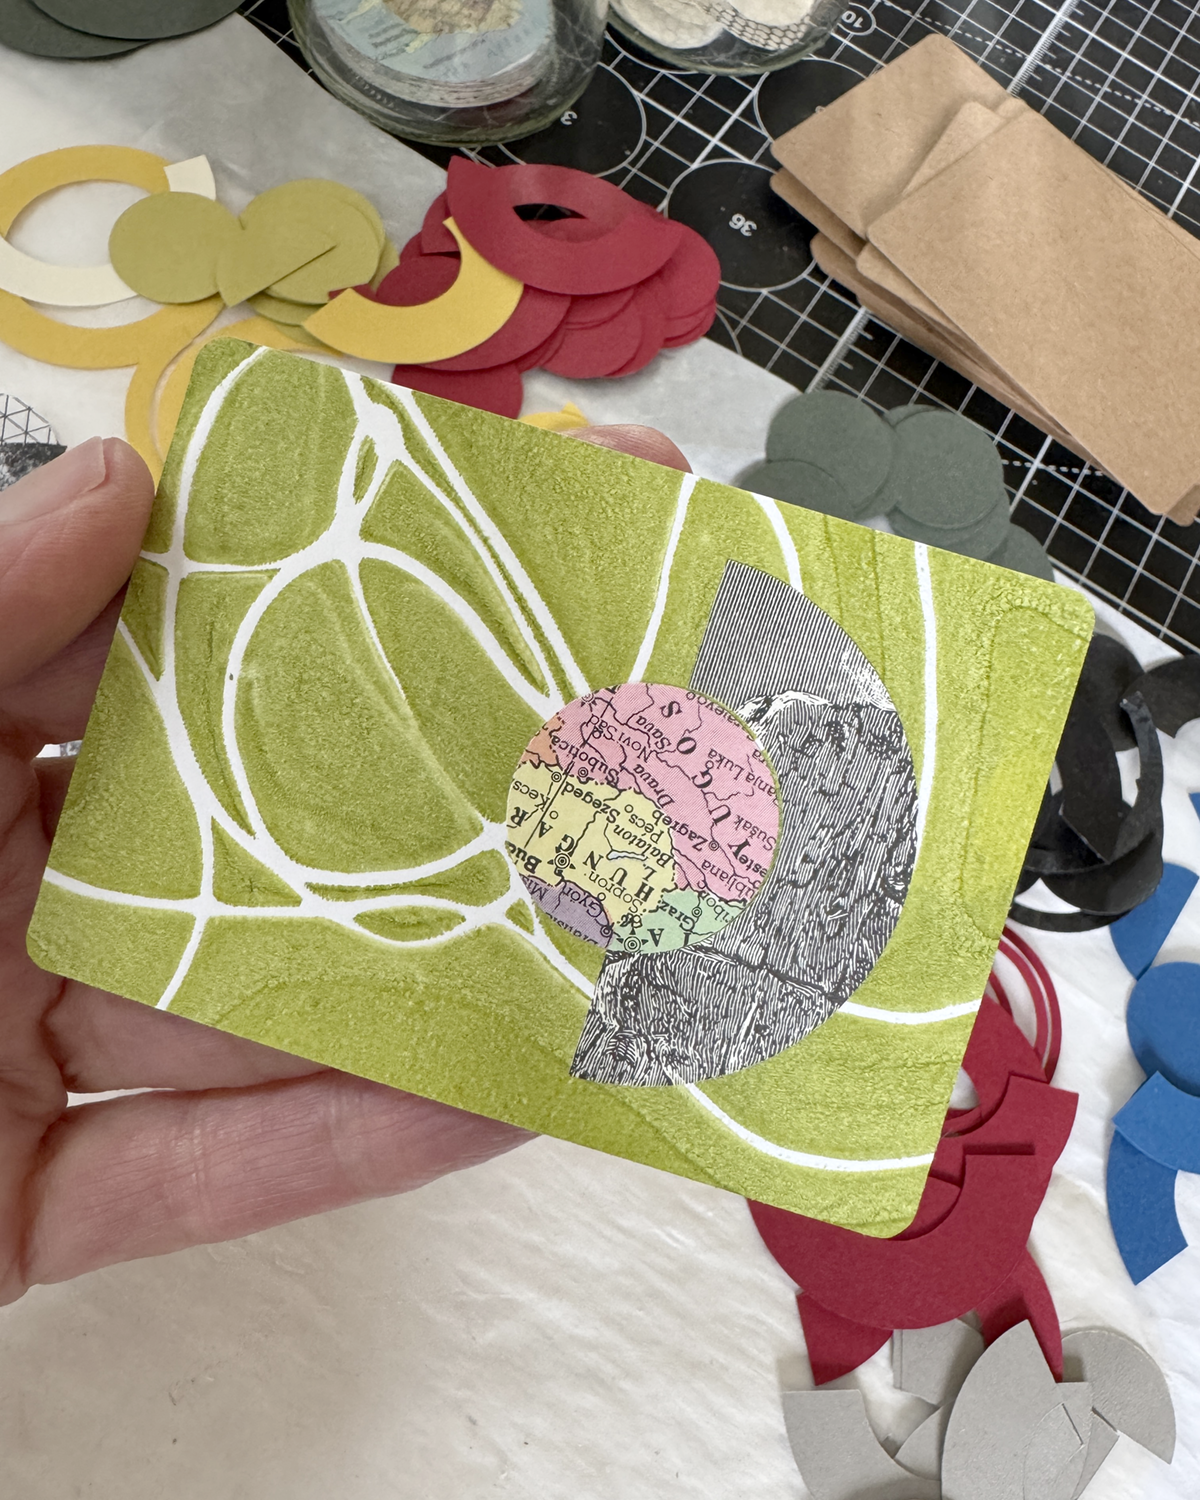
Choosing which mono prints — including brayer roll-offs, as seen above — is a pleasant task, like seeing old things with fresh eyes.
Some of the papers I cut for the 6×6 panels did not play so well with the color palette, and were rejected for use. However, they look swell on the various mono prints and the smaller ATC size! Yay old maps and line drawings!
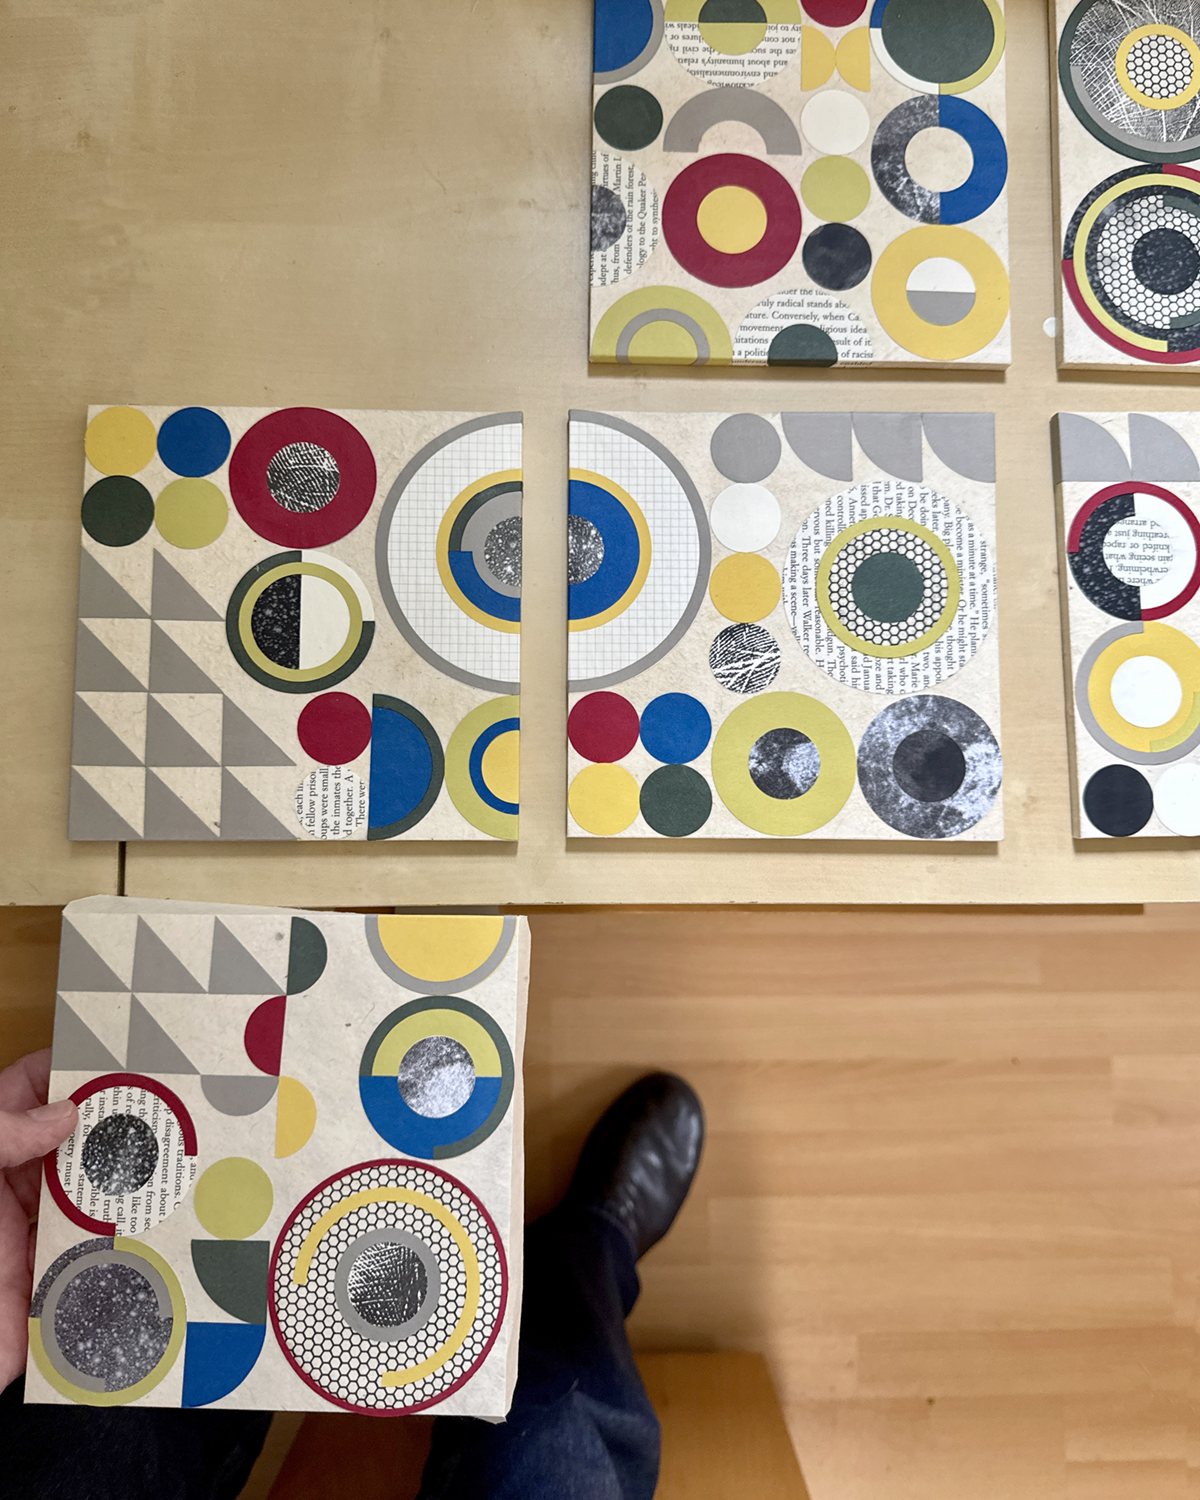
Not gonna lie, fifty 6×6-inch panels is a lot of eventual individual artworks to make in as many days. Priming and sanding them all was a good way to ease into the enormity.
Border panel work-in-progress
I eventually got into a kind of rhythm of creation, with a set of steps and best practices. Iteration is a great way to really explore the geometric relationships with color and balance. (Amusing, too, as I rejected placements that looked like butts or boobs, although the occasional egg yolk or eyeball were okay.) Every single panel was a surprise, and interesting to see through to its completion. Somewhere after panel 25 or so, I gained trust in the process and my ability. Flow state increased in onset and duration.
Playing with arrangements, checking in with what works
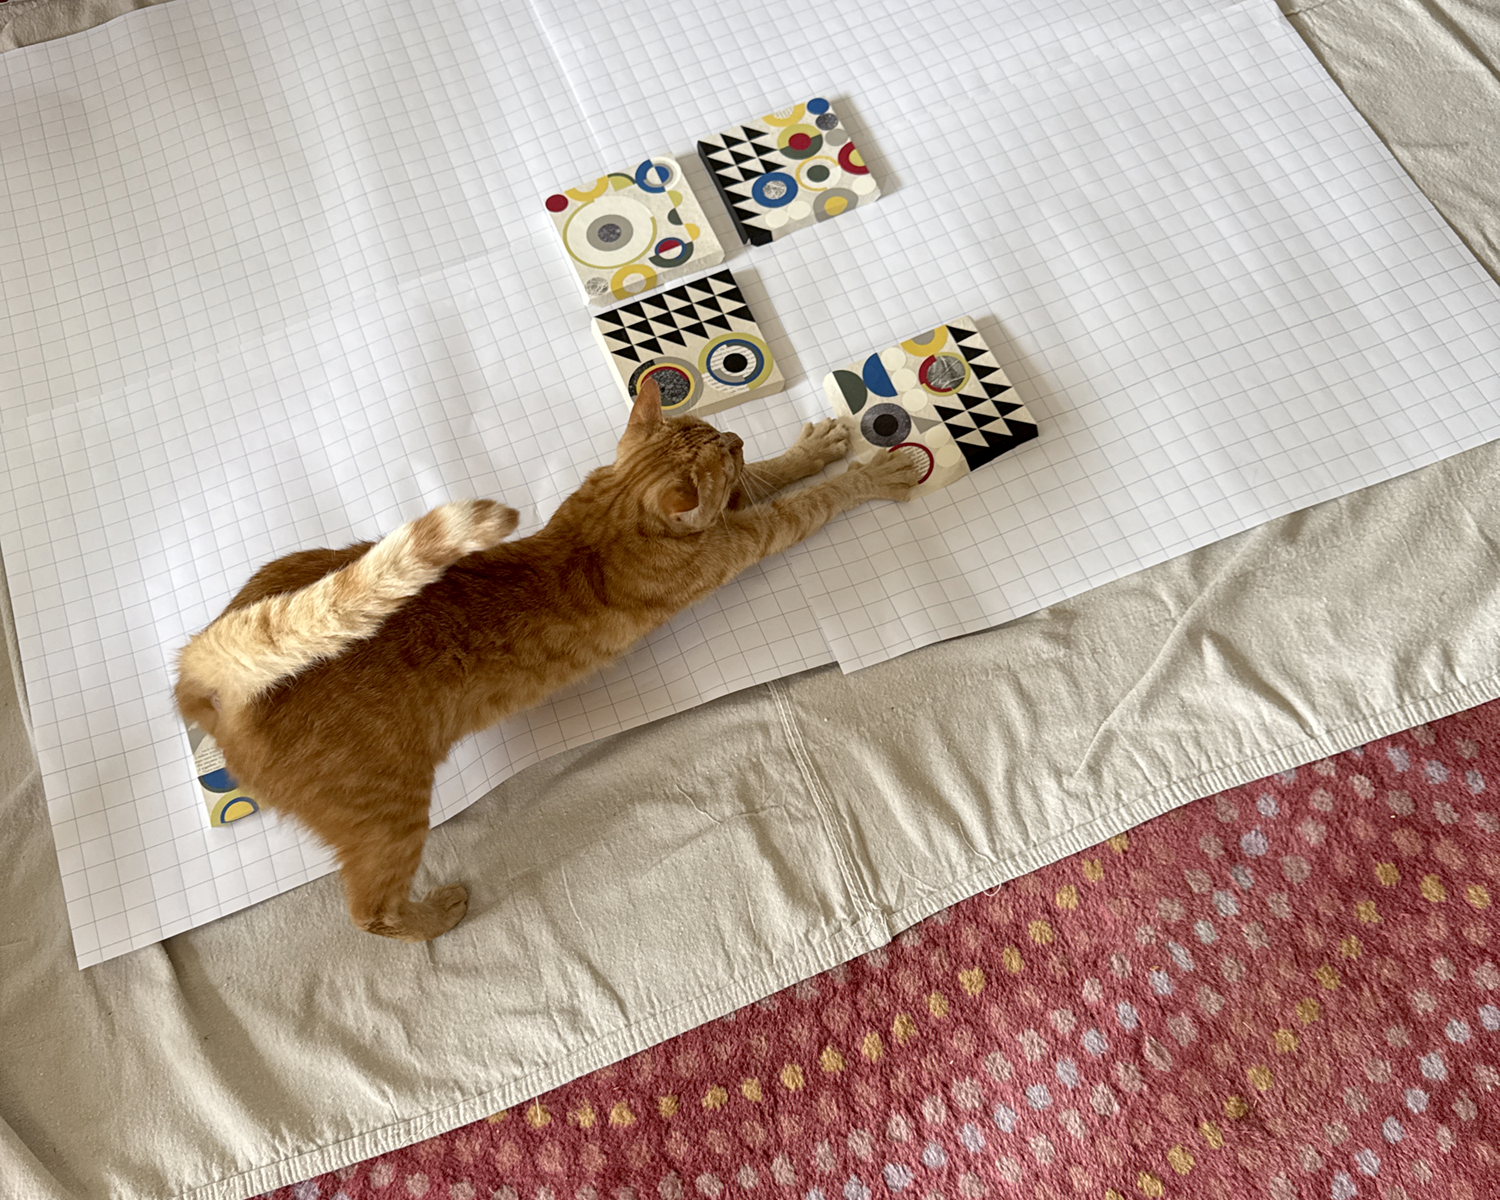
Periodically, I’d lay out the work to date on some inadequate surface and just look, to see what I could see, and use the insight or finding on the next piece.
Of course I had help if I laid them out on the floor.Studio Assistant and First Buddy Mateo
Tater has a large flat box on the ell of my desk in which he lounges and naps, etc., while I work. In the process of sorting and packaging the finished panels for transport to the gallery, I took his large box and replaced it with a smaller one — just temporarily! — and he was not at all having it.
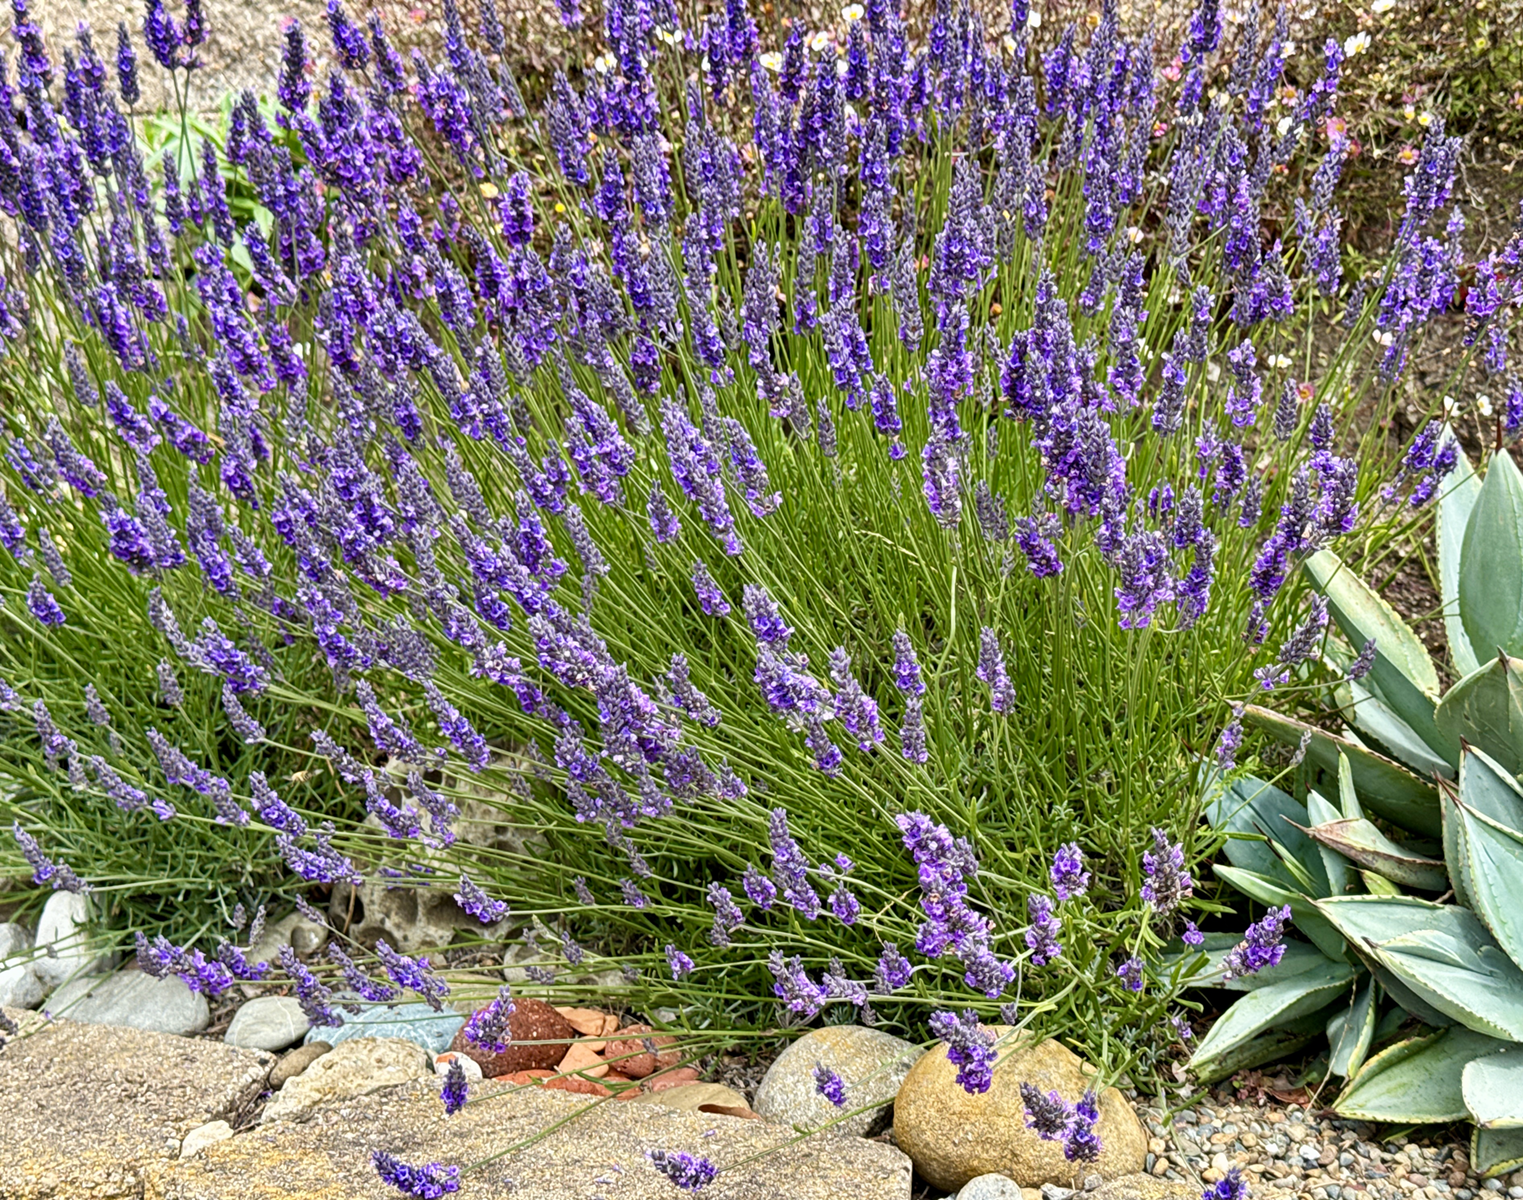
Lastly! The lavender is abloom here in foggy, mizzling Pacifica. There are about 20 bees of various species on the job, on this plant alone, and the scent is divine. I sit on the retaining wall and just breathe.
Earlier this month I was delighted/surprised to be accepted to the 17th Annual Sanchez Art Center 50|50 Show, in which 50 artists complete 50 small works in 50 days. (I’ll just let that sink in a bit. It’s both a lot and a little at the same time.)
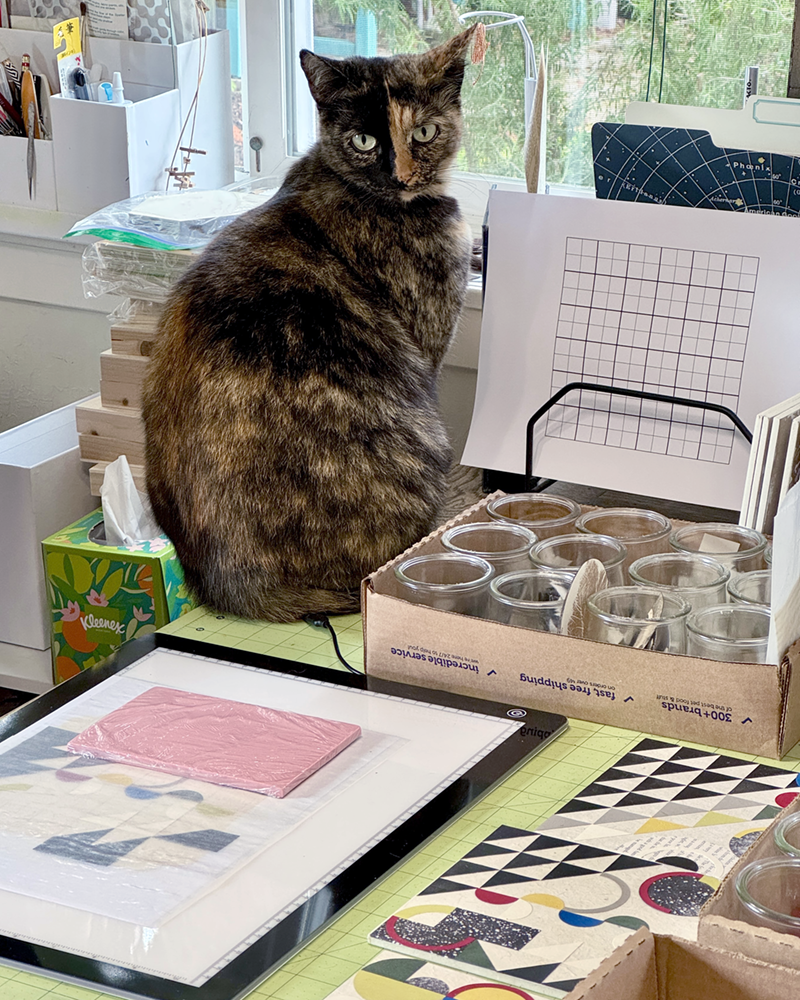
Maxine surveys the new mayhem on the studio table
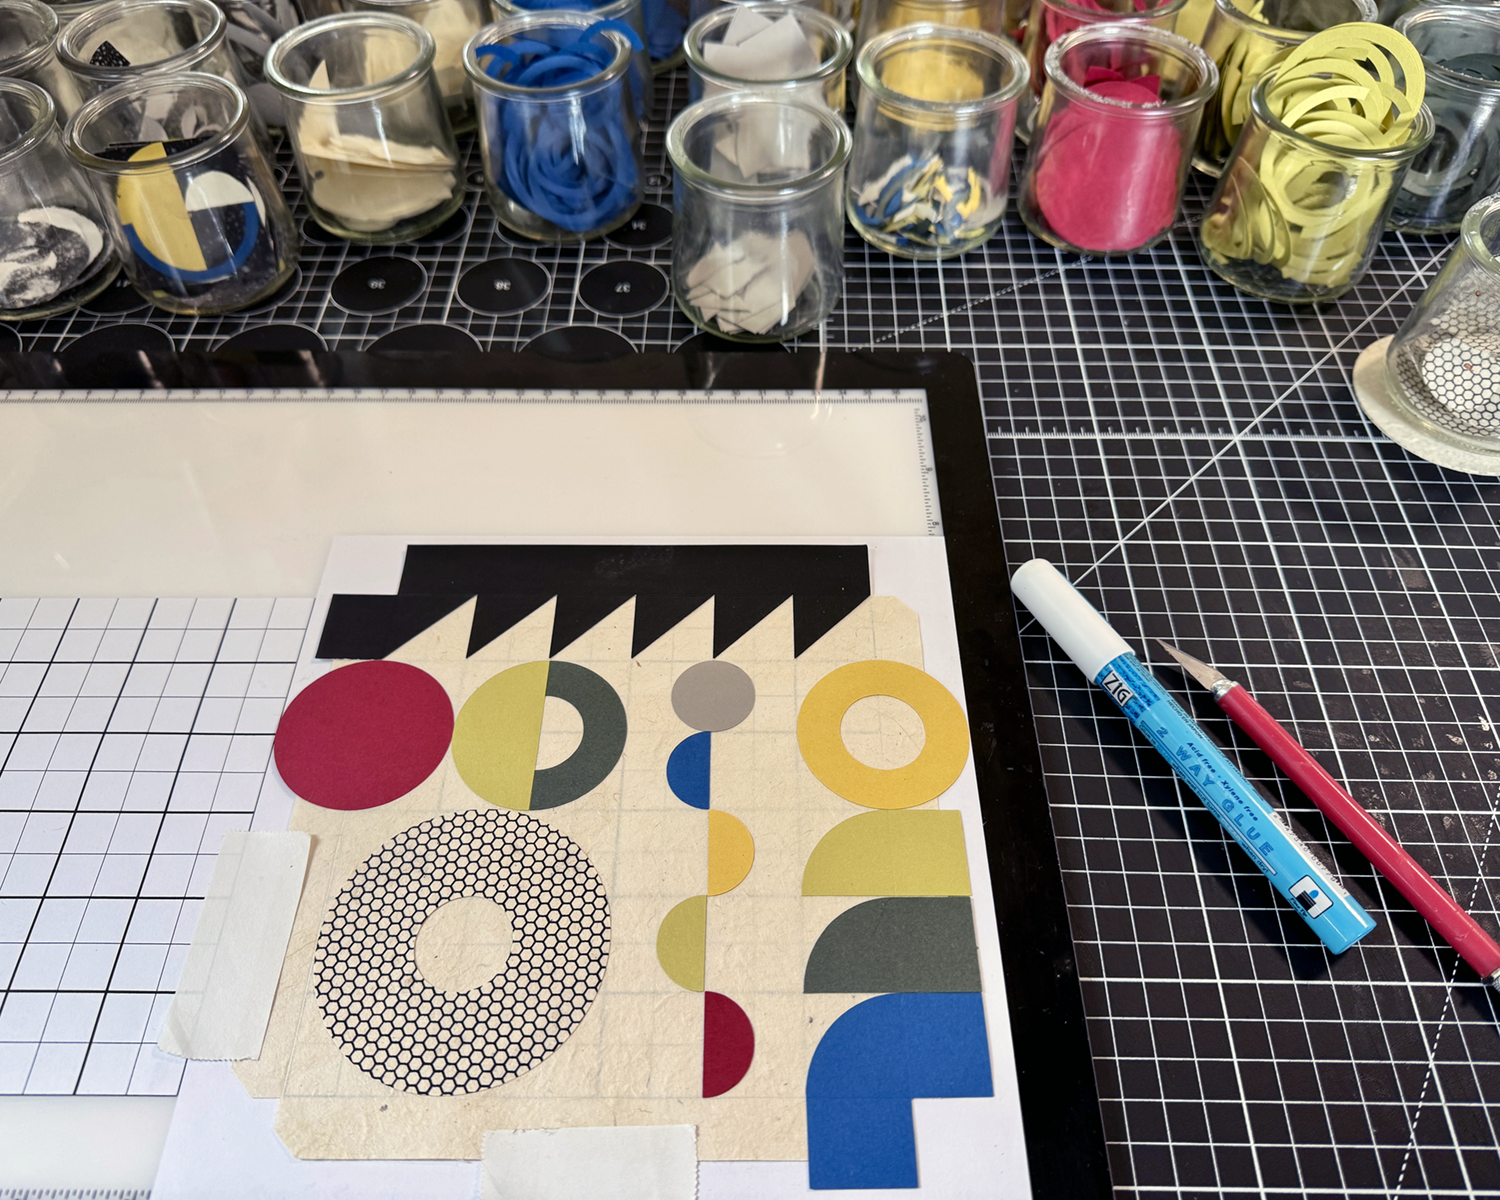
In the weeks leading up to the call for entries, I worked on ideas for proof of concept — Can I do fifty of this? Is it sufficiently interesting and compelling? Will I wish I was never born? I finally arrived at an exploration of abstract geometric collage — well suited to the size and scale of the project and of deep historical and personal significance. Working through a dozen or so test pieces, I refined my materials and techniques until I heard that still, small voice announcing, “Yes, this is good. You can do this.”
Prototypes in progress, solid, printed and found papers on handmade lokta
Then, I had to write the dread Artist’s Statement — a standard part of any entry process — and one of the most challenging things I’ve ever had to do. I made it excruciating, but! I persevered. Here’s what I arrived at (in fear and loathing) as the submission deadline was approaching:
“Constructed with awareness, but not with calculation, led by high intuition, and brought to harmony and rhythm.” — Piet Mondrian, 1916 Awareness, intuition, harmony, rhythm… How many ways can circles, squares and triangles be assembled to create compositions that flow, balance and fit in the space allowed? In these collage works, cut papers — color, mono printed and found — are manipulated and arranged to create balanced, rhythmic patterns and correspondences that please and satisfy our curious pattern-seeking sensibilities. In exploring abstract geometric collage, evidence of the — my! — maker’s hand is evident in tiny misalignments; they are forgiven and unintentionally lend an animation to the work. When multiple compositions are hung together, new patterns emerge. Possibilities remain endless.
Once I got over myself and that hurdle, I realized two things: first, artist statements are not carved in stone for all eternity and can and should be revised at will, at any time. Second, I’m pretty sure most people are not as mean, judgmental or paralyzing as my inner critic. And so, merrily, we rolled along.
Front deck setup for panel priming, ten at a timeA new LED light pad makes accurate placement possible
Wish me luck, inspiration and endurance, friends! These panels are (thus far) fun and satisfying to build! They make your eyes dance (in a good way)! The show opens Friday, 05 September, and runs through Sunday, 05 October. If you’re in the SF Bay Area, do consider stopping by the Sanchez Art Center to enjoy this exhibition of 50 artists’ works!
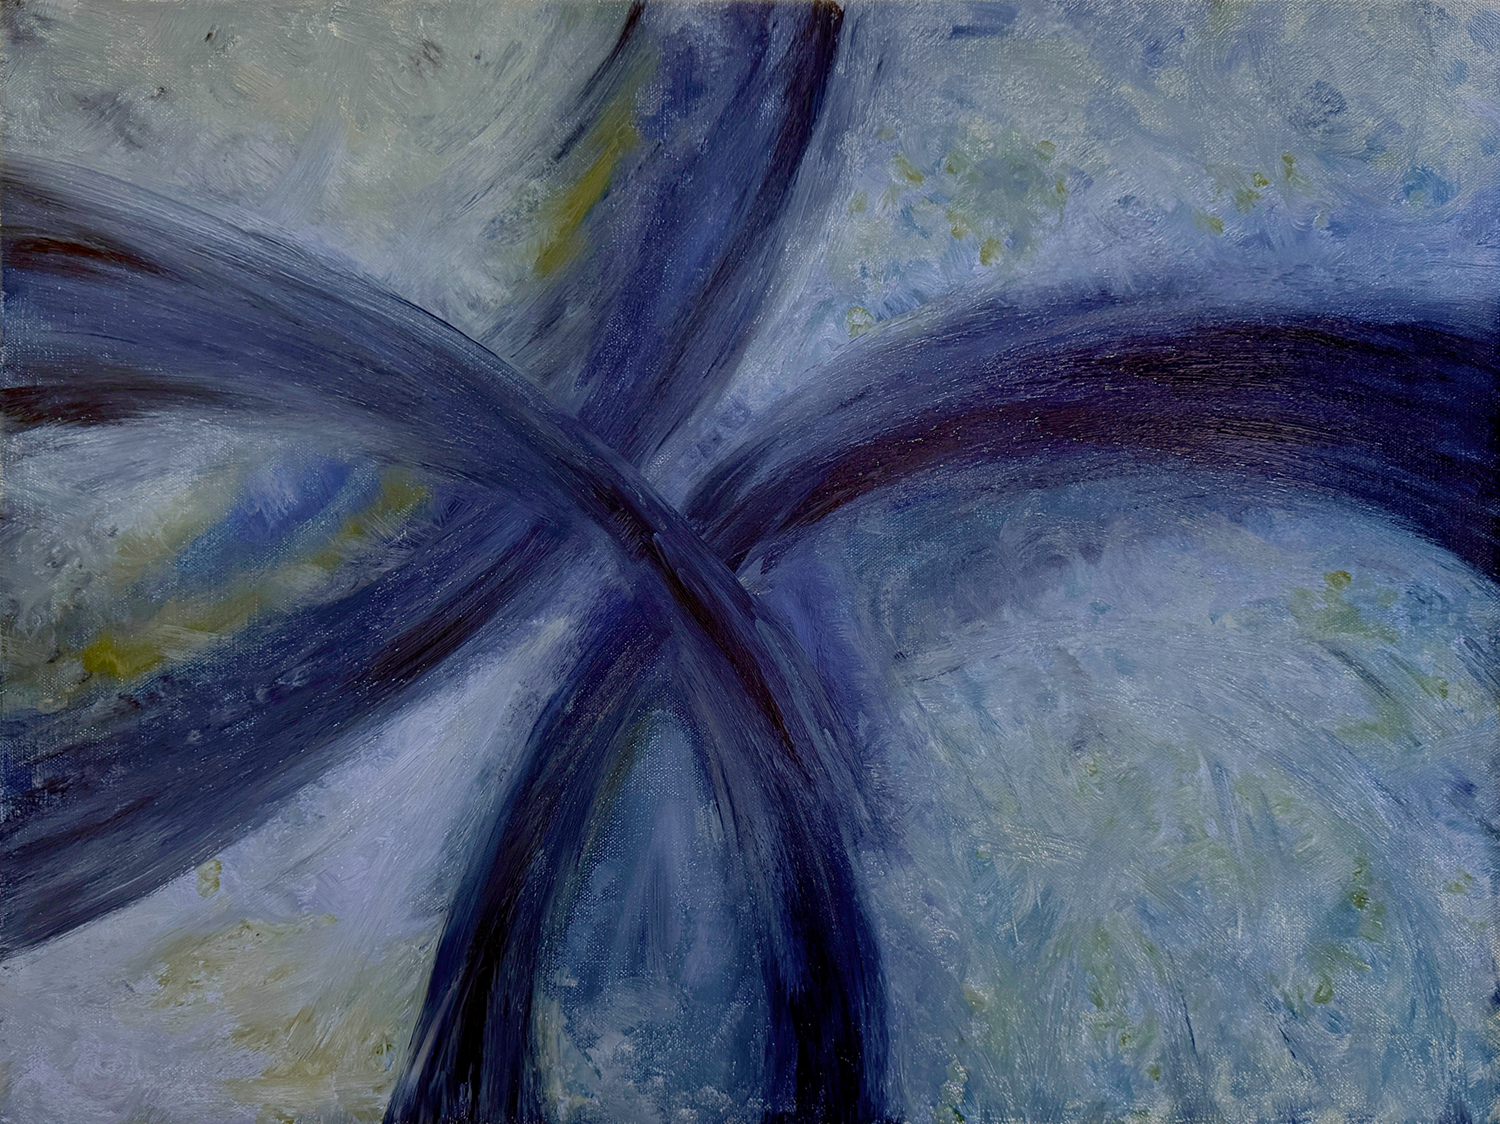
This piece started out last year as a foray into something else entirely, and sat in limbo a liminal state for months.
On the way, somewhere
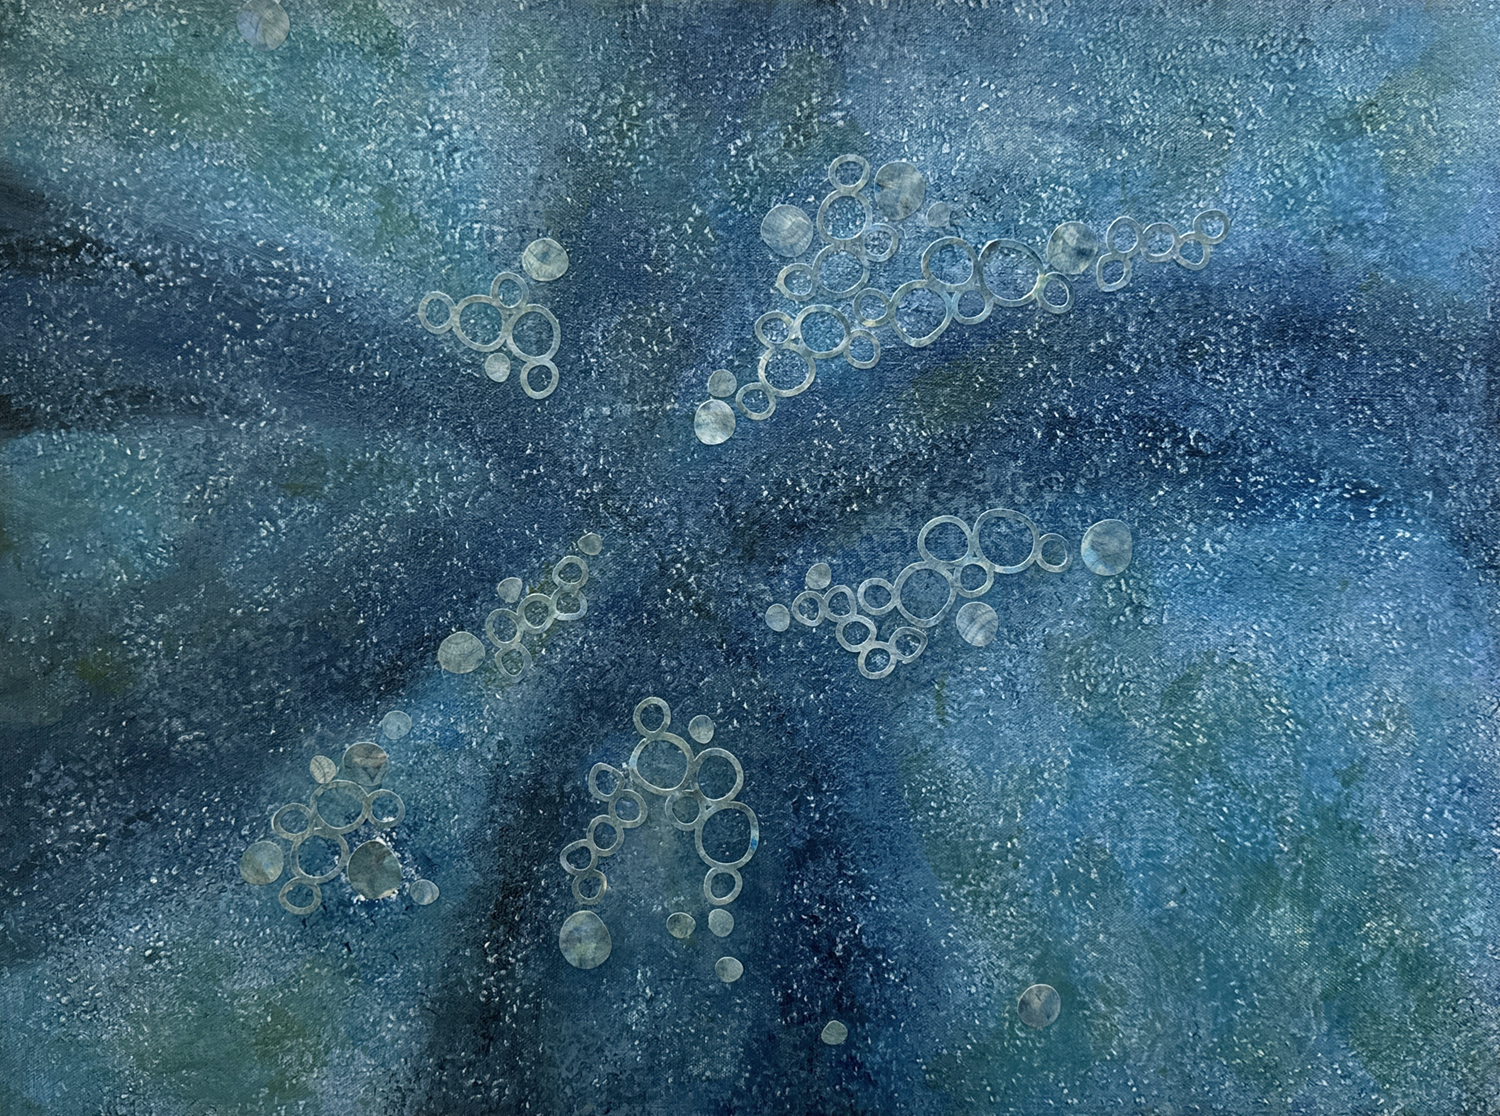
It became a deep blue-green painted background for an exploration of printed and cut papers in bubble patterns.
Going for a more backgroundy thing?
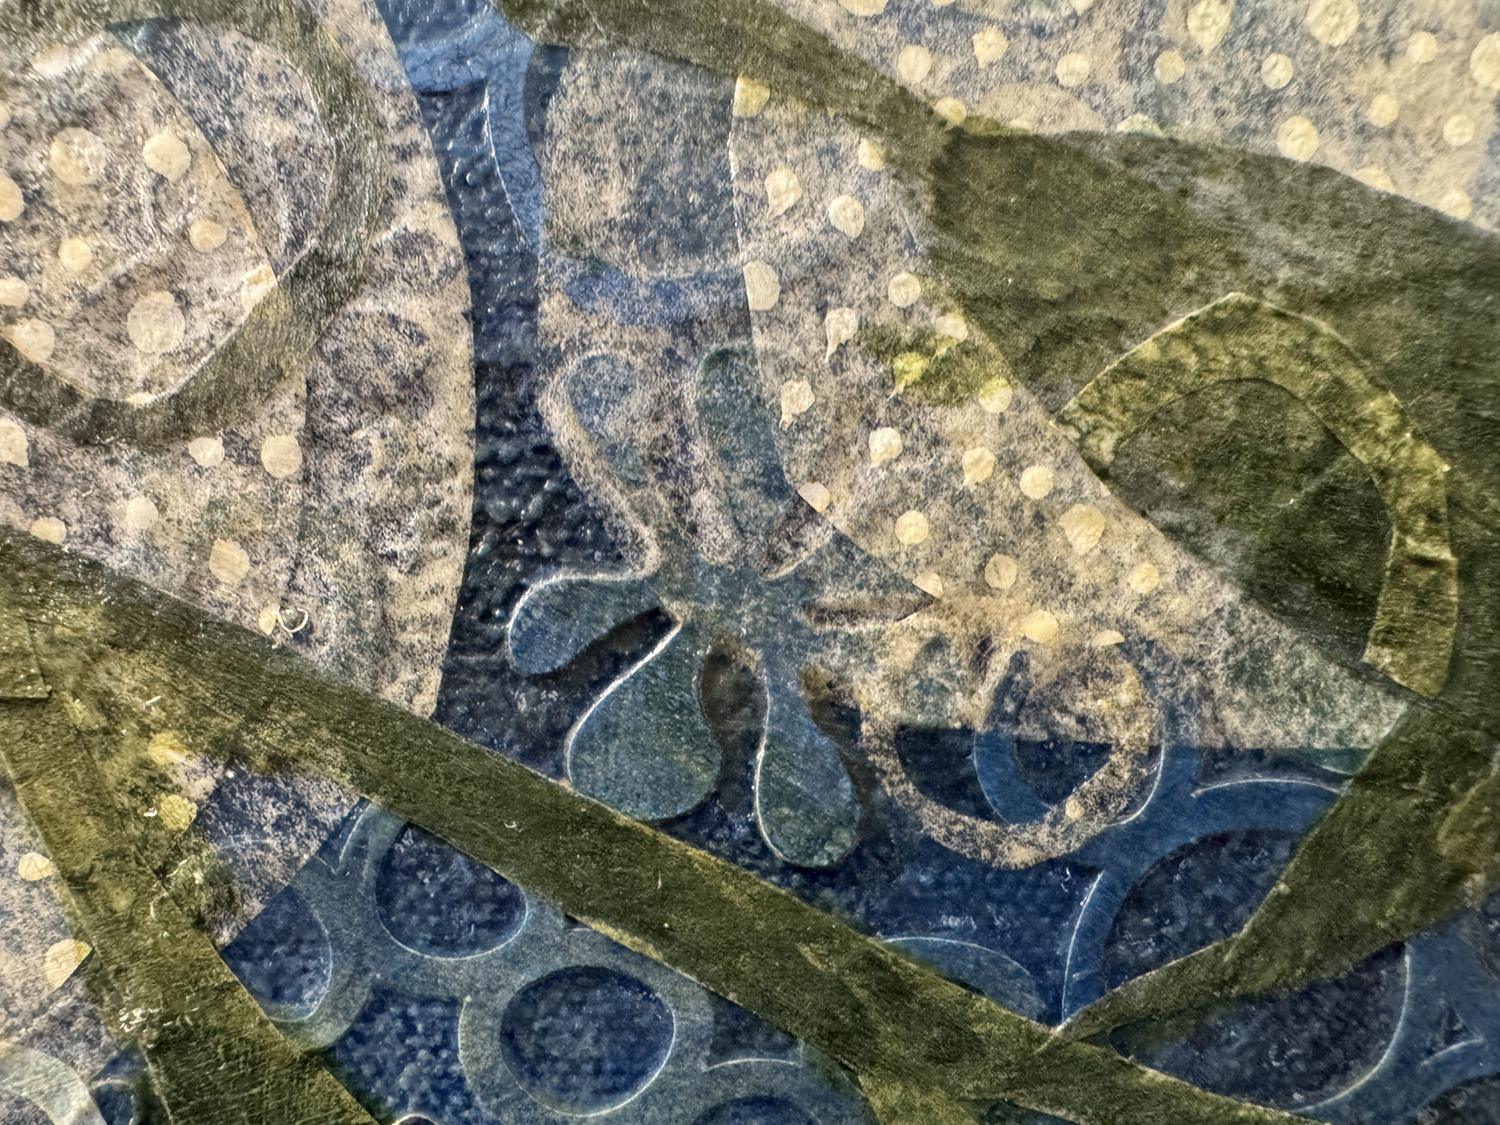
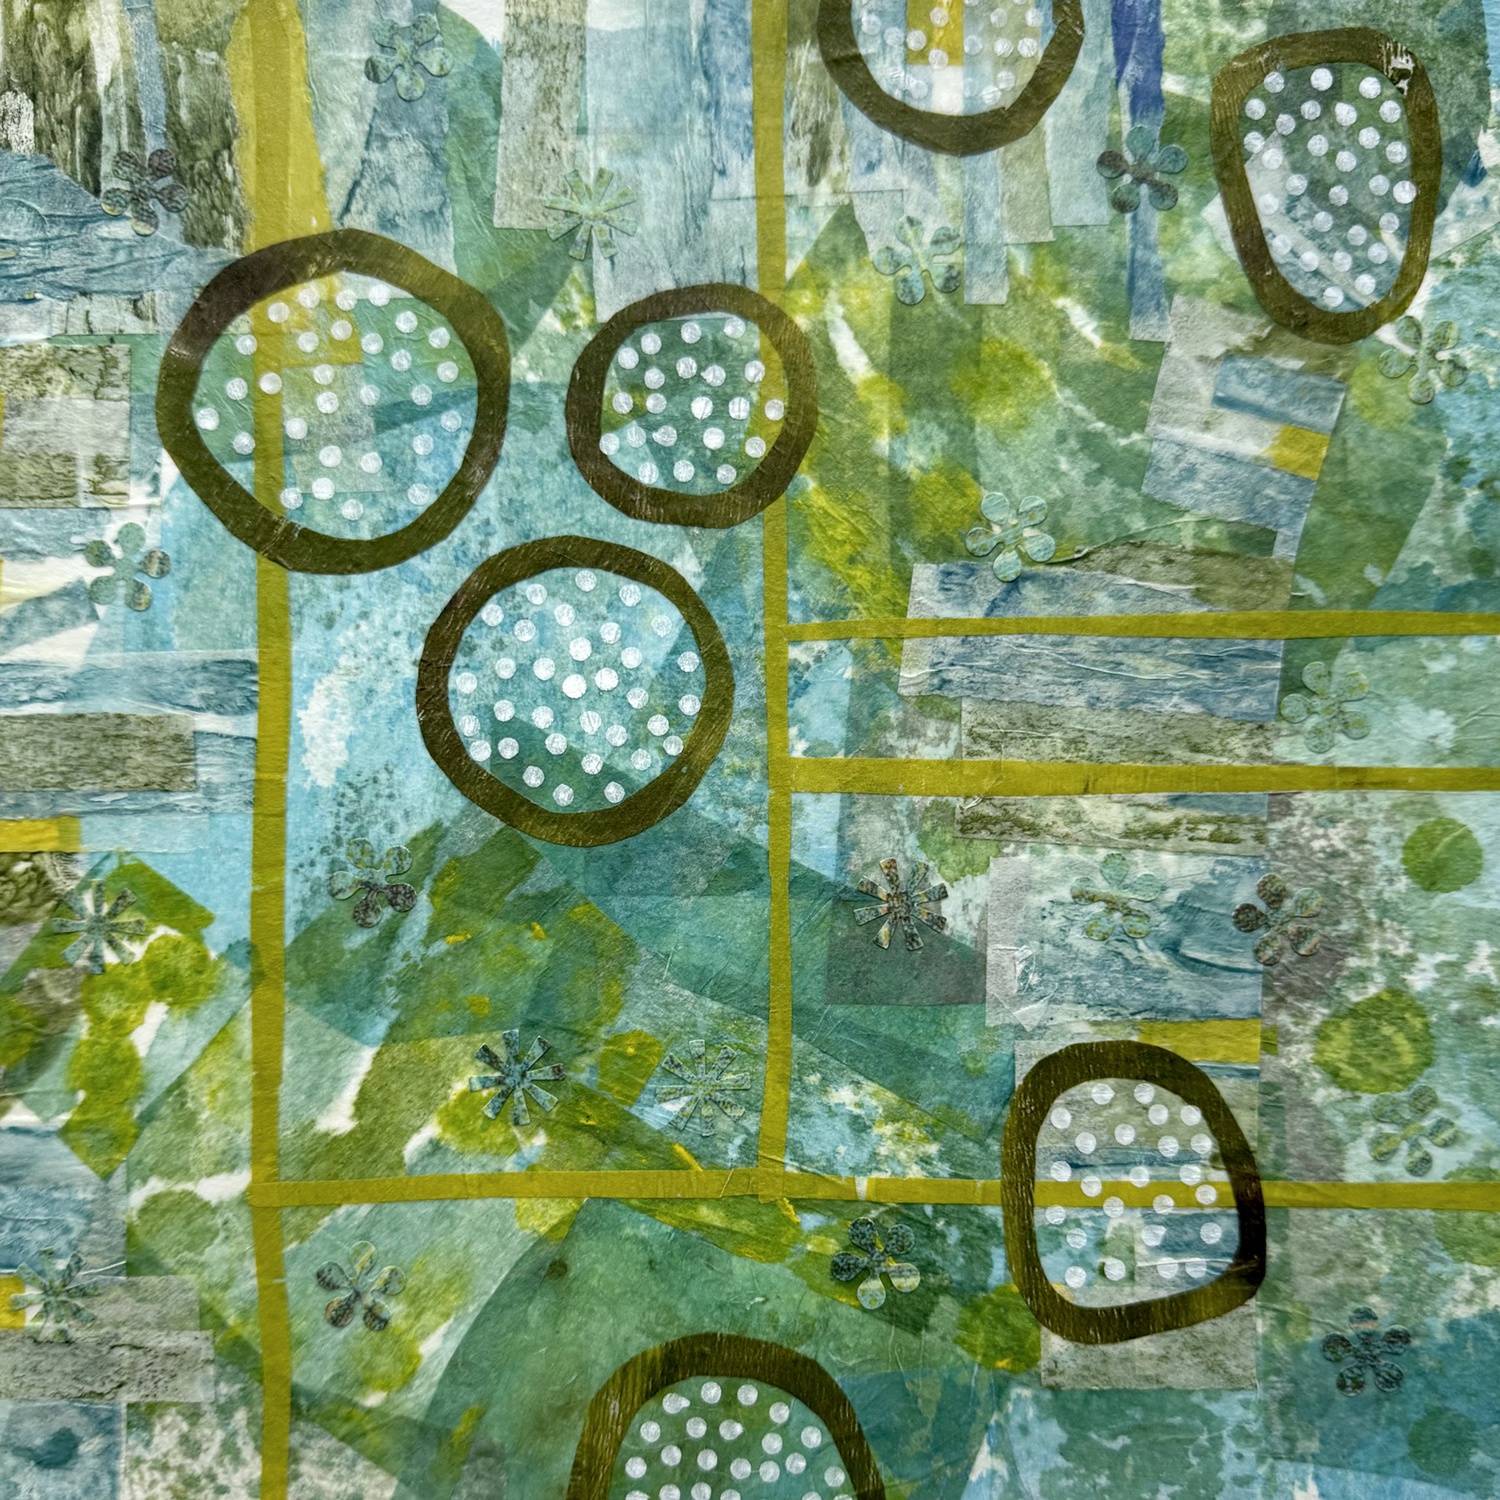
I worked mindfully, attentively, listening, conjuring beginner’s mind, getting discouraged. Small amoeba shapes — a recurring interest for me — were cut and added, to no avail. The piece and I were lost. It sat on the easel, sometimes covered by other projects, and became studio background. I studied, read a lot of art books, went to the Museum. And then, one day it occurred to me to add large lumpy amoeba shapes cut from thin tissue. I liked it! Then I saw they needed white dotted patches, and dot dot dot, a background was complete.
Closeup of one of the original background amoeba and bubble shapes, and subsequent layers
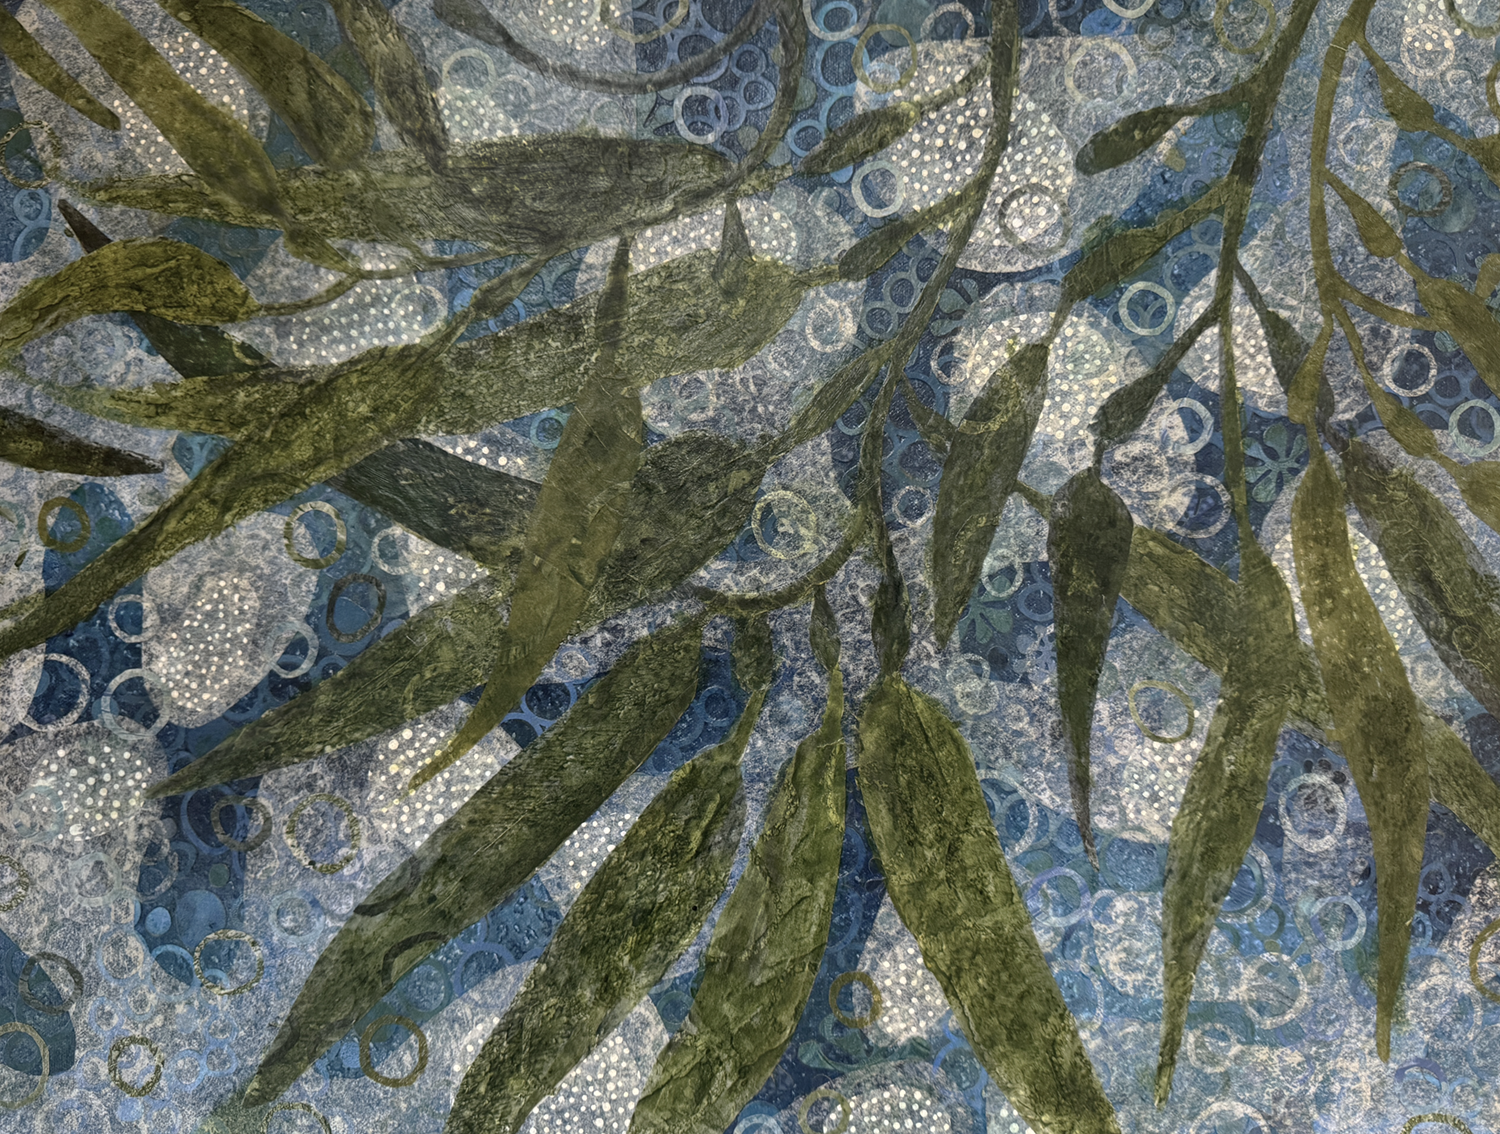
Ideas came regularly after that, and we were ON. The seaweed fronds and more bubbles! were cut from sheets of stamped, printed and painted tissue papers I keep readymade in stock. It was all cut, paste, consider, a bubble here, a bubble there, from there on.
I’ve learned so much from this piece — mostly what-not-to-do’s — and I’m satisfied to call it done. I can even look at it and smile, and feel like I’m another step along the way to competence. SO good.
Memory of a Grid. Posca dots and punch-cut asterisks, painted tissue paper, found paper, 10×10 inches
I’m learning to come back to a piece and listen.
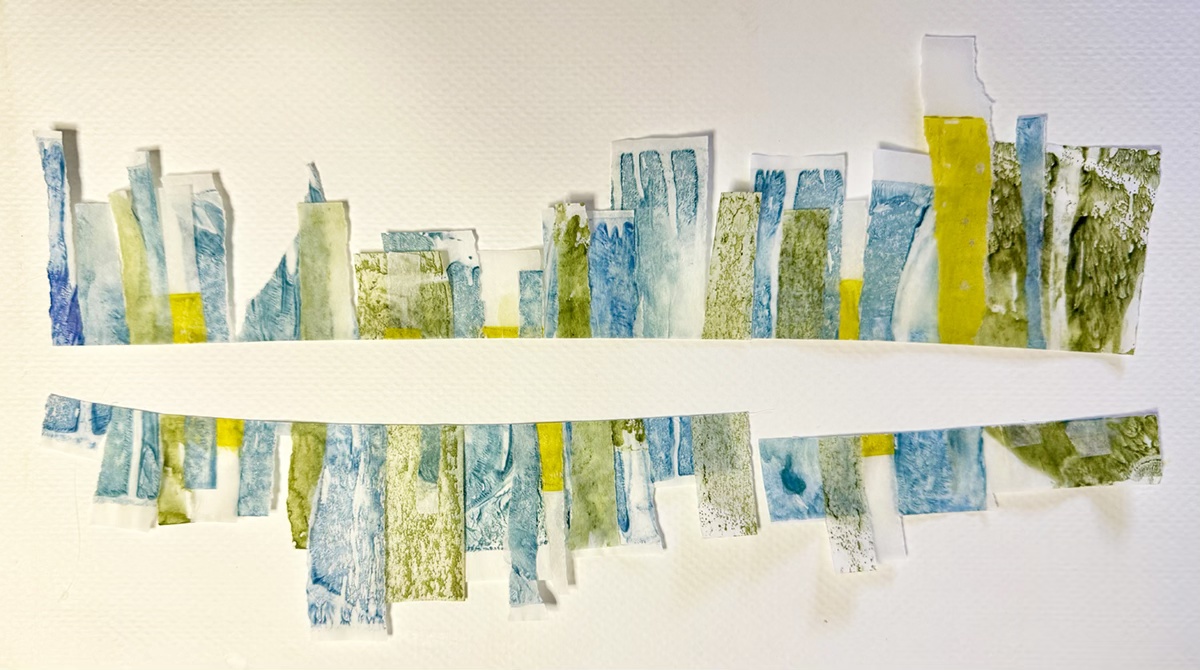
These are offcuts from a later collage, and proved to be missing parts for the Grid Memory composition. See if you can spot them in the finished piece! Also beautiful in their own right.This one, made in early October, was a surprise winter holiday card, 4.5 x 6 inches
I was getting frustrated with my results and overwhelmed with choices working at larger sizes. I found freedom in smaller sizes and more rapid iteration.
Snippet. Screen-printed/painted tissue papers, 5 x 7 inches
And I also found freedom and joy in slicing up the larger unsuccessful pieces for the smaller compositions, like this snippet. It’s empowering to deconstruct a work that’s just not. Or just throwing! it! away!
Crazy, beautiful collage cat Maxine (actual photograph, not a collage, real cat)
(Just realized there’s not nearly enough cat pictures in this post)
Cheers to you all, and best of vision in all your endeavors
Thanks for reading along and feeling my pain in adult learning and artistic expression. May your winter holidays be loving and bright, full of good coffee and rational and/or goofy conversation and companionship. 2025 coming right up!
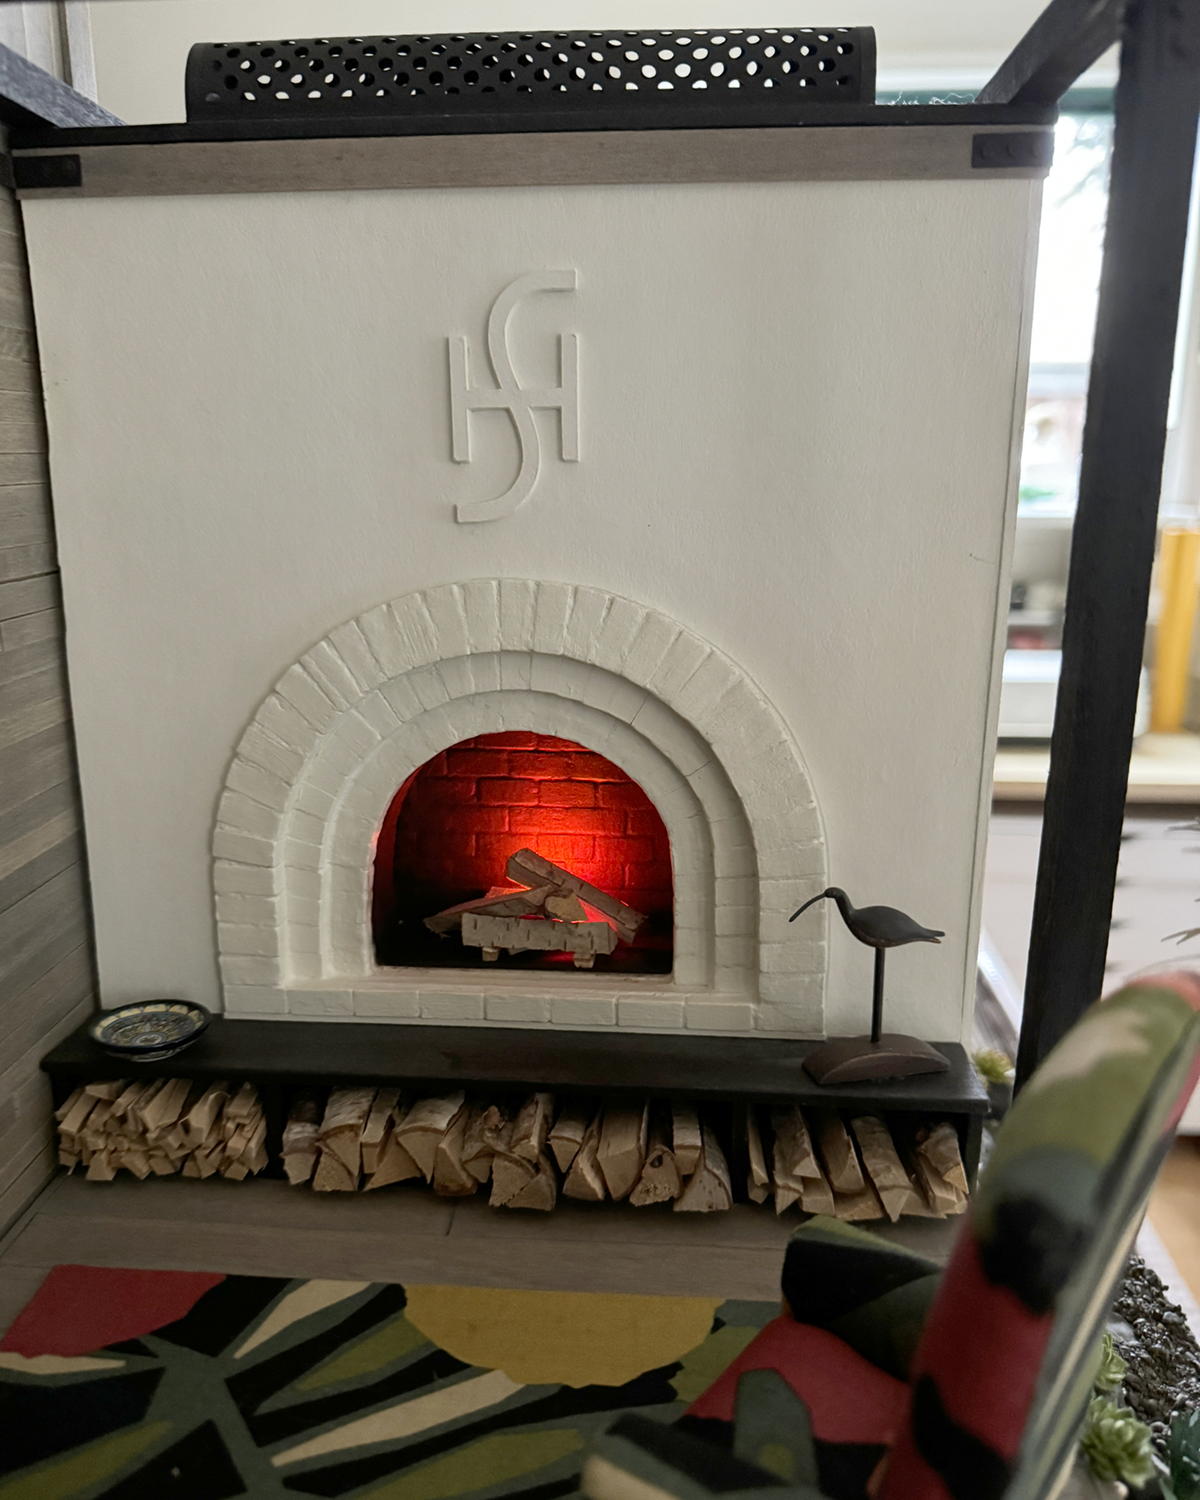
Well this is exciting! Studio Inki is moving into the old Sea House Leadlights building. (Leadlights needed more space and moved into the imaginary milking barn near the Warming Hut.) Interior design planning is in process, and will feature an open concept to maximize the abundant natural light and epic views. The famous Leadlights-designed windows and doors will remain. “I still really love them,” enthused the new owner.
At this point, the adobe and brick fireplace on the side deck will remain largely unchanged, aside from a thorough cleaning and new limewash. I’m very looking forward to actually completing the set of Kris Compas estate chair kits with the Pescadero thrift store dress fabric upholstery… very Studio Inki.
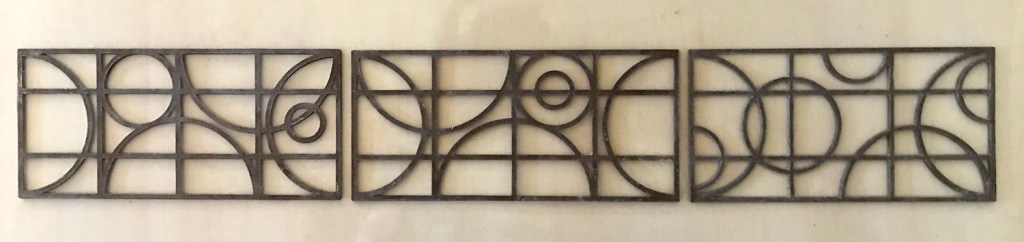
The Conservatory has a celestial motif in the leaded windows, which is carried through in the railing panel design.
I cut multiples of each panel from chipboard on the Cricut Maker. (Side note: I get the best results from editing the cutting presets, after a test cut on my chosen material.) I decided on a double, rather than triple layer, to lessen the alignment errors.
I used a lamination technique I learned from the talented Heather Tracy at Thicketworks. She uses thin cyanoacrylate on her intricate chipboard pattern pieces to seal, strengthen and stabilize the material. When dry they are easily sanded and very, very hard, and take acrylic paints beautifully.
Wheelbarrow pattern design by Heather Tracy of Thicketworks
To learn the nuances of the technique, I used one of Heather’s patterns she generously makes available free of charge. (She also has an Etsy shop, a YouTube channel of tutorials, and a maker club.) I made the blue wheelbarrow first, and then the red, slightly improving my results. It is a worthwhile technique, but messy. (Also, to me cyanoacrylate is one of those devil’s bargain products.) If you’re not familiar with Heather’s work, I encourage you to check it out!
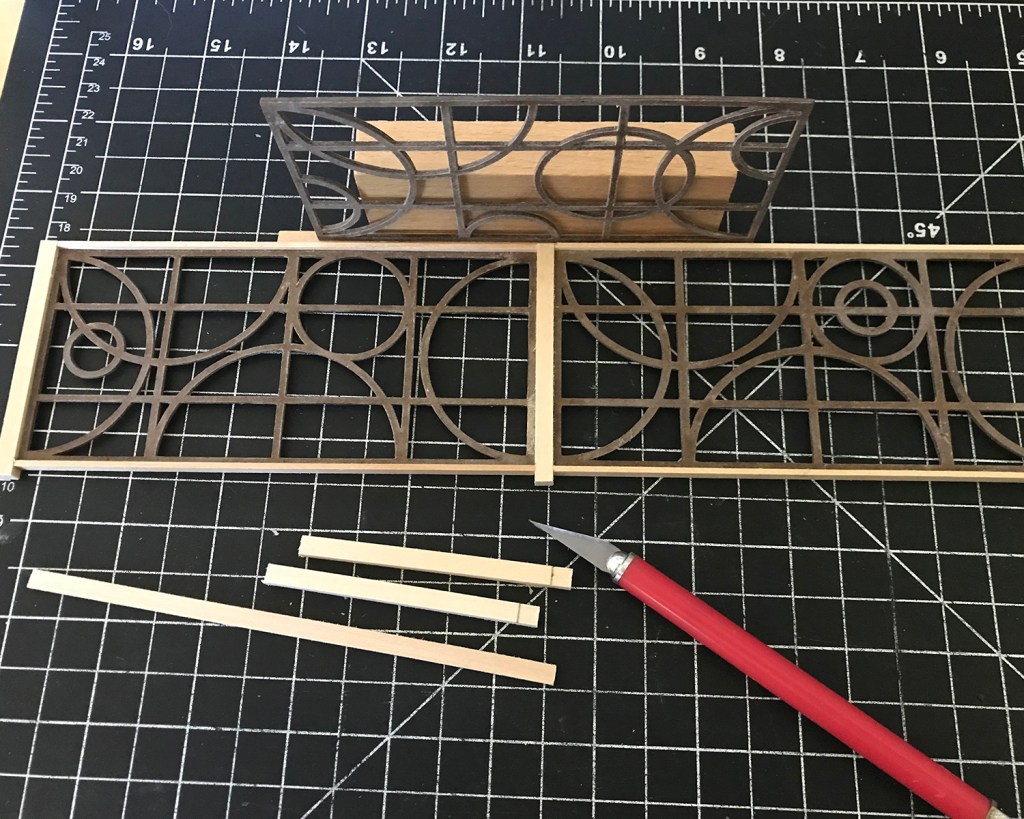
After sanding the panels smooth — paying particular attention to the outside edges — I glued (using wood glue) them into post and rail surrounds.
These were then joined into the L-shaped railing.
I sprayed the assembly with multiple light coats of matte black primer + paint, to seal and increase attachment bonds. After the glue and paint cures overnight, I’ll finish sand it and paint a final coat, then give it a matte seal.
I like a good wide top railing, for cats to lounge, elbows to lean, and drinks to be set upon, so I used 3/4- by 1/8-inch basswood. Thinking now of bracket designs to be cut from card stock to attach the railing securely to the deck, but that’s for tomorrow.
Having just finished watching the Amazon series Tales From The Loop, I’ll leave you with this image of Point Montara Light.
K2-S0 says “Heartfelt homage and appreciation for John Prine, RtFIP.”
Mostly, my family and I are OK. My charming husband has been working from home — as I have been for the last 14 years — and given the wee square footage of our house, it’s been remarkably harmonious and kind. We’ve weathered the death of my younger brother, after a long illness, without being able to gather and grieve his passing, and most recently, the furloughs and layoffs of half of my husband’s corporate master company.
The awareness that many others are experiencing far worse experience and circumstance is never far from my heart and my mind. How could it be otherwise? We are all in this together. (And for all of you who have reason to say fuck you with two middle fingers to this trite truism, I hear you.)
However.
Ruby and Maddie are learning to wash dishes. Without me.
Scarlett maintains her unrepentant insistence on knowing interior spaces.
Um, nothing much new in that propensity.
My birthday was in early March, and I splurged on new deck furniture from Tidewater Workshop. Of course our planned new front deck construction is delayed until who knows when, but I built and painted all the new pieces with the leftovers from the wave gate project, and am sealing them as the weather allows. Above are three of the rectangular side tables.
The recent April full moon coincided with my mother’s birthday and mild weather. What a wonderful reason to sit outside late and watch the night sky.
I’ve been keeping busy with multiple projects and diversions. This 1:12 scale Bandai kit was so very satisfying to build.
What with shelter in place and all, my walks are constrained to our hilly mid-century suburban neighborhood, and I’m keen on … finding more interesting things to notice than whatever, or sweating, or not dying from a heart attack. (My neighborhood *is* really hilly.) So today it was flowers, and this one won: Cerinthe major ‘Purpurascens’ honeywort. I use the iNaturalist app to help me identify that with which I am unfamiliar.
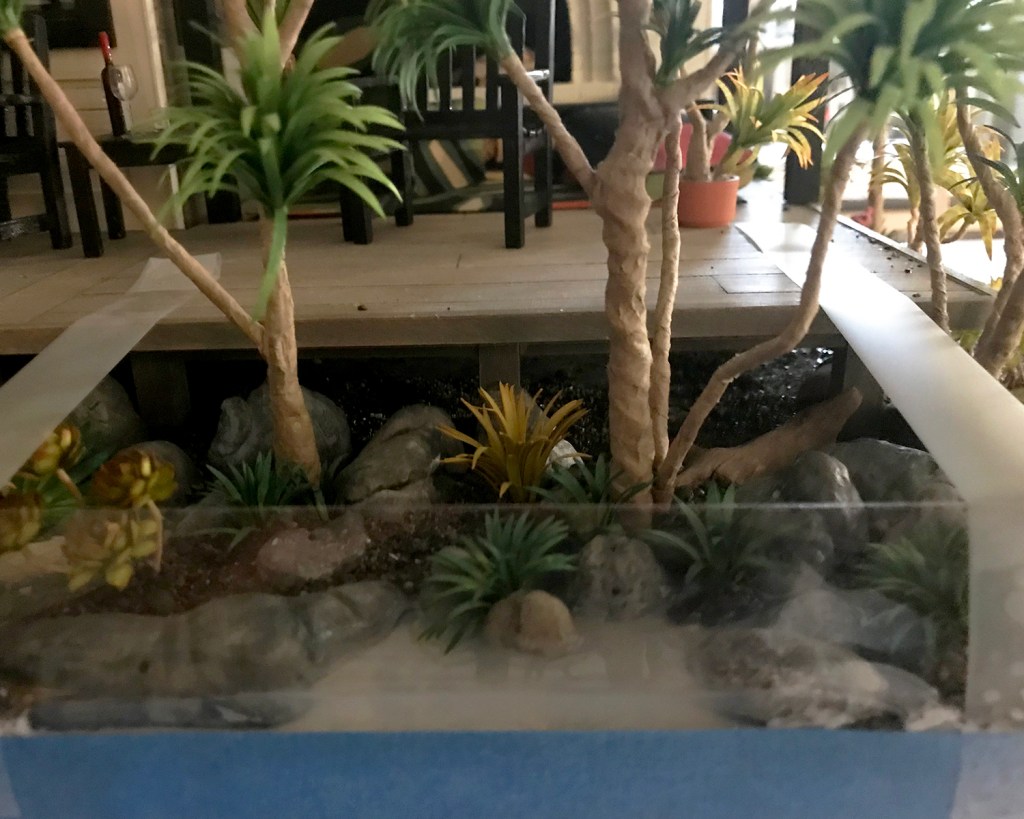
Although this photo was taken during high tide, this is the water feature look I want to emulate on the Sea House Conservatory low tide build.
Sea House Leadlights
After watching countless hours of video demonstrations from a variety of sources, I started my experiment with a small area at the front of the Leadlights landscaping that seemed natural for a water incursion. I glued a 2-inch tall length of acetate to the project board to form a dam, several inches longer than the intended 4-inch-wide pour, reinforced with masking tape below and tape holdfasts above.
First pour
Several deep breaths and I poured a scant quarter-inch of Realistic Water ™ from Woodland Scenics into the prepared area. Recommendation is an eighth-inch, but hey, it pours fast. So far so good.
Not any different 5 minutes later
I did the same prep on the Conservatory project board.
Constructing a dam around the Conservatory pier
One tricky situation encountered is when any element of the landscaping extends past the base, even a little. I had some time to consider ways I will do it differently next time, as I held the acetate to the base while the glue set adequately.
The indispensable Hand Clamp
When the glue seemed set, I boldly — yet delicately — poured the first course of water into the prepared base. Altogether, five or six individual glugs into each tide pool and basin.
The first pour
Unsurprisingly, as I looked and marveled at the swampy effect and the no-going-back-nowness, a few small, very slow leaks began to develop. I used wide painter’s tape to further seal — more on that later — the acetate dam to the base. Checking again about two hours later I added more tape, and also noticed a few small areas where the glue I had used to cement the gravel and boulders to the base seemed to be turning opaque white.
Hmmm.
The recommendation for the water product is to let each layer dry at least 24 hours. It was very late by this time, so I called it a night very early morning and went to bed.
Hmmmmm. Should I be concerned?
Next morning, not 24 hours later, I was encouraged to see the water was turning clearer, but the small white areas were still present, noticeably in the transition areas of gravel I had applied a few days earlier.
What is causing those weird areas of white in the gravel?
So I re-read the product label instructions.
What?!
Not for use with PVA glue. I’ll shorten my whole lengthy tirade — who doesn’t commonly use PVA glue? Why wasn’t this the very first caveat on the label, and why was this condition never mentioned in any of the company’s instructional videos on use of the product, etc… and lots of swears and unkind, rude assumptions and declarations. But then there was the offhand “Cure above 70°F.” Thankfully I have a wise and patient bitch buddy to vent to with whom I can vent. You know who you are are.
Then I calmed down enough to embrace that since there was nothing I could do about it now, I’d wait and see what would continue to happen. After all, it had not been even 24 hours yet, and it is a rather larger area and blah, grumble, blah.
I wasted more time did more research on pouring water, this time with a variety of mediums and preparation techniques, and even grubbed around in some forums, which I detest, and learned that yes/no there are some/not any problems with PVA glue that can be gotten around by sealing everything with — and here again suggestions vary — some sort of varnish, and, most valuably, some clever ways to build and seal dams for water feature success. One involved swamp water.
Time passed, and my watery problems with this product mostly resolved themselves. I continue to steep myself in the experiences of others.
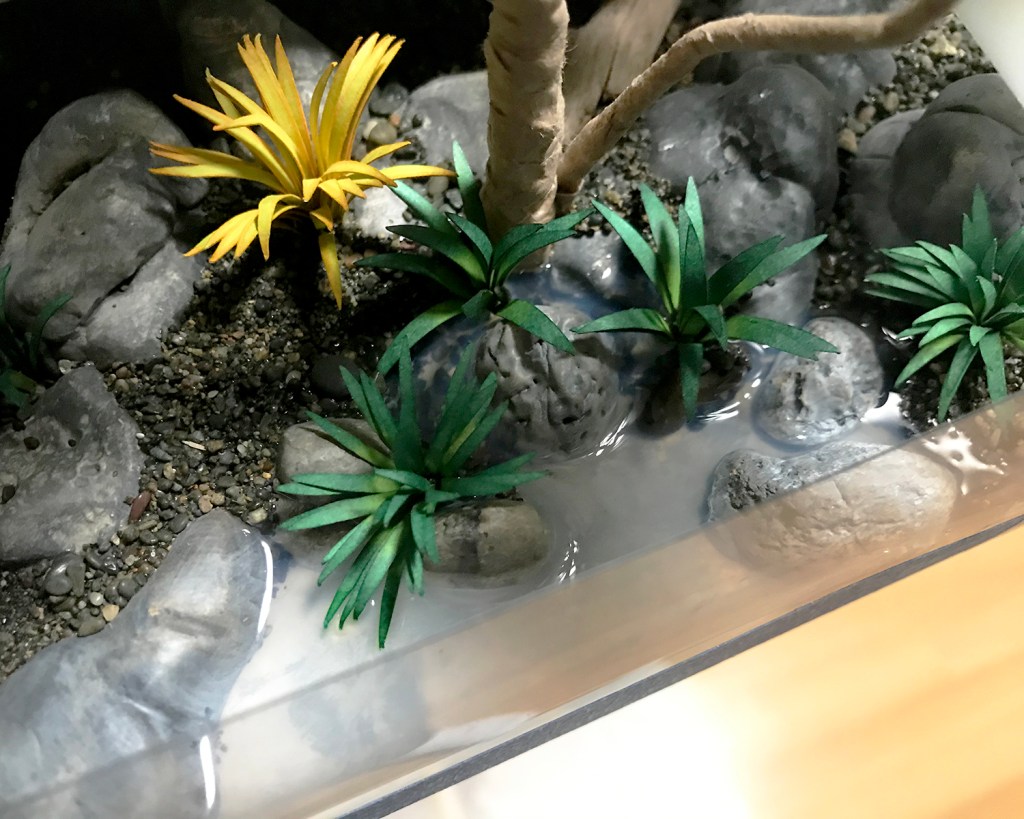
Leadlights water feature, with live edge!
I did a second pour on Leadlights, and a second and third pour on areas of the Conservatory. Above you can see the dam removed to reveal the fully cured water. (One of the plants bled a little color into the water, but I don’t mind.) I wanted a “live edge” to the water, and used an Xacto knife to carve away the lip. The project base itself will be edge-banded with thin basswood for a finished look :)
I have made a water effect!
All in all, I am happy with and consider the results a success. I’ll know so much more on the next one.
Check out the light shimmer on the right pier piling, a reflection from the late afternoon light. Magical realism, which validates my efforts :)
I’ll leave you with this image found in Bolinas, on the estuary marsh/riparian transition on a winter afternoon hike at low tide. (Very low and long ago for this guy.)