This is the piece I showed at the Art Guild Annual Members Exhibit. Glimmering Girl. Found metal objects, hand-stitched cotton thread, mono printed torn and cut paper collage, 8 x 10 inches
Here’s a closeup peek at the piece I’m working on now. The patinas and colors are so luscious. I’ve been collecting the found bits for years, and the process of messing around assembling them into beings is enjoyable. Something wants to emerge.
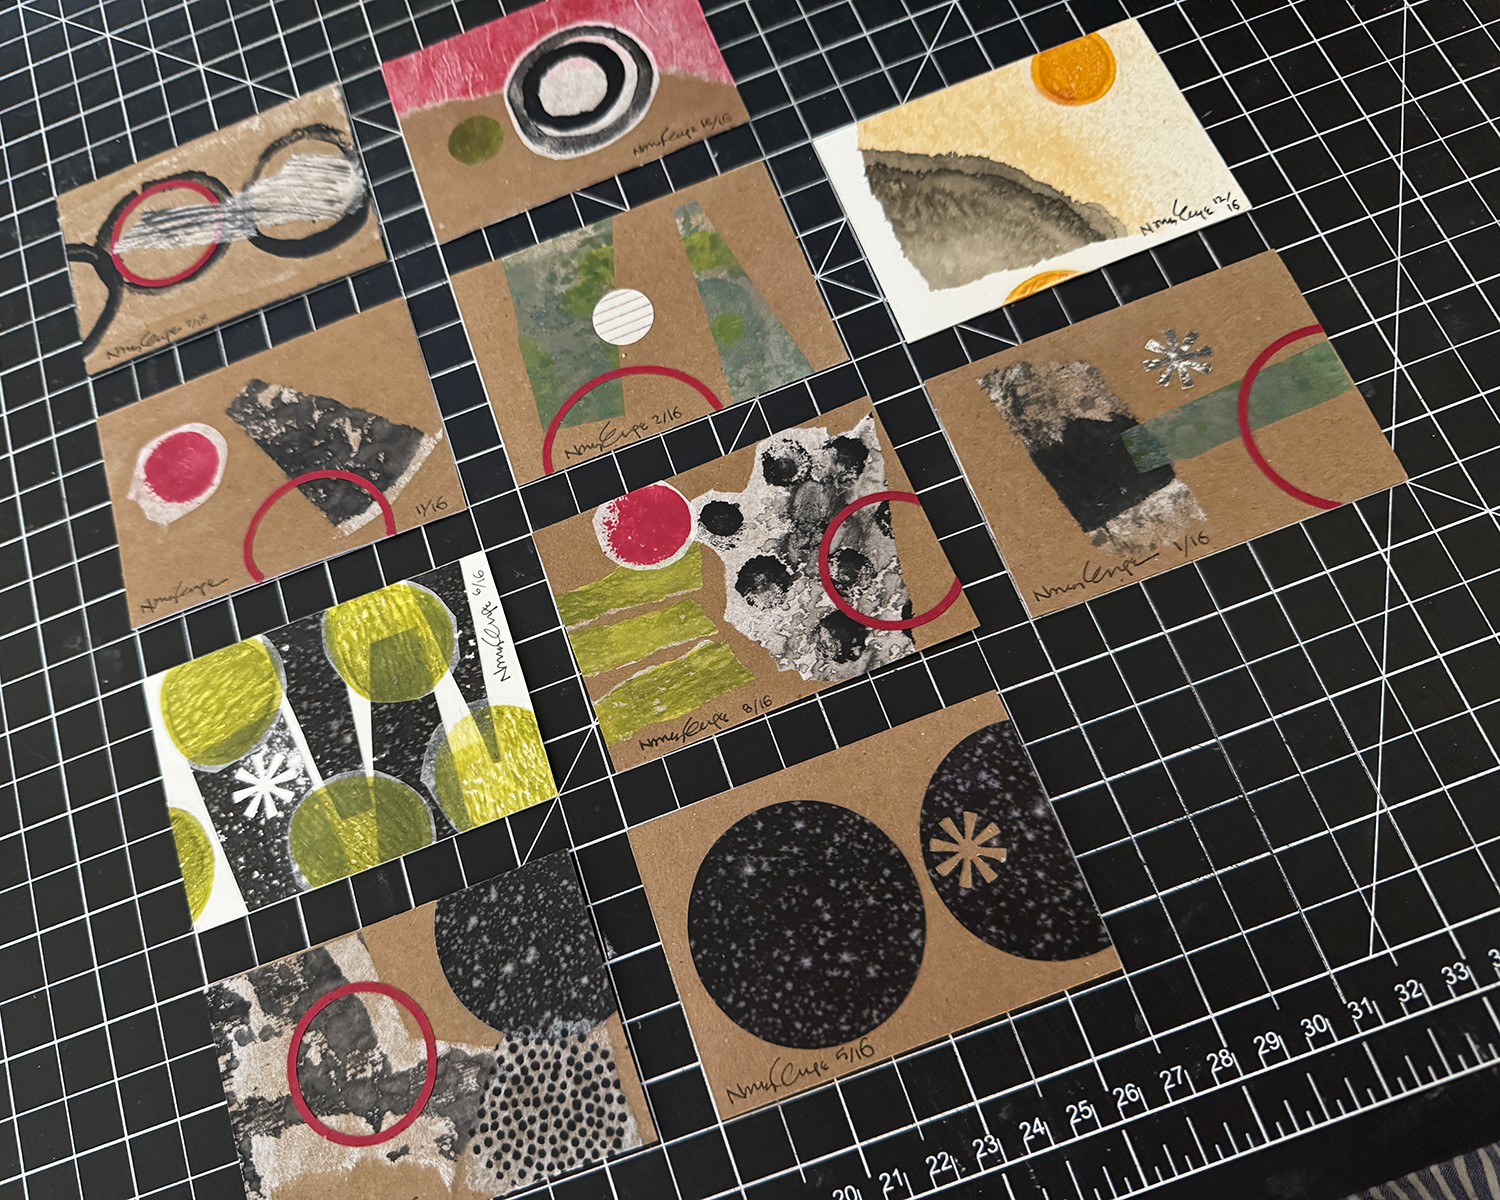
In the monthly discussion group I attend, we decided to exchange Artist Trading Cards. Fun to make, pulling out all the old scrap materials, and working small and fast.
So fun that I decided to do the backs as well. And afterwards, I was moved to tidy up and get rid of so many bits and pieces and better organize what remains.
Sharp Park winter sun beach walk, high tide, storm clouds gathering
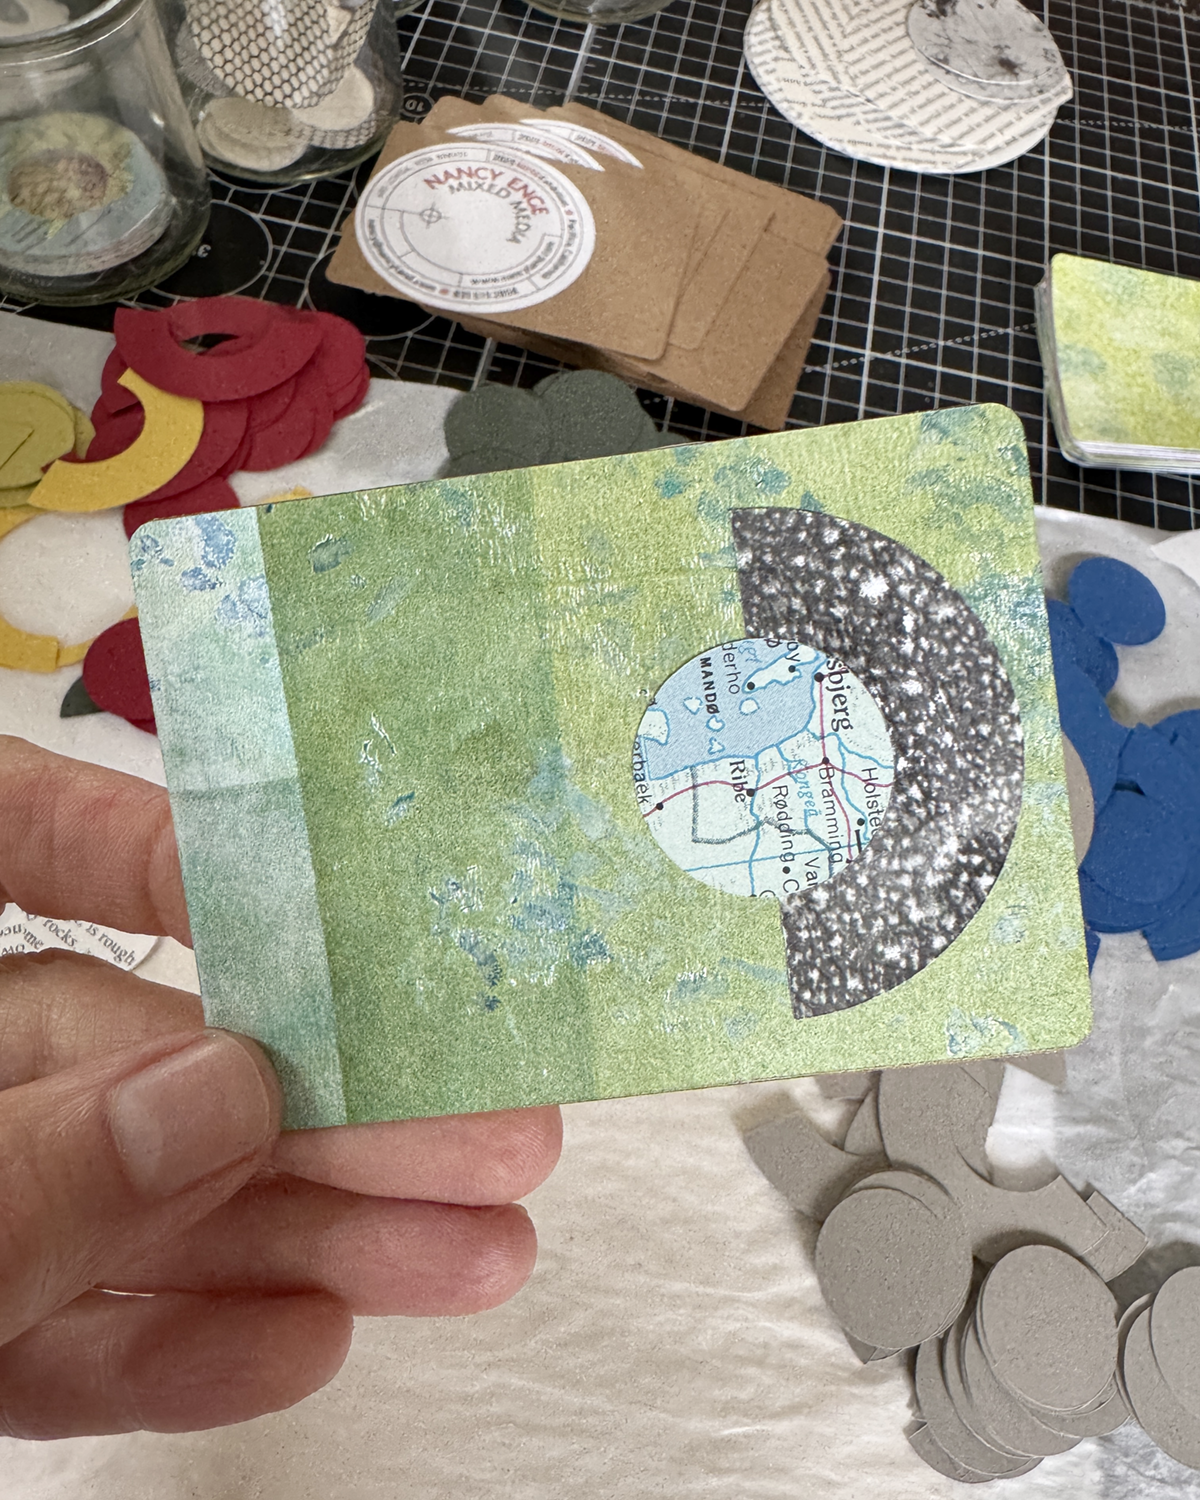
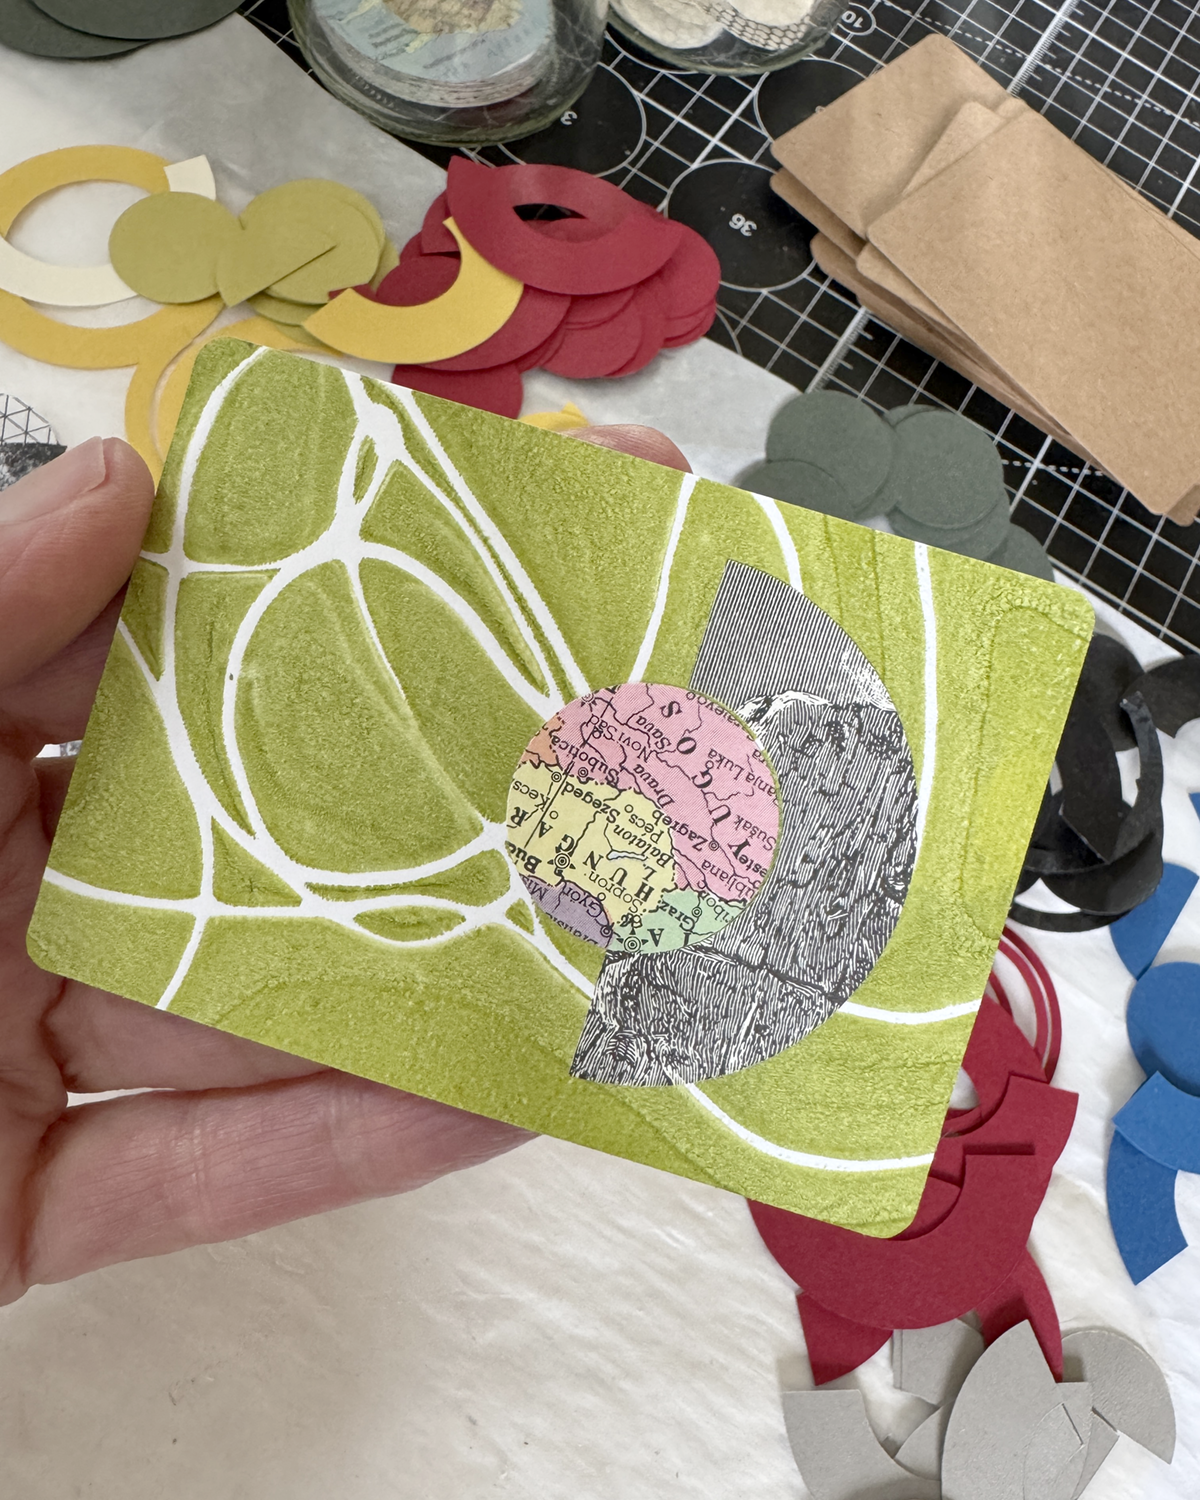
I decided to make an edition of 50 Artist Trading Cards with some of the leftover cut shapes and monoprinted papers for background. It’s a fast, fun and carefree process; no rulers, grids or light boxes involved.
Choosing which mono prints — including brayer roll-offs, as seen above — is a pleasant task, like seeing old things with fresh eyes.
Some of the papers I cut for the 6×6 panels did not play so well with the color palette, and were rejected for use. However, they look swell on the various mono prints and the smaller ATC size! Yay old maps and line drawings!
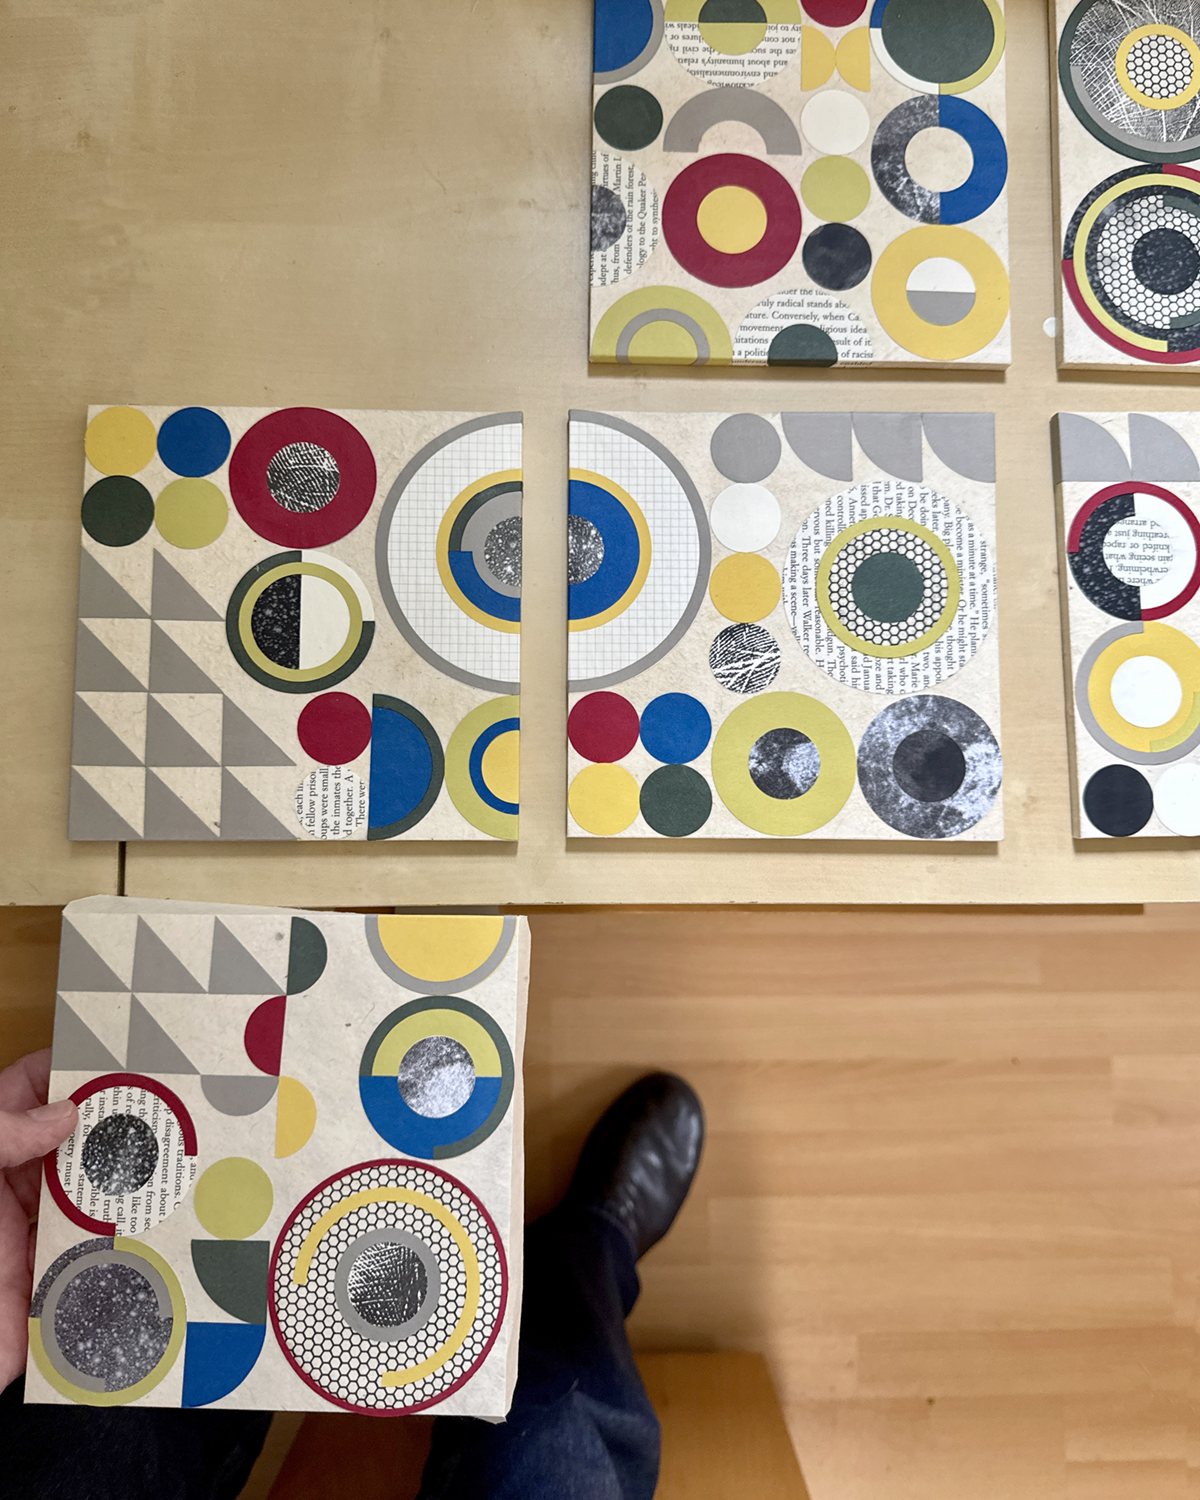
Not gonna lie, fifty 6×6-inch panels is a lot of eventual individual artworks to make in as many days. Priming and sanding them all was a good way to ease into the enormity.
Border panel work-in-progress
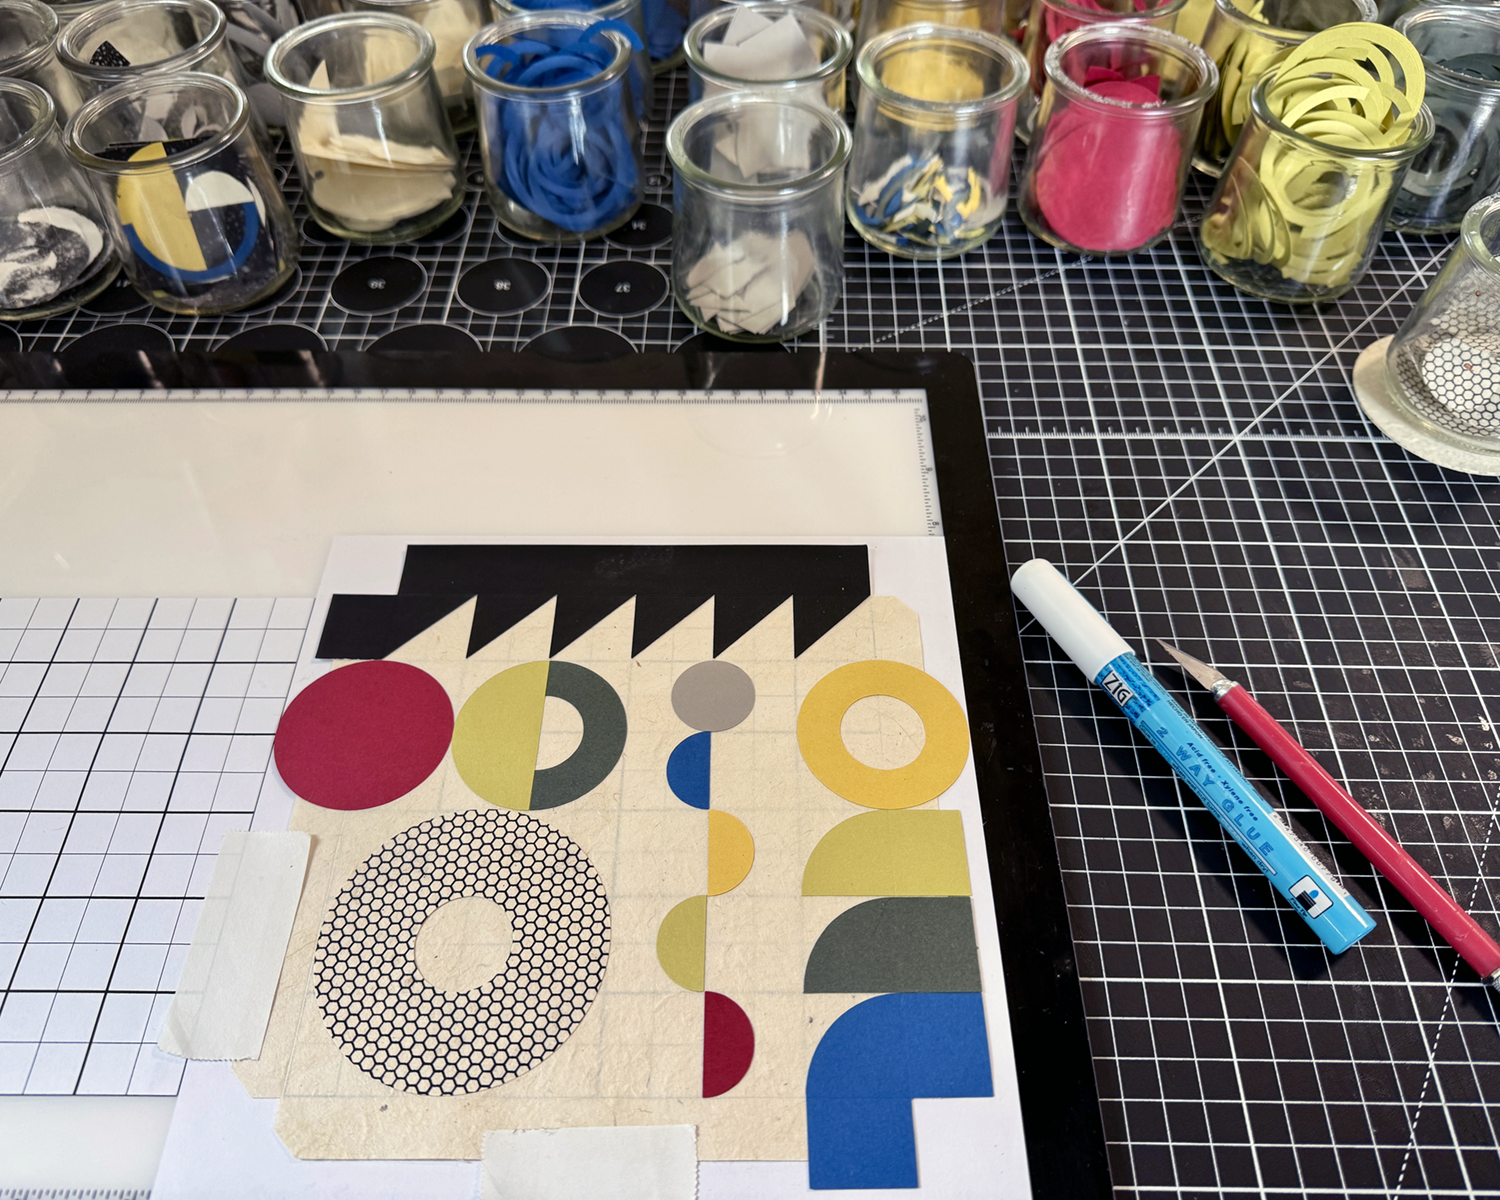
I eventually got into a kind of rhythm of creation, with a set of steps and best practices. Iteration is a great way to really explore the geometric relationships with color and balance. (Amusing, too, as I rejected placements that looked like butts or boobs, although the occasional egg yolk or eyeball were okay.) Every single panel was a surprise, and interesting to see through to its completion. Somewhere after panel 25 or so, I gained trust in the process and my ability. Flow state increased in onset and duration.
Playing with arrangements, checking in with what works
Periodically, I’d lay out the work to date on some inadequate surface and just look, to see what I could see, and use the insight or finding on the next piece.
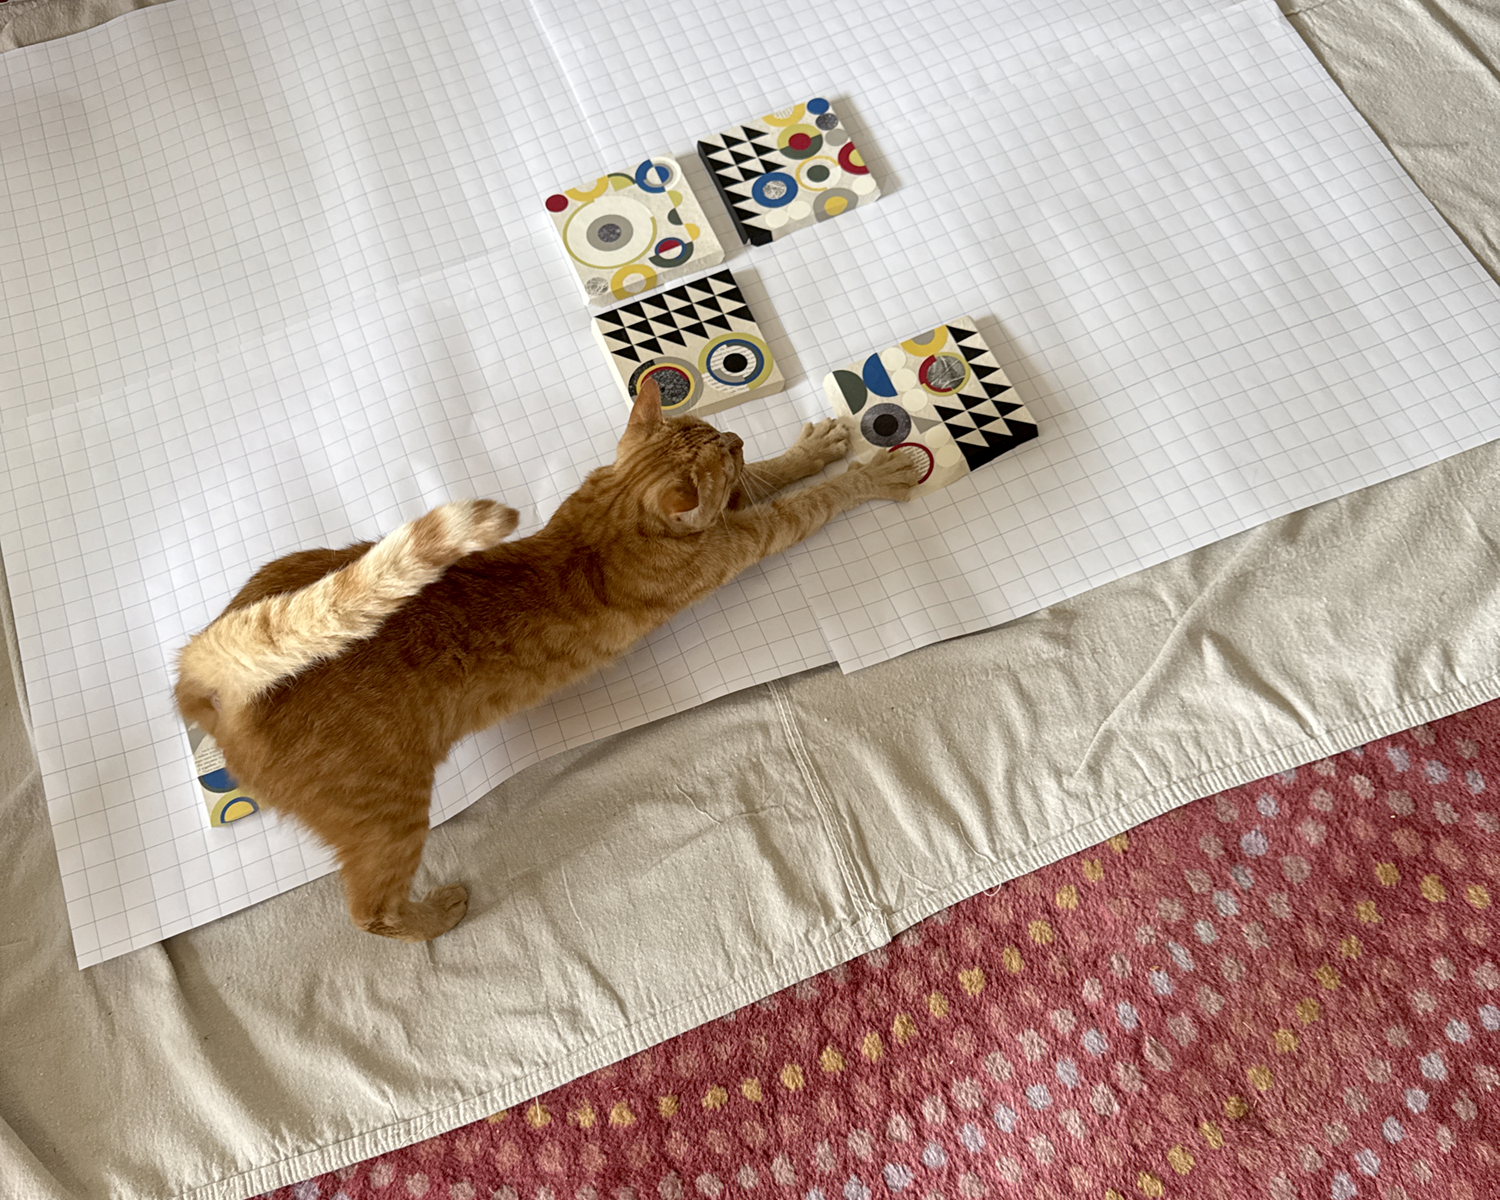
Of course I had help if I laid them out on the floor.Studio Assistant and First Buddy Mateo
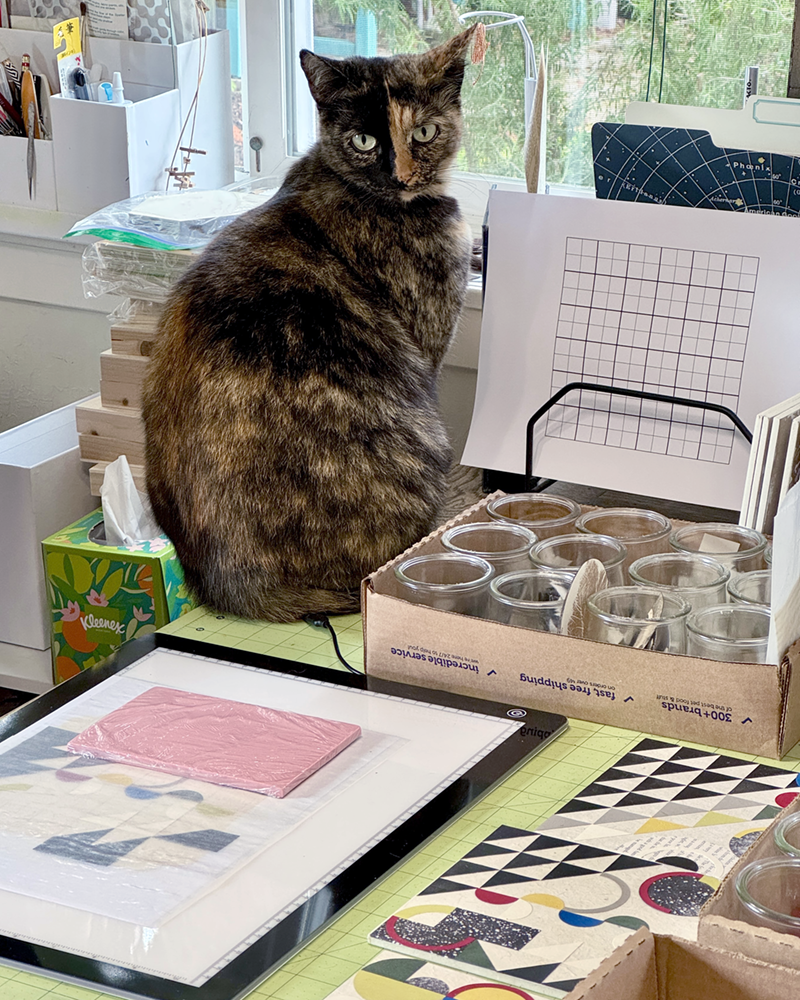
Tater has a large flat box on the ell of my desk in which he lounges and naps, etc., while I work. In the process of sorting and packaging the finished panels for transport to the gallery, I took his large box and replaced it with a smaller one — just temporarily! — and he was not at all having it.
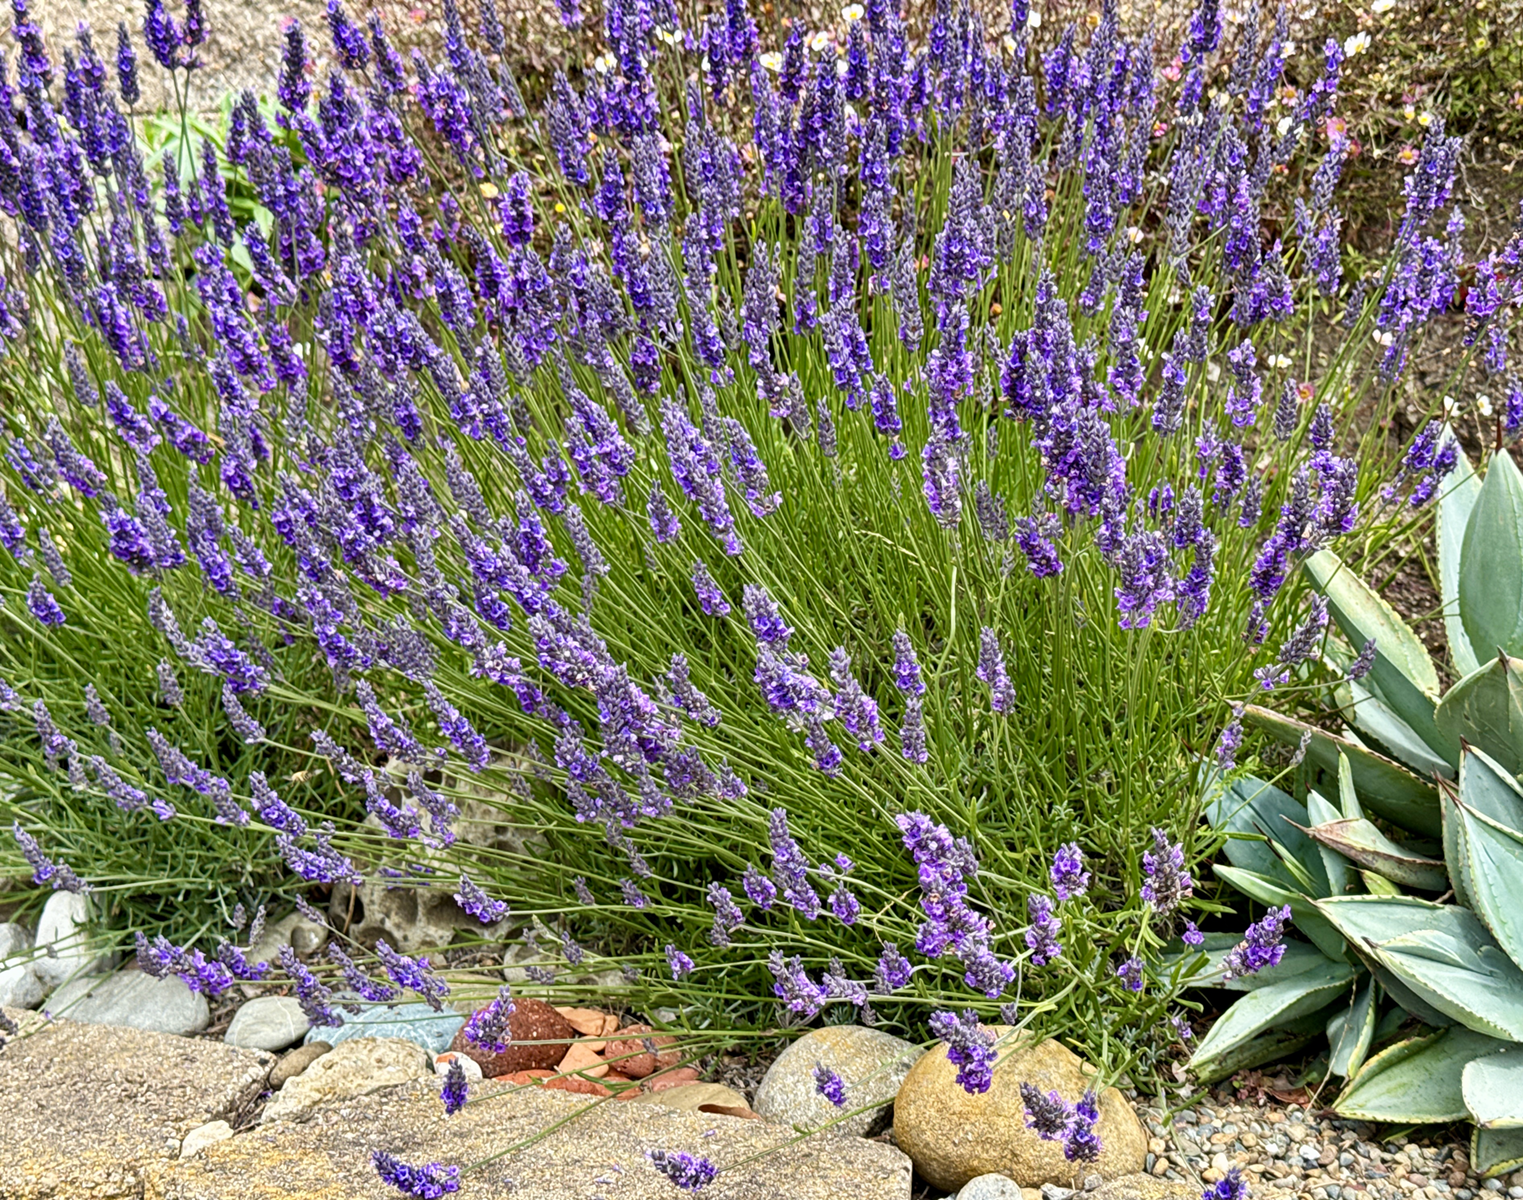
Lastly! The lavender is abloom here in foggy, mizzling Pacifica. There are about 20 bees of various species on the job, on this plant alone, and the scent is divine. I sit on the retaining wall and just breathe.
Earlier this month I was delighted/surprised to be accepted to the 17th Annual Sanchez Art Center 50|50 Show, in which 50 artists complete 50 small works in 50 days. (I’ll just let that sink in a bit. It’s both a lot and a little at the same time.)
Maxine surveys the new mayhem on the studio table
In the weeks leading up to the call for entries, I worked on ideas for proof of concept — Can I do fifty of this? Is it sufficiently interesting and compelling? Will I wish I was never born? I finally arrived at an exploration of abstract geometric collage — well suited to the size and scale of the project and of deep historical and personal significance. Working through a dozen or so test pieces, I refined my materials and techniques until I heard that still, small voice announcing, “Yes, this is good. You can do this.”
Prototypes in progress, solid, printed and found papers on handmade lokta
Then, I had to write the dread Artist’s Statement — a standard part of any entry process — and one of the most challenging things I’ve ever had to do. I made it excruciating, but! I persevered. Here’s what I arrived at (in fear and loathing) as the submission deadline was approaching:
“Constructed with awareness, but not with calculation, led by high intuition, and brought to harmony and rhythm.” — Piet Mondrian, 1916 Awareness, intuition, harmony, rhythm… How many ways can circles, squares and triangles be assembled to create compositions that flow, balance and fit in the space allowed? In these collage works, cut papers — color, mono printed and found — are manipulated and arranged to create balanced, rhythmic patterns and correspondences that please and satisfy our curious pattern-seeking sensibilities. In exploring abstract geometric collage, evidence of the — my! — maker’s hand is evident in tiny misalignments; they are forgiven and unintentionally lend an animation to the work. When multiple compositions are hung together, new patterns emerge. Possibilities remain endless.
Once I got over myself and that hurdle, I realized two things: first, artist statements are not carved in stone for all eternity and can and should be revised at will, at any time. Second, I’m pretty sure most people are not as mean, judgmental or paralyzing as my inner critic. And so, merrily, we rolled along.
Front deck setup for panel priming, ten at a timeA new LED light pad makes accurate placement possible
Wish me luck, inspiration and endurance, friends! These panels are (thus far) fun and satisfying to build! They make your eyes dance (in a good way)! The show opens Friday, 05 September, and runs through Sunday, 05 October. If you’re in the SF Bay Area, do consider stopping by the Sanchez Art Center to enjoy this exhibition of 50 artists’ works!
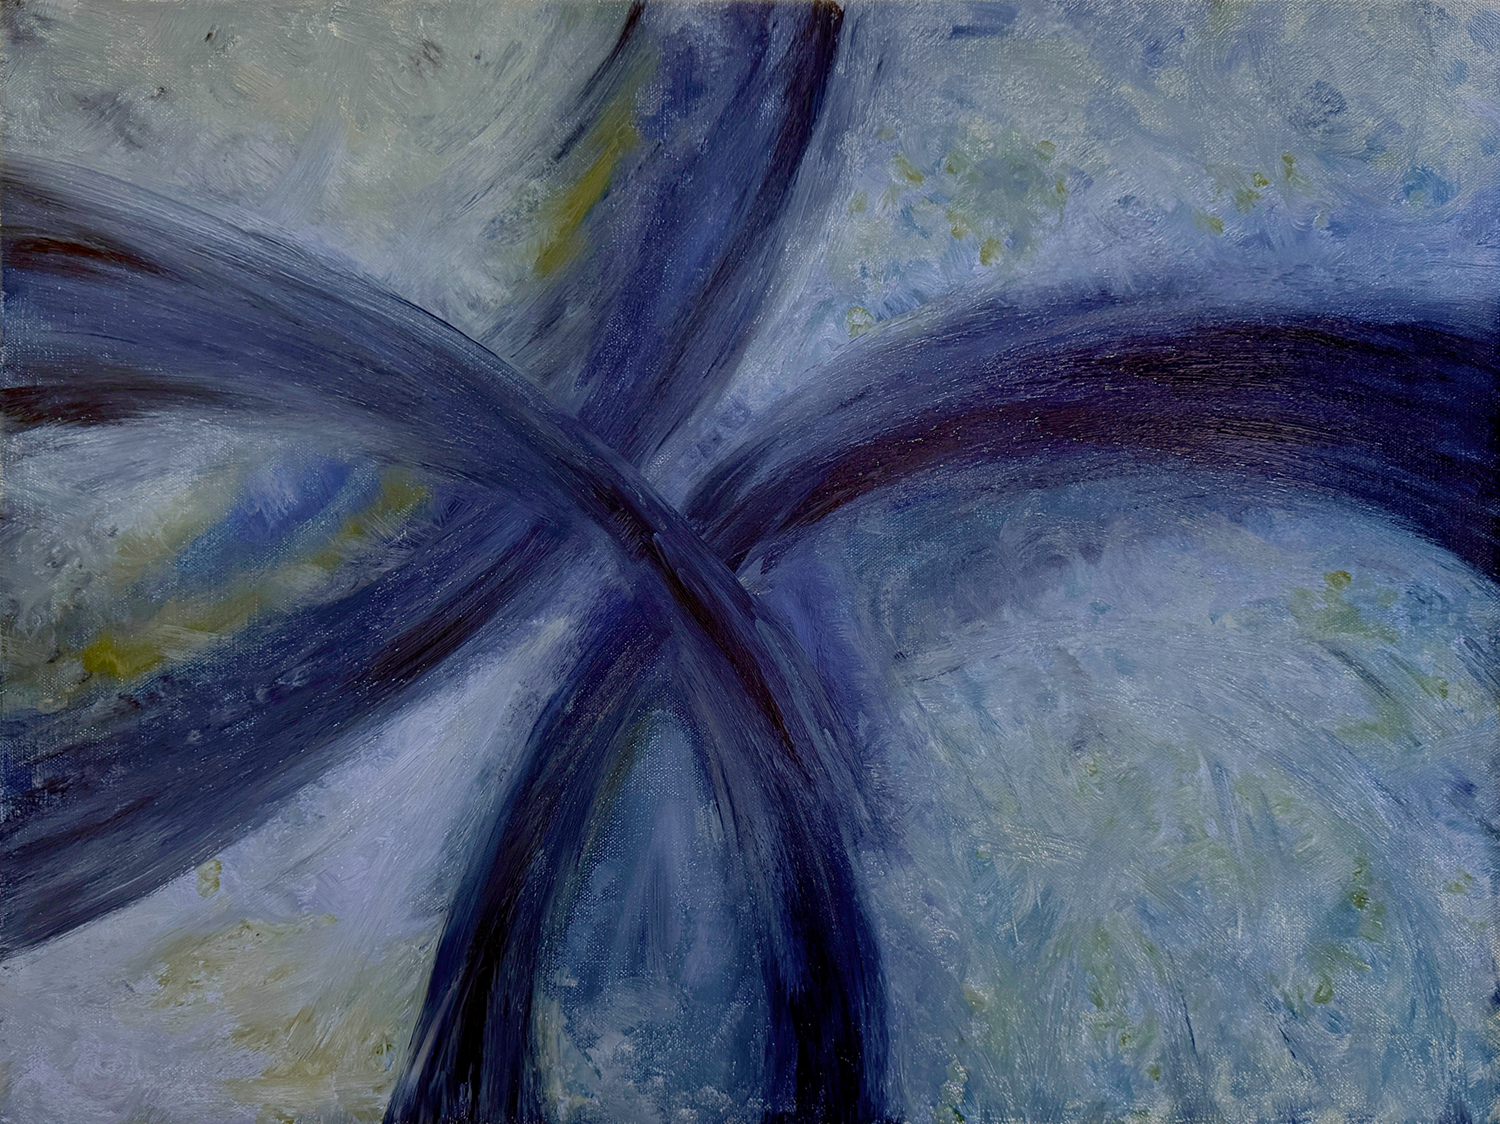
This piece started out last year as a foray into something else entirely, and sat in limbo a liminal state for months.
On the way, somewhere
It became a deep blue-green painted background for an exploration of printed and cut papers in bubble patterns.
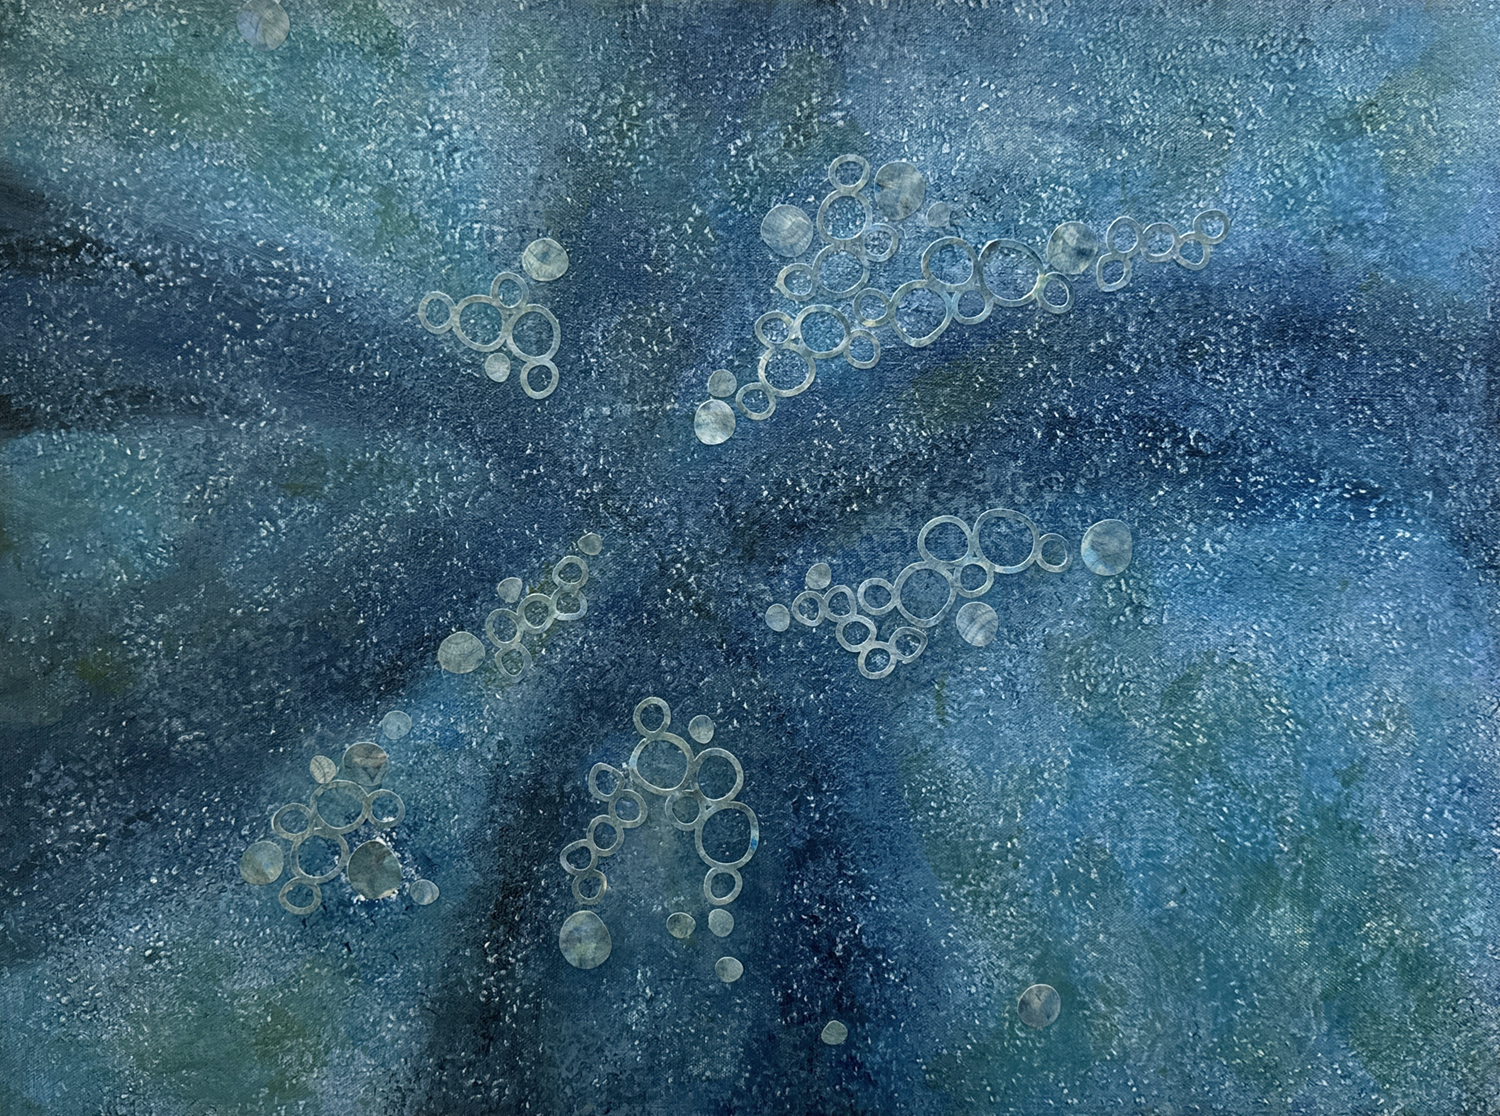
Going for a more backgroundy thing?
I worked mindfully, attentively, listening, conjuring beginner’s mind, getting discouraged. Small amoeba shapes — a recurring interest for me — were cut and added, to no avail. The piece and I were lost. It sat on the easel, sometimes covered by other projects, and became studio background. I studied, read a lot of art books, went to the Museum. And then, one day it occurred to me to add large lumpy amoeba shapes cut from thin tissue. I liked it! Then I saw they needed white dotted patches, and dot dot dot, a background was complete.
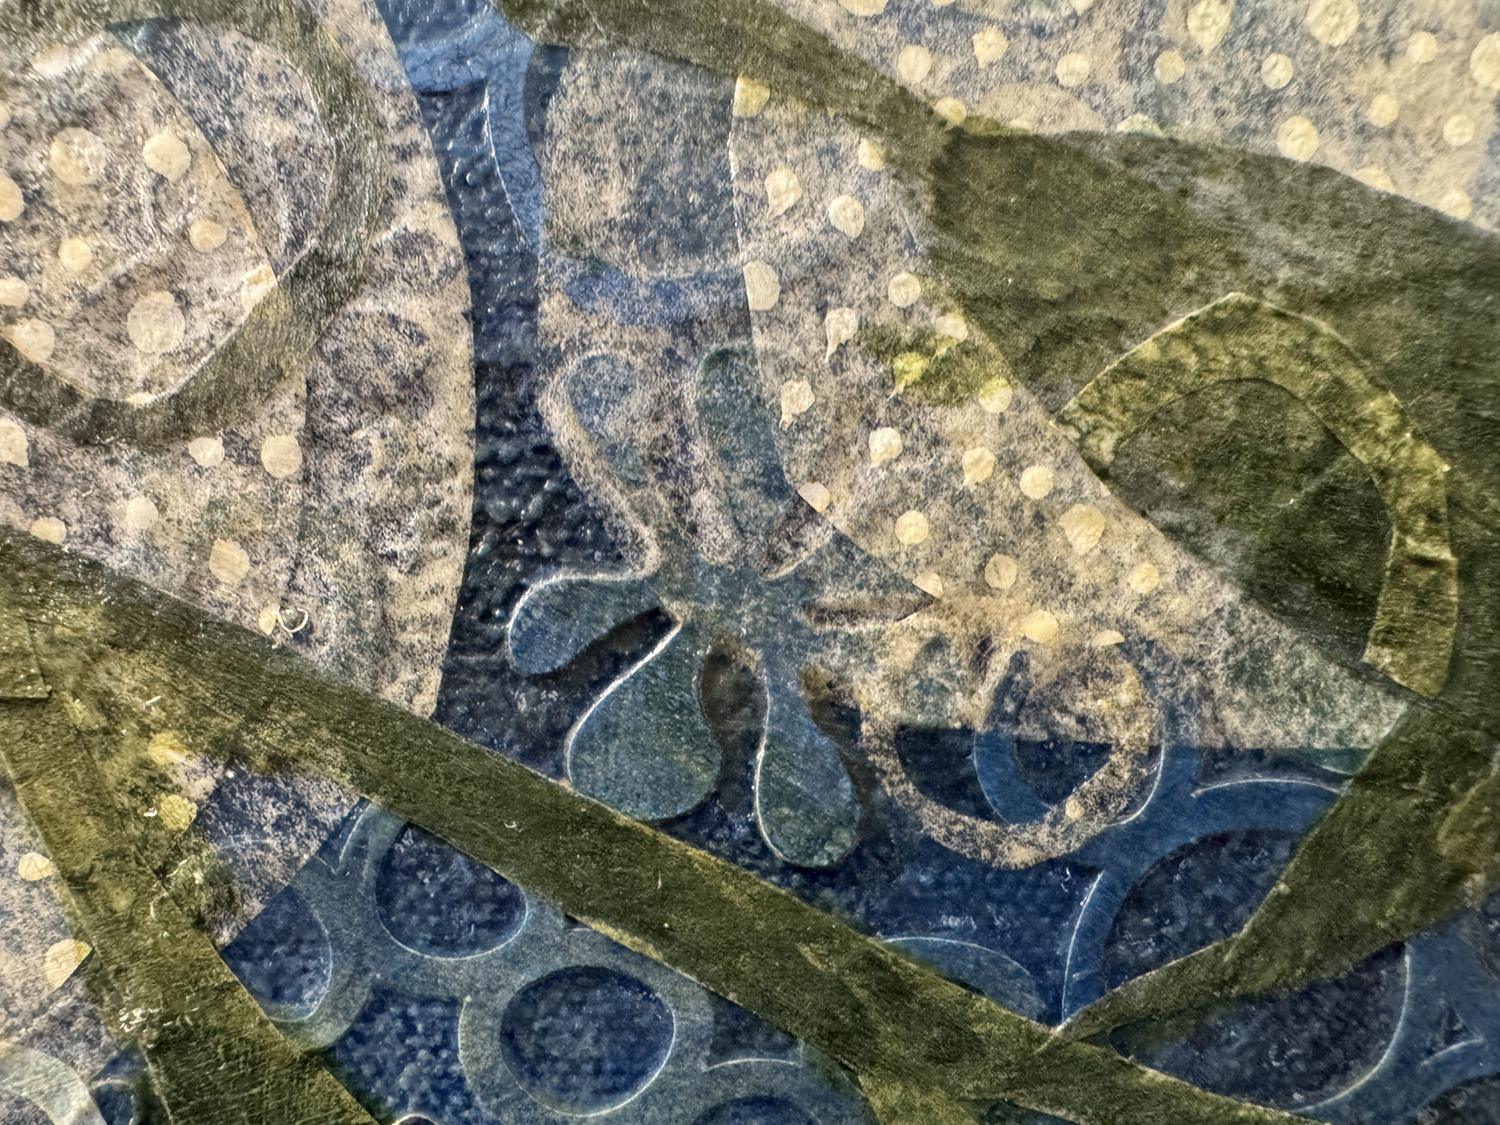
Closeup of one of the original background amoeba and bubble shapes, and subsequent layers
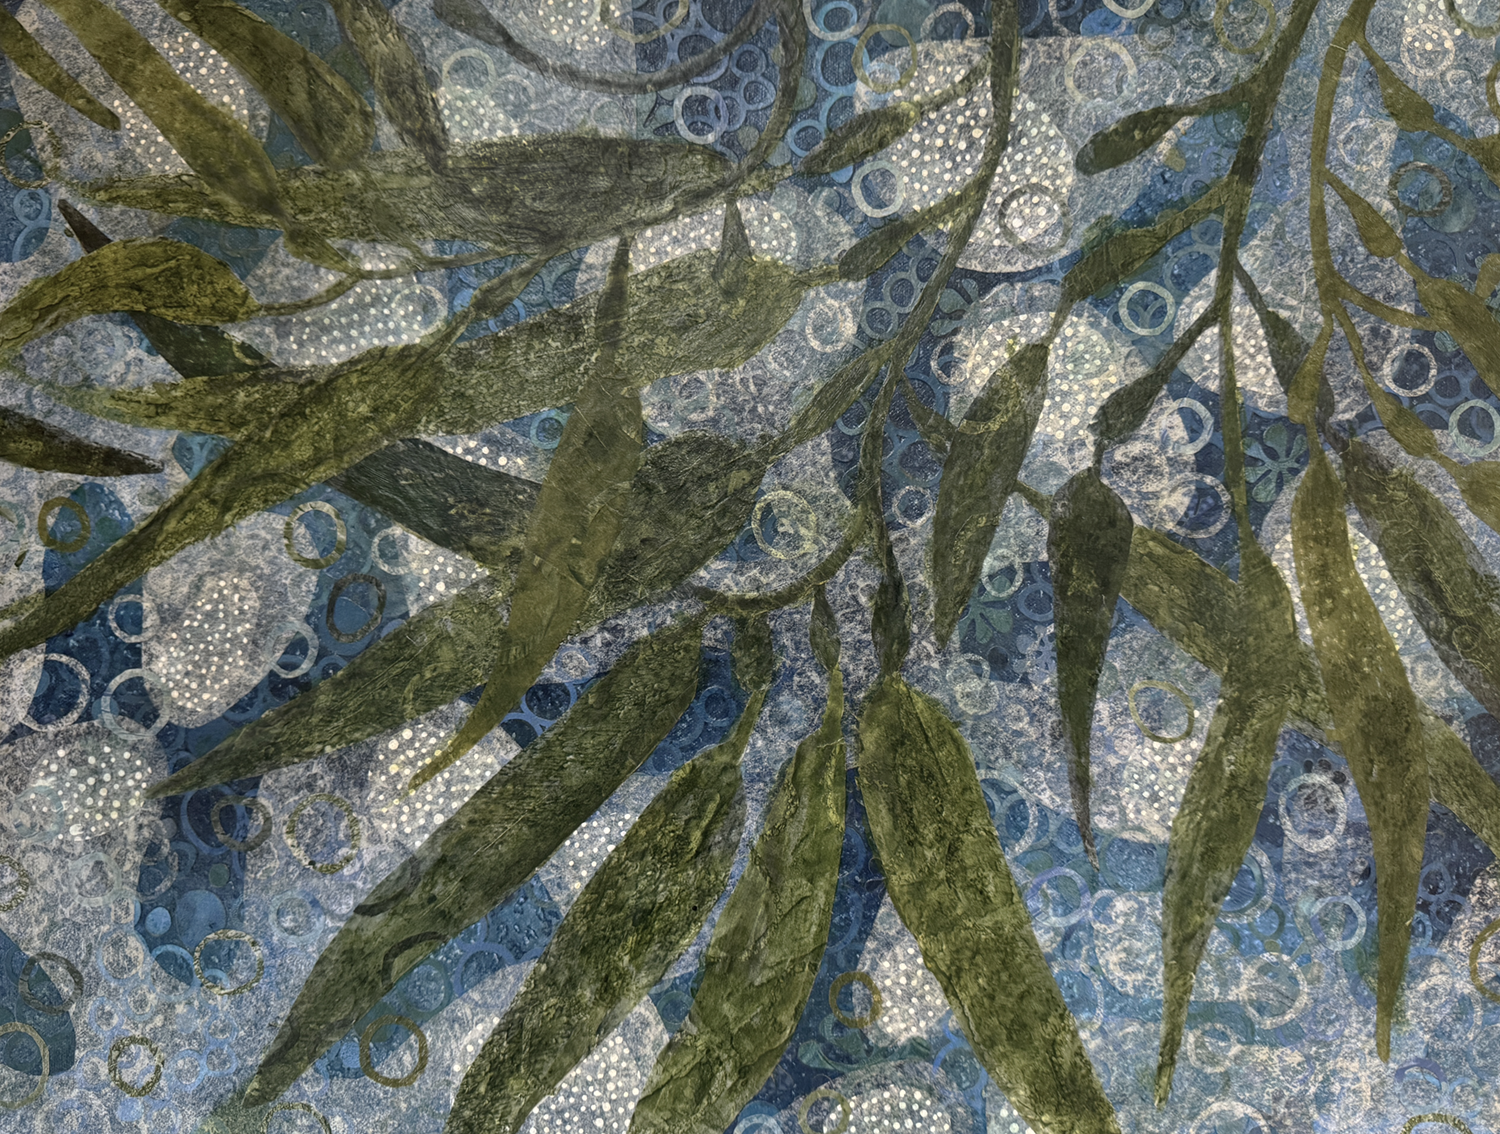
Ideas came regularly after that, and we were ON. The seaweed fronds and more bubbles! were cut from sheets of stamped, printed and painted tissue papers I keep readymade in stock. It was all cut, paste, consider, a bubble here, a bubble there, from there on.
I’ve learned so much from this piece — mostly what-not-to-do’s — and I’m satisfied to call it done. I can even look at it and smile, and feel like I’m another step along the way to competence. SO good.
Mostly a lot of standing and staring, and getting distracted going through the many bins of collected miniature treasure, but I’ve constructed my dream standing-height work surface along the back wall, and assembled a pair of paper storage units from Melvins Miniatures, very satisfying. Alpha Stamps has a set of mini rulers and triangles that make the work surface more functional and desky. Having fun printing out scaled versions of my collages and mounting them on boards to hang and/or display on an easel. Adorable! The exquisite leather cowboy boots are vintage, handmade way before everything was 3D printed; sadly artist unknown to me. One of my paper bags serves as a temporary trash bin. (I’ll have to throw a lot of paper scraps on the floor around it for realism.) The pumpkins are one of the first miniature things I ever made that I was happy with, from wads of plastic film bound tightly with thread and covered in small shreds of tissue paper and acrylic medium. Potted yuccas and succulents are production samples from the MMS+S kit days, all in Braxton Payne terra cotta pots. And the vintage Kunstlerschutz Wagner flocked pig is an old dear friend who’s come to live in the studio to keep us all company.
Sea House Conservatory Pier, ready for her water feature!
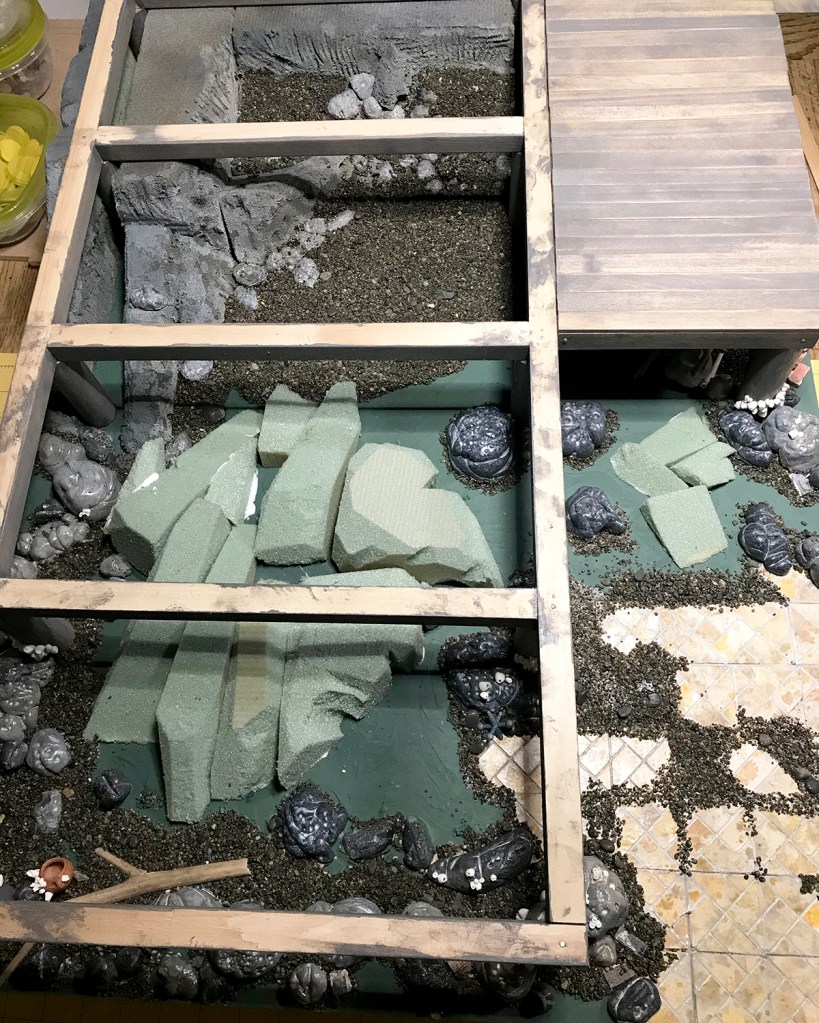
In preparation for creating the tidal water surge under the Sea House Conservatory, I mixed up a nice ocean green base color and painted it generously on the project board. I made sure the whole 26 x 20-inch base — foam cliff landslide, boulders, cobble, gravel, old tiled patio — was well-sealed with glue or paint to prevent water leaks. Two-inch tall heavy acetate strips were cut, ready to glue to the base to form a (removable) perimeter dam.
I estimated an area about 18 by 18 inches would be covered an inch deep, then used the Woodland Scenics water estimator to see how much product I needed to buy. Two, maybe three bottles?
Um, no. No, no, no. Depending on whether I chose “Realistic ($24 for 16 ounces)” or “Deep Pour ($30 for 12 ounces)” the estimated 180 ounces required 12 or 15 product bottles, costing a total of $288 or $450. For a feature, however awesome, mostly obscured beneath the Conservatory deck, this makes no sense. Back to the proverbial literal project board to drastically reduce surface area.
More cowbell! I mean, more reefs and rocks!
After fashioning more florist foam into reefs and rocks, I glued them to the project board.
Black Model Magic rocks and cobble
Starting this time with black Model Magic, I forged another batch of accent rocks.
Rocks, mid-wash and spray processThe open water feature base is realistically and financially reduced.
The foam shoreline formations were generously sealed and detailed with a few shades of warm and cool gray acrylic and stabbing holes with a pointy thing. All base edges were given a transitional application of gravel, cobble and accent rocks. These were allowed to dry, excess gravel brushed out, and the process repeated.
Barnacles make everything better.
“What are those white cone things?” I can hear those of you looking at this photo on your phone exclaim. What, yes! Those white things are perfect barnacles, crafted by Keli of iseecerulean.com.
Rocks to Keli
(I am not ungrateful. We have a longtime water-influenced exchange going on.)
Sea House Conservatory, under the pier
I did a final brushing and shaking off loose gravel after the glue dried over my (1:1 life) front deck, just as the sun was setting.
Kansas remembers me nowThe lunatic is on the grass
You know how it is when maybe you fall a little bit too much in love with your build? That’s how it is for me right now with these sunset light photos. I have about a dozen that made first, even second cut, and they are all epic. One more, please indulge me.
Will be largely unseen
I sighted through all the open viewpoints, and as I mentioned earlier, most all will be obscured once the Conservatory is in place. But I know, and now you do too, what lies beneath.
The first of two estate chairs for Sea House Leadlights. Probably.
I bought two of Kris Comapas’s Estate Chair kits because I wanted to use more of this thrift store dress fabric, which I love.
From a Pescadero thrift store strapless, bubble-hemmed dressHappy little estate chair, work in progress
It’s a rather large scale print for miniature upholstery, as well as being a very fine and lightweight fabric, but did I mention how happy it makes me feel?
Though legless and unpiped, still a very welcoming estate chair
Kris includes good instructions and cord to make fabric-covered piping in her kits, but I generally prefer a twisted cord made from 3 strands of embroidery floss.
Yes, K-2’s eyes light up (when he sees me)
Here you can see my associate K-2SO inspecting the floss piping with his massively articulated fingers. (I love him, too.)
I find attaching tiny piping gracefully onto miniature upholstery to be a tedious task, so I’m putting it off until I feel more… um, articulated dextrous. And patient.
Sea House Leadlights design studio
The Leadlights design studio also has a new chair. Makes it look way more office-y, don’t you think? I’m really pleased with the level of quality and detail in this chair. (Ack! This photo also reminds me I want to finish tricking out the desk accessories, and to trim that orange bookmark on the last-minute-made sketchbook!)
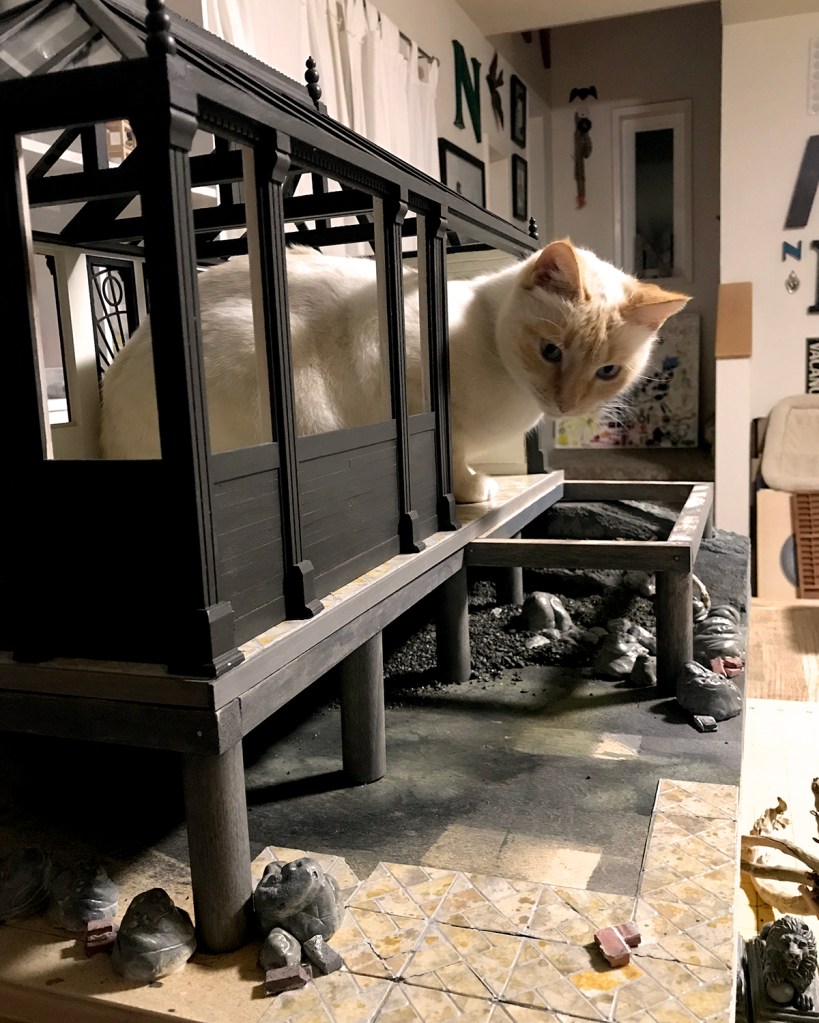
That brick rubble is glued down Scarlett. (Yes, she checked.)
Work continues on the Sea House Conservatory build, with a sea level rise remediation support pier in place.
Model Magic air-dry clay rocks and boulders
Geologic rock and boulder construction is underway. My preferred material — think I’ve tried just about all of them — is Model Magic air dry clay, made by Crayola. It is lightweight, inexpensive, readily available, pleasant and responsive to sculpt, accepts all kinds of pigments well, and dries with virtually no shrinking.
Spatters and washes and sprays, oh myLots and lots of boulders and rocksGranite-veined black rocks
With this last batch of rocks, I experimented with adding black acrylic paint or India ink to the white clay before sculpting. One batch had fine black gravel mixed in. The paint or ink initially made the compound stickier to work with, but it was nice to start with a pre-tinted base. These have green and gray washes spritzed on. When dry (takes a day or two depending on size and relative humidity) with a fine brush I painted the surf erosion holes and granite veins with white acrylic, diluted 1:1 with water.
As I was ordering new clay, I learned Model Magic also comes in black, gray, and “Earthtone, Bisque and Terra Cotta”. So stoked to use these colors on the next exploratory rock and boulder sets.
Closeup before the tide comes in
The finished rocks are slicked with a satin multi-purpose sealer, as they’re meant to look wet. The final Conservatory project base will have about an inch of water in tidal flow. (I’m excited about that, too, as I’ve never worked with a “water feature” before :)
Sea House Conservatory, in progress, February 2020
Deck planks are installed, and I’ve finally arrived at a stair design that makes sense and blends into the overall structure.
Yesterday I was at Chrissy Field in the Presidio, and took a bunch of pier photos for genuine detail ideas. It was a perfect winter’s day, cool, clear and sunny, with very little breeze.
Looking north to the Golden Gate Bridge and MarinChrissy Field, Presidio. See the fog horse galloping over the City?
Albie oversees receipt of Serendipity Shed base kits, 16 August 2019
I thought it might be interesting to review building highlights of the Sea House Leadlights studio office, from start through submission. (Can’t really say “completion” because things never stay done ‘round here.) There are links back to original posts — if any were made — with more details. I wasn’t very bloggy :)
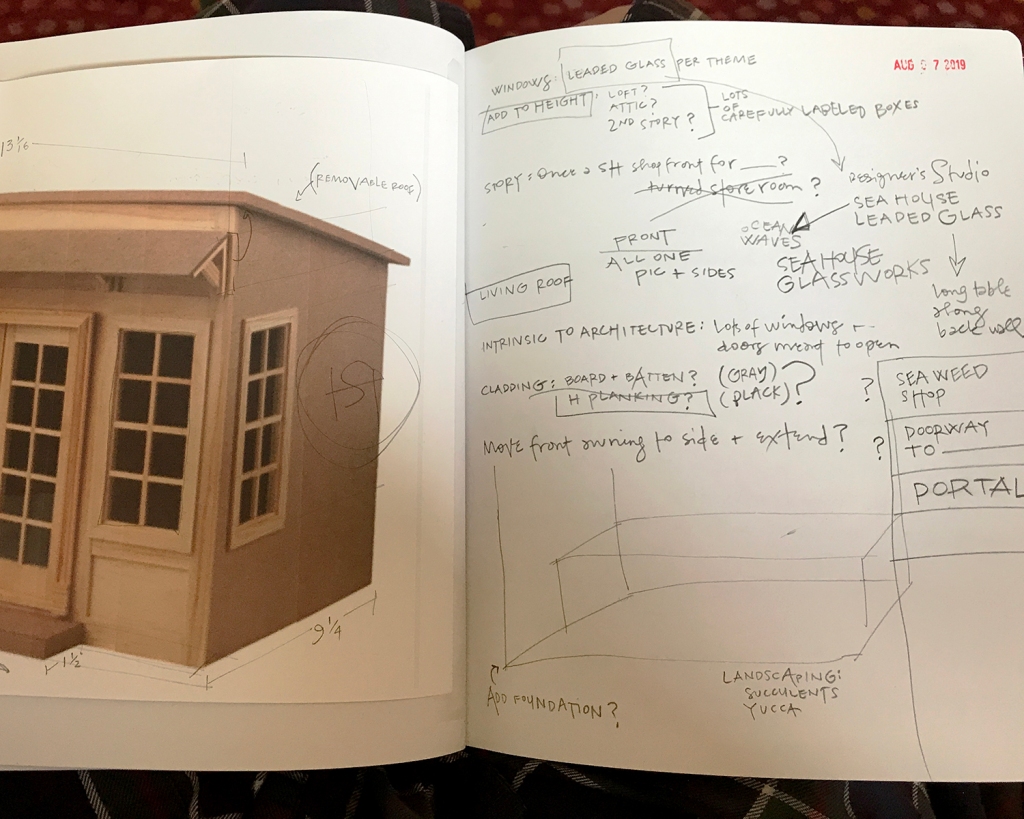
First ideas
I spend a lot of pages thinking, sketching, dreaming, considering and working out dimensions and story.
The starry floor in process
The first floor idea, though fun to design, paint and assemble, did not work well in the space. So it goes.
Two base kits mashed together
Height was added to the starter kit with parts from a second. I like to retain recognizable elements of the kit, so the roof angle and footprint, as well as door and lower window placement remained unchanged.
Loft wall detail
I glued cold press 140 lb. watercolor paper to the walls for texture before painting, and added a whitewashed aged brick back wall in the loft.
Adding siding to the new frontHalf-loft installed, supported by faux beams
I opted to make the front façade removable as well as the roof… this makes it so much easier to photograph the interior.
Bench tops and bottoms
I cut the built-in benches from 1/16-inch basswood on the Cricut Maker. These were glued together and supported with 1/8-inch dividers.
Interior space begins to come togetherTree Frog green was the only possible finish color, with black leather cushions
I thought and sketched about the window designs for some time. The Pavilion is bubble-themed; the Conservatory celestial… for the Leadlights design studio I went Egyptian Deco. Mostly sort of.
Sea House Leadlights front doors and front/side windowsSea House Leadlights upper window
The upper window is a stylized scarab. Very.
The “leading” designs for the windows are cut from lead black cardstock, glued front and back to the plexi, then framed in black on the exterior (and tree frog on the interior). I like to see wood grain, so I use a 1:1 ratio of acrylic paint and staining medium.
The scarab window at night
If one looks straight on, the window frames the bricked loft wall and the old Sea House logo. With sacred scarab wings.
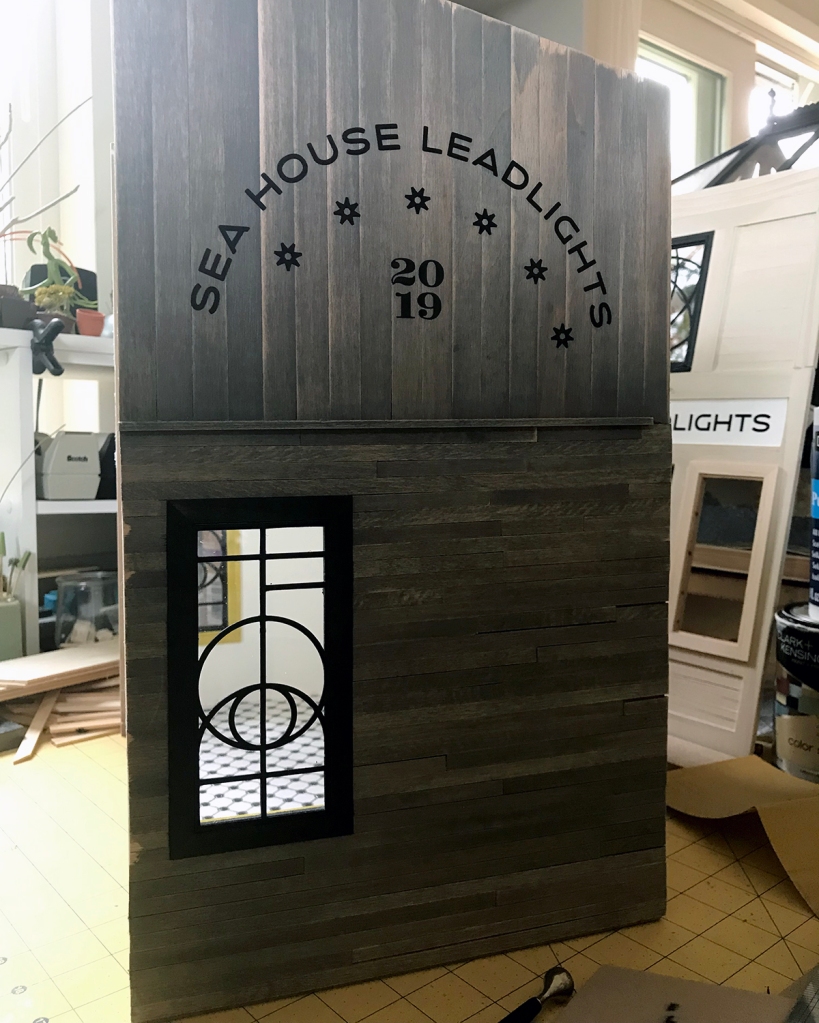
Side building signage
I — or rather the Cricut Maker — cut the signage from matte black vinyl. The stars in the design are meant to resemble anchor plates used to reinforce old buildings. I love them.
In this backlit photo, the vinyl letters appear to float off the side of the building. It’s not quite so unnatural-looking in person, but knocking back the synthetic smoothness is on my eternal learn-to-do list, to find ways to tone down the material. (Transferring wee letters and figures is a fiddly, fussy business, especially onto an uneven surface, and I am not eager.)
Side signView from above
Here’s a roof’s-eye look at the progressing build. The holes are drilled for the LED light fixtures that will illuminate the work space below. (The wiring to be concealed beneath a custom rug and other stuff stored in the loft.) A narrow shelf beneath the scarab window on the removable front might support batteries if I ever add lighting to the front. Floor tiles gleam softly with scuff-resistant utility. Leather window seats beckon.
The entrance to the Sea House Leadlights office is up a few stairs and across the deck to the left of the fireplace. A set of leaded glass doors opens into a snug but functional design studio.
Details: Terra cotta pot by Braxton Payne. Basswood deck and siding stained with Minwax Classic Gray. Pumpkins made from tissue paper and thread. Boulders sculpted from air dry clay painted with acrylic washes and sealed with ultra matte varnish. All succulents, yucca and other plants hand colored with W&N Promarkers. Many are prototypes; some available as kits at Modern Miniature Succulents + Sundries.)
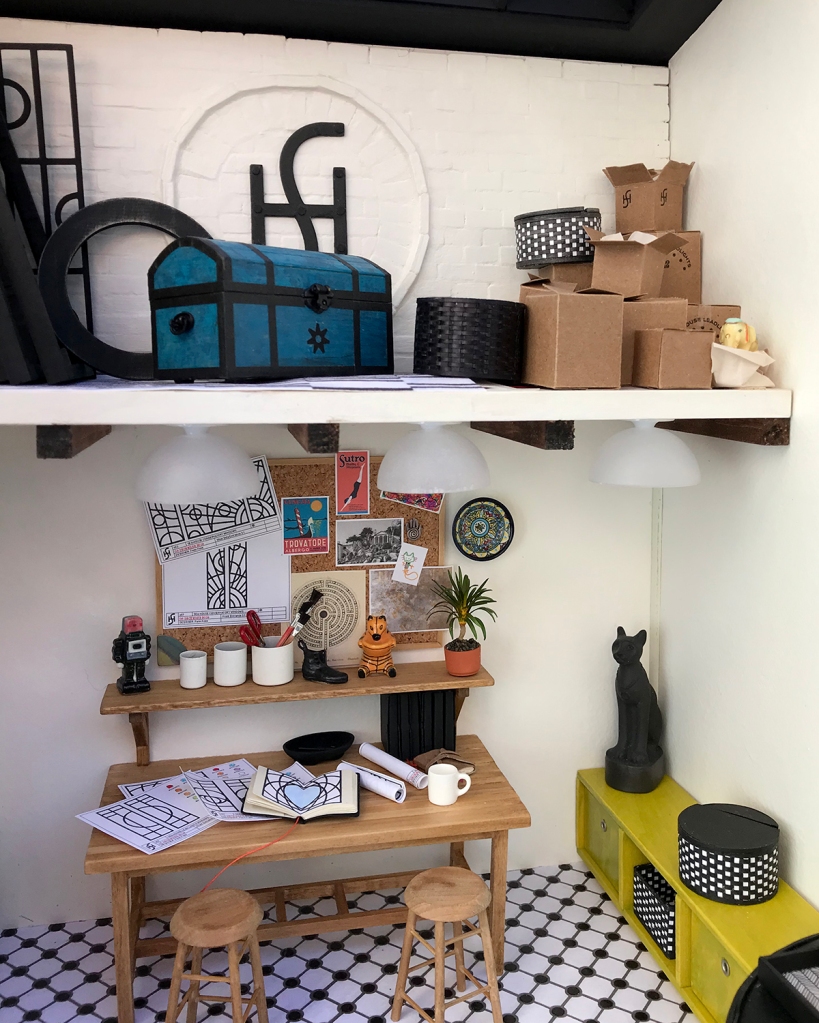
Desk and bulletin board
Beneath the half-loft a large tabletop desk has plenty of room to roll out plans and inspiration. Low built-in cabinets with black leather cushions provide more seating, storage and level surfaces for tea trays.
Details: The ceiling lights are 12V modified for warm white LEDs. Bulletin board is made from cork sheet framed with basswood stained to match. Sketchbooks made from my kits at MMS+S. Various meaningful artifacts including original leaded glass designs for other Sea House buildings, and a drawing of a cat by my then 4-year old daughter. Fèves, prized vintage Monopoly shoe, and an anodized earring from the 1980s.
The white-washed brick loft stores window frames, tools, Sea House memorabilia and miscellaneous treasure — as well as the switch (lift the black basket) and battery pack (hidden in a custom box) for the LED lights.
A gazebo-style roof welcomes natural light. (I’ll detail more of that happy construction in another post.) I made the 1:144 scale basswood model of the source kit for the original Sea House Pavilion, built some years ago. The Egyptian cat is a porcelain fève. Best of all is the vibrant painting by Jim Tracey that commands the studio — also another post.
Finally, of course, Scarlett. Here she has somehow managed to fluidly infiltrate an impossibly small entrance to the Sea House Sea Rise Pavilion loft (my ongoing remodel of the original 2013 build.) I swear she does these things just to remind me she can.